Skip to content

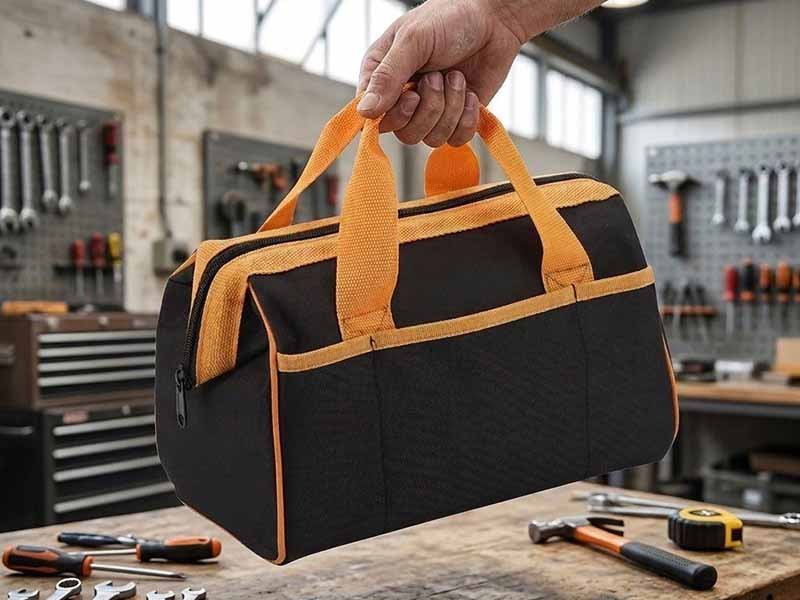
A bag can look perfectly finished on a sample table and still fail quickly once it is filled with a laptop, tools, groceries, sports equipment, travel gear, or other real contents. The reason is that seam performance depends on much more than whether the stitching looks straight. Fabric construction, sewing thread, stitch formation, seam allowance, reinforcement, webbing, hardware, loading direction, and the way force travels through the whole bag all influence whether a joint remains stable in use. A seam that appears neat may still slip, tear around the needle holes, pull out of the body panel, or fail at a poorly reinforced stress point.
Bag seam strength is tested by applying a controlled force across a sewn joint and recording the maximum force, seam deformation, slippage, fabric damage, thread rupture, and failure location. Laboratory methods such as ASTM D1683/D1683M and ISO 13935 can evaluate sewn-seam performance under controlled conditions, while finished-bag pull and load tests help assess handles, straps, bottoms, webbing attachments, and other load-bearing structures.
The number produced by a tensile tester is important, but it is only the beginning of the analysis. Two backpack seams can reach similar peak forces and still have very different quality. One may fail because the sewing thread reaches its limit, while the other may tear through the body fabric beside the reinforcement. Those results require completely different corrections. A reliable test program therefore does not ask only how much force a seam can withstand. It asks where the force goes, what changes first, why the joint fails, and whether the same construction can be reproduced consistently during bulk production.
What Is Bag Seam Strength?
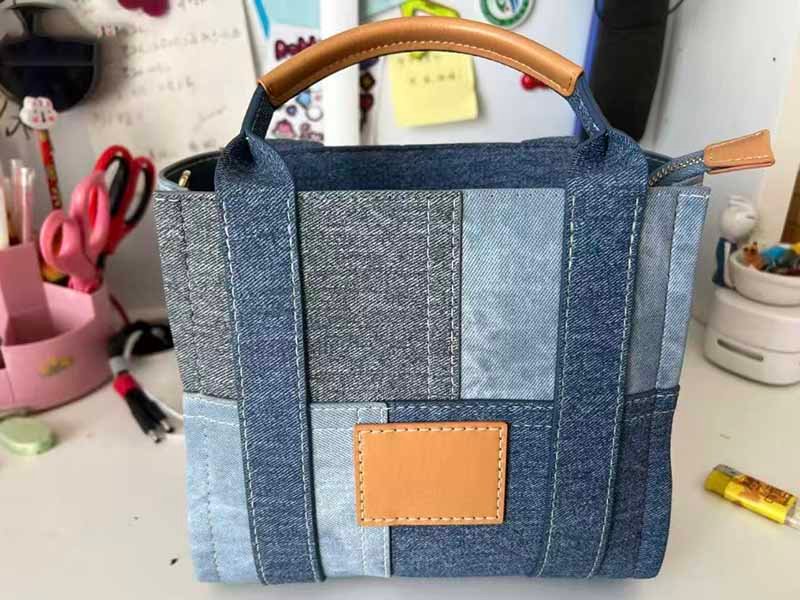
Bag seam strength is the ability of a complete sewn joint to resist separation when force acts across it. It is not determined by fabric or thread strength alone. The fabric, thread, stitch type, seam construction, seam allowance, reinforcement, needle penetration, and loading direction work together as one structural system, so a useful test must evaluate both force and the physical way the seam deforms or fails.
What Does Seam Strength Measure?
Seam strength testing measures how a sewn assembly responds when increasing force tries to pull the joined materials apart. In a controlled tensile test, the force generally acts across the seam, allowing the testing equipment to record how the joint behaves as the load rises. Depending on the method and product construction, engineers may evaluate maximum force, thread rupture, fabric tearing, seam opening, yarn displacement, stitch pull-through, or another clearly defined failure condition.
ASTM D1683/D1683M-22 is one recognized method used for sewn seams in woven fabrics. The method applies force perpendicular to the seam and can be used to evaluate characteristics including maximum breaking force, seam efficiency, stitching failure, and seam slippage. This makes it much more useful than simply pulling a seam by hand and deciding whether it “feels strong,” because the test creates a controlled result that can be compared with other specimens, constructions, and production lots.
The recorded force still needs context. A result of 600 N is roughly equivalent to 61.2 kgf, but that does not mean a completed backpack is safely rated to carry 61.2 kilograms. The laboratory specimen has a controlled width, gripping position, loading direction, and extension rate that are very different from the way an actual bag is lifted, swung, dropped, or carried. The number describes the behavior of the tested specimen under a defined procedure, not the safe working load of the finished product.
This distinction is especially important when reviewing supplier test reports. A useful report should identify the method, specimen construction, test direction, maximum force, visible deformation, failure location, and failure type. A sheet containing only one impressive Newton value may look technical, but it does not provide enough information to understand the quality of the seam or to reproduce the result later.
Is Seam Strength the Same as Fabric Strength?
Fabric tensile strength and seam strength are related, but they describe different things. A fabric tensile test examines the material itself under load. A seam test evaluates the material after it has been cut, folded, pierced repeatedly by a needle, joined with sewing thread, and incorporated into a particular seam construction. Those operations change the way force moves through the material, which is why strong base fabric does not automatically produce a strong sewn joint.
The same principle applies to sewing thread. A thicker or stronger thread may improve performance in some constructions, but it is not a universal solution. If the thread becomes much stronger than a lightweight body material, the weak point may simply move from thread rupture to fabric tearing. The seam may then fail beside the stitch line rather than through the thread itself. In that situation, increasing thread strength alone does not solve the structural problem.
Stitch density introduces another trade-off. More stitches can distribute force across additional thread loops, but every stitch also creates a needle penetration. In some materials, excessive stitch density can place too many holes in a narrow area and create a perforation-like line that encourages tearing. The correct stitch density therefore depends on the fabric structure, thread, needle, seam type, and expected load rather than on the assumption that more stitches are always better.
In practical bag manufacturing, the seam also interacts with linings, foam, binding, reinforcement patches, webbing, leather tabs, laminated materials, and hardware. A shoulder-strap attachment, for example, should be treated as a complete structural assembly rather than as a single row of stitches. The most reliable construction is the one in which these components transfer force predictably without allowing one small area to become the first uncontrolled weak point.
Which Factors Affect Seam Strength?
Fabric construction is one of the first variables to examine because woven polyester, nylon Oxford, canvas, lightweight lining fabrics, ripstop materials, and coated textiles can react differently to sewing and tensile loading. Yarn density, coating, backing, weave stability, thickness, and material flexibility can influence whether the seam remains stable, develops slippage, or tears around the stitch line when the force becomes concentrated.
Sewing variables also matter. Thread size and type, needle size, stitch type, stitch density, seam allowance, thread tension, number of stitch rows, and seam geometry can all influence performance. A narrow seam allowance may allow the material to pull away from the stitch line more easily, while a very dense stitch line may damage certain fabrics. A technically stronger construction usually comes from balancing these variables rather than maximizing any one of them.
Reinforcement becomes particularly important at handles, shoulder straps, D-ring tabs, bottom corners, and other concentrated stress points. Common approaches include extending webbing farther into the body panel, increasing reinforcement coverage, adding another stitch row, using bartacks where appropriate, reinforcing the bottom structure, or changing the shape of a reinforcement patch so that force is distributed across a larger area instead of stopping abruptly at one edge.
Szoneier’s documented manufacturing process uses combinations such as stronger materials, wider webbing, bottom reinforcement, bartack stitching, double stitching, reinforcement panels, sample load testing, and checks on key stress points when a product requires higher carrying performance. The useful principle behind these methods is simple: the seam should not be viewed as an isolated line. It should be understood as one part of the complete path through which the product carries weight.
Which Bag Seams Should Be Tested?
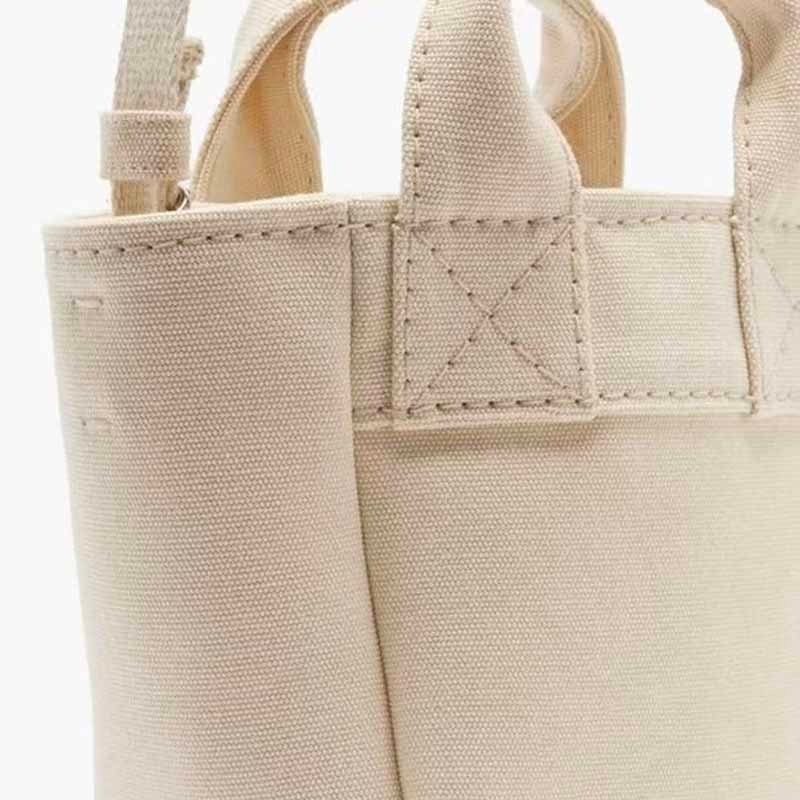
The seams that deserve the most attention are those that carry or transfer meaningful load. Handle roots, shoulder-strap anchors, bottom seams, side-to-bottom joints, webbing attachments, D-ring tabs, reinforcement transitions, and other structural connections normally deserve more testing than decorative seams. The correct locations depend on the product type, carrying method, expected contents, load direction, and consequences if the joint fails.
Which Load-Bearing Seams Are Critical?
Critical seams usually occur where force transfers from one component into another. A tote handle is an easy example. The contents pull downward through the bottom and body panels, while the user pulls upward through the handles. The handle attachment therefore becomes a transition zone between two opposing forces. If the webbing insertion, reinforcement, fabric, or stitching is inadequate, failure can occur even when the handle material itself is very strong.
Backpack shoulder roots experience more complex loading because the force is not always vertical. A backpack can be carried on two shoulders, lifted by one strap, swung onto the back, pulled from a car seat, or carried briefly from one shoulder. These actions introduce diagonal and dynamic loads that can be more demanding than a simple straight pull. The joint therefore has to tolerate changes in direction as well as changes in force.
Bottom seams are another important area because they carry the weight of the contents while the upper part of the bag is pulled upward by handles or straps. Corners where bottom panels meet side panels can become concentrated stress zones, particularly in tool bags, travel bags, cooler bags, and products carrying dense items. A seam may look secure during visual inspection but gradually open or tear when weight remains in the bag for a longer period.
Smaller attachments can also become major weak points. A strong metal D-ring offers little protection if the small webbing tab holding it to the body is poorly reinforced. The same applies to snap hooks, buckle anchors, trolley attachments, pet safety clips, and MOLLE webbing. Testing should follow the load path rather than focusing only on the most visually obvious seams.
| Critical Area | Main Load Condition | Common Failure to Watch |
|---|---|---|
| Handle root | Repeated vertical lifting | Thread rupture, fabric tearing, webbing pull-out |
| Shoulder-strap anchor | Vertical and diagonal load | Panel tear, seam opening, webbing movement |
| Bottom seam | Continuous contents load | Seam separation, edge tearing, deformation |
| Side/bottom corner | Multi-directional stress | Local tearing or structural opening |
| D-ring or hook tab | Concentrated pulling | Tab pull-out or reinforcement failure |
| Bartack area | Concentrated stitch load | Thread breakage or fabric perforation |
| Zipper end | Repeated opening and pulling | Seam opening or zipper-end tearing |
| Reinforcement edge | Stress transfer | Tearing just outside reinforced area |
How Do You Map a Bag’s Load Path?
A load-path review begins with the contents rather than the stitches. Imagine the bag loaded in the way it is actually intended to be used, then trace how that weight reaches the person carrying it. For a tote bag, the path may be contents → bottom → body panels → reinforcement → handle webbing → user. For a backpack, the path may continue through the back panel, shoulder-root reinforcement, straps, adjusters, and hardware before the load reaches the wearer.
Every transition is a possible weak point. If a handle webbing ends very close to the visible stitch line, a large amount of force may be concentrated within a small area. Extending the webbing farther into the panel can spread the load across more material. Similarly, a reinforcement patch can look substantial but still perform badly if the highest stress occurs exactly at the patch edge, because the tear may simply move from the original seam to the edge of the reinforced region.
Load direction matters as much as load amount. A perfectly vertical laboratory pull is useful for comparing constructions, but finished bags are rarely used so neatly. They experience one-sided carrying, swinging, diagonal pulling, rapid lifting, uneven contents, and repeated movement. These real conditions should influence which seams are selected for laboratory testing and which finished components need additional pull or load checks.
The most useful load-path review is therefore done during product development, not after the first complaint. When designers and manufacturers identify the main structural transitions before bulk production, they can place reinforcement where the load actually travels and choose tests that reproduce the most meaningful risks instead of testing whichever seam happens to be easiest to cut from a sample.
Do Different Bags Need Different Test Points?
Different bag categories need different test priorities because their structures and use conditions are not the same. A lightweight promotional drawstring bag, a laptop backpack, a pet carrier, and a professional tool bag may all contain sewn fabric, but the forces acting on their seams differ greatly. Applying one standard internal test plan to every category can therefore miss the areas that matter most.
For a backpack, shoulder-root attachments, the top carry handle, and the bottom structure are usually important. A tote bag commonly places more emphasis on handle roots and bottom or side seams. Duffle and travel bags often introduce detachable shoulder straps, D-ring tabs, hooks, trolley-related structures, and longer handles. Tool bags can add rigid contents and concentrated point loads that place unusual stress on the bottom and handle structure.
Pet carriers have another complication because the load can move. An animal shifting suddenly can create dynamic forces that are different from a stable test weight. Cooler bags may combine body fabrics, insulation, lining, and webbing in thicker multilayer joints. Tactical products may contain extensive MOLLE webbing and accessory attachment points that require their own structural review.
Szoneier’s documented tensile-testing scope includes straps, handles, webbing, D-rings, snap hooks, buckles, zipper endpoints, MOLLE attachments, pet safety clips, and tool-bag handle areas. Its load-testing scope covers products including backpacks, tote bags, cooler bags, tool bags, pet carriers, duffle bags, travel bags, tactical bags, rolling bags, and medical bags. These examples illustrate why the testing plan should be built around the product architecture rather than around one generic definition of a “bag seam.”
How Do You Test Bag Seam Strength?
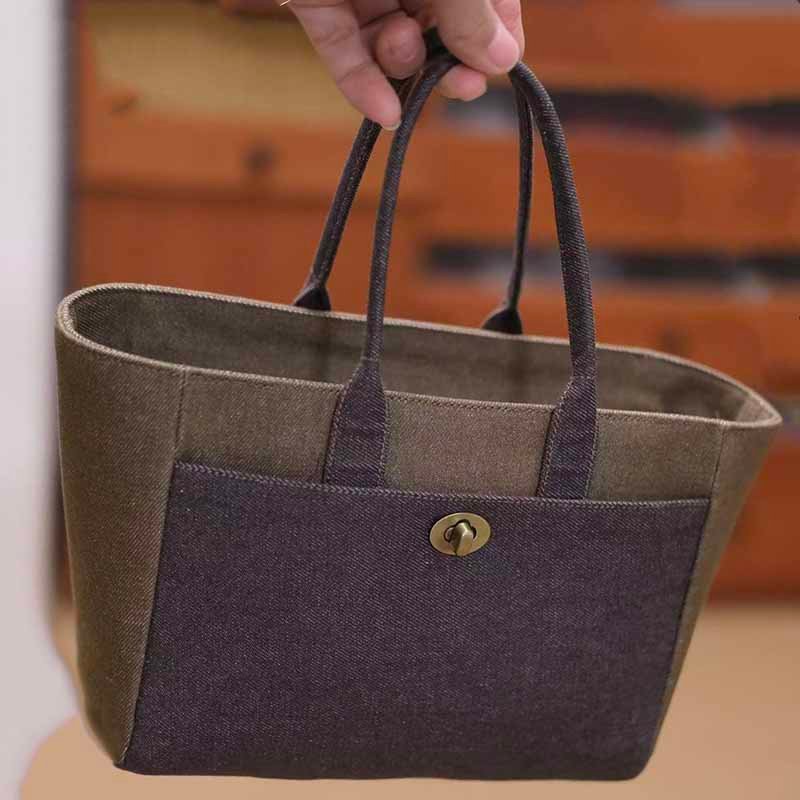
Bag seam strength is normally evaluated with controlled tensile testing of representative sewn specimens, supplemented where appropriate by component pull tests and finished-bag load testing. The specimen construction, test direction, machine setup, conditioning, and failure criteria should be defined before testing. Maximum force should be recorded together with seam opening, thread rupture, fabric tearing, slippage, and the exact location of failure.
How Do You Prepare a Seam Sample?
A precise machine cannot compensate for an unrepresentative specimen. If the test sample uses a different fabric, thread, stitch density, seam allowance, or reinforcement from production, the resulting data may be accurate for the specimen while being almost useless for the actual product. Development samples should therefore reproduce the intended construction closely enough to answer the engineering question being investigated.
The specimen record should identify the material code, fabric orientation, thread, stitch type, seam type, stitch density, seam allowance, reinforcement, and test direction. If webbing or another load-bearing component is involved, the record should also include details such as webbing width, insertion depth, reinforcement location, and the approved sample version. These details make it possible to understand exactly what was tested and to repeat the construction later.
Multiple specimens are usually more informative than one result because sewn textile assemblies naturally vary. The formal number of specimens should follow the relevant standard, laboratory protocol, or project requirement rather than an arbitrary factory habit. During internal product development, several nominally identical specimens can help reveal whether the construction behaves consistently or whether the apparent strength depends too heavily on individual sewing variation.
Traceability becomes especially important during sample revisions. If the first prototype fails and the second one succeeds, the team needs to know what changed. Perhaps the reinforcement was enlarged, the webbing was inserted farther, the thread was changed, or the stitch geometry was revised. Without these records, testing becomes trial and error. With them, the result becomes useful engineering evidence that can be transferred into bulk production.
How Is a Tensile Seam Test Performed?
A tensile seam test uses a tensile testing machine, commonly a constant-rate-of-extension machine, to pull the specimen under controlled conditions while measuring the applied force. For common sewn-seam methods, the force acts across the seam rather than along it. The machine records the force response as the specimen deforms, allowing the operator to identify the maximum force and observe the physical condition associated with failure.
ASTM D1683/D1683M-22 is an active test method covering failure in sewn seams of woven fabrics. It applies force perpendicular to the seam and can be used to evaluate sewn-seam strength and related failure behavior. One particularly important limitation is that the standard does not claim to predict actual seam wear in service. Laboratory results are controlled comparison data, not a direct forecast of every movement the finished bag will experience.
That limitation matters because real bags encounter shock, swinging, repeated lifting, uneven contents, abrasion, diagonal loads, and changes in temperature or moisture. A seam coupon clamped in a tensile tester cannot reproduce all of those conditions. The laboratory test remains valuable because it isolates a joint and makes comparison possible, but it should not be marketed as proof that the complete bag will survive a particular real-world load indefinitely.
A useful result therefore combines the peak force with the observed failure behavior. The report should identify whether the thread snapped, the fabric tore, the seam slipped, the reinforcement moved, or another structural event occurred. Photographs and specimen references can make the result much easier to interpret when engineers later compare revisions or investigate a production problem.
How Do You Test Handles and Straps?
Handles and shoulder straps are often better evaluated as complete structural attachments rather than as isolated rows of stitching. A handle connection may include webbing, reinforcement, body fabric, lining, foam, binding, and multiple stitch rows. The question is not simply whether the sewing thread is strong. It is whether the whole assembly transfers force from the bag body into the handle without allowing one component to become an uncontrolled weak point.
A pull test can isolate a particular connection. A shoulder strap, for example, can be loaded while the operator observes whether the bartack breaks, the webbing moves, the body fabric tears, or the reinforcement separates. D-ring tabs, buckle anchors, snap-hook connections, MOLLE attachments, and other sewn components can be evaluated in the same general way when a suitable fixture and project-specific protocol are used.
Loading direction should reflect how the component is used. A perfectly vertical pull may not expose a weakness that occurs when a strap is loaded diagonally. For higher-risk designs, more than one direction may need to be reviewed. The test plan should also distinguish component strength from assembly strength. A supplier may provide a high tensile-strength figure for a webbing or metal hook, but the completed attachment can still fail at a much lower load because the sewn connection is the weakest point.
Material certificates are therefore only one part of structural validation. A strong webbing specification does not automatically prove a strong shoulder attachment, just as a strong fabric data sheet does not automatically prove a strong bottom seam. Testing the finished connection provides evidence about the assembly that actually carries the load.
Do Finished Bags Need Load Tests?
Finished-bag load tests are valuable for many products because they answer questions that flat seam specimens cannot answer. A specimen test isolates a controlled joint, while a completed-bag test shows how the bottom, body panels, reinforcements, handles, straps, and hardware interact when the whole product is loaded. Used together, these two approaches provide a much clearer picture than either one alone.
Static loading can reveal gradual seam opening, bottom sagging, webbing movement, hardware deformation, and changes in product shape. Short lifting tests can quickly expose weak handles or shoulder attachments. Where the product specification calls for it, repeated loading can help evaluate fatigue and cumulative damage that a single maximum-force pull may not show. The test method should be selected according to the product use rather than because a particular test sounds impressive.
The conditions need to be documented carefully. Saying that a bag “passed 20 kg” provides very little information unless the reader also knows whether the 20 kg load was held for ten seconds, one hour, or repeated over multiple cycles; whether one or two handles were used; whether the bag was stationary or repeatedly lifted; and what damage was considered a failure. Without these details, comparison between suppliers or production lots becomes unreliable.
Szoneier’s documented capabilities include internal loading checks, static load testing, short-duration lifting tests, customer-specified weight tests, and coordination of third-party load testing according to product type, intended use, target load, and structural requirements. The purpose of these checks is not to replace a formal laboratory standard but to close the gap between controlled seam data and the way the finished bag actually carries weight.
Which Seam Test Standards Apply?
ASTM D1683/D1683M-22 and the ISO 13935 series are important references for sewn seams, particularly in woven textiles, but they are not universal instructions for every bag construction. Material type, seam geometry, and test objective determine whether a method is appropriate. Coated fabrics, leather, neoprene, nonwovens, multilayer structures, curved seams, and finished strap assemblies may require another recognized or project-specific protocol.
What Is ASTM D1683/D1683M-22?
ASTM D1683/D1683M-22 is the ASTM Standard Test Method for Failure in Sewn Seams of Woven Fabrics. The method evaluates sewn-seam behavior when force is applied perpendicular to the seam and can be used to study maximum breaking force, stitching failure, seam efficiency, and seam slippage or yarn displacement. It provides a controlled framework for comparing seam constructions rather than relying on subjective judgments such as whether a seam feels strong when pulled by hand.
The method is particularly useful because it treats the seam as an engineered system. Thread, stitch type, seam type, and stitch density all influence the result. This matches real bag production, where a joint can fail through the sewing thread, through the base material, or through movement of the fabric yarns without a complete thread rupture.
Its scope still needs to be respected. Modern bags frequently combine woven textiles with coatings, foam, reinforcement, PU materials, leather, neoprene, binding, webbing, and other layers. A conventional straight seam in woven polyester may fit a standard textile method much more naturally than a thick curved shoulder-strap attachment involving several materials. Engineers should therefore confirm that the chosen procedure is appropriate rather than applying a test number to every sewn structure for the sake of appearing technical.
ASTM also makes clear that this seam method does not predict actual wear performance. That statement is extremely useful for product developers because it sets a realistic boundary around laboratory data. The test provides repeatable information about a controlled seam assembly, while finished-product durability still depends on the complete construction and the conditions encountered during use.
What Is ISO 13935-2:2026?
ISO 13935-2:2026 is the current edition of the ISO method for determining maximum force to seam rupture using the grab method. The 2026 edition applies a controlled tensile force perpendicular to a straight sewn seam and is intended primarily for woven textile fabrics and made-up textile articles that fall within the standard’s stated scope.
The edition date matters because technical files often survive for years. A product launched several seasons ago may still contain an older reference. When a brand, laboratory, and factory need to reproduce the same test, identifying the standard and edition reduces ambiguity. Simply writing “ISO seam strength test” leaves too much room for different interpretations.
Scope is equally important. Bags often use coated Oxford, PU-backed polyester, neoprene, synthetic leather, genuine leather, TPU laminates, and multilayer padded structures. These materials may not behave like a conventional woven textile specimen, and some fall outside the normal applicability of standard textile seam methods. Curved seams and complex attachments create additional challenges because the laboratory geometry may not represent the way the finished joint is loaded.
The practical lesson is not that formal standards are unsuitable for bags. It is that the method should follow the material and the engineering question. A recognized textile test may be ideal when comparing two woven seam constructions. A purpose-built attachment pull test may provide more meaningful evidence when the question concerns a completed shoulder strap or handle connection.
| Test Reference | Main Purpose | Bag-Industry Consideration |
|---|---|---|
| ASTM D1683/D1683M-22 | Sewn-seam failure in woven fabrics | Controlled seam comparison; does not predict real-life wear |
| ISO 13935-2:2026 | Maximum force to seam rupture by grab method | Primarily applicable to defined textile constructions |
| Finished-bag load test | Complete product under specified load | Requires defined weight, duration, loading method, and failure criteria |
| Component pull test | Handles, straps, tabs, hardware connections | Loading direction and fixture should reflect product structure |
| Customer-specific protocol | Brand, retailer, or project requirement | Acceptance criteria should be agreed before testing |
Which Fabrics Do These Standards Cover?
Material classification should be checked before selecting a test method because a bag that looks like a simple fabric product can contain several very different materials. Woven polyester, woven nylon, canvas, and many Oxford constructions are common in sewn bags, but coatings and laminations can change the way a specimen stretches, slips, grips in the jaws, or fails around the seam.
A polyester Oxford fabric with a PU or PVC coating may behave differently from an uncoated woven fabric even when the face looks similar. Neoprene is a composite material rather than a conventional woven body textile. Synthetic leather can use woven, knitted, or nonwoven backing beneath a polymer surface. Genuine leather behaves differently again. TPU laminates, EVA structures, mesh, foam-backed fabrics, and thick reinforced assemblies can create additional testing and clamping challenges.
Geometry matters as well. Standard textile specimen methods rely on controlled dimensions and loading direction. A curved shoulder-root seam, a heavily padded handle base, or a webbing attachment crossing multiple layers may distribute force in a way that cannot be represented accurately by cutting a conventional straight specimen from the product.
For this reason, the first step should be to define the question. If the goal is to compare two woven fabric seams under controlled conditions, a recognized textile method may be appropriate. If the goal is to determine whether a completed handle connection will remain intact, a component pull or finished-bag test may provide more relevant evidence. A method is useful because it answers the right question, not because it carries an ASTM or ISO reference.
Do Standards Set a Universal Pass Value?
There is no single Newton value that automatically makes every bag seam acceptable. Formal standards primarily define how a specific property is measured. The acceptance requirement normally comes from the product specification, intended use, retailer protocol, customer requirement, engineering target, or an agreed comparison with an approved reference product.
This distinction prevents a common sourcing misunderstanding. Asking whether a bag “passes ASTM” is incomplete unless the requirement identifies the exact method, specimen, tested location, required value, and permitted failure behavior. A small cosmetic pouch, a grocery tote, a laptop backpack, a pet carrier, and a heavy-duty tool bag may all use sewn seams, but their expected structural loads and consequences of failure are completely different.
A useful acceptance specification can define the method edition, tested location, material, test direction, minimum value, allowable seam opening, unacceptable failure modes, and reporting format. If there is no existing customer requirement, an engineering target can be developed using expected use, comparative samples, prototype testing, and an appropriate project-defined margin. The important step is to set that target before bulk production, not after a disappointing result appears.
Copying a number from another bag rarely produces a sound specification because the construction may be completely different. A clearly documented project-specific requirement, supported by a suitable method and realistic product testing, is more useful than a high number with no technical relationship to the actual product.
How Do You Read Seam Test Results?

A seam-test result should be read as a combination of maximum force, consistency, deformation, and failure mode. One high peak value does not prove that the construction is reliable. The most useful result shows when the joint begins to change, how closely repeated specimens behave, what component fails first, and whether that failure is acceptable for the intended use of the product.
What Does Maximum Force Mean?
Maximum force is the highest force recorded under the specified test conditions before the defined rupture or failure event. It is commonly reported in Newtons. Newton values are useful because they provide a standardized force measurement, but they are frequently misunderstood when converted into kilograms. For reference, 100 N is approximately 10.2 kgf, 500 N approximately 51.0 kgf, and 1,000 N approximately 102.0 kgf. These conversions describe force equivalence only; they do not represent a safe carrying capacity for a completed bag.
Consider a fictional internal development comparison using five nominally identical seam specimens. If the results are 612 N, 598 N, 635 N, 621 N, and 606 N, the mean is 614.4 N and the range is 37 N. These numbers are examples only, not recommended acceptance limits. The useful observation is that the results are relatively close to one another and can then be compared with the physical failure behavior.
| Specimen | Maximum Force | Difference From Mean | Observed Failure |
|---|---|---|---|
| 1 | 612 N | -2.4 N | Thread rupture |
| 2 | 598 N | -16.4 N | Thread rupture |
| 3 | 635 N | +20.6 N | Thread rupture |
| 4 | 621 N | +6.6 N | Thread rupture |
| 5 | 606 N | -8.4 N | Thread rupture |
| Mean | 614.4 N | — | Consistent failure type |
| Range | 37 N | — | — |
If another five-specimen set produced one very high result and several much lower results, the highest value should not be presented as proof of superior strength. Variation can indicate inconsistent sewing, material differences, reinforcement placement problems, or other process instability. For product development, a repeatable construction is usually more valuable than one exceptional specimen that cannot be reproduced reliably.
Which Seam Failure Modes Matter?
Failure mode often provides more useful engineering information than the peak force alone. Thread rupture indicates that the sewing thread or stitch system has reached a limiting condition before the surrounding material. The response may involve reviewing thread size, thread type, stitch pattern, sewing tension, or the number of load-sharing rows, depending on the product and the location of the break.
Fabric tearing beside the seam tells a different story. In that situation, simply increasing thread strength may provide little benefit because the base material has become the limiting component. The correction may involve increasing reinforcement coverage, changing the fabric, adjusting stitch density, reviewing needle size, increasing seam allowance, or spreading the force across a wider area.
Seam slippage occurs when yarns move and a visible opening forms around the stitch line while the sewing thread may remain intact. This can reduce appearance and structural stability without producing a dramatic thread break. Stitch pull-through can occur when the sewing line cuts or pulls through the surrounding material. Webbing pull-out may point to insufficient insertion depth or inadequate reinforcement, while tearing around a dense bartack can suggest excessive stress concentration around the needle holes.
Hardware detachment can also be misleading. The metal component may remain completely intact while the fabric or webbing tab holding it to the product fails. A useful test report should therefore describe the complete failure location rather than merely state that a D-ring or buckle “failed.” The engineering response depends on knowing exactly which part of the assembly stopped carrying the load.
Is Seam Slippage a Failure?
Seam slippage can be a failure even when the sewing thread has not broken. In some woven fabrics, increasing load causes the yarns surrounding the stitch line to move away from one another, producing a visible opening beside the seam. The joint may technically remain connected, but the opening can damage appearance, weaken structural stability, and continue to grow during repeated use.
The acceptable amount depends on the product, seam location, and agreed specification. A small amount of visible opening may have different consequences on an internal lining seam than on the exterior body of a premium tote or a load-bearing backpack panel. This is one reason seam acceptance should combine mechanical values with visual and structural criteria rather than relying on one maximum-force number.
Slippage can also reveal that the underlying fabric structure is not well matched to the chosen seam. Increasing stitch density is not always the correct fix because additional needle holes may introduce a different weakness. A larger seam allowance, different seam type, reinforcement, backing material, or more stable fabric construction may produce a better result.
The important practical point is that the test should not wait for catastrophic rupture before the joint is judged. A seam that develops unacceptable opening well below its peak force may already be unsuitable for the intended product. Recording when the opening begins can therefore provide useful information alongside the final maximum-force value.
How Do You Set Pass/Fail Criteria?
A useful acceptance requirement combines several dimensions rather than relying only on force. The first is the minimum project-defined force under the selected test method. The second is allowable deformation, because a seam may remain technically connected while opening or distorting enough to make the product unacceptable. The third is failure mode, since some failures may be considered more serious than others. The fourth is consistency across repeated specimens.
The target should begin with intended use. A bag expected to carry a defined working load should be evaluated at the structural points most likely to experience that load. Prototype testing can then help establish whether the construction provides appropriate performance. If a retailer, brand, or customer already has an established testing protocol, that requirement should be incorporated into the project rather than replaced with a factory-created number.
Finished-product requirements need the same clarity. A phrase such as “20 kg load test” is incomplete unless the method states whether the weight is static or repeatedly lifted, whether the bag is suspended from one or both handles, how long the test lasts, whether the load is centered, and what damage counts as failure. These details make the result repeatable and comparable.
The best time to agree on the acceptance criteria is before mass production begins. If the customer and manufacturer only decide what “pass” means after the test result is available, testing becomes a source of argument rather than a tool for controlling quality. Clear criteria create a common technical reference that can be reused during later production lots and repeat orders.
How Is Seam Strength Controlled in Production?
Seam strength is controlled by converting the approved construction into repeatable production requirements and checking the variables that can change structural performance. Material, thread, seam allowance, stitch formation, webbing insertion, reinforcement, and bartack placement should remain consistent from sample to bulk. In-line inspection is especially important because many structural mistakes become hidden after lining, binding, or final assembly is completed.
How Do You Define Seam Requirements?
An approved physical sample is an important reference, but high-risk seams should also be translated into measurable production information. A note that simply says “make the handle strong” is not enough. The production team needs to understand which material, reinforcement, thread, seam type, stitch construction, seam allowance, webbing overlap, and attachment method created the approved result.
The level of documentation should reflect the structural risk. A decorative pocket seam does not require the same degree of control as the shoulder root of a heavily loaded backpack. Critical locations may justify specified reinforcement materials, thread requirements, stitch ranges, webbing insertion dimensions, bartack positions, or approved construction drawings. Hidden reinforcements should be checked before the lining closes the structure because final inspection may not be able to see them.
Clear specifications also reduce differences between operators and production lines. One skilled sewing operator may understand intuitively how far a webbing should extend into a body panel, while another operator may interpret the same drawing differently. Converting the approved construction into measurable instructions reduces dependence on personal interpretation and helps the factory reproduce the same structure over larger quantities.
Repeat orders make this discipline even more valuable. Months after the original development, the same product can be produced again without relying on someone’s memory of how the first sample was assembled. For brands managing multiple colors, sizes, or related SKUs, this repeatability can be just as important commercially as the original tensile result.
How Are Samples Verified Before Bulk?
The most cost-effective time to discover a weak seam is during sample development. A prototype can reveal stress concentrations that are difficult to predict from a drawing or tech pack alone. A reinforcement patch may be too small, a strap may enter the body at an unfavorable angle, or a bottom seam may begin to distort under a realistic load. These issues can be corrected while the project is still flexible.
A practical development cycle is sample → test → observe failure → modify construction → retest → approve → document → bulk production. The modification does not always mean adding heavier materials. Sometimes the better solution is moving a reinforcement, extending webbing farther into the body, changing stitch spacing, increasing seam allowance, or altering the way force reaches a structural corner.
Once the construction is approved, production control shifts toward repeatability. In-line inspection can focus on skipped stitches, loose thread, incorrect seam allowance, wrong thread, reinforcement misplacement, short webbing insertion, incomplete bartacks, and material damage. These defects matter because they can change strength even when the completed bag still looks acceptable from the outside.
Szoneier’s documented QC process combines pre-production sample confirmation, sewing instructions, production inspection, semi-finished checks, final review, and rework of visible stitching defects rather than depending only on a final inspection after the product is fully assembled. This approach is particularly valuable around hidden load-bearing structures because mistakes are easier and less expensive to correct before the remaining panels and lining have been closed.
How Does In-Line QC Control Seams?
In-line QC should concentrate on the process variables that can alter structural performance, not merely on whether the stitch line looks straight. An inspector can confirm that the correct reinforcement has been placed before the area becomes hidden, verify that the approved webbing extends far enough into the body, and check whether the seam allowance remains consistent with the approved construction.
Stitch formation also deserves attention. Skipped stitches, visible thread loops, irregular tension, and incomplete bartacks may indicate that the joint is not being sewn as intended. The inspector should understand which areas are structural priorities. A backpack may require more attention around shoulder roots and the top handle, while a tote may concentrate risk around handle roots and the bottom. Tool bags may need additional focus on bottom reinforcement and heavy pocket structures.
Bartacks should be judged as part of the whole attachment rather than simply counted. A dense bartack can look very strong but still perform poorly if it misses the reinforcement underneath, sits too close to a weak fabric edge, or creates excessive needle damage in a small area. The reinforcement, webbing position, stitch pattern, and surrounding material all determine whether the bartack contributes to a stronger load path.
Inspection frequency should reflect order size, product risk, previous defect history, and customer requirements rather than one universal number. Critical structural operations may justify closer in-line review than cosmetic operations. Finding a repeated strap-attachment error after the first few dozen units is far less costly than finding the same problem after several thousand completed bags reach final inspection.
When Is Third-Party Testing Needed?
Third-party testing is most useful when independent evidence provides clear value beyond routine factory development and QC. Common situations include retailer protocols, formal brand specifications, higher-risk applications, tender requirements, customer-requested test reports, or projects where an independent laboratory result is needed before shipment or market release.
The test request should be technically complete before samples are sent. The exact method, specimen or finished component, required result, failure criteria, and production stage should already be defined. A vague instruction such as “tensile test required” may lead different laboratories or suppliers to select different methods. A clear standard reference or customer protocol provides a much better basis for comparison.
Sample source also matters. A hand-made development prototype can demonstrate the potential of the design, but it does not provide the same evidence as a sample selected from bulk production. When the goal is to validate production consistency, the tested unit should come from a stage that reflects the actual manufacturing process rather than only the development room.
Szoneier’s documented testing support includes internal pull checks as well as coordination of third-party tensile and load-bearing tests according to project requirements. The company documentation also describes project-based cooperation with recognized laboratories such as SGS, Intertek, BV, and TÜV when external verification is needed. The most efficient strategy is normally to identify structural risks during development, perform relevant internal checks, control the critical construction during production, and use independent testing where objective third-party evidence genuinely adds value.
How Should Test Records Support Repeat Orders?
A seam-strength test becomes more valuable when the result can support future production instead of disappearing after the first order ships. A useful record connects the result to the exact approved construction, including material specification, thread, seam type, reinforcement, tested location, test method, maximum force, deformation, failure mode, sample version, photographs, and any corrective action taken during development.
Suppose the first shoulder-strap sample tears immediately outside the reinforcement. The second version increases reinforcement coverage and performs acceptably under the agreed test. If the factory records only the final force number, the original reinforcement geometry may accidentally reappear on a repeat order. If the full construction change is recorded, the improvement becomes part of the production standard rather than a temporary development decision.
These records are also useful when developing related products. A new backpack using a similar fabric and strap system can begin with evidence from the previous project rather than starting every decision from zero. The earlier result does not remove the need to test the new structure, because changes in dimensions and load path can alter performance, but it gives the development team a more informed starting point.
Over time, a manufacturer can build a practical internal database connecting materials, seam constructions, reinforcement methods, and real test behavior. That kind of traceability is one of the clearest signs of mature production management. Strong seam control is not simply achieving one impressive laboratory value. It is understanding why the construction worked, reproducing it consistently, and being able to verify the same critical details when the product returns for its next production run.
Conclusion
Testing bag seam strength is most useful when it is treated as part of product engineering rather than as a single laboratory number. A reliable process begins by understanding the load path, identifying the highest-risk seams and attachments, selecting an appropriate test method, recording both force and failure behavior, and confirming that the approved construction can be reproduced during mass production. ASTM and ISO methods can provide valuable controlled data, but their scope and limitations should always be respected.
For custom bag programs, the strongest evidence usually comes from several layers working together: laboratory seam testing where appropriate, component pull testing for handles and straps, finished-product load checks, carefully defined acceptance criteria, and production QC focused on hidden reinforcement and stress points. This approach helps brands make better decisions before bulk production rather than discovering structural problems through returns, complaints, or damaged products in the market.
Szoneier approaches seam strength as part of the complete custom manufacturing process, connecting material selection, structural development, sampling, sewing, testing, in-line inspection, final QC, and repeat-order control. The purpose is not to make unsupported claims about how much every bag can carry. It is to develop a construction that matches the intended use, verify the important stress points with suitable methods, and give the approved structure a better chance of remaining consistent from the first sample through ongoing production.
Frequently Asked Questions
How is bag seam strength measured?
Bag seam strength is commonly measured by applying a controlled tensile force across a sewn specimen and recording the force and failure behavior. Depending on the material and test purpose, a recognized method such as ASTM D1683/D1683M or an applicable ISO procedure may be used. The result should be reviewed together with seam slippage, fabric tearing, thread rupture, and failure location rather than judged only by the highest recorded Newton value.
What is a good seam strength for a bag?
There is no single universal seam-strength value that applies to every bag. An appropriate requirement depends on product type, expected working load, material, seam construction, test method, loading direction, and customer or retailer specifications. A lightweight pouch and a heavy-duty tool bag require very different structural performance, so the acceptance value should be established for the actual product rather than copied from an unrelated test report.
What is ASTM D1683 used for?
ASTM D1683/D1683M is used to evaluate failure in sewn seams of woven fabrics under controlled tensile loading. It can provide information about maximum seam force, stitching failure, seam efficiency, and seam slippage or yarn displacement. The method is valuable for comparing seam constructions, but it does not by itself predict the real-world service life or safe carrying capacity of a completed bag.
What is the difference between seam strength and seam slippage?
Seam strength describes the resistance of the sewn joint to failure under force, while seam slippage refers to movement of the fabric yarns around the stitch line that creates an opening without necessarily breaking the sewing thread. A seam can therefore remain technically connected while already becoming unacceptable in appearance or structural stability. Both conditions should be considered when evaluating the quality of a woven bag seam.
How do you test backpack shoulder-strap strength?
Backpack shoulder straps can be evaluated through component pull tests, finished-product load tests, or other project-defined methods that load the strap attachment in a controlled direction. The test should observe not only whether the thread breaks but also whether the body fabric tears, the webbing pulls out, the reinforcement shifts, or the attachment deforms. Loading direction is important because real shoulder straps often experience diagonal as well as vertical forces.
Are finished-bag load tests necessary if seam tensile testing has already been done?
Finished-bag tests are often useful because a laboratory seam specimen does not reproduce every structural interaction in the complete product. A finished load test can reveal bottom sagging, handle movement, hardware deformation, reinforcement problems, or stress concentrations that are not visible in a flat seam specimen. For load-bearing bags, specimen testing and finished-product testing usually provide stronger evidence when they are used together rather than treated as substitutes.
Can seam strength be improved without using heavier fabric?
Yes. Seam performance can often be improved through better load distribution rather than simply increasing fabric weight. Possible changes include extending webbing farther into the body, enlarging or repositioning reinforcement, adjusting seam allowance, changing stitch geometry, selecting a more suitable thread and needle combination, or reducing stress concentration around corners and bartacks. The correct change depends on the observed failure mode, which is why testing and failure analysis should come before redesign.