 Skip to content
In today’s crowded market, a bag is more than just a carrier—it’s a walking billboard for your brand. Whether you’re outfitting corporate swag, retail merch, or custom promotional items, understanding the art and science of logo application is essential. From classic screen printing on canvas totes to embossed logos on luxury leather, each method offers unique advantages, costs, and material compatibilities.
Putting a logo on a bag involves selecting the right method—screen printing, embroidery, heat transfer, debossing/embossing, or patches—matched to the bag’s material and intended use. Screen printing suits thick fabrics; embroidery adds dimension; heat transfers allow full-color prints on synthetics; debossing/embossing works for leather and PU; and patches offer flexibility across materials. Choosing the optimal technique ensures crisp, durable branding that resonates with customers and withstands everyday wear.
Imagine a sleek corporate tote bearing your company’s emblem, handed out at a major conference—each attendee becomes a brand ambassador, sparking conversations everywhere they go. Ready to dive into the “what,” “which,” and “how” of bag branding? Let’s get started.
What Are the Most Common Logo Application Methods?
The five primary logo application methods are screen printing (ideal for high-volume runs on canvas and cotton), embroidery (providing a tactile, upscale finish on fabrics and some leathers), heat transfer & sublimation (enabling full-color, photographic designs on polyester and nylon), debossing/embossing (imprinting logos into leather or PU for a sophisticated, permanent mark), and patches & appliqués (sewn or heat-sealed emblems that work on virtually any substrate). Each technique varies in setup cost, durability, color fidelity, and material compatibility, guiding brands to the best choice for their custom bags.
Choosing the right logo application method involves weighing factors such as bag material, order volume, aesthetic goals, and budget constraints. Below, we explore each technique’s process, advantages, limitations, and best-use scenarios.
1. Screen Printing: Ink Meets Fabric
Process Guide
- Artwork Preparation: Separate your logo into individual color layers.
- Screen Creation: Coat mesh screens (60–230 threads/inch) with photo-emulsion and expose through film positives.
- Printing: Align screens on a multi-station press; deposit plastisol or water-based ink through screens using squeegees.
- Curing: Pass printed bags through a conveyor dryer at 150–160 °C to fully polymerize inks.
Advantages
- Cost Efficiency: Low cost per unit on orders over ~200 items.
- Opacity & Vibrancy: Solid coverage even on dark fabrics.
- Longevity: High wash-fastness and abrasion resistance.
Limitations
- Color Restrictions: Practical up to 6 colors; gradients require halftones.
- Setup Fees: Screen and stencil costs make small runs expensive.
Best For
- Bulk canvas totes, cotton backpacks, denim accessories.
2. Embroidery: Stitching Your Brand
Process Guide
- Digitizing: Convert your vector logo into a stitch file, mapping colors and stitch types.
- Hooping: Secure bag panels onto stabilizer backing to prevent puckering.
- Stitching: Multi-needle machines execute design at 500–1,200 stitches/min.
- Finishing: Trim jump threads and remove backing.
Advantages
- Premium Aesthetic: Adds texture and depth.
- Durability: Thread resists fading and abrasion.
- Multicolor Capability: Up to 15 thread colors in one run.
Limitations
- Detail Limits: Fine text or intricate detail can “fill in.”
- Cost: Higher per-piece price ($3–$7) and minimum stitch counts.
Best For
- Corporate laptop bags, structured caps, premium totes.
3. Heat Transfer & Sublimation: The Power of Heat
Heat Transfer Vinyl (HTV)
- Process: CNC-cut colored vinyl, weed away excess, heat-press at 140–160 °C for 10–15 seconds, peel carrier.
- Pros: Bright solids; works on cotton/poly blends.
- Cons: Edges may peel over many washes.
Dye Sublimation
- Process: Print dye-infused inks on transfer paper; under heat (180–200 °C) and pressure, inks vaporize into polyester fibers.
- Pros: Photographic detail; seamless feel.
- Cons: Only on white or light polyester; requires polyester substrate.
4. Debossing and Embossing: Imprint in Leather and PU
Process Guide
- Die Creation: Engrave custom steel die with your logo pattern.
- Heat & Pressure: Press die into leather/PU at 120–150 °C under 1–2 MPa for 2–5 seconds.
- Foil Stamping (Optional): Apply heat-activated foil during emboss for metallic accents.
Advantages
- Elegant Finish: Permanent, no added materials.
- Longevity: No risk of peeling or fading.
Limitations
- Costly Tooling: Dies cost $300–$800 each.
- Material Constraints: Limited to 0.8–2 mm thick hides and synthetics.
Best For
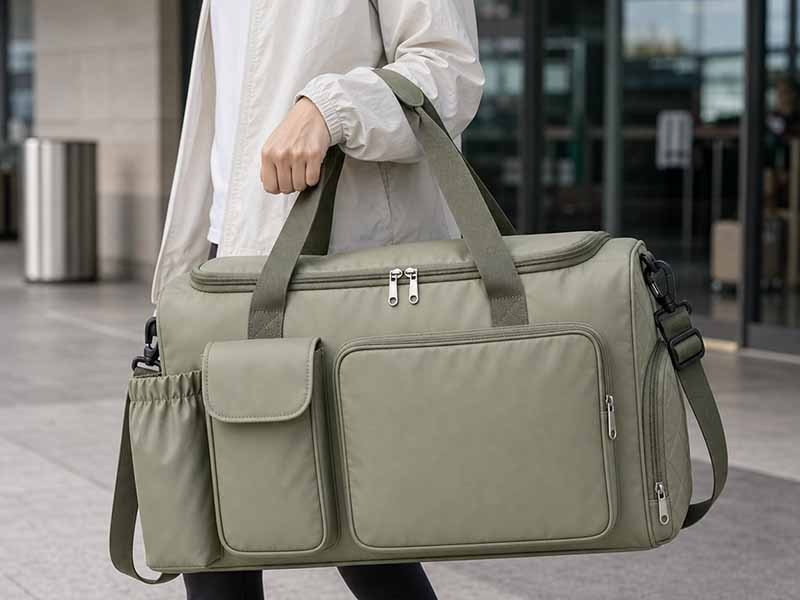
- Luxury leather handbags, slim card wallets, PU travel cases.
5. Patches & Appliqués: Versatile Emblems
Process Guide
- Patch Production: Create woven, embroidered, PVC, or leather patches.
- Attachment: Sew around edges or heat-seal adhesive backing onto bag surface.
Advantages
- Flexibility: Apply to any bag material.
- Design Freedom: Intricate shapes, borders, and multiple layers.
Limitations
- Bulk: Adds thickness at the attachment point.
- Labor: Sewing patches increases production time and cost.
Best For
- Denim jackets, gym bags, promotional giveaways.
Why Custom Bags with Logo for Business Matter: Branding Benefits
Custom bags emblazoned with your logo transform everyday items into powerful marketing tools. They provide repeated brand exposure—every use is a walking advertisement—while conveying professionalism and quality. Branded bags foster customer loyalty, as recipients associate your company with functional, well-made products. They also offer cost-effective promotion: compared to digital ads, a one-time investment in custom logo bags yields ongoing awareness. Whether distributed at events, sold in a retail line, or used as corporate gifts, logo bags help embed your brand in daily life.
Which Bag Materials and Fabrics Work Best for Each Technique?
Different logo methods pair optimally with specific substrates: screen printing and embroidery excel on natural fibers—cotton canvas, denim, twill—thanks to their stable, absorbent weaves. Heat transfer and dye sublimation demand synthetic, tightly woven fabrics such as nylon and polyester for vibrant, permanent coloration. Debossing/embossing shines on thicker hides—genuine leather or high-quality PU—where heat and pressure can imprint cleanly. Patches offer the greatest versatility, adhering by sewing or heat-seal to virtually any material, from neoprene to mesh.
Matching your bag’s material to the chosen logo application method is crucial for achieving crisp, durable results. Below, we explore the ideal fabric and leather substrates for each technique, along with practical considerations.
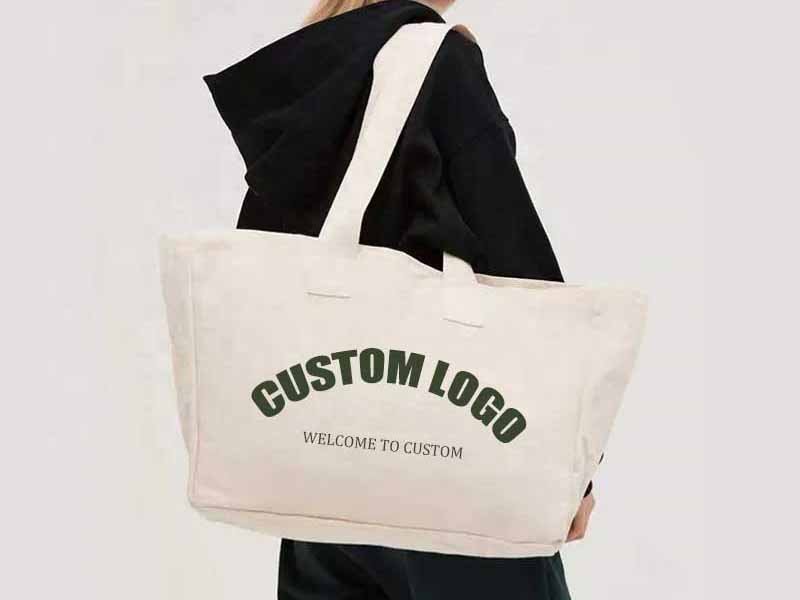
Canvas and Cotton: Screen Printing & Embroidery
Material Characteristics:
- Wovens with thread counts of 8–12 oz cotton canvas provide a tight, durable foundation.
- Twill and denim offer slight diagonal weaves that visually complement printed or stitched logos.
Why Screen Print Works:
- Natural cotton fibers absorb plastisol or water-based inks readily, yielding opaque, vibrant prints.
- Ink bonds into the fabric, with minimal cracking after repeated washes.
Why Embroidery Works:
- The stable canvas weave supports needle penetration without puckering.
- Embroidered threads anchor securely, resisting abrasion.
Considerations:
- Pre-wash fabrics to pre-shrink and remove sizing.
- Use appropriate stabilizers—tear-away or cut-away—to maintain bag structure during stitching.
Nylon and Polyester: Heat Transfer & Sublimation
Material Characteristics:
- Synthetic fibers feature tight weaves and hydrophobic surfaces that accept heat-activated inks and vinyl.
- High-density weaves (e.g., 600D polyester) withstand press temperatures without melting.
Why Heat Transfer Works:
- HTV films bond to polymer surfaces under heat/pressure, creating thin, flexible logos.
- Ideal for low-volume, multicolor designs without screen setup.
Why Sublimation Works:
- Dye-sublimation chemically infuses inks into polyester, producing seamless, full-color images.
- No hand-feel—printed areas remain as soft as the base fabric.
Considerations:
- Sublimation only on light-colored polyester to ensure true color reproduction.
- Avoid nylon for sublimation; poly-blend alternatives may produce muted results.
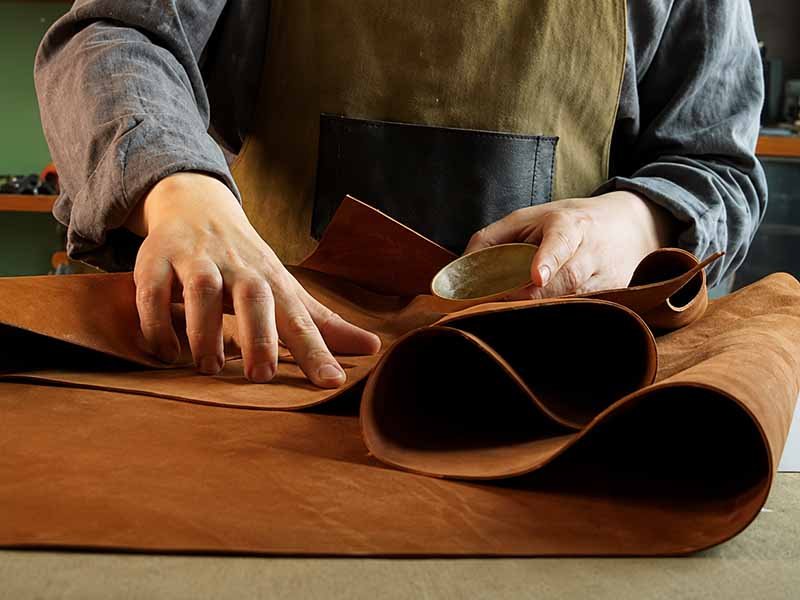
Leather and PU: Debossing, Embossing & Foil Stamping
Material Characteristics:
- Genuine top-grain leather (0.8–2.0 mm) and high-grade PU simulate a stable surface for imprinting.
- Heat tolerance and surface rigidity are essential for crisp impressions.
Why Deboss/Emboss Works:
- Custom steel dies press into leather/PU under controlled heat (120–150 °C) and pressure (1–2 MPa), creating a permanent tactile mark.
- Foil stamping applies metallic or colored foils simultaneously for high-contrast accents.
Considerations:
- Test small swatches to calibrate heat/pressure—too much can scorch leather; too little yields shallow imprints.
- PU alternatives offer color uniformity and cost savings but may lack the patina of genuine leather.
Mixed-Material Bags: Hybrid Approaches
Material Characteristics:
- Many modern bags combine panels—canvas bodies with leather accents or nylon exteriors with faux-leather trims.
Hybrid Branding Strategies:
- Multimethod Logos: Screen print on fabric panels, deboss on leather trim, and attach small leather patches in one piece.
- Spot Branding: Reserve each technique for the substrate best suited—embroider only the canvas pocket, heat-transfer on the nylon front trim.
Considerations:
- Coordinate placement to ensure each logo fragment sits on the correct material.
- Factor in movement and flex—avoid rigid logos on highly curved or flexing areas.
Versatility of Patches & Appliqués
Material Characteristics:
- Patches—embroidered, woven, PVC, leather—are manufactured separately then affixed.
- Backings include iron-on adhesives, Velcro, or traditional stitching.
Why Patches Work:
- Universal compatibility: apply to canvas, nylon, leather, neoprene, mesh, and more.
- Easy replacement or repositioning for limited-edition runs or event-specific branding.
Considerations:
- Heat-seal adhesives must match base fabric’s melting point; test adhesion strength.
- Sewn patches require allowance for seam allowances and may add bulk.
How Do You Prepare Your Artwork and Files for Logo Application?
To achieve crisp, accurate logos on bags, provide vector files (AI, EPS, or SVG) with all text converted to outlines and linked images embedded. Separate colors into distinct layers for screen printing and specify Pantone codes for exact matching. For heat transfer and sublimation, supply high-resolution (300 dpi+) TIFF or PNG files. Embroidery requires digitized stitch files (DST, PES) with defined stitch counts. Include clear mock-ups showing logo placement dimensions and orientation on the bag, and approve physical or digital proofs before production.
Successful logo application begins long before the press or machine fires up—it starts at the artwork stage. Brands and designers must translate their creative vision into technical files that dial in color, scale, and placement to exacting standards. Below, we explore each step in preparing your artwork for different logo methods, ensuring seamless production and flawless results.
Choosing the Right File Formats and Vector Requirements
Vector vs. Raster:
- Vector Files (AI, EPS, SVG) are paramount for screen printing, debossing, foil stamping, and laser engraving because they scale infinitely without loss of resolution. Convert all text to curves or outlines to avoid font mismatches.
- Raster Files (TIFF, PNG) are acceptable only for heat transfer vinyl (HTV) and dye sublimation, where photographic detail and color gradients are required. Ensure a minimum of 300 dpi at full print size to prevent pixelation.
Layer Organization:
- Organize your layers by color and design element. In Adobe Illustrator, name each layer clearly (e.g., “Pantone 186 C Body,” “White Underbase”) to guide prepress technicians.
- Merge or flatten background layers only when no alterations are needed—flat images hinder color separations.
Color Separations and Pantone Matching
Screen Printing Preparations:
- Each color block in your logo must become its own separation. Simple logos with 1–4 solid colors are ideal; complex gradients require halftone screens.
- Specify Pantone Matching System (PMS) codes for spot inks. This ensures consistent hues across different print runs and substrates.
Heat Transfer and Sublimation:
- For sublimation, convert colors to CMYK mode and apply any necessary RGB-to-CMYK profiles. Test printed proofs because sublimated colors on polyester can shift slightly upon heat activation.
- For HTV, solid color vinyl requires each color as its own layer. Avoid small, intricate details that can be difficult to weed from vinyl sheets.
Embroidery Threads:
- Digitize your logo into stitch files using embroidery software. Map each design color to a thread brand and shade (e.g., Madeira Rayon 1142 for red). Aim for no more than 12–15 thread colors to keep machine changeovers efficient.
Sizing, Placement Guides, and Mock-Ups
Defining Logo Dimensions:
- Provide specific width and height in millimeters or inches. Include bleed and safety margins—typically an extra 3–5 mm beyond the design boundary to accommodate minor shifts during application.
- For bags, common logo sizes range from 50 × 50 mm on small pouches to 200 × 100 mm on tote fronts.
Placement Templates:
- Supply digital templates showing bag panels flat with registration marks where the logo should sit. Include measurements from seam to logo edge (e.g., “Center logo 50 mm below top hem, 75 mm from side seam”).
- For 3D objects like backpacks, include side and back panel diagrams.
Mock-Up Reviews:
- Generate realistic 3D or Photoshop mock-ups by mapping your artwork onto bag images. This helps stakeholders visualize final products and catch alignment issues early.
- Provide both digital and (when possible) physical pre-production samples. Vinyl test transfers or embroidered patches sewn onto a sample bag panel reveal potential problems—misaligned stitches, incorrect color values, or fabric distortions.
Proof Approvals and Pre-Production Samples
Digital Proofs:
- After artwork submission, expect a digital print or embroidery simulation proof. Review colors, placement, and sizing meticulously. Request changes before mass runs—once plates or digitized files are cut, alterations incur extra charges.
Physical Samples:
- For high-value orders, always approve a physical “strike-off” or stitched sample. This is the final check for tactile qualities: thread tension, vinyl adhesion, embossed depth, or patch attachment strength.
- Verify that the logo withstands light flexing and surface contact without cracking or peeling.
Document Change Requests:
- Communicate any adjustments clearly in writing or annotated PDFs. Confirm in writing that each change has been incorporated before proceeding.
How Is Each Logo Application Method Executed Step-by-Step?
Each logo technique follows a precise workflow:
- Screen Printing: Prepare screens for each color, align on the press, flood and print, then cure inks.
- Embroidery: Digitize the design, hoop the bag with stabilizer, stitch multiple thread colors, trim and back.
- Heat Transfer/Sublimation: Print or cut the transfer, position on the bag, apply heat and pressure, and peel the carrier.
- Deboss/Emboss: Heat the custom die, align on the panel, press under controlled temperature and pressure, then release.
- Patches: Produce patches, place and either sew around edges or apply heat-activated adhesive under press.
Implementing your logo cleanly and consistently requires mastery of each method’s equipment, materials, and parameters. Below is a detailed look at the essential steps, typical settings, and best practices.
Screen Printing Setup, Registration, and Curing
- Artwork & Screen Preparation
- Separate your vector logo into solid color layers.
- Coat stainless-steel frames (mesh 110–160 tpi) with photo‐emulsion.
- Expose each screen under UV light using film positives; wash out unexposed areas to form stencils.
- Press Setup & Registration
- Mount screens on a multi‐station carousel or flat‐bed press.
- Use registration pins or marks to align successive screens, ensuring perfect layer overlap.
- Printing Process
- Apply the first color ink flood across the screen.
- Drag the squeegee at a 45° angle, 70–90 shore A hardness, at 300–500 mm/s, depositing ink through open mesh areas.
- Rotate to the next station, print subsequent colors in order from lightest to darkest.
- Ink Curing
- Convey printed bags through a drier at 150–160 °C for 60–90 seconds to fully cure plastisol inks, or use water‐based inks with a flash unit between colors.
- Quality Check
- Inspect for pinholes, misregistration, or uneven ink coverage.
- Perform a wash‐and‐rub test: 40 °C laundering and 500 rub cycles to verify durability.
Embroidery Digitizing, Threading, and Finishing
- Digitizing
- Convert your logo into an embroidery file (DST, PES) using software that determines stitch paths, densities (250–400 stitches/inch), and underlay types.
- Machine Setup & Hooping
- Load the file into a multi‐needle embroidery machine (6–15 needles for color changes).
- Hoop the bag panel with a tear‐away stabilizer to prevent puckering.
- Stitching Process
- Run the program at 500–800 stitches/min.
- Monitor thread breaks, tension, and needle wear.
- Finishing
- Trim jump threads and excess backing.
- Apply a fabric sealant on the back to lock threads and enhance wash resistance.
- Quality Check
- Measure stitch density and tension consistency.
- Test seam strength by gently tugging the stitches (target ≥ 10 N force).
Heat Press Parameters for Transfers and Sublimation
- Design Output
- For HTV, cut each color layer from vinyl using a plotter.
- For sublimation, print CMYK raster images onto transfer paper using sublimation inks.
- Press Setup
- Preheat the bag surface briefly to remove moisture.
- Set the heat press to 140–160 °C, 3–5 bar pressure, and a dwell time of 10–15 seconds (HTV) or 45–60 seconds (sublimation).
- Application
- Align the transfer on the bag panel.
- Press with even pressure; for HTV, peel the carrier warm or cold per vinyl specs.
- Quality Check
- Perform a peel‐adhesion and wash‐fastness test: 3 machine washes at 30 °C with 5 rub cycles.
Debossing/Embossing Dies, Pressure Settings, and Finishing
- Die Fabrication
- Machine-engrave a hardened steel die with your logo at 0.5 mm depth.
- Press Configuration
- Preheat the die to 120–150 °C; adjust hydraulic pressure to 1–2 MPa.
- Place the bag panel between the die and counterplate.
- Press Operation
- Lower under dwell time of 2–4 seconds to transfer the impression.
- Lift, allow to cool briefly, then inspect.
- Foil Enhancement (Optional)
- Position metallic foil between die and hide; heat and pressure transfer foil only to raised areas.
- Quality Check
- Measure emboss depth (target ± 0.1 mm); check for scorch marks or incomplete horns.
Patch Attachment: Sewing, Heat-Sealing, and Adhesive Options
- Patch Production
- Embroidered, woven, PVC, or leather patches are pre-fabricated with heat-seal or sew-on backings.
- Positioning
- Place patches accurately per placement template; secure temporarily with heat-resistant tape.
- Attachment Methods
- Sewing: Use a lockstitch or zigzag machine, 3–4 mm stitch length, ensuring 1.5 mm from patch edge.
- Heat-Seal: Press at 150–160 °C, moderate pressure, for 8–12 seconds.
- Quality Check
- Test adhesion with a peel force gauge (≥ 10 N).
- Inspect seam consistency and any puckering.
What Quality Control Measures Ensure a Durable, High-Quality Logo?
Robust QC for bag logos includes adhesion and wash-fastness tests for prints and transfers, tensile and rub-fastness tests for embroidery threads, peel-force assessments for patches, and depth/uniformity checks for embossing. Colorimeters verify Pantone matches (ΔE ≤1.0), and light-box inspections confirm registration accuracy. Sampling follows an AQL 2.5 plan, with 5–10% of units tested per run. Detailed QC protocols ensure every logo resists everyday wear, laundering, and environmental exposure, safeguarding your brand’s integrity.
Ensuring your bag’s logo endures countless uses begins with a structured QC program that addresses each application method’s unique failure modes. Below, we outline key tests and inspection steps tailored to screen printing, embroidery, heat transfers, embossing, and patches.
Screen Print & Heat Transfer Durability
- Wash-Fastness Testing
- Protocol: Follow ISO 6320 or AATCC 61 standards—simulate 5–10 domestic wash cycles at 40 °C using non-bio detergents.
- Pass Criteria: No visible cracking, peeling, or significant color loss; ink adhesion remains ≥95%.
- Abrasion & Crocking Tests
- Martindale Abrasion: 5,000–10,000 rub cycles to confirm print integrity under friction.
- AATCC Crockmeter: Dry and wet crock tests ensure prints don’t transfer to other surfaces.
- Peel Adhesion (for HTV)
- Procedure: Use a 180° peel test on a tensile tester at 300 mm/min.
- Acceptable Strength: ≥10 N/25 mm width; lower failures indicate poor vinyl or press parameters.
Embroidery Stitch & Thread Reliability
- Tensile Strength of Threads
- Method: ASTM D2256 strip tests on embroidered samples.
- Target: Thread break strength ≥15 N to withstand tugging.
- Stitch Density & Uniformity
- Inspection: Confirm density (stitches per inch) matches digitized design (±5%).
- Defects Check: No skipped stitches, loose loops, or thread nestling.
- Color Fastness to Rubbing and Washing
- AATCC 116 Rubbing Test: ≥4–5 grade on a 1–5 scale for dry and wet rub.
- Wash Cycles: 5 domestic washes with minimal fading (ΔE ≤2.0).
Embossing/Debossing Precision
- Depth and Uniformity Measurement
- Tool: Digital depth gauge at multiple points—ensure emboss depth within ±0.1 mm of spec.
- Visual Inspection: Light-box or angled lighting to spot incomplete or uneven impressions.
- Material Integrity
- Flex Test: Repeated folding at embossed area (500 cycles at 90° bend) to check for cracking or lifting.
- Surface Hardness: Shore A durometer readings confirm coating resilience.
Patch Attachment Strength
- Peel and Shear Tests
- Peel Test: Use 180° peel at 300 mm/min; strength ≥10 N.
- Shear Test: ASTM D3654 shear at 50 mm/min; patch resists sliding off under ≥20 N.
- Seam and Edge Inspection (Sewn Patches)
- Stitch Count: Validate a minimum of 6 stitches per inch.
- Thread Tension: Uniform, with no puckering or thread breakage.
Color Consistency and Registration
- Pantone Verification
- Colorimeter: Measure CIEXYZ/CIELAB values against master standards; ΔE ≤1.0 for spot colors.
- Batch Comparisons: Ensure uniformity across production lots.
- Registration Accuracy
- Overlay Test: Superimpose proof on digital template to detect misalignment >0.5 mm.
- Visual Check: Inspect multi-color prints for ghosting or color shifts.
Statistical Sampling and Documentation
- AQL Sampling Plans: Follow ISO 2859-1 Level II for lot sizes—test 5–10% of units, accepting ≤2.5% defects.
- QC Reports: Document test results, non-conformities, corrective actions, and sign-offs.
- Continuous Improvement: Analyze defect trends quarterly to refine processes, update tooling, and train staff.
Why Partner with Szoneier for Custom Logo Bags?
Szoneier offers end-to-end OEM/ODM services for custom logo bags, backed by 18+ years of experience and ISO/BSCI–certified facilities. We provide low MOQs (50 units), rapid prototyping (7–10 days), and integrated capabilities—material R&D, digital artwork support, multi-method logo application (screen print, embroidery, heat transfer, embossing, patches), and in-house quality control with AQL sampling. From canvas totes to leather travel bags, we customize every detail—materials, finishes, hardware, packaging—ensuring on-time delivery and consistent brand excellence at competitive costs.
Choosing the right manufacturing partner can make or break your branded bag project. Here’s why Szoneier stands out as the strategic choice for businesses seeking high-quality, customized logo bags:
Vertical Integration and Material Expertise
- Full Supply-Chain Control: We manage every stage—fabric sourcing (canvas, nylon, PU, leather), cutting, logo application, stitching, and final QC—under one roof. This reduces lead times, minimizes handling errors, and ensures traceability.
- R&D on Materials and Inks: Our in-house lab develops bespoke coatings, threads, and inks optimized for adhesion, wash fastness, and color vibrancy across diverse substrates. Brands benefit from performance-tested solutions without hunting multiple vendors.
Low MOQs and Rapid Sampling
- Accessible for All Brand Sizes: Szoneier’s MOQ of 50 units enables startups and small retailers to test new designs without heavy investment.
- Fast Turnaround: Digital mock-ups delivered in 48 hours; physical prototypes (complete with your logo method of choice) ready in 7–10 days. Quick iterations let you refine placement, color, and technique without delaying your launch.
Multi-Method Logo Capabilities
- Screen Printing & Embroidery Lines: Automated presses and multi-needle embroidery machines handle high volumes and complex colorways with precision.
- Heat Transfer, Sublimation & Foil Stamping: Dedicated heat presses and embossing stations ensure consistent temperature and pressure control for crisp, durable logos.
- Patches & Appliqués: Our patch workshop creates woven, PVC, and leather emblems that integrate seamlessly onto any bag style.
Rigorous Quality Assurance
- AQL 2.5 Sampling: We inspect 5–10% of each production run, applying wash, abrasion, peel, and color tests as appropriate to your chosen logo method.
- Data-Driven Improvements: QC data is analyzed monthly, guiding process enhancements and preventing repeated issues—translating to lower defect rates (<0.5%) and reliable brand representation.
Customization and Value-Added Services
- Design Consultation: Our experts advise on the best logo methods for your material, budget, and usage scenario—balancing visual impact with durability.
- Hardware & Packaging Solutions: Choose from custom-engraved zippers, metal badges, woven labels, plus branded dust bags, gift boxes, and swing tags, creating a cohesive unboxing experience.
- Global Logistics Support: From our China-based production facilities, we coordinate sea, air, or express shipments, handling export documentation and compliance.
Ready to Brand Your Bags?
Contact Szoneier today to discuss your logo application needs—from initial design to final delivery. Let us help you create custom logo bags that make a lasting impression.
manufacturer Categories
- Custom Tote Bags Manufacturer
- custom backpacks Manufacturer
- custom travel bags& Duffle bags manufacturer
- custom makeup bags & toiletry bags manufacturer
- custom cooler bags manufacturer
- custom drawstring bags manufacturer
- custom makeup bags & toiletry bags manufacturer
- custom golf bags manufacturer
- custom fireproof bags manufacturer
- custom dry bags manufacturer
- custom ski bags manufacturer
- custom gym & sports bags manufacturer
- custom laptop bags manufacturer
- custom tactical bags manufacturer
- custom beach bags manufacturer
- custom medical bags manufacturer
- custom camera bags manufacturer
- custom wetsuits manufacturer
- custom leather goods manufacturer
- more personalized products
Can't find the answers?
No worries, please contact us and we will answer all the questions you have during the whole process of bag customization.
Make A Sample First?
If you have your own artwork, logo design files, or just an idea,please provide details about your project requirements, including preferred fabric, color, and customization options,we’re excited to assist you in bringing your bespoke bag designs to life through our sample production process.