 Skip to content
How to Dry Backpack: Step by Step Guide
- Eric
- January 10, 2025
- 8:28 am
When your backpack gets soaked,whether from an unexpected rainstorm, a sweaty hike, or spilling your water bottle,you’ll want to dry it properly to maintain its shape, prevent odors, and extend its lifespan. But how exactly do you dry a backpack without causing damage? Getting it right is more than just tossing the bag in a corner or (worse) throwing it into a dryer. From carefully caring for drawstrings, zippers, and fabrics, to ensuring the inside is fully dried to prevent mold, there’s a bit more to it than meets the eye. Trust me, the first time I dunked my beloved hiking pack in the dryer on high, it came out half its original shape, with melted buckles. Let’s help you avoid that fate!
Properly drying a backpack involves cleaning it first, removing excess moisture with towels, then air drying (or using low-heat methods) to protect fabrics and hardware. Tools like fans, dehumidifiers, or sunlight (in moderation) can speed up the process. Ensuring all compartments are moisture-free prevents mold, odors, and damage.
We’ll explore the detailed steps to keep your backpack fresh, odor-free, and intact, whether it’s a simple canvas daypack or a specialized hiking rucksack.
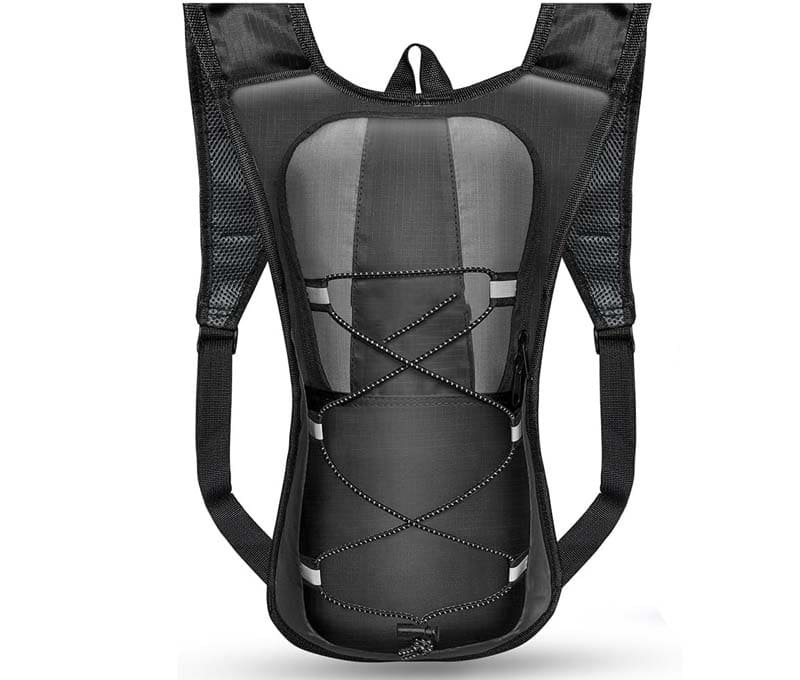
What Materials Are Your Backpack Made Of?
Identifying your backpack’s materials,canvas, leather, nylon, polyester, or blends,is crucial. Each fabric reacts differently to moisture, so knowing what you’re dealing with helps you choose the right drying approach and avoid accidental damage.
Synthetic vs Natural Fabrics
Synthetic Fabrics (Nylon/Polyester)
- Quick-Dry Superstars: These are typically lightweight and water-resistant, so they shed moisture faster than natural fibers. Perfect for sports or hiking backpacks that face rain or sweat regularly.
- Heat Sensitivity: Extreme dryer heat can melt or warp the synthetic fibers, especially if it’s uncoated or older.
- Outdoor-Ready: Many outdoor packs incorporate sturdy nylon or ripstop polyester, designed to handle tough conditions but best dried with gentle methods.
Natural Fabrics (Canvas/Leather)
- Canvas: A heavier cotton weave that’s breathable yet can soak up water. It might take longer to dry but is relatively easy to hand-wash and air dry. Oiling or waxing some canvas backpacks can add water resistance.
- Leather: Offers a classic, polished look but is sensitive to water and heat. If not dried properly, it can stiffen, crack, or get moldy. Leather bags are best dried slowly, away from direct heat, and occasionally treated with conditioner.
Zippers, Straps, and Hardware
- Metal Zippers and Clips: Ensure they’re fully dry to avoid rust. A quick wipe-down with a microfiber cloth helps.
- Plastic Components: These are generally durable but might warp if exposed to high dryer temperatures.
Waterproof Coatings
- Repellent Coatings: Some backpacks feature DWR (Durable Water Repellent) or similar finishes to keep water off. Thorough drying helps maintain these protective layers.
- Re-Coating: Over time, the waterproof layer might degrade. Proper drying is your first defense, but you might need reapplication or a specialized spray if you notice water soaking in.
How to Properly Clean Your Backpack Before Drying?
Cleaning eliminates dirt, sweat, and bacteria that lead to mold or foul smells. This ensures your backpack is fresh post-drying and prevents stains from setting in.
Spot Cleaning Stains
- Targeting Specific Areas: Use a small sponge or cloth with mild soap and water to dab away stains like juice spills or mud smudges.
- Avoid Bleach or Harsh Chemicals: They can discolor fabrics or degrade protective coatings, leaving your backpack worse off than before.
Deep Cleaning Methods
- Canvas Backpacks: A gentle hand wash in a tub or large sink with mild detergent. Let the bag soak briefly, then swirl it around—like washing delicate clothes.
- Leather Backpacks: Wipe with a slightly damp cloth, then pat dry. Leather-friendly soaps and conditioners help preserve softness and shine. Avoid soaking leather entirely, as water can cause it to warp or crack.
Drying After Cleaning
- Press, Don’t Wring: Gently press out moisture to avoid distorting the bag’s shape. Twisting or squeezing too hard can damage stitches or warp the fabric.
- Rinse Thoroughly: If soap or detergent remains, it can dry into a crunchy residue or attract more dirt next time.
Quick Tip
For extremely dirty or stained backpacks, consider a specialized backpack wash bag (if your washing machine allows) or a professional cleaning service. This might sound fancy, but for high-end or beloved packs, it’s worth the extra care.
Which Tools and Supplies Do You Need to Dry a Backpack?
You’ll need clean towels, a fan or drying rack, optional dehumidifiers, and a well-ventilated space. Having these on hand ensures an efficient, safe drying process without damaging your backpack.
Essential Items
- Absorbent Towels: Help remove surface water, speeding up the initial drying phase. Prefer cotton or microfiber towels for maximum absorption.
- Fans or Drying Racks: A fan increases air circulation, and a rack keeps the backpack suspended or spread out to avoid moisture being trapped on one side.
Additional Tools
- Dehumidifiers: If you live in a humid climate or have a damp basement, a dehumidifier can significantly cut drying time.
- Mesh Pouches: For smaller removable pieces like side pouches or water bottle holders, mesh bags can keep them from blowing away while air drying outside.
Eco-Friendly Options
- Natural Ventilation: Hang your backpack outdoors on a breezy day for a sunlight-and-wind combination (though be mindful of color fading).
- Reusable Drying Aids: Microfiber towels or cloths that you can wash repeatedly are better for the environment than single-use paper towels.
What Are the Best Methods to Dry a Backpack?
Air drying is the safest option, often supported by towels or fans to speed things up. Machine drying can be risky, potentially melting synthetic parts, but if you must, use the lowest heat possible and check frequently.
Air Drying vs Machine Drying
Air Drying:
- Pros: Gentle on fabrics, shape-preserving, environmentally friendly.
- Cons: Time-consuming, relies on good airflow or sunny weather.
Machine Drying:
- Pros: Faster, convenient if you’re short on time or in a damp climate.
- Cons: Risk of shrinkage, melted hardware, or compromised waterproof coating.
Using Towels to Remove Excess Water
- Lay the Backpack Flat: Spread a dry towel on a table or floor, place the bag on top.
- Pat or Roll: Press down gently to soak up moisture, then roll the towel over the bag to draw out additional water.
- Repeat: Switch to a fresh towel if the first gets saturated.
Sunlight and Shade
Sunlight Drying:
- Pros: Natural warmth, speeds drying, can help kill bacteria.
- Cons: Fades colors over time, can weaken some fabric fibers if exposure is too prolonged.
Shade Drying:
- Pros: Gentler on delicate materials, preserves color vibrancy.
- Cons: Slower process, might require more frequent repositioning for even drying.
Can You Put Backpacks in the Dryer?
Short Answer: It’s generally not advisable due to high heat possibly warping fabrics, melting zippers, or weakening straps.
Detailed Insights:
- Heat Damage: Synthetic materials can lose shape, and plastic hardware can warp or melt.
- Hardware Risks: Metal zippers may suffer from banging against the drum, leading to breakage or bent teeth.
- Alternative Solutions: If absolutely necessary, use a pillowcase or laundry bag, lowest heat setting, and a short cycle,checking the bag regularly.
How to Dry a Backpack Without Damaging It?
Use gentle air drying methods, avoid direct heat, maintain the bag’s shape with supports, and ensure every compartment is moisture-free to prevent odors or mold.
Avoiding Direct Heat
- Why High Temperatures Are Harmful: They can shrink or melt synthetic fabrics, crack or dry out leather, and degrade adhesives or waterproof coatings.
- Safe Alternatives: Air dry in a well-ventilated room, direct a fan across it, or place in indirect sunlight.
Maintaining Shape
- Stuffing with Dry Items: Insert small pillows, scrunched-up paper, or clean towels to prop up the bag’s interior.
- Using Molds or Supports: This especially helps if your bag is structured (like a camera or laptop backpack). A frame or mold ensures compartments don’t collapse.
Protecting Hardware
- Preventing Rust: Thoroughly dry metal parts like zippers or hooks. A quick rub with a microfiber cloth can remove lingering moisture.
- Regular Maintenance: Lubricate zippers with silicone spray or specialized zipper lubricant if they start feeling stiff after drying.
How Long Does It Take for a Wet Backpack to Dry?
Factors Influencing Drying Time:
- Material: Nylon or polyester generally dry faster (6–12 hours), while canvas or leather can take 24+ hours.
- Environment: Warm, dry, breezy climates speed things up. Cold, humid places slow everything down.
- Drying Method: Fan use or placing near a gentle heat source (like a radiator at a distance) can cut drying times in half.
Estimated Times:
- Lightly Wet: 4–6 hours if it’s just damp from sweat or drizzle.
- Soaked: 24–48 hours if thoroughly drenched.
Are There Quick Drying Techniques for Backpacks?
Yes. High-speed fans, dehumidifiers, and gently using a hairdryer on low heat can speed up drying. However, use caution to avoid overheating or damaging delicate fabrics and components.
Using a Hairdryer on Low Heat
- Distance Matters: Keep the dryer at least 6–8 inches away, moving it continuously.
- Temperature Control: The lowest setting is key to avoid melting plastic or messing up synthetic fibers.
- Spot Drying: This method is handy for targeted wet spots—like the bottom of the bag or around zippers.
Leveraging High-Speed Fans
- Direct Airflow: Place a fan a foot or two away, letting air circulate inside the bag’s main compartment and pockets.
- Cross Ventilation: If possible, open windows or use two fans for a gentle cross-breeze, speeding up evaporation.
Using Dehumidifiers
- Moisture Extraction: Dehumidifiers pull moisture out of the air, which is especially useful if you live in a humid environment.
- Compact Spaces: Placing the backpack in a small room or closet with a running dehumidifier can drastically cut drying time.
- Cost vs. Benefit: Dehumidifiers can be pricey, but if you frequently deal with damp items, it might be worth it.
| Tool | Pros | Cons |
|---|---|---|
| Hairdryer (Low Heat) | Speeds up small spot drying, portable | Risk of heat damage if misused |
| High-Speed Fan | Even, safe airflow, energy-efficient | Requires space, may still be slow |
| Dehumidifier | Great for humid climates, consistent dryness | Higher upfront cost, limited portability |
What Are Common Mistakes to Avoid When Drying a Backpack?
Steer clear of high heat, neglecting pockets, overstuffing during drying, skipping pre-cleaning, and storing it while damp. These errors can cause lasting damage and mold growth.
Using High Heat on Delicate Materials
- Why It’s Risky: Synthetic fibers can melt, while leather can warp or crack.
- Safer Alternatives: Low heat or no heat at all, plus a steady fan breeze.
Not Fully Drying All Compartments
- Consequences: Damp pockets or hidden corners can spawn mold and mildew, giving your bag a nasty odor.
- Solution: Turn pockets inside out, unzip hidden compartments, and direct air into them.
Overstuffing While Drying
- Issue: Too many items hamper airflow, leading to partial dryness or a weird shape.
- Solution: Only use lightweight, dry support items (like rolled towels) to maintain form.
Skipping Pre-Cleaning
- Problem: Residual sweat, dirt, or food bits can breed bacteria in the drying phase, inviting unpleasant smells or fungus.
- Solution: Always do a quick rinse or spot-clean before you dry.
Improper Storage After Drying
- Impact: Even a slightly damp bag can cause mold or degrade materials over time.
- Solution: Double-check dryness, then store it in a cool, ventilated closet or container away from direct sunlight.
How to Maintain Your Backpack’s Shape While Drying?
Use dry towels or paper inside the backpack to support its structure, hang it or place it on a rack for even airflow, and avoid placing heavy items during the drying phase to preserve its form.
Stuffing with Dry Items
- Benefits: Maintains the original silhouette, especially if your backpack has structured panels or a distinct shape.
- What to Use: Old newspapers, packing paper, or small rolled-up towels. Avoid anything that might bleed color or transfer lint when damp.
Using Molds or Supports
- Specialized Inserts: Some photography or sports backpacks come with removable molded inserts that help keep compartments rigid. Dry these inserts separately, then reassemble once everything is moisture-free.
- Household Hacks: A small plastic container or even a clean lunchbox can hold the shape of the main compartment.
Avoiding Compression
- Let It Breathe: Try not to place the backpack under heavier objects or in cramped spaces where it can’t “air out.”
- Gentle Handling: If you must move it mid-drying, do so carefully, supporting the bottom so you don’t collapse the sides.
Hanging the Backpack
- Best Practices: Use a sturdy hook or hanger. Ensure straps aren’t twisted. This method allows a 360° air circulation, drying the backside as well.
- Watch Out for: Overly narrow hooks that can create dents or stretch the strap material over time.
What Are the Benefits of Properly Drying Your Backpack?
Proper drying prevents mold, mildew, and odor buildup, maintains fabric and hardware longevity, and keeps your backpack ready for the next adventure without unpleasant surprises.
Preventing Mold and Mildew
- Health Considerations: Mold growth can trigger allergies or respiratory issues, especially if you store the bag in closed spaces.
- Odor Control: Dampness left unchecked results in that musty basement smell, which can be hard to eliminate once embedded.
Extending the Backpack’s Lifespan
- Why It Matters: Quality backpacks can be an investment. With mindful drying, you can keep them looking fresh for years.
- Cost Savings: Replacing a bag less frequently means more money in your pocket to spend on your next trip instead.
Maintaining Odor-Free Gear
- Convenience: Nobody wants to open their backpack and get a whiff of stale water or sweat.
- Electronics Safety: If you store electronics (like laptops or tablets) inside, a consistently dry environment is crucial for preventing corrosion or water damage.
Preserving Fabric Integrity and Hardware
- Zipper Functionality: Dry, lubricated zippers run smoothly and last longer.
- Color Retention: Overly moist fabrics might fade or show water spots in the long run.
- Strap Reliability: Wet straps that remain damp can fray or lose elasticity faster.
Drying Methods vs. Backpack Materials
| Material | Best Drying Method | Pros | Cons |
|---|---|---|---|
| Canvas | Air Drying with Fans | Preserves shape, straightforward | Takes longer, can hold moisture longer |
| Leather | Air Drying in Shade | Prevents cracking, keeps texture supple | Requires conditioning post-dry, watch for dryness |
| Nylon/Polyester | Machine Dry (Low Heat) or Air Dry | Dries quickly, easy to spot-clean | Heat can warp or damage if not cautious |
| Eco-Friendly Blends | Air Drying Naturally | Minimal energy usage, aligns with sustainability | May take more time, watch for mold in humid climates |
Conclusion
When it comes to preserving the shape, hygiene, and overall longevity of your favorite backpack, how you handle the drying process truly matters. Follow these steps,clean and blot your bag first, pick an air-based drying strategy (or, if needed, carefully use low heat), keep it well-ventilated, and ensure all compartments get fully dried. This helps your backpack remain odor-free, mold-free, and as good as new. With the right approach, you’ll sidestep the heartbreak of melted zippers or musty smells and keep your go-to carry gear ready for whatever adventure comes next.
At Szoneier, we specialize in crafting high-quality, customizable backpacks tailored to your specific needs. Whether you need a durable design for outdoor adventures, a sleek and professional style for business use, or personalized branding for your company, we’ve got you covered. Our free design consultations, sample offerings, and bulk-order options ensure you get the perfect backpack that combines functionality, durability, and style. Contact us today to create a backpack that’s uniquely yours,crafted with expertise and built to last!
Latest blogs


Can't find the answers?
No worries, please contact us and we will answer all the questions you have during the whole process of bag customization.
Make A Sample First?
If you have your own artwork, logo design files, or just an idea,please provide details about your project requirements, including preferred fabric, color, and customization options,we’re excited to assist you in bringing your bespoke bag designs to life through our sample production process.