A canvas pencil pouch can look almost effortless: two fabric panels, one zipper, and a printed logo. In production, however, small decisions quickly change its strength, capacity, appearance, and cost. A pouch made from dense 10 oz cotton canvas will behave very differently from one made from loose 6 oz canvas. A zipper opening that is 15 mm too short can make long pencils difficult to remove, while a lining cut too generously may catch in the slider. These details are easy to miss in a product photo, yet they shape the experience every time the pouch is opened.
A well-made canvas pencil pouch starts with a clear use case, measured internal capacity, suitable canvas weight, stable lining, reliable zipper, and a sewing structure that protects the corners and zipper ends. The approved sample should confirm size, logo position, color, loading performance, seam quality, packaging, and production tolerances before bulk fabric is cut.
For retailers, stationery labels, schools, museums, gift companies, and promotional programs, the smartest development work happens before the first sample reaches the sewing line. One seemingly minor choice—such as changing from an unlined flat pouch to a lined box pouch—can alter material consumption, labor time, shipping volume, and retail price. The following guide explains where those changes come from and how to make each decision with fewer surprises.
What Is a Canvas Pencil Pouch?
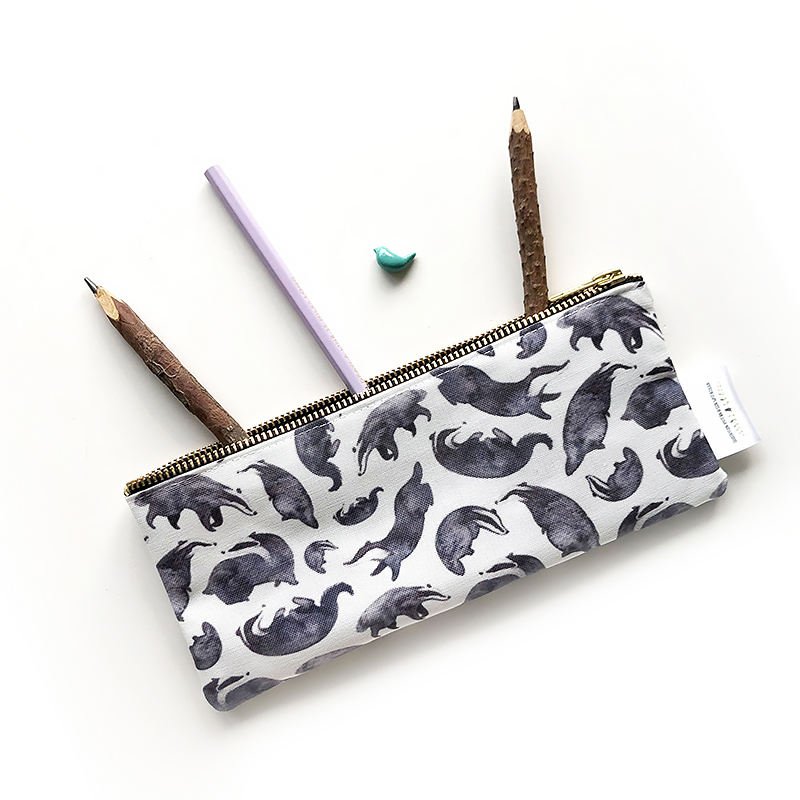
A canvas pencil pouch is a soft storage case made from cotton, cotton-blend, polyester, or recycled canvas. It usually includes a zipper, stitched fabric body, and optional lining. Its final quality depends on fabric density, dimensions, opening length, seam structure, zipper installation, decoration method, and the amount of weight carried inside.
Why Choose a Canvas Pencil Pouch?
Canvas is widely chosen because it combines a natural textile appearance with enough strength for repeated daily use. It can be made soft and foldable for promotional programs or firm and structured for retail stationery collections. The surface also works with screen printing, embroidery, digital printing, patches, woven labels, and other decoration methods.
A canvas pouch can support many price levels without changing the main product concept. A simple unlined version may use stock fabric, a nylon coil zipper, and one printed logo. A higher-priced version may include dense cotton canvas, woven lining, internal pockets, metal hardware, custom zipper pullers, and individual retail packaging.
Canvas also gives product designers more freedom than a rigid pencil box. The pouch can be flat, boxed, triangular, round, expandable, fold-open, or divided into several compartments. It can be compressed inside a schoolbag and shipped flat, reducing carton volume.
Before selecting canvas, the sourcing team should still consider several limitations:
- Untreated cotton canvas absorbs moisture and ink more easily than coated synthetic fabric.
- Pale canvas colors show pencil dust, makeup marks, and handling stains more clearly.
- Heavy canvas can make a small pouch feel stiff or difficult to turn during sewing.
- Loose-weave canvas may allow fine printed lines to break across the fabric texture.
- Cotton-rich fabrics may shrink or change hand feel after washing.
- Dark dyed canvas may require colorfastness testing when paired with light lining or packaging.
Canvas works best when its weight, finish, structure, and intended retail position are considered together rather than selected from appearance alone.
Is a Canvas Pencil Pouch Durable?
Canvas can provide excellent daily-use durability, but fabric thickness by itself does not determine product life. Most failures begin at concentrated stress points rather than across the middle of the fabric panel.
The areas requiring the most attention are:
- Both ends of the zipper opening
- Lower side corners
- Boxed bottom seams
- Handle or loop attachment points
- Internal divider edges
- Areas where several thick fabric layers meet
- Seams exposed to sharp pencils or metal rulers
A heavy 12 oz canvas pouch can still fail when the zipper ends are not reinforced or the seam allowance is too narrow. A lighter 8 oz pouch may last longer when the fabric is tightly woven, the thread is suitable, and the stress points are secured correctly.
For daily stationery use, the following construction values provide a useful development reference:
| Construction Area | Recommended Development Range | Main Purpose |
|---|---|---|
| Main seam allowance | 7–10 mm | Keeps the fabric edge securely inside the seam |
| Stitch density | 8–10 stitches per inch | Balances seam strength and clean appearance |
| Zipper-end reinforcement | 2–3 secured stitch passes | Reduces opening at both zipper ends |
| Corner reinforcement | Backstitch or double-stitch section | Resists pressure from pencils and tools |
| Edge distance for labels | At least 6–8 mm from seam line | Prevents labels from being partly hidden |
| Fabric shrinkage allowance | Based on tested fabric result | Maintains finished dimensions |
These values should be adjusted for the actual fabric, thread, needle, coating, and product design. Very dense canvas may need a stronger needle and a slightly longer stitch to avoid fabric damage. Thin promotional canvas may need backing around embroidered logos to prevent puckering.
Durability should also be checked while the pouch is loaded. An empty sample may open smoothly, while a fully packed pouch may place extra pressure on the zipper and side seams. A useful sample test is to fill the pouch with the intended stationery, close it fully, carry it in a bag for several days, and repeat the zipper movement under load.
Where Is a Canvas Pencil Pouch Used?
Canvas pencil pouches serve more markets than school stationery alone. The same product structure can be adjusted for art supplies, office accessories, travel storage, gift programs, cosmetics, cables, small tools, and branded merchandise.
The intended use should be confirmed before dimensions or materials are finalized.
| Use Scenario | Main Product Needs | Frequent Design Mistake |
|---|---|---|
| School stationery | Easy opening, good capacity, washable lining | Pouch is too short for rulers or long pencils |
| Art supplies | Extra length, abrasion resistance, organized storage | Light lining becomes stained by charcoal or ink |
| Office accessories | Clean shape, subtle branding, compact size | Oversized logo makes the pouch look promotional |
| Museum gift shop | Strong visual design, quality fabric, retail packaging | Artwork is printed too close to seams |
| Corporate gifting | Controlled cost, clear logo, reliable delivery | Too many custom parts increase MOQ and lead time |
| Cosmetic storage | Wipe-clean lining, wider base, smooth zipper | Untreated cotton lining absorbs product spills |
| Cable organizer | Internal loops, soft lining, wider opening | Flat pouch provides poor access to adapters |
| Travel accessory | Low weight, secure closure, packable structure | Heavy canvas adds weight without improving function |
| Children’s collection | Safe materials, smooth edges, tested components | Decorative parts are added without considering age use |
| Premium stationery | Dense canvas, refined hardware, precise stitching | Expensive materials are paired with weak construction |
A school pouch and a premium gift pouch may share the same outer dimensions while requiring completely different materials and workmanship. School products often place more weight on capacity, stain resistance, and cost control. Premium retail products place more weight on hand feel, shape, logo execution, zipper appearance, and packaging.
The product should also be checked against the way it will be sold. A pouch displayed on a hanging card needs a suitable attachment point and balanced weight. A pouch sold online needs accurate capacity images and dimensions. A pouch packed inside a stationery set must fit the tray, box, or shipping carton without being compressed into an unattractive shape.
Which Canvas Pencil Pouch Materials Work Best?
For most canvas pencil pouches, an 8 oz to 12 oz canvas provides a strong balance of structure, sewing performance, and cost. The final choice should also account for weave density, fiber composition, coating, lining, zipper size, logo method, washing requirements, and the weight of the items carried inside.
Which Canvas Pencil Pouch Fabric Is Best?
Canvas weight is often stated in ounces per square yard or grams per square meter. The conversion is useful, but two fabrics with the same listed weight may still look and perform differently.
Fabric behavior is also affected by:
- Yarn thickness
- Number of yarns per inch
- Weave tightness
- Cotton or polyester content
- Surface brushing
- Stone washing or enzyme washing
- Water-repellent treatment
- Wax or PU coating
- Dyeing method
- Fabric shrinkage
- Colorfastness
- Actual production tolerance
The following table can be used during early product development:
| Canvas Weight | Approximate GSM | Hand Feel and Structure | Suitable Pencil Pouch Use |
|---|---|---|---|
| 6 oz | 203 GSM | Light, soft, easy to fold | Giveaways, events, simple unlined pouches |
| 8 oz | 271 GSM | Balanced, flexible, easy to sew | School, office, and everyday stationery |
| 10 oz | 339 GSM | Firmer body with better shape | Retail collections and branded merchandise |
| 12 oz | 407 GSM | Heavy, dense, and substantial | Premium boxed pouches and tool-style cases |
| 14 oz | 475 GSM | Very firm with reduced flexibility | Structured designs with limited turning |
| 16 oz | 542 GSM | Thick and rigid | Heavy-duty or specialized storage products |
An 8 oz canvas is often suitable for a flat pouch because the structure does not need to stand upright. A 10 oz canvas gives a box pouch better shape without making the corners excessively bulky. A 12 oz canvas can create a premium feel, but sewing becomes more difficult when the zipper, lining, tabs, and side seams create several overlapping layers.
Fabric weight should not be increased merely to make a pouch feel expensive. A dense medium-weight canvas with neat stitching can look more refined than an extremely heavy fabric with bulky corners and uneven seams.
Fiber composition also matters.
Pure cotton canvas offers a natural texture and accepts many printing methods well. It can, however, shrink, absorb water, and crease more readily. Polyester canvas offers better dimensional stability, color consistency, and moisture resistance. Cotton-polyester blends sit between the two, combining a textile feel with improved stability.
Before bulk ordering, the factory and sourcing team should confirm:
- Fiber composition
- Fabric weight and accepted tolerance
- Usable fabric width
- Color reference
- Shrinkage result
- Rubbing colorfastness
- Surface finish
- Print compatibility
- Coating requirement
- Required testing standard
A small cutting from a fabric book is not enough for final approval. The material should be reviewed as a complete sewn sample because folds, seams, printing, and lining can change how the canvas looks and feels.
Which Canvas Pencil Pouch Lining Works?
A lining does more than hide the internal seams. It affects cleanliness, opening movement, shape, product life, and the way the pouch feels when users reach inside.
Common lining options include:
| Lining Material | Main Advantages | Main Concerns | Recommended Use |
|---|---|---|---|
| Cotton | Natural feel and good printability | Absorbs ink, dust, and moisture | Lifestyle and natural textile collections |
| Polyester | Stable, light, economical, many colors | Thin grades may feel inexpensive | School, office, and promotional pouches |
| Nylon | Strong abrasion resistance and smooth surface | Higher cost than basic polyester | Art tools, cables, and heavy daily use |
| Oxford fabric | Firm structure and good durability | Can add bulk inside small pouches | Tool-style and organized cases |
| PU-coated polyester | Easier to wipe clean | Coating can crack when poorly selected | Cosmetics and art supplies |
| Nonwoven fabric | Low cost and light weight | Lower long-term strength | Entry-level promotional products |
| Brushed fabric | Soft protection for delicate items | Holds dust and is harder to clean | Glasses, electronics, or premium accessories |
The lining should be slightly controlled in size so it follows the outer shell without sagging. Excess lining material can become trapped in the zipper slider. A lining cut too small can pull the pouch inward and distort the corners.
For pencil and art supply pouches, lining color deserves careful thought. White and pale beige create a clean appearance at first, but graphite, ink, charcoal, and makeup marks become visible quickly. Medium gray, navy, brown, or printed lining can hide ordinary wear more effectively.
The lining seam should also be positioned carefully. When the seam sits directly below the zipper opening, users may see loose threads or raw edges every time the pouch is opened. A turned lining or bound internal seam creates a cleaner result but adds sewing operations.
For products carrying sharp pencils, compasses, craft knives, or metal rulers, a thin decorative lining may not provide enough protection. A stronger nylon or Oxford lining, combined with controlled seam allowance, can reduce puncture and abrasion risks.
Which Canvas Pencil Pouch Zipper Lasts?
The zipper is the most frequently handled component on a pencil pouch. A strong canvas body cannot compensate for a slider that jams, a puller that bends, or zipper tape that separates from the seam.
Three zipper families are often used:
| Zipper Type | Appearance | Main Advantages | Main Limitations |
|---|---|---|---|
| Nylon coil | Soft and understated | Flexible, light, smooth, economical | Less visually substantial than metal |
| Molded plastic | Bold and sporty | Corrosion-resistant, strong teeth, many colors | Can appear large on slim pouches |
| Metal | Refined and substantial | Premium appearance and solid hand feel | Heavier, higher cost, may scratch nearby items |
Number 3 nylon coil zippers work well for slim and lightweight pencil pouches. Number 5 coil zippers are better suited to wider box pouches, organizers, and designs expected to carry more weight.
A larger zipper is not always better. On a narrow pouch, oversized teeth can dominate the design and make the opening feel stiff. On a heavily loaded organizer, a very small zipper may feel weak and become harder to operate.
Zipper quality should be reviewed through several details:
- Slider movement should remain smooth from end to end.
- The lining must stay clear of the zipper teeth and slider.
- Zipper tape should lie flat without waves.
- Both zipper ends should be secured inside the seam.
- The puller should be large enough to grip without being excessively heavy.
- Painted pullers should resist visible chipping during handling.
- Metal parts should match the requested finish across the production run.
- Zipper color should be checked against the canvas under normal lighting.
- The opening length should allow the intended stationery to enter easily.
Opening length deserves special attention. A 20 cm pouch does not automatically provide a 20 cm usable opening. Side seams, zipper stops, end tabs, and rounded corners reduce access. Long rulers or art pencils may fit inside the body but still be difficult to insert through a short opening.
During sample approval, the zipper should be tested in four conditions:
- Empty pouch
- Half-loaded pouch
- Fully loaded pouch
- Pouch compressed inside a bag
The slider should move without catching, the side seams should not pull apart, and the pouch should not twist when the zipper is closed. Repeating the opening and closing movement several dozen times during sample review often reveals problems that are not visible during a quick inspection.
How Is a Canvas Pencil Pouch Made?
A canvas pencil pouch is produced through material confirmation, pattern development, artwork preparation, fabric cutting, logo application, zipper sewing, body assembly, lining construction, shaping, cleaning, inspection, and packing. Each step must follow the approved sample because small differences in cutting, seam allowance, zipper position, or corner depth can change the finished size and appearance.
How Is a Canvas Pencil Pouch Cut?
Cutting accuracy determines whether the finished pouch is straight, balanced, and consistent across the order. Even excellent sewing cannot fully correct panels that were cut with the wrong dimensions, grain direction, or logo position.
Before cutting begins, the production team should confirm all pattern components. A simple flat pencil pouch may require only an outer front panel, outer back panel, lining panels, zipper, and zipper-end tabs. A more structured design may also require gussets, bottom panels, foam, interfacing, pockets, binding, webbing loops, labels, and decorative patches.
The pattern should include more than the finished dimensions. It must also show:
- Seam allowance
- Zipper length
- Zipper tape position
- Corner radius
- Gusset depth
- Pocket dimensions
- Label position
- Logo position
- Fabric direction
- Matching points
- Turning openings
- Reinforcement areas
For example, a finished pouch measuring 20 × 9 cm cannot be cut as two panels measuring exactly 20 × 9 cm. Extra material is required for seams, zipper installation, and shaping. If the pattern maker uses a 10 mm seam allowance on each side, the cutting size becomes larger than the finished size. The exact increase depends on the construction method.
Canvas grain direction must also be controlled. When one panel is cut along the warp direction and another is cut at an angle, the two sides may stretch differently during sewing. The finished pouch can twist, become uneven, or show diagonal wrinkles.
Printed canvas requires additional planning. A centered pattern, stripe, logo, or repeated graphic must remain visually balanced after the edges are folded and sewn. The cutting team may need placement marks or transparent templates to ensure the artwork appears in the same position on every piece.
Fabric preparation before cutting can include:
- Fabric inspection for holes, stains, weaving defects, and shade variation
- Fabric relaxation after being tightly rolled
- Shrinkage testing for cotton-rich canvas
- Color grouping by dye lot
- Face-side identification
- Coating inspection
- Print direction confirmation
Large orders are often cut in layers. The fabric is spread in controlled stacks, cut according to markers, and divided into numbered bundles. Each bundle may contain the parts for a fixed number of pouches. Numbering helps prevent color shades and components from becoming mixed during sewing.
The following controls are useful during cutting:
| Cutting Item | Control Method | Risk When Ignored |
|---|---|---|
| Panel size | Pattern and measurement check | Finished pouch size varies |
| Fabric grain | Direction marks on pattern | Body twists after sewing |
| Shade grouping | Separate cutting by dye lot | Color mismatch within one pouch |
| Logo placement | Position marks or templates | Logo moves toward seams |
| Corner shape | Fixed cutting template | Left and right corners differ |
| Notches | Clear alignment marks | Panels shift during assembly |
| Bundle count | Numbered production bundles | Parts become mixed or lost |
| Fabric defects | Inspection before spreading | Stains or holes enter production |
Szoneier confirms cutting patterns against the approved sample before bulk material is processed. For custom orders, the goal is to solve dimensional and structural problems before hundreds or thousands of identical panels are cut.
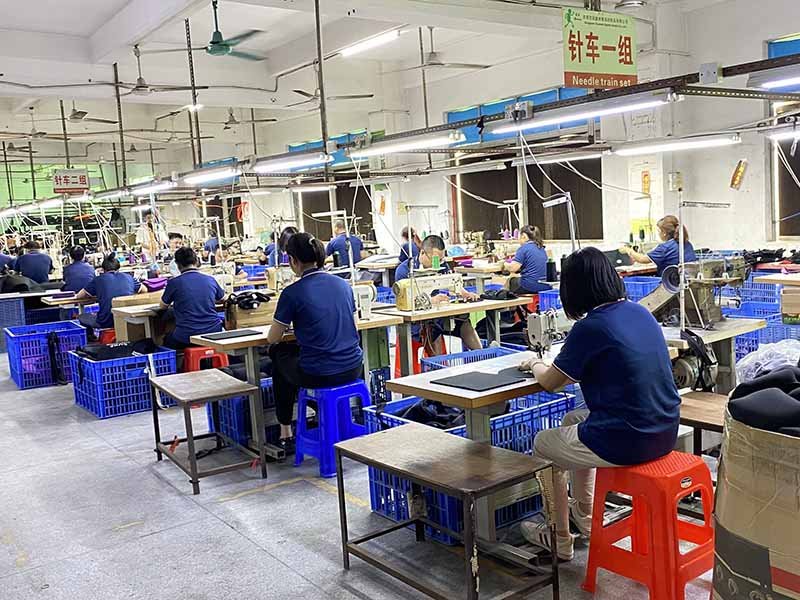
How Is a Canvas Pencil Pouch Sewn?
The sewing sequence depends on the pouch structure. A simple flat case can be assembled quickly, while a multi-layer organizer may require many separate operations and several workstations.
Logo decoration is often completed before the pouch body is closed. Screen printing, embroidery, patches, and labels are easier to position while the canvas panel is flat. Internal pockets and dividers are also usually attached before the outer body and lining are joined.
A common sewing sequence for a lined flat pouch may include:
- Apply the printed or embroidered logo.
- Attach the brand label or decorative patch.
- Sew internal pockets to the lining.
- Prepare zipper-end tabs.
- Attach one side of the zipper to the outer canvas.
- Attach the corresponding lining panel.
- Repeat the process on the opposite side.
- Topstitch along the zipper edges.
- Open the zipper partially.
- Sew the outer body seams.
- Sew the lining seams while leaving a turning opening.
- Turn the pouch through the lining opening.
- Close the turning opening.
- Shape the corners and inspect the zipper.
Leaving the zipper partly open before closing the body is important. If the zipper is completely closed and the body is sewn shut, turning the pouch becomes difficult or impossible.
A box pouch follows a different sequence. The operator may sew the zipper first, close the body, cut or fold the lower corners, and then sew the boxed sections. Another method uses separate gusset panels. Both methods can create a similar external shape, but they differ in material use, corner appearance, sewing time, and internal cleanliness.
Sewing control should focus on areas that affect strength and appearance:
| Sewing Area | Main Control |
|---|---|
| Zipper seam | Straight tape, even distance, no lining interference |
| Side seams | Matching panel edges and consistent allowance |
| Lower corners | Equal left and right depth |
| Topstitching | Even distance from zipper edge |
| Labels | Straight position and complete seam capture |
| Pocket openings | Reinforced ends |
| Handles or loops | Box stitch or repeated reinforcement |
| Turning opening | Closed neatly without visible puckering |
Needle choice should match the fabric thickness and number of layers. A needle that is too fine can bend or break when passing through heavy canvas, zipper tape, lining, and reinforcement at the same time. A needle that is too large can leave visible holes or damage coated fabric.
Thread should also match the product. Polyester thread is commonly used because it offers stable strength and works with many fabric combinations. Thread color may match the canvas for a clean look or contrast with it as part of the design. Contrast stitching requires higher sewing accuracy because every uneven line becomes more visible.
A frequent problem appears where the zipper, zipper tab, outer canvas, lining, and side seam overlap. The combined thickness can cause skipped stitches, broken needles, or bulky corners. The pattern and sewing method should reduce unnecessary layer buildup rather than relying on operators to force the material through the machine.
How Is a Canvas Pencil Pouch Finished?
Finishing begins after the pouch is completely sewn. The product is turned to the correct side, corners are shaped, loose threads are trimmed, and the surface is cleaned. The zipper, lining, logo, labels, and structure are then reviewed together.
Corner shaping is especially important for boxed and gusseted pouches. If the corners are not pushed out evenly, one side may look shorter or softer than the other. Heavy canvas can make turning more difficult, so the pattern may require trimmed seam allowances or carefully clipped curves.
Pressing can improve shape, but heat and pressure must match the materials. Cotton canvas may tolerate moderate pressing, while PU-coated fabric, heat-transfer logos, foam, or synthetic lining can be damaged by excessive temperature.
Before pressing, the operator should confirm:
- Logo heat resistance
- Lining heat resistance
- Coating type
- Zipper material
- Foam or interfacing composition
- Risk of color transfer
- Risk of shine marks on dark fabric
Steam can soften creases in cotton canvas, but too much moisture may temporarily change the shape or reveal shrinkage. For washed or intentionally relaxed canvas, excessive pressing can remove part of the desired casual texture.
Thread trimming should cover both the outside and inside. Long threads around the zipper, labels, pockets, or lining reduce the sense of quality and may become caught during use.
Cleaning may involve removing:
- Fabric dust
- Tailor’s chalk
- Adhesive residue
- Oil marks
- Loose fibers
- Thread fragments
- Handling stains
- Packaging dust
Dark canvas often shows light dust and lint. Pale canvas shows oil, pencil marks, and hand stains. Production tables, storage bins, and packing areas should therefore remain clean throughout manufacturing rather than relying on a final cleaning step.
A structured pouch may need paper filling or a shaped insert before packing. Flat pouches are often packed without filling to reduce carton size. The packing method should be tested because excessive folding can leave permanent creases or distort printed logos.
How Is a Canvas Pencil Pouch Checked?
Inspection should take place during production and again before packing. Waiting until the entire order is finished makes correction slower and more expensive.
Material inspection confirms whether the canvas, lining, zipper, thread, labels, and packaging match the approved requirements. Cutting inspection checks dimensions, grain direction, panel shape, and logo placement. Sewing inspection focuses on seam quality, zipper installation, corner symmetry, and internal construction.
A complete finished-product check can include:
- Finished width, height, and depth
- Usable zipper opening
- Canvas color and surface
- Lining color and cleanliness
- Logo size and position
- Zipper movement
- Slider and puller condition
- Stitching consistency
- Seam security
- Corner symmetry
- Internal pocket position
- Label direction
- Thread trimming
- Product odor
- Packing method
- Carton quantity
- Shipping marks
Dimension tolerances should be set before production. Fabric products cannot always be held to the same tolerance as molded plastic parts because sewing, turning, pressing, and fabric behavior create natural variation. However, a defined tolerance prevents large differences from being accepted without review.
A useful control table may look like the following:
| Quality Point | Development Target | Inspection Method |
|---|---|---|
| Finished width | Approved size with agreed tolerance | Measure flat without stretching |
| Finished height | Approved size with agreed tolerance | Measure at the center |
| Box depth | Equal on both sides | Measure both lower corners |
| Logo position | Based on approved reference points | Measure from seam or center line |
| Zipper function | Smooth movement without catching | Open and close under load |
| Seam condition | No open seams or skipped stitches | Visual and hand inspection |
| Lining fit | No severe sagging or twisting | Open pouch and check all sides |
| Pull strength | Suitable for intended use | Controlled manual or test method |
| Surface quality | No major stain, hole, or weaving defect | Inspect under adequate lighting |
| Packing count | Matches order and carton list | Piece and carton count |
Functional checks should use the actual intended contents whenever possible. A pouch may pass a visual inspection but fail during use because the opening is too narrow, the lining catches, or the body becomes distorted when full.
For stationery use, one practical loading test can include:
- Ten standard pens
- Five pencils
- One eraser
- One sharpener
- One small ruler
- One marker
The exact contents should match the project. After loading, the pouch should close without excessive force. The zipper should remain straight, and the side seams should not pull apart.
Szoneier uses staged production control rather than relying only on a final check. Material problems are handled before cutting, cutting problems before sewing, and sewing problems before packing. This approach reduces repeated defects and protects delivery schedules.
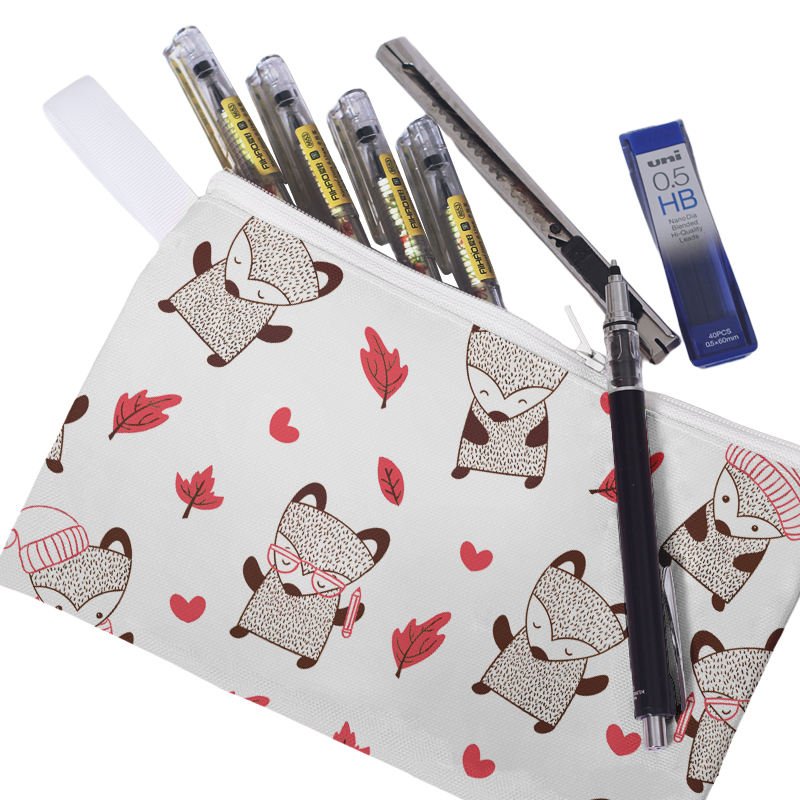
How Do You Customize a Canvas Pencil Pouch?
A canvas pencil pouch can be customized through shape, dimensions, canvas weight, color, lining, compartments, zipper, puller, logo, labels, stitching, packaging, and surface treatment. The strongest design choices are based on how the pouch will be used, how much it must carry, and where it will be sold.
Which Canvas Pencil Pouch Shape Fits?
Shape affects capacity, material consumption, sewing difficulty, packing volume, and display appearance. A product should not be selected from photographs alone. It should be chosen according to what users need to store and how easily they need to access it.
Flat pouches are among the simplest structures. They use two main panels and work well for pens, pencils, cables, cosmetics, or promotional gifts. They are economical to sew and can be shipped flat. Their limitation is reduced depth, especially when filled with thick markers or accessories.
Box pouches use folded or sewn corners to create width and volume. They hold more items and can sit more steadily on a desk. They require additional sewing and more fabric than a flat pouch. Corner depth must be controlled because even a small difference becomes visible when the pouch stands.
Triangular pouches provide a stable base and a distinctive shape. They suit school and lifestyle collections, but the internal space narrows near the top.
Round or barrel pouches work well for casual stationery and children’s collections. Curved seams require careful sewing to avoid puckering.
Standing pouches are designed with a wider base and may remain upright when open. They improve desk access but require a stable structure and controlled weight distribution.
Fold-open organizers offer clear access to tools and stationery. They may include mesh pockets, elastic loops, dividers, and several zipper sections. They provide strong organization but involve more components, labor, and inspection.
The following table compares common structures:
| Shape | Capacity | Sewing Difficulty | Shipping Volume | Suitable Use |
|---|---|---|---|---|
| Flat | Low to medium | Low | Low | Promotions, office, simple stationery |
| Box | Medium to high | Medium | Medium | School and retail collections |
| Triangular | Medium | Medium | Medium | Fashion and school ranges |
| Barrel | Medium | Medium | Medium | Casual and children’s products |
| Standing | Medium to high | Medium to high | Medium | Desk use and makeup storage |
| Fold-open | High organization | High | High | Art tools and premium stationery |
| Multi-layer | High | High | High | Large school sets and organizers |
The shape should also suit the logo. A long horizontal logo works well on a flat front panel. A square patch may fit a box pouch more naturally. Repeated artwork may work across curved panels, while centered graphics require stable front-panel placement.
Which Canvas Pencil Pouch Size Works?
External dimensions are only the starting point. Internal capacity is reduced by seam allowance, lining, padding, pockets, binding, zipper tape, and rounded corners.
A pouch measuring 20 × 9 cm externally may not provide a full 20 × 9 cm usable space. Side seams can reduce the length, and the zipper opening may be shorter than the body. Thick contents also change how the pouch closes.
Size development should begin with a content list. Instead of requesting a “medium pencil pouch,” define the items it must hold.
For example:
| Intended Contents | Suggested Starting Structure |
|---|---|
| 8–12 pens and pencils | Slim flat pouch |
| 15–20 pens plus eraser | Classic flat or small box pouch |
| Markers, sharpener, ruler | Medium box pouch |
| Brushes and long art pencils | Extended flat or roll-style pouch |
| School stationery set | Large box or multi-layer pouch |
| Cables and adapters | Wide-opening box pouch |
| Makeup brushes | Long lined pouch |
| Small tools | Reinforced box or organizer pouch |
Reference dimensions can help during early development:
| Pouch Type | Reference Finished Size | Notes |
|---|---|---|
| Slim flat | 19 × 6 cm | Suitable for limited stationery |
| Standard flat | 20 × 9 cm | Useful for everyday pen storage |
| Large flat | 22 × 11 cm | Better for markers and accessories |
| Small box | 19 × 7 × 5 cm | Compact but more spacious |
| Standard box | 21 × 8 × 6 cm | Good school and retail capacity |
| Long art pouch | 24 × 10 cm | Suitable for brushes and long tools |
| Large organizer | 22 × 12 × 7 cm | Suitable for dividers and multiple sections |
The zipper opening should be tested separately from the body length. A pouch intended for a 20 cm ruler may need more than 20 cm of external length because the ruler must pass through the opening at an angle.
Depth should also be selected carefully. Increasing a box pouch from 5 cm to 7 cm may improve capacity, but it also changes fabric consumption, carton volume, shape, and the pressure placed on the zipper when fully loaded.
A physical loading test gives more reliable results than calculations alone. Szoneier can develop samples around supplied contents, item measurements, or reference products. Providing actual stationery dimensions helps the pattern team create more accurate internal capacity.
Which Canvas Pencil Pouch Logo Is Best?
The logo method affects appearance, cost, minimum quantity, production time, and long-term wear. It should be selected after reviewing the artwork and canvas surface.
Screen printing is suitable for solid-color logos, short text, and simple graphics. It works well on flat canvas panels and can provide strong color coverage. Fine lines may become less clear on rough or loose-weave canvas.
Embroidery creates texture and a durable premium appearance. It works well for small emblems, names, and simple icons. Dense embroidery can make light canvas stiff or cause puckering, so backing and stitch density must be controlled.
Heat transfer supports detailed multicolor artwork and gradients. It can work well for small orders, but the canvas surface must be compatible with heat and pressure. A coarse texture may remain visible through the transfer.
Digital printing allows complex artwork and multiple colors without separate screens for each color. Results depend on fabric composition, treatment, and color base. Printing on natural beige canvas looks different from printing on white canvas.
Woven labels create consistent branding and are useful when the same label is applied across several pouch colors. They can be sewn into the side seam, attached to the front, or used inside the lining.
Patches add depth and material contrast. Options include cotton, woven, leather, PU, rubber, felt, and embroidered patches. Patches require space around the edges for stitching or bonding.
The selection can be compared as follows:
| Logo Method | Detail Level | Surface Feel | Order Flexibility | Main Use |
|---|---|---|---|---|
| Screen printing | Medium | Flat | Medium to high | Simple logos and promotional graphics |
| Embroidery | Medium | Raised | Medium | Premium icons and lettering |
| Heat transfer | High | Smooth or slightly raised | High | Multicolor and detailed artwork |
| Digital printing | High | Integrated with fabric | High | Full-color graphics and patterns |
| Woven label | High for small text | Textile | High | Consistent brand identification |
| Embroidered patch | Medium | Raised | Medium | Fashion and lifestyle designs |
| Leather or PU patch | Low to medium | Textured | Medium | Premium and outdoor styling |
| Rubber patch | Medium | Dimensional | Lower for new molds | Sport and modern collections |
Logo position should be defined using measurements rather than visual descriptions. “Centered” can be interpreted differently when the pouch has curved corners, a zipper, or a gusset.
A clear logo specification can include:
- Logo width and height
- Distance from top zipper seam
- Distance from left or right side seam
- Center line reference
- Thread or ink color
- Artwork file
- Required finish
- Approved sample photograph
- Orientation
- Special texture or gloss requirement
Artwork should preferably be supplied in a vector format when possible. Files such as AI, EPS, SVG, or editable PDF allow clean resizing and production setup. High-resolution PNG or PSD files may be used for some printing methods, but low-resolution screenshots often produce poor edges.
How Is a Canvas Pencil Pouch Sample Made?
Sample development begins with collecting enough information to create a stable first version. A reference image alone may show style, but it rarely confirms fabric weight, lining, internal size, zipper type, construction, or logo method.
A useful development brief should include:
- Product dimensions
- Intended contents
- Preferred shape
- Canvas material and weight
- Outer color
- Lining material and color
- Zipper type and color
- Puller style
- Logo artwork
- Logo size and position
- Internal pockets or dividers
- Label requirements
- Packaging
- Order quantity
- Delivery country
- Required tests or standards
The first sample is then used to confirm structure and appearance. It should be reviewed in a fixed order so important functional details are not overlooked.
Start with dimensions and capacity. Load the intended contents and check whether the pouch closes easily. Then check the zipper opening, lining, seams, logo, corners, and overall balance.
Sample comments should be measurable. Instead of saying “make the pouch larger,” specify the required increase. Instead of saying “move the logo slightly,” provide the new distance from a seam or center line.
A clear sample review table may include:
| Review Item | Approved | Change Required | Revised Requirement |
|---|---|---|---|
| Finished size | |||
| Canvas weight | |||
| Outer color | |||
| Lining | |||
| Zipper | |||
| Logo size | |||
| Logo position | |||
| Pocket size | |||
| Corner shape | |||
| Capacity | |||
| Packaging |
Once revisions are completed, an approved sample or signed specification becomes the production reference. Materials, dimensions, logo, construction, and packaging should not be changed during bulk production without written confirmation.
Szoneier provides design support and sample development for custom canvas pencil pouches. Projects may begin from a sketch, photograph, technical drawing, existing sample, or basic product idea. The development team can help organize missing details, recommend materials, adjust dimensions, and prepare a structure suitable for production.
How Do You Source a Canvas Pencil Pouch?
Sourcing a canvas pencil pouch starts with a complete product specification rather than a general request for price. The factory needs to understand the pouch size, canvas weight, lining, zipper, logo, order quantity, color breakdown, packaging, and delivery destination. A physical sample should be approved before bulk production so appearance, capacity, workmanship, and packing can be checked under real use conditions.
What Is the Canvas Pencil Pouch MOQ?
The minimum order quantity for a canvas pencil pouch depends on more than the number of finished pieces. Fabric availability, color selection, logo process, zipper customization, lining, labels, and packaging can all raise or lower the workable starting quantity.
A simple pouch made with stock canvas, a standard zipper, and one printed logo is usually easier to arrange in a smaller production run. A pouch requiring custom-dyed canvas, printed lining, a molded zipper puller, several colorways, and retail boxes needs a larger material commitment.
The order structure also matters. One thousand pieces in one color are easier to control than one thousand pieces divided into ten colors. Each color may require separate fabric preparation, cutting bundles, thread changes, zipper matching, logo setup, inspection, and packing.
MOQ is often influenced by the following components:
| Order Component | Lower-MOQ Direction | Higher-MOQ Direction |
|---|---|---|
| Canvas | Stock fabric and stock color | Custom dyeing or special finish |
| Zipper | Standard size and available color | Custom tape color or puller |
| Logo | Heat transfer or standard label | Multi-color screen print or molded patch |
| Lining | Stock polyester lining | Custom print or custom-dyed lining |
| Labels | Existing woven label | Newly developed woven label |
| Packaging | Polybag or paper band | Printed box or custom insert |
| Colorways | One or two colors | Many colors in small quantities |
| Structure | Flat single-compartment pouch | Multi-layer organizer |
| Testing | Standard material documentation | Market-specific laboratory testing |
When asking about MOQ, provide the quantity per design and per color. The factory cannot judge production efficiency from the total order quantity alone.
For example:
| Total Quantity | Color Breakdown | Production Complexity |
|---|---|---|
| 1,000 pieces | 1 color × 1,000 | Straightforward |
| 1,000 pieces | 2 colors × 500 | Manageable |
| 1,000 pieces | 5 colors × 200 | More setup and material pressure |
| 1,000 pieces | 10 colors × 100 | High complexity for a small total |
| 3,000 pieces | 3 colors × 1,000 | Efficient for bulk planning |
A lower MOQ may be possible when the design uses available materials and simple branding. It may not be possible when suppliers require larger minimums for dyed canvas, printed lining, zipper tape, or packaging.
Szoneier supports low-MOQ customization where the material and construction allow it. The team can also simplify a design without removing its visual identity. Common adjustments include using an available canvas color, selecting a standard zipper, replacing a molded puller with a woven zipper tape, or applying a woven label instead of custom hardware.
The best MOQ is not always the lowest number. An order should be large enough to maintain stable material matching, sewing efficiency, and unit cost while remaining suitable for the sales plan.
What Affects Canvas Pencil Pouch Cost?
The cost of a canvas pencil pouch is built from material, labor, branding, packaging, inspection, and order management. Two pouches with the same external size may have very different prices because their internal construction and production requirements are different.
The main cost areas include:
- Outer canvas consumption
- Canvas weight and finishing
- Lining material
- Zipper type and length
- Puller design
- Interfacing or padding
- Number of panels
- Internal pockets
- Labels and patches
- Logo process
- Sewing time
- Reinforcement
- Inspection requirements
- Individual packaging
- Carton packing
- Testing
- Shipping terms
Fabric weight affects cost, but construction often has a greater effect than expected. A flat unlined pouch may require a limited number of sewing operations. A lined box pouch with internal pockets, piping, foam, and embroidery requires more components and more handling at each workstation.
A cost comparison can be organized as follows:
| Design Feature | Cost Effect | Reason |
|---|---|---|
| Heavier canvas | Moderate increase | More material weight and harder sewing |
| Cotton lining | Moderate increase | Additional material and assembly |
| Printed lining | Higher increase | Printing setup and color control |
| Metal zipper | Moderate increase | Higher component cost |
| Custom puller | Higher initial cost | Mold or development work |
| Internal pocket | Moderate increase | Extra cutting and sewing |
| Foam padding | Moderate increase | Additional material and layer control |
| Embroidery | Depends on stitch count | Machine time rises with dense artwork |
| Screen printing | Depends on colors | Each color may require separate setup |
| Woven label | Low to moderate increase | Label production and attachment |
| Gift box | High packaging increase | Printing, forming, storage, and shipping volume |
| Multi-compartment design | Significant increase | More materials and sewing operations |
Logo pricing should be evaluated by artwork rather than by method name alone. A small one-color screen print is different from a large four-color print. A simple embroidered icon is different from a dense full-front embroidery design.
Embroidery cost is affected by:
- Logo dimensions
- Stitch count
- Number of thread colors
- Backing material
- Position
- Canvas thickness
- Production quantity
Screen-printing cost is affected by:
- Number of colors
- Print dimensions
- Ink type
- Fabric color
- Required opacity
- Number of print locations
- Drying requirements
Packaging can also change the delivered cost more than expected. A flat pouch in a polybag occupies little space. A pouch packed with internal filling and a rigid printed box uses more carton volume and increases freight cost.
Cost control should begin with the parts users notice and handle most:
- Canvas hand feel
- Zipper movement
- Main stitching
- Logo clarity
- Capacity
- Clean lining
- Packaging condition
Money spent on hidden decoration has limited value when the zipper feels weak or the pouch does not hold the intended contents.
A useful cost-engineering process is:
- Confirm the target sales channel.
- Define the required retail position.
- Identify essential product functions.
- Select the canvas and zipper.
- Confirm the logo method.
- Add only useful internal features.
- Review packaging volume.
- Produce a sample.
- Recalculate cost from the approved construction.
A quotation based only on a reference photo is an early estimate. The final quotation should be based on confirmed dimensions, materials, logo, construction, quantity, packing, and delivery terms.
How Long Does Canvas Pencil Pouch Production Take?
The production schedule starts before sewing. Time is required for design confirmation, material sourcing, sample preparation, revisions, bulk material approval, logo production, cutting, sewing, inspection, packing, and shipment.
A simple stock-material design can move faster than a pouch using custom colors or components. Custom-dyed canvas, printed lining, custom zipper tape, molded hardware, and printed boxes all add preparation stages.
A project schedule commonly includes the following steps:
| Production Stage | Main Work |
|---|---|
| Design review | Confirm structure, size, use, and artwork |
| Material selection | Match canvas, lining, zipper, and labels |
| Pattern development | Prepare cutting pieces and construction |
| Sample production | Cut, decorate, sew, finish, and inspect |
| Sample review | Check dimensions, loading, logo, and quality |
| Revision | Correct measurable issues |
| Bulk material preparation | Order or prepare approved components |
| Pre-production confirmation | Review final material and construction |
| Cutting | Spread, cut, mark, and bundle panels |
| Logo production | Print, embroider, transfer, or attach patches |
| Sewing | Assemble zipper, lining, body, and compartments |
| In-line inspection | Check workmanship during production |
| Final inspection | Review finished products and packing |
| Packing | Insert, bag, label, carton, and count |
| Shipment | Arrange transport and export documents |
Delays often come from incomplete information rather than factory sewing capacity. Common causes include:
- Low-resolution artwork
- Missing logo dimensions
- Unconfirmed Pantone colors
- Late packaging changes
- Repeated size changes
- Unavailable zipper colors
- Custom hardware approval
- Slow sample feedback
- Unclear test requirements
- Last-minute color additions
A clean approval process reduces these problems. Each revision should be recorded in one document rather than spread across separate messages. The latest approved size, material, logo, and packing requirements should be easy for both sides to identify.
A production planning file can include:
| Item | Confirmation Needed |
|---|---|
| Finished size | Width, height, and depth |
| Outer fabric | Composition, weight, color, finish |
| Lining | Material, weight, and color |
| Zipper | Type, size, tape color, teeth color |
| Puller | Standard or custom |
| Logo | Method, size, color, position |
| Labels | Type, content, and position |
| Size and location | |
| Packaging | Polybag, paper band, box, or display card |
| Carton | Quantity per carton and shipping marks |
| Testing | Product or material test requirements |
| Quantity | Total and breakdown per color |
| Delivery | Destination and trade terms |
Szoneier provides fast development and short production planning for suitable orders. The exact schedule is confirmed after reviewing the complete design, materials, quantity, and packaging.
A fast schedule should never remove essential approval steps. Skipping the sample, color confirmation, or pre-production review may save a few days at the beginning but create larger problems during bulk production.
Which Canvas Pencil Pouch Factory Should You Choose?
A suitable canvas pencil pouch factory should understand fabric development, product construction, logo application, quality control, and export packing. Sewing capacity alone is not enough. The factory should be able to identify risks before production and explain how different choices affect cost, appearance, and lead time.
Start by reviewing whether the factory can handle the complete product:
- Canvas sourcing
- Fabric inspection
- Pattern development
- Design support
- Sample sewing
- Logo application
- Lining and zipper assembly
- Bulk production
- In-line quality control
- Final inspection
- Private labeling
- Packaging
- Export delivery
Ask specific questions instead of requesting only a company introduction.
Useful questions include:
- Which canvas weights are available?
- Can the fabric composition be confirmed?
- Can you test shrinkage before cutting?
- How do you control color differences?
- Which zipper sizes do you recommend?
- Can you make a custom zipper puller?
- How do you prevent lining from catching?
- Can you produce internal pockets or dividers?
- Which logo method fits our artwork?
- How is logo placement controlled?
- What information is needed for a sample?
- How are sample changes recorded?
- What is the MOQ per color?
- Which packaging options are available?
- How is finished size inspected?
- Can the pouch be tested with our actual contents?
- How are defective pieces handled?
- Which shipping terms can be arranged?
The answers should be clear and connected to the product. A supplier who says every material and process is “no problem” without asking about the design may not have reviewed the risks carefully.
A factory evaluation can be organized in a simple scorecard:
| Evaluation Area | What to Review |
|---|---|
| Material knowledge | Canvas weight, weave, finish, shrinkage, and color |
| Product development | Pattern, sample, structure, and capacity |
| Decoration | Printing, embroidery, labels, and patches |
| Sewing quality | Zipper, seam, lining, corner, and reinforcement |
| Communication | Clear answers and measurable sample comments |
| Quality control | Material, in-line, and finished-product checks |
| Order flexibility | Quantity, colors, materials, and packaging |
| Export experience | Packing, documents, and shipping coordination |
| Problem solving | Ability to identify risks and offer alternatives |
| Repeat production | Ability to match approved products on later orders |
A physical sample remains one of the most important evaluation tools. Review it under normal use rather than only on a table.
Check the sample by:
- Filling it with the intended contents
- Opening and closing the zipper repeatedly
- Pulling lightly at both zipper ends
- Checking corner symmetry
- Comparing logo position with the drawing
- Inspecting the lining
- Looking for skipped stitches
- Checking internal thread trimming
- Measuring the usable opening
- Reviewing the packing method
The lowest quotation should not automatically decide the order. A price difference may come from lighter fabric, thinner lining, a lower-grade zipper, fewer reinforcement stitches, simplified packing, or reduced inspection.
A reliable comparison requires every supplier to quote the same specification.
Szoneier has more than 18 years of experience in fabric development and sewn-product manufacturing. Its manufacturing work includes bags, koozies, sports supports, medical supports, wetsuits, neoprene products, and custom fabric accessories.
For canvas pencil pouch projects, Szoneier can support:
- Product design assistance
- Material recommendations
- Pattern development
- Custom sizing
- Low-MOQ production
- Fast sampling
- Sample support
- Screen printing
- Embroidery
- Heat-transfer logos
- Woven labels
- Custom patches
- Private labeling
- OEM and ODM production
- Custom packaging
- Production quality control
- Export coordination
The development process can begin from a technical drawing, reference photo, physical product, sketch, or written idea. When specifications are incomplete, the design team can help organize the dimensions, structure, material, and branding details before sampling.
Start Your Canvas Pencil Pouch Project
A successful custom canvas pencil pouch begins with clear product information. The more precise the request, the more accurately the factory can recommend materials, calculate cost, prepare a sample, and plan production.
When a project is still at the concept stage, provide the intended use and expected contents. Szoneier can help define the structure and prepare a workable product proposal.
A custom pouch should be judged by more than its appearance. It must open smoothly, hold the intended items, keep its shape, protect the contents, carry the logo clearly, survive repeated use, and arrive in suitable packaging.
Contact Szoneier to discuss your canvas pencil pouch design, request material recommendations, develop a sample, or receive an OEM, ODM, and private-label quotation.