Skip to content

Have you ever considered making your own lunch bag? It might seem like a complicated task at first, but in reality, it’s pretty simple. Whether you’re trying to cut down on plastic use or just want to design something unique, making your own lunch bag is a fun and rewarding project. This guide will show you how to create a functional, stylish, and eco-friendly lunch bag that suits your needs,without breaking the bank.
Making a lunch bag is a straightforward DIY project that requires only a few materials and tools. By following simple steps, you can create a custom lunch bag that is practical, eco-friendly, and easy to make. This guide will show you how to choose fabrics, sew the bag, and add insulation.
Ready to start?
What Materials Do You Need to Make a Lunch Bag?
The right materials can make or break your lunch bag. Choosing the right fabric, insulation, and tools is essential to create a durable and functional bag. This section covers all the essentials, including fabric options, insulation choices, and tools.
Fabric Selection: Which Fabrics Are Best for Lunch Bags?
When making a lunch bag, choosing the right fabric is crucial. It needs to be durable, easy to clean, and sometimes, even waterproof. Here are the top fabric choices for lunch bags:
- Cotton Fabric: Cotton is breathable, eco-friendly, and easy to work with. However, it doesn’t offer much insulation on its own, so you’ll need to add a liner or another layer for added insulation.
- Canvas Fabric: Heavy-duty canvas is a popular choice for lunch bags because it’s sturdy and holds its shape well. It also has a classic look. You can find it in many colors and patterns, and it works well with both casual and stylish designs.
- Nylon or Polyester: If you need a fabric that’s more water-resistant, nylon or polyester is the way to go. These materials are lightweight, durable, and great for keeping your food dry in rainy weather.
- Insulated Fabric: For extra insulation, consider using materials like Insul-Bright or Thermal Fleece. These fabrics have an inner reflective layer that helps keep your food hot or cold for longer periods.
Insulation Materials: How Do You Keep Your Food at the Right Temperature?
To keep your food fresh, you’ll need an insulation layer inside the bag. This is especially important if you want your lunch to stay cold or hot for longer periods. Common options include:
- Foam Insulation: A cost-effective and lightweight option that helps retain the temperature of your food.
- Reflective Insulation (Mylar): A highly effective material used in high-quality lunch bags. It reflects heat back into the bag, keeping hot foods warm for longer and cold foods cooler.
- Fleece or Felt: Soft and flexible, fleece insulation is a great option for adding comfort to your lunch bag. It provides moderate insulation and is usually eco-friendly.
| Insulation Material | Pros | Cons |
|---|---|---|
| Foam Insulation | Great at keeping food cool, lightweight | Needs an additional fabric cover |
| Insul-Bright | Reflects heat, keeps food warm or cold | Can be a bit bulky |
| Thermal Fleece | Soft and flexible, works well for moderate insulation | Can be less durable over time |
By carefully choosing the right insulation material, you can ensure your food stays at the right temperature for longer periods, making your lunch bag even more practical.
Waterproof Lining:
Having a waterproof lining can make your lunch bag more durable and functional. For instance, vinyl or nylon linings are popular choices for adding an extra layer of protection. This prevents spills, stains, and moisture from seeping into the fabric, keeping your lunch bag fresh and clean.
How Do You Make a Lunch Bag from Scratch?
Making a lunch bag from scratch involves several key steps, including cutting the fabric, sewing the pieces together, and adding insulation. Let’s break down the process in simple terms to help you create a functional and stylish lunch bag.
Choose Your Pattern: Which Design Suits Your Needs?
Before you start sewing, you’ll need to pick a pattern. There are several options to choose from depending on your skill level and desired outcome. Some easy patterns for beginners include:
- Simple Tote Bag Style: A basic square or rectangular shape, perfect for carrying lunch containers.
- Lunch Box Style: A more structured design with a zipper closure, offering a more secure and insulated lunch bag.
- Roll-Up Lunch Bag: A stylish option where you roll the top of the bag closed. This design is more compact and versatile for various lunch sizes.
Cutting Your Fabric: What Are the Key Measurements?
The first step in making your lunch bag is cutting your fabric. Here’s a basic guide on measurements:
- Base: Cut a rectangular piece of fabric, typically about 12-14 inches wide and 6-8 inches tall, depending on the desired size of the bag.
- Sides: Cut two rectangular pieces for the sides, usually 12 inches wide by 6-8 inches tall. The length should match the height of your base piece.
- Top Flap: This piece will fold over the top of the bag, typically 3-4 inches high.
- Straps: Cut two strips of fabric, each 20-24 inches long and about 2-3 inches wide, depending on the style you prefer.
Make sure to add a seam allowance of about 0.5 inches around all edges for proper stitching.
Sewing the Bag: Step by Step Instructions
Once your fabric pieces are cut, you can begin sewing the bag together:
- Sew the main body of the bag: Take the outer fabric pieces and sew them together, leaving an opening at the top. Do the same with the inner fabric. This is where you’ll insert the insulation.
- Insert insulation: Place your insulation layer between the outer and inner fabrics to keep your food at the right temperature.
- Attach the handles or straps: Add straps using your chosen material. Make sure they’re secure enough to carry the weight of your lunch.
- Sew the closure: Attach a zipper, magnetic clasp, or Velcro at the top of the bag for easy opening and closing.
- Finish the edges: Trim any excess fabric and finish the edges with a serger or a zigzag stitch to prevent fraying.
Adding Insulation: How to Position It?
Once the basic structure of the bag is sewn together, add the insulation. Cut the insulation material to match the dimensions of the bag. Use fabric glue or a basting stitch to attach it to the inside of the bag, ensuring it stays in place. If you’re using a reflective liner, make sure the shiny side faces inward to reflect heat back inside the bag.
What Are the Benefits of Making Your Own Lunch Bag?
Making your own lunch bag is not only a creative DIY project, but it also offers practical benefits like customization, sustainability, and cost savings. Here’s why you should consider making your own lunch bag today.
How Can You Personalize Your Lunch Bag?
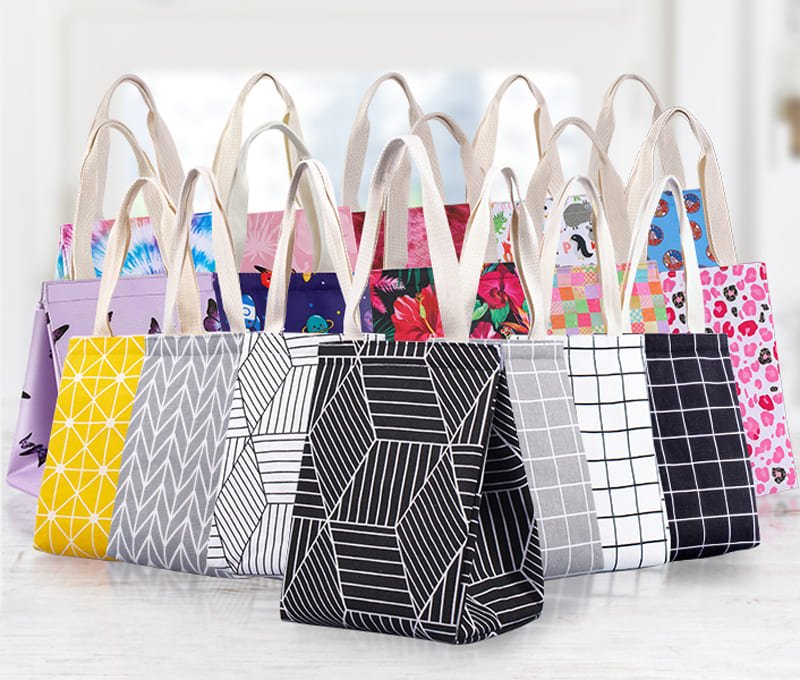
One of the biggest advantages of making your own lunch bag is the ability to customize it to your preferences. You can choose:
- Fabric Patterns and Colors: Select your favorite colors, prints, and designs to create a lunch bag that reflects your personal style.
- Size and Shape: Adjust the size of the bag to fit your lunch containers, snacks, or even drinks.
- Additional Features: Add extra compartments, a front pocket, or a stylish button to make the bag more functional and unique.
Why Is a DIY Lunch Bag Better for the Environment?
Making your own lunch bag is a sustainable choice. By choosing eco-friendly materials and avoiding mass-produced plastic lunch bags, you can significantly reduce waste. Additionally, you’re giving new life to fabric scraps and leftover materials.
Is It More Affordable Than Buying Pre-Made Bags?
Creating your own lunch bag can be significantly cheaper than buying a pre-made one. The cost of materials is relatively low, especially if you already have some fabric or insulation at home. Plus, you can design the bag to your specifications, reducing waste by only using what you need.
How Long Does It Take to Make a Lunch Bag?
The time required to make a lunch bag depends on your experience and the complexity of the design. On average, it takes around 2 to 4 hours to make a simple lunch bag from start to finish.
Beginners vs Experienced Sewers: How Does Experience Affect Time?
If you’re new to sewing, it might take a little longer to complete the project. However, with practice, you’ll be able to whip up a lunch bag in no time. Experienced sewers can finish a simple bag in under an hour, especially with pre-made patterns.
Where Can You Order Custom Lunch Bags in Bulk?
If you’re considering creating a custom lunch bag for a brand or business, ordering in bulk from a trusted manufacturer can be an efficient solution. Learn how to find the right supplier for your needs.
Customization Options for Bulk Orders
Explore options like adding a brand logo, choosing specific fabric types, or opting for eco-friendly materials. A reliable supplier can help you create a unique lunch bag that represents your business or event.
How to Find the Right Supplier for Your Needs
Look for suppliers with experience in custom bag production, especially those with a proven track record of delivering high-quality products. Platforms like Szoneier offer a range of customizable options to help bring your lunch bag designs to life.
Ready to Make Your Own Lunch Bag?
Making your own lunch bag is a great way to have a practical, eco-friendly solution for your daily meals. Whether you’re looking to personalize your style or reduce plastic waste, DIY lunch bags have endless possibilities. Ready to start your project? Check out Szoneier factory for high-quality materials and customizable options that fit your needs. Have a question or want to get a quote for custom orders? Feel free to reach out!