Hey there, leather lovers! Welcome to your journey into the world of leather dyeing.If you’re looking to breathe new life into your leather bag, you’re in the right place. Dyeing a leather bag isn’t just about changing its color; it’s a fun way to personalize it and make it truly yours. Whether it’s an old favorite that needs a refresh or a new bag waiting for your creative touch, this guide will take you through every step to ensure you get professional-looking results. So, let’s dive right in and explore the colorful realm of leather dyeing.
Why Dye Your Leather Bag?
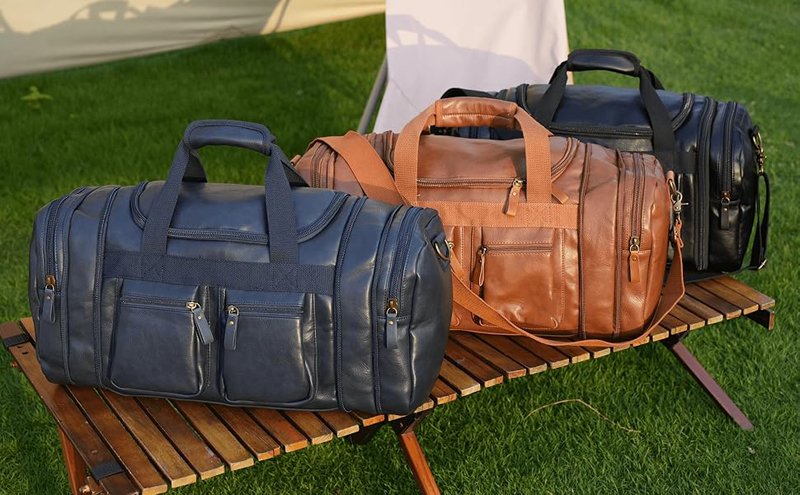
First things first – why bother dyeing your leather bag? Well, for starters, it’s a great way to breathe new life into an old favorite. Maybe you’ve got a classic brown satchel that you’d love in black, or perhaps you’re feeling adventurous and want to try a bold red or blue. Whatever your reason, dyeing your own leather bag can be a fun, rewarding project that saves you money and gives you a unique piece.
Leather and Dyes: Know Your Stuff
Leather, that timeless material, comes in many forms, but not all are created equal when it comes to dyeing. Before we jump in, let’s talk about leather and dyes.Full-grain leather, with its intact grain, is the most durable and takes dye the best, showing off those beautiful natural imperfections. Split-grain leather, on the other hand, has had its top layer removed, making it more uniform but less breathable and less receptive to dye.Here’s a quick guide:
Vegetable-tanned leather: This is your best bet for dyeing. It’s natural and takes dye like a champ.
Chrome-tanned leather: This one’s a bit trickier. It’s already been treated with chemicals, so the dye might not take as well.
Suede and nubuck: These are no gos for dyeing. They’ll just soak up the dye unevenly and look messy.
What is Leather Dyeing

Types of Leather Dyes
First things first,let’s talk about dyes,the type of leather you’re working with will determine which dye or finish is best for your project. Here’s a handy guide to seven different leather dyes and finishes that you can consider:
- Shoe Polish: This is a quick and easy option if you’re after a more temporary fix. Shoe polish sits on top of the leather rather than penetrating it, so while it’s great for a quick touch-up, it won’t last as long as other dyes.
- Alcohol-Based Leather Dyes: These dyes are a popular choice because they penetrate the leather deeply, resulting in vibrant, long-lasting colors. Just keep in mind that alcohol can strip moisture from the leather, making it a bit stiff. So, it’s a good idea to follow up with a leather conditioner to keep your leather supple and flexible.
- Sunlight: Believe it or not, the sun can be a natural way to dye leather! If you have vegetable-tanned leather, simply leave it out in the sun. The UV rays will gradually darken the leather, turning it into a rich brown over time. Just be patient,this process can take an hour or more, depending on how dark you want it.
- Oil-Based Leather Dyes: Unlike alcohol-based dyes, oil-based dyes won’t strip your leather of its natural moisture. They penetrate the fibers to deliver a rich, saturated color. These dyes work especially well on full and top grain leather that hasn’t been treated with surface finishes.
- Water-Based Leather Dyes: If you’re looking for a dye with fewer toxins, water-based dyes are a solid choice. They produce softer, more muted colors and won’t dry out your leather, leaving it feeling supple and nice.
- Resolene: This acrylic dye can be applied in thin layers as a protective finish. Once dry, it forms a shiny, solid surface that protects your leather. It’s particularly effective on corrected grain leather, which has been sanded down, ensuring a durable finish. Plus, there are various colors and finishes available, making resolene quite versatile.
- Resin Finisher: Made from natural resin, this finisher gives your leather a softer, subtler finish while offering a bit of protection against dirt. However, keep in mind that resin-based finishes aren’t water-resistant, so they’re best for items that won’t be exposed to moisture.
| Type of Dye | What It’s Like | Best For |
|---|---|---|
| Alcohol-based | Dries super fast and gives bright colors | Quick projects, detailed finishes |
| Oil-based | Soaks deep into the leather for rich colors | Long-lasting, full-color changes |
| Water-based | Easy cleanup and low odor | Beginners or light touch-ups |
What to Think About
- Leather Type: Different leathers absorb dye differently. For instance, vegetable-tanned leather is super absorbent. If you’re dyeing chrome-tanned leather, you might need a special dye.
- Color Fastness: Make sure the dye can handle sunlight and wear. You don’t want your beautiful new color fading after a few months!
Gather Your Supplies Before Dyeing Leather

Dyeing leather can be a fun and rewarding project, but to get it right, you’ll need to gather a few essential supplies. First off, make sure you have a well-ventilated workspace. This is super important because leather dyes can release fumes that aren’t safe to breathe in. If you’re working indoors, open the windows and turn on a fan. If you’re outside, pick a dry day and avoid direct sunlight. You don’t want your dye drying too quickly!
Now, here’s a list of what you’ll need:
- Deglazer: This is a special solution that cleans the leather and prepares it for dyeing. Think of it as a primer that ensures the dye adheres properly.
- Spray Bottle: After deglazing, lightly mist your leather with water. This helps the dye absorb better, making your first coat go on smoothly.
- Paint Brush: Use a paintbrush or a wool dauber to apply your dye. A brush allows for even application, so you get that nice, consistent color.
- Leather Dye: Choose the right dye for your project. The type of dye you select will not only determine the color but also influence the feel and quality of your leather once it’s dry.
- Leather cleaner and conditioner.
- Protective gear: gloves, an apron, and a mask (safety first!).
- Scrap Rag: Keep an old cloth handy to wipe away any excess dye and clean up spills. It’s a real lifesaver during the process!
- Gloves: Let’s be real,dyeing can get messy! Wear gloves that cover your forearms to protect your skin. Dishwashing gloves work just fine and will keep your hands clean.
- Drop Cloth: Finally, protect your workspace by laying down a drop cloth or cutting open a large trash bag and taping it down. This will help you keep everything tidy and avoid any unwanted stains.
With these supplies ready, you’re all set to start your leather dyeing adventure! Enjoy the process and watch your leather transform into something uniquely yours.
How to Dye Leather:Process Steps Guide

Ready to elevate your leatherworking game? Learning how to properly dye leather is a fantastic way to do just that! Here’s a simple step-by-step guide to help you prepare, dye, and finish your leather pieces like a pro.
1.Prepare Your Workstation:
Start by finding a large table to work on. If you’re indoors, open the windows and turn on a fan to help ventilate the space and disperse any dye fumes. Aim for a comfortable temperature of around 70 degrees Fahrenheit. To protect your surface, cut open a large trash bag and lay it down. If you’re working outside, pick a warm, calm day and stay in the shade to avoid harsh sunlight. Don’t forget to wear gloves and spread old towels on the floor to catch any spills!
2.Cleaning and Preparing the Leather Bag
A clean leather surface is crucial for dyeing. Here’s how to prep your bag like a pro:
Clean It Up:
- Grab your leather cleaner and a soft cloth. Wipe down the bag to remove dirt, oils, or any old finishes. Think of it like giving your leather a fresh start!
- Don’t soak it,just a little cleaner goes a long way.
Dry It Off:
- Let the leather dry completely before you start dyeing. This usually takes about 30 minutes. Patience is key here!
Conditioning (If Needed):
- If your leather feels especially dry, a little conditioner can help restore its moisture. Just let it soak in before you move on to dyeing.
3.Apply Your Deglazer:
Grab a clean cloth and apply a deglazer (or leather preparer) to your leather. This step is crucial as it removes any sealant, allowing the dye to soak into the fibers more effectively. If you’re dyeing leather shoes, make sure to remove the shoelaces first and stuff the insides with balled-up paper to keep them dry.
4.Dampen the Leather
Lightly spray the leather with water to slightly dampen the surface. This helps the dye absorb evenly, ensuring a smooth application.
5.Testing the Dye
This is super important! Always do a dye test before going all-in on your bag. Here’s how:
- Pick a hidden spot on the bag,maybe the inside of a pocket.
- Dab a bit of dye on that area and let it dry completely.
- Check the color. If you love it, great! If not, adjust your dye or technique.
6.Applying the Dye
Now for the fun part,applying the dye! Here’s how to do it right:
- Choose Your Tool:
- A brush is great for detailed areas, while a sponge can cover larger sections quickly. If you’re feeling adventurous, an airbrush can give you a super smooth finish!
- Start Dyeing:
- Apply the dye in thin, even layers. Start from one end and work your way to the other, covering all areas without over-saturating. Think of it like painting a wall,steady strokes make all the difference!
- Layering for Depth:
- If you want a deeper color, let the first layer dry completely before adding more. This usually takes about 30 minutes. Trust me, it’s worth the wait!
Tips for a Flawless Finish
- Go with the Grain: Always apply the dye in the direction of the leather grain. It’ll look more natural and polished.
- Blend the Edges: Use a clean applicator to blend any edges where two sections meet. This helps avoid any harsh lines.
7.Drying and Curing
Once you’ve got the dye applied, it’s time to let it dry properly:
- Air Dry: Place your bag in a well-ventilated area, away from direct sunlight. Direct heat can cause the dye to crack.
- Curing Time: Give it at least 24 hours to cure. This is crucial for the dye to set and bond with the leather.
8.Conditioning and Finishing
After dyeing, it’s important to condition the leather:
- Conditioning:
- Apply a high-quality leather conditioner to restore moisture. This keeps the leather soft and prevents it from drying out.
- Finishing Touches:
- Consider adding a leather finish or sealer to protect your dye job. This adds a nice shine and makes your bag more durable.
Buffing for Extra Shine
Once everything has dried, take a soft cloth and buff the surface gently to give it that polished look.
9.Caring for Dyed Leather Bags
To ensure your dyed leather bag stays looking fabulous, follow these care tips:
- Regular Cleaning: Wipe it down with a soft, damp cloth to remove dust and dirt. Avoid harsh chemicals that could harm the dye.
- Conditioning: Reapply conditioner every few months to keep the leather hydrated and supple.
- Smart Storage: Store your bag in a cool, dry place. Use a dust bag to protect it from light and dust, which can fade the color.
Tips for Dyeing Leather
Dyeing leather can be a fun and creative process, but a few tips can make it even smoother. Here are three practical suggestions to help you achieve the best results:
- Use a Variety of Tools: Don’t just stick to one applicator! Different tools can help you get different effects. For example, sponges are great for adding texture and covering larger areas, while cotton balls work wonders for reaching into smaller spots. If you want to blend colors, a spray bottle can really help you achieve that seamless look. Having a mix of tools on hand will make your dyeing process much easier and more enjoyable.
- Test Your Dye Color: Before you dive in, remember that the color of the dye in the bottle might not match what you see on your leather. Always do a small test first! Try applying a bit of dye on a scrap piece of leather to see how it turns out. This way, you can adjust the color or even mix different dyes to get just the right shade before committing to the entire piece.
- Try Dipping for Speed and Ease: If you want a quicker method, consider dip dyeing your leather. Just pour some dye into a bowl or container (make sure it’s one you don’t mind sacrificing) and ensure there’s enough to fully submerge your leather item, like a belt or wallet. Dip it in for a few seconds, then pull it out and let it dry overnight. Dipping is a fast technique that gives you an even coating, making it a great option if you’re looking to save time while still getting fantastic results.
Tips To Fix Common Dyeing Issues:
- Streaking: If you see streaks, it’s usually due to uneven application. Make sure you’re applying dye evenly and blending well.
- Uneven Color: If some areas look lighter, apply more dye to those sections, letting each layer dry thoroughly before reapplying.
- Dye Transfer: If the dye rubs off, it might not have set properly. Ensure you follow all drying and curing times strictly.
Conclusion
Dyeing a leather bag is such a rewarding project! It’s a fantastic way to express your creativity and make your accessories unique. By following these steps, you can achieve stunning results that reflect your personal style.
So why not give it a try? Grab that old leather bag from the back of your closet and give it a new lease on life. Who knows, you might just discover a new hobby.