 Skip to content
How Do You Waterproof a Leather Bag:7 Expert Techniques for Lasting Protection
- Eric
- June 7, 2025
- 9:35 am
Leather bags are more than accessories—they’re investments. But one unexpected rainstorm or accidental coffee spill can leave your favorite tote looking tired and stained. Imagine rushing through a downpour, only to find dark water spots marring your handcrafted leather bag. The good news? With the right approach, you can shield your leather against moisture and spills without sacrificing its natural beauty.
In just a few steps, you can transform a vulnerable leather surface into a water-repellent fortress—no heavy plastics or bulky rain covers required. By selectively applying waxes, oils, and sprays, you’ll create an invisible barrier that lets water bead up and roll away, keeping your leather supple and vibrant. Ready to learn how? Keep reading to master waterproofing techniques that pros use, and hear a true story of rescuing a family heirloom from ruin.
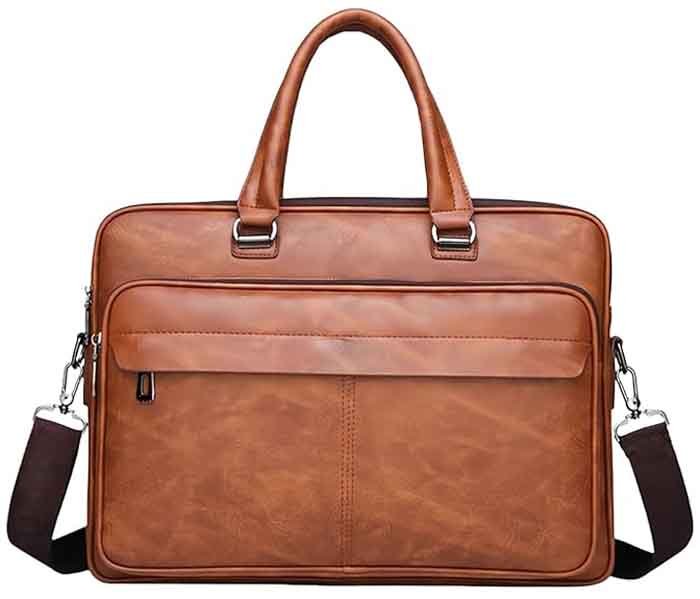
What Types of Leather Require Waterproofing?
Leather hides come in many “personalities,” and knowing yours is step one. Below is a quick guide:
| Leather Type | Porosity | Factory Finish | Water Vulnerability | Ease of Treatment |
|---|---|---|---|---|
| Full-Grain (Vegetable-Tanned) | High | None | Very High | Requires wax or oil |
| Top-Grain | Medium | Light Coating | Medium | Spray or wax |
| Corrected-Grain | Low | Heavy Coating | Low | Spray |
| Patent Leather | None | Glossy Coating | Very Low | Rarely needs treatment |
| Suede & Nubuck | Very High | N/A (Nap Finish) | Extremely High | Requires special spray only |
Most leather benefits from protection, but porous hides soak up moisture fastest. Full-grain and vegetable-tanned leathers, prized for their natural look, need wax or oil. Top- and corrected-grain leathers already have factory finishes, so a polymer spray is usually enough. Suede and nubuck, with their velvet-like nap, demand dedicated suede sprays.
Leather porosity determines how quickly water penetrates. Full-grain leather keeps all the natural markings and pores intact, which is great for breathability and patina development, but those same pores act like miniature sponges. Corrected-grain leather gets a thick surface layer, blocking moisture more effectively but sacrificing some of that authentic look and feel. When you treat your leather, tailor the method to the hide—wax for the thirsty full-grain, spray for the smoother corrected-grain.
Waterproofing Leather: A Brief History
- Ancient Origins: Indigenous peoples used animal fats and beeswax to waterproof hides for footwear and clothing.
- 19th Century Advances: Mink oil became popular among horse trainers to protect saddles and bridles.
- Modern Innovations: Today’s fluoropolymer and silicone sprays build on these natural fats with lightweight polymers—offering fast application and clear finishes.
Knowing this lineage reminds us that water protection isn’t a gimmick—it’s a time-tested craft evolving alongside technology.
Which Waterproofing Products Work Best on Leather Bags?
Picking the right treatment is like choosing a recipe: balance ingredients for taste (look) and texture (function). Here’s a guide:
| Product | Key Ingredient | Cost (USD/oz) | Cure Time | Duration | Finish |
|---|---|---|---|---|---|
| Beeswax Balm | Beeswax + Lanolin | $1.20 | 30–60 min | 4–6 months | Matte, slightly darker |
| Mink Oil | Mink Fat | $0.80 | 20–40 min | 3–4 months | Rich sheen, deeper hue |
| Silicone Spray | Polydimethylsiloxane | $0.50 | 5–10 min | 1–2 months | Clear, no color change |
| Fluoropolymer Spray | PTFE or PU Polymer | $0.70 | 10–15 min | 2–3 months | Ultra-clear, lightweight |
Wax balms penetrate deeply and offer months of protection, best for heirloom pieces. Mink oil nourishes and adds sheen but can darken light hides. Silicone sprays are wallet-friendly and dry in minutes, ideal for quick touch-ups. For heavy rain or humidity, fluoropolymer sprays give a longer-lasting, invisible barrier without altering color.
- Wax Balms: They fill surface pores, creating a dense barrier but slightly darkening the leather. Perfect for winter gear or daily drivers that withstand slush and salt.
- Oils (Mink/Neatsfoot): These nourish fibers, restoring suppleness—especially great for vegetable-tanned leather prone to stiffness. Overuse risks a sticky feel and dust attraction.
- Silicone Sprays: Affordable and fast, these rely on hydrophobic silicone chains to repel water. Best for light rain and quick reapplication.
- Fluoropolymer Sprays: Advanced polymers form a microscopic film that resists water, oil, and stains. Frequently used by outdoor gear brands—an excellent choice if you want “set it and forget it” for a month or more.
Consider your climate and usage: if you live where it pours, lean on waxes and fluoropolymers; if you need speed and clarity, choose silicone.
Defining Waterproof vs Water-Resistant
- Water-Resistant: Beads off light rain or splashes. Great for daily commuters and mild climates.
- Waterproof: No water entry even under pressure. Achieved with factory-applied coatings, liners, or laminated membranes—rarely via consumer sprays alone.
Most home treatments deliver water-resistance. True waterproofing often requires a fully coated or lined bag.
How Do You Prepare Your Leather Bag Before Waterproofing?
Getting the surface clean and dry makes all the difference—otherwise, you’re sealing in dirt or old residues. Follow these prep steps:
- Brush Off Debris: Use a soft nylon or horsehair brush to lift dirt from seams and grain.
- Wipe Gently: Lightly dampen a microfiber cloth with distilled water; remove surface dust. Avoid wetting the leather.
- Leather Cleaner: Choose a pH-balanced, neutral leather cleaner. Apply a small amount on a cloth, working in circular motions to dissolve oils and buildup.
- Dry Completely: Let the bag air-dry 4–6 hours at room temperature. Insert absorbent silica packets inside pockets to speed drying.
- Test Spot: Always test your waterproofing product on an inconspicuous interior flap or underside of a strap. Wait 10 minutes to check for color change or surface reaction.
Before sealing in moisture protection, clean your bag thoroughly: brush off dirt, wipe with distilled water, use a neutral leather cleaner, then air-dry completely (4–6 hours). Finally, test your chosen product on a hidden area to ensure no unwanted color or texture changes.
- Why Not Tap Water? Tap water has minerals that can leave deposits or rings on leather. Distilled water avoids spotting.
- Avoid Heat: Radiators, hair dryers, or direct sun can over-dry and crack hides. Patience is key—leather absorbs treatments best when it’s at its natural moisture balance.
- Removing Stubborn Stains: For oil or ink spots, specialized stain removers exist—but read instructions carefully. Premature waterproofing over stains can lock them permanently in place.
- Leather Conditioning Bonus: If your leather feels stiff or crumbly after cleaning, apply a thin layer of conditioner (skip on patent or heavily coated leathers). Let it absorb overnight before waterproofing.
How to Apply Wax, Oil, and Spray for Maximum Water Resistance?
Application technique is everything. Sloppy smears trap residue; too much product blocks breathability. Here’s how to nail each:
A. Wax Balm Application
| Step | Action | Tip |
|---|---|---|
| 1 | Scoop a pea-sized amount onto a clean, lint-free cloth. | Use a cloth dedicated solely to waxing. |
| 2 | Rub in small circular motions, covering 4×4 inch areas. | Work methodically to avoid missed spots. |
| 3 | Wait 10–15 minutes for absorption. | Leather will darken slightly as it absorbs. |
| 4 | Buff with a second clean cloth, removing any excess residue. | Finish until the leather feels dry to touch. |
For wax balms, work in small circles: apply a pea-sized dab, spread evenly, wait 10 minutes, then buff off the excess. This ensures deep penetration without a sticky surface. Wax treatments last 4–6 months and withstand harsh winter conditions.
B. Oil Treatment
- Drop Sparingly: Place 2–3 drops of mink or neatsfoot oil on a microfiber cloth.
- Wipe Along the Grain: Move cloth in one direction to avoid blotchy absorption.
- Let Sit 20–30 Minutes: Oil needs time to sink deep.
- Wipe Off Excess: Prevent a greasy finish and dust attraction.
Oil treatments improve suppleness but can darken leather. Reserve oils for vegetable-tanned hides or very dry environments.
C. Spray Treatment
| Pass | Distance | Movement | Dry Time |
|---|---|---|---|
| 1 | 6–8 inches | Horizontal sweep | 2–3 minutes |
| 2 | Rotate bag | Vertical sweep | 2–3 minutes |
| 3 | Overlap areas | Diagonal for cover | Final 10 min |
Hold sprays 6–8 inches away and apply three light passes—horizontal, vertical, then diagonal—waiting 2–3 minutes between each. After the final coat, let your bag air for 10 minutes before buffing off any wet spots. This multi-pass method ensures an even, clear barrier that lasts 1–3 months.
- Layering Products: Some pros start with a wax base, follow with a fluoropolymer spray for extra boost. Always allow full cure between layers.
- Avoid Overload: Excess wax or oil clogs pores, making leather stiff. Excess spray pools on the surface, leaving a white haze if you buff too early.
- Edge & Seam Focus: Water tends to sneak in at stitched seams and edges. Spend extra time in these zones—thin, consistent coats, not dollops of product.
Do Natural Oils and Waxes Affect Leather Color or Texture?
Yes—and that can be a feature, not a bug. Here’s what to expect:
| Product | Color Change | Texture Shift | Reversibility |
|---|---|---|---|
| Beeswax Balm | Slight darkening (5–10%) | Firmer hand feel, fills pores | Light scuffing buff restores original feel |
| Mink Oil | Moderate darkening (10–15%) | Increased suppleness, slight sheen | Fades over weeks with wear |
| Silicone Spray | None | No change | N/A |
| Fluoropolymer | None | No change | N/A |
Natural waxes and oils enrich leather color—darker, more “worn-in” patina—and firm up the hand feel (wax) or add sheen (oil). Polymer sprays maintain original hue and texture. Always test on a hidden seam to gauge impact, then plan treatments around seasonal style preferences.
- Light vs. Dark Hides: On tan or beige leathers, waxes and oils deepen tones noticeably—think of it as “aged” styling. On chocolate or black hides, the effect is more subtle, giving a richer appearance.
- Sheen vs. Matte: Oils impart a satin glow; waxes offer a rugged matte finish. If you love the look of raw suede, stick to spray protectors only.
- Maintenance Cycle: Color shifts mellow over time. Regular light cleaning and occasional spray touch-ups keep the finish consistent, while monthly wax or oil reapplications refresh both look and protection.
Are There Special Waterproofing Tips for Suede and Nubuck Bags?
Suede and nubuck require TLC:
- Dry Brush First: Use a dedicated suede brush to lift the nap and remove dirt.
- Suede-Safe Spray: Choose a water-based fluoropolymer or silicone spray labeled for suede. Hold 8–10 inches away.
- Multiple Light Coats: 2–3 passes, letting each dry completely (12–24 hours total).
- Rebrush Nap: After full drying, gently brush to restore the velvet texture.
Suede and nubuck can’t handle oils or waxes—they’ll mat the nap. Instead, brush clean, then apply 2–3 light coats of a suede-specific spray, letting each dry up to 24 hours. Finish by re-brushing to revive the plush texture. Touch up every 4–6 weeks in regular use.
- Avoid Water on Suede: If your suede bag does get wet, stuff it with paper to hold shape and let it air-dry naturally—no heat.
- Stain Resistance: Many suede sprays also repel oil, coffee, and wine. Look for “stain-blocking” on the label for extra peace of mind.
- High-Traffic Areas: Corners, straps, and bottom panels need extra attention—lightly overspray, then spot-brush to redistribute product without oversaturation.
How Often Should You Reapply Waterproofing, and How Do You Maintain It?
A simple routine keeps your bag looking great:
| Climate/Use | Spray | Wax/Oil | Inspection |
|---|---|---|---|
| Heavy Rain/Commute | Every 1–2 months | Every 4–6 months | Monthly water-bead test |
| Moderate Use/Dry Area | Every 3–4 months | Every 6–8 months | Quarterly visual check |
| Occasional Use | Every 6 months | Annually | Bi-annual deep clean & test |
If you brave heavy rain daily, reapply sprays every 1–2 months and waxes/oils every 4–6 months. In drier or lighter-use scenarios, you can stretch spray to 3–4 months and wax to 6–8 months. Always do a quick water-bead test—if drops no longer bead up, it’s time for maintenance.
- Visual & Tactile Inspection: Look for dark spots or dry-feeling patches. Run your finger—if it feels tacky, buff off excess; if it feels dry, time for more treatment.
- Quick Touch-Up Kit: Keep a mini spray bottle and soft cloth in your bag. After unexpected drizzle, give key areas a spritz and wipe to revive protection on the go.
- Seasonal Reset: Before winter (salt, slush) and before rainy season, do a full clean, dry, then apply your longest-lasting treatment—usually wax plus fluoropolymer spray.
A little care goes a long way. By embedding these checks into your routine—say, quarterly—you extend leather life by years and keep your bag looking spectacular.
Conclusion
Waterproofing a leather bag is part science, part ritual—and totally worth it. You’ve learned:
- Which hides need what: Match full-grain to wax/oil; corrected-grain to spray; suede to specialized sprayers.
- How to prep properly: Clean, dry, and test first.
- Exact application methods: Small circles for wax, grain-direction wipes for oil, multi-pass mists for sprays.
- Color & texture effects: Waxes darken; oils shine; sprays preserve.
- Special-case protocols: Suede and nubuck need their own gentle regime.
- Maintenance schedules: Quarterly or seasonal routines keep protection fresh.
Feeling inspired? At Szoneier, we don’t just treat leather after production—we can integrate water-repellent finishes right into your custom bag design. From logo embossing to hardware selection, we tailor every detail to your brand’s needs.
Ready to elevate your leather line?
manufacturer Categories
- Custom Tote Bags Manufacturer
- custom backpacks Manufacturer
- custom travel bags& Duffle bags manufacturer
- custom makeup bags & toiletry bags manufacturer
- custom cooler bags manufacturer
- custom drawstring bags manufacturer
- custom makeup bags & toiletry bags manufacturer
- custom golf bags manufacturer
- custom fireproof bags manufacturer
- custom dry bags manufacturer
- custom ski bags manufacturer
- custom gym & sports bags manufacturer
- custom laptop bags manufacturer
- custom tactical bags manufacturer
- custom beach bags manufacturer
- custom medical bags manufacturer
- custom camera bags manufacturer
- custom wetsuits manufacturer
- custom leather goods manufacturer
- more personalized products

Can't find the answers?
No worries, please contact us and we will answer all the questions you have during the whole process of bag customization.
Make A Sample First?
If you have your own artwork, logo design files, or just an idea,please provide details about your project requirements, including preferred fabric, color, and customization options,we’re excited to assist you in bringing your bespoke bag designs to life through our sample production process.