 Skip to content

Ever felt the need to carry just the essentials—phone, wallet, keys—without a bulky tote or backpack? Enter the waist bag (also known as a fanny pack), the hands-free accessory that’s part fashion statement, part travel necessity. Whether you’re a seasoned bag maker or a beginner venturing into custom designs, knowing how to make a waist bag can open new possibilities for your brand or hobby.
To make a waist bag, you need to gather durable fabric (nylon, canvas, or water-resistant synthetics), quality hardware (zippers, buckles, webbing), and basic tools like a heavy-duty sewing machine. Start by designing a pattern that includes the main body, front pocket, lining, and belt strap. Cut fabric pieces with precise seam allowances, interface panels for structure, then sew in a logical order—lining first, then outer shells, followed by zipper installation, and final topstitching for a clean finish.
What Tools and Materials Do You Need to Make a Waist Bag?
To make a waist bag, gather sturdy fabrics like 500D nylon or cotton canvas, ripstop nylon for water resistance, and foam or woven interfacing to stabilize panels. Choose quality hardware—YKK zippers, Duraflex buckles, and 1″ to 1.5″ polypropylene webbing. Essential tools include a heavy-duty sewing machine, non-slip shears, chalk or fabric markers, and seam rollers for crisp seams.
Constructing a waist bag begins with selecting the right materials and equipping yourself with appropriate tools. A single misstep—like choosing a flimsy zipper or forgetting interfacing—can compromise functionality. Let’s explore every material choice, tool requirement, and specialist accessory to ensure your finished bag stands up to daily wear.
Which Fabrics Work Best for Durability and Style?
Nylon (500D to 1000D Cordura or Ballistic):
- Durability: Known for high tensile strength and abrasion resistance; 500D is lighter yet still sturdy, while 1000D offers maximum durability.
- Water Resistance: Many nylon fabrics come with a polyurethane (PU) coating or DWR (durable water repellent) finish—essential for outdoor or travel waist bags.
- Comfort & Aesthetics: Smooth, can be printed in bold patterns; suitable for both urban and sporty styles.
- Cost: $5–$10 per yard, depending on denier and coating.
- Use Cases: Festival bags, commuter pouches, minimalist travel packs.
Canvas (10 oz to 12 oz Cotton Duck):
- Durability: Very durable; breaks in over time to a softer patina.
- Water Resistance: Natural canvas requires wax or PU treatment to repel water; untreated canvas soaks through.
- Aesthetics: Rustic look—ideal for casual or heritage-style waist bags.
- Cost: $3–$6 per yard; wax treatments add $1–$2 per yard.
- Use Cases: Eco-friendly brands, artisan markets, vintage-inspired lines.
Ripstop Nylon (210D to 400D):
- Durability: Lightweight yet tear-resistant due to reinforced ripstop grid.
- Water Resistance: Often PU-coated; dries quickly when wet.
- Aesthetics: Slightly textured; available in a vast array of colors.
- Cost: $4–$8 per yard.
- Use Cases: Running belts, ultralight travel waist bags, hiking pouches.
Polyester Waxed Canvas or Waxed Cotton:
- Durability: Waxed finish offers water resistance; polyester base gives mild stretch.
- Aesthetics: Matte, rugged; vintage vibe.
- Cost: $6–$12 per yard.
- Use Cases: Fashion-forward waist bags, camera carry pouches.
Fabric Comparison
| Fabric Type | Durability | Water Resistance | Aesthetic Style | Cost (USD/yard) |
|---|---|---|---|---|
| 500D Nylon | High | Moderate (PU/DWR) | Modern, sporty | $5–$7 |
| 1000D Cordura | Very High | High (PU) | Tactical, rugged | $8–$10 |
| 10 oz Canvas | High | Low (needs wax) | Heritage, rustic | $3–$6 |
| Ripstop Nylon 210D | Medium | Moderate (PU) | Lightweight, vibrant | $4–$6 |
| Waxed Polyester | High | High (waxed) | Vintage, premium | $6–$12 |
What Hardware (Zippers, Buckles, Straps) Should You Choose?
Zippers:
- Brands & Types: YKK #5 or #8 coil zippers are reliable; #5 is lighter and more flexible, #8 withstands heavier loads. Water-resistant zippers (PU-coated) cost 10–20% more.
- Length & Placement: For a standard waist bag with a 10″ width, use a 12″ zipper to allow overlap. For front pockets, a 7″ zipper is common.
- Cost: $2–$5 each, depending on length and water-resistant finish.
Buckles & Adjusters:
- Duraflex or ITW Buckles: One-inch side-release buckles are most common; for heavier loads (e.g., camera gear), 1.5″ buckles add stability.
- Cam Buckles vs. Ladder Lock Adjusters: Cam buckles allow micro-adjustments without holes; ladder locks are simple and inexpensive.
- Cost: $1–$3 per buckle or adjuster.
Webbing & Straps:
- Polypropylene Webbing: Lightweight, inexpensive ($0.30–$0.60 per foot), available in various colors. UV-resistant options cost slightly more.
- Nylon Tubing or Round Cord: For decorative edges or drawstring closures—$0.50–$1 per foot.
- Foam Webbing (1/4″ to 3/8″): Adds comfort to waist strap—$1–$2 per foot.
D-Rings & Tri-Glides:
- Uses: Attach small gear, adjust strap lengths, or connect decorative elements. Metal D-rings ($0.50–$1 each) provide strength; plastic options ($0.20–$0.40) reduce weight.
- Recommended Sizes: 3/4″ or 1″ internal width for most waist bags.
Hardware Cost Breakdown
| Component | Size/Type | Cost (USD/each) |
|---|---|---|
| YKK #5 Zipper | 12″ Standard, nylon coil | $2.00 |
| YKK #8 Zipper | 12″ Heavy-duty, water-resistant | $3.50 |
| Side-Release Buckle | 1″ Polypropylene | $1.00 |
| Cam Buckle | 1″ Aluminum | $2.50 |
| Polypropylene Webbing | 1″ Woven | $0.40/foot |
| Foam Webbing | 1/4″ (for comfort) | $1.50/foot |
| Metal D-Ring | 3/4″ Zinc alloy | $0.75 |
| Tri-Glide Adjuster | 1″ Plastic | $0.30 |
Do You Need Specialized Sewing Machines or Accessories?
Heavy-Duty Sewing Machines:
- Recommended Models: Industrial walking foot machines (e.g., Juki DU-1181, Consew 206RB) handle multiple layers of thick fabric and webbing.
- Home Machines: Some heavy-duty home models (e.g., Janome HD3000, Singer Heavy Duty 4452) can manage up to 4 layers of 10 oz canvas but struggle with 1000D Cordura plus webbing.
- Cost: Industrial machines range $800–$2,500; home machines range $200–$600.
Accessories:
- Non-Slip Sewing Table: Prevents materials from shifting; essential when feeding ripstop nylon or slippery fabrics.
- Walking Foot Attachment: Ensures even feeding of top and bottom layers—especially useful on home machines.
- Binding Clips vs. Pins: Clips hold heavy fabrics better than pins, which can bend or leave holes—use 1″ plastic clips.
- Seam Roller & Press Cloth: Creases seams flat before topstitching, preventing shifting of layers.
- Cost: Clips ($5–$10 per pack), seam roller ($8–$15), press cloth ($3–$5).
Thread & Needles:
- Thread: Bonded nylon or polyester heavy-duty thread (Tex 70 to 210) ensures strong seams—$5–$10 per spool.
- Needles: Leather/denim needles (size 16/100 or 18/110) for sturdy fabrics; microtex for detailed stitching on lighter materials—$5–$8 per pack.
How Do You Design the Waist Bag Pattern and Layout?
To design a waist bag, first decide overall dimensions (e.g., 10″ × 5″ × 2.5″ for everyday use, 8″ × 4″ × 2″ for running) and outline main compartments. Include ergonomic belt strap curves and adjustments. Consider “are waist bags in style?”—current trends favor slim profiles with hidden pockets. Clarify “difference between a waist bag and a sling bag”—waist bags hug the waist, while sling bags cross chest or back.
Are Waist Bags in Style?
Current Trend Landscape:
- Streetwear Influence: Luxury streetwear brands regularly feature waist bags (e.g., Supreme, Gucci) in show collections—signals mainstream acceptance.
- Athleisure Wave: Active communities (runners, cyclists) rely on waist bags for essentials—sleek, lightweight designs are trending in fitness apparel sections.
- Casual Fashion Adoption: Celebrities on vacation often sport waist bags crossbody or around the waist—blurring functional and fashion lines.
Style Considerations:
- Minimalist vs. Statement: Slim, monochromatic waist bags appeal to those valuing subtlety, while bold patterns and logos cater to statement-makers.
- Seasonality: Lightweight nylon bags surf surge in summer festival seasons, while waxed canvas or leather waist bags peek during autumn for a rustic vibe.
- Color Trends: 2025 sees earth tones (olive, rust, mustard) paired with muted pastels—teams well with hipster or retro styles.
Practical Implications for Designers:
- Balance Function & Fashion: Overly bulky waist bags feel outdated—maintain under 3″ depth for daily use.
- Customization Potential: Offer limited-edition prints, reflective detailing for night runs, or hidden anti-theft pockets—adds value beyond aesthetics.
What Dimensions Suit Common Use Cases (Travel, Running, Fashion)?
Travel Waist Bags:
- Typical Dimensions: 10″ wide × 6″ tall × 3″ deep; fits passport, phone, wallet, small chargers.
- Volume: 600–800 cubic inches (roughly 3–5 liters).
- Use Case: Airport security—fits under coat, keeps valuables close; sightseeing—holds camera, map, snacks.
Running/Fitness Waist Bags (Running Belts):
- Typical Dimensions: 8″ wide × 4″ tall × 1.5″ deep; minimal bulk, holds phone, keys, small gel packets.
- Volume: 150–250 cubic inches (approx. 1–2 liters).
- Use Case: Runners need low bounce and secure fit—bag sits low on hips with elasticized strap.
Fashion & Streetwear Waist Bags:
- Dimensions: 9″–12″ wide × 5″–7″ tall × 2″–3″ deep; emphasis on style—room for sunglasses, cosmetics, small water bottle.
- Volume: 800–1,200 cubic inches (5–8 liters).
- Use Case: Trend-driven events, casual outings—style outweighs minimalism.
Everyday Casual Waist Bags:
- Dimensions: 9″ wide × 5″ tall × 2″ deep; fits daily essentials—compact wallet, glasses, phone.
- Volume: 500–700 cubic inches (3–4 liters).
- Use Case: Daily errands, dog walking, coffee runs—balance storage and low profile.
Recommended Dimensions by Use Case
| Use Case | Width | Height | Depth | Volume (liters) | Notes |
|---|---|---|---|---|---|
| Travel | 10″ | 6″ | 3″ | 3–5 | Includes multiple compartments |
| Running/Fitness | 8″ | 4″ | 1.5″ | 1–2 | Low-profile, elastic or expandable strap |
| Fashion/Streetwear | 9–12″ | 5–7″ | 2–3″ | 5–8 | Statement features, decorative pockets |
| Everyday Casual | 9″ | 5″ | 2″ | 3–4 | Streamlined, basic organization |
What Is the Difference Between a Waist Bag and a Sling Bag?
Definition & Carry Style:
- Waist Bag: Worn around the hips or waist; can also be worn across the chest as a “crossbody” for a sling-like effect.
- Sling Bag: Worn over one shoulder, resting diagonally across the back or chest; typically larger and functions as a small backpack.
Design Differences:
- Strap Configuration: Waist bags use a single adjustable waist strap attached directly to the main pouch; sling bags have a longer shoulder strap that may run from top corner to bottom corner of the bag.
- Center of Gravity: Waist bags sit lower, stabilizing load at hips; sling bags distribute weight across one shoulder and upper back.
- Quick Access: Waist bags allow quicker front-access pockets; sling bags may require rotating the bag to the front but allow larger compartments.
Functional Implications:
- Waist Bag: Better for active pursuits like running, hiking, or biking—keeps bag secure and low.
- Sling Bag: Better for moderate carrying needs—photographers or urban explorers can carry slightly larger loads (e.g., camera).
Aesthetic & Style:
- Waist Bag: Often casual or sporty; minimal profile; streetwear adapts them across chest as sling bags for style points.
- Sling Bag: Offers a more balanced look on back; appeals to urban commuters needing laptop sleeves or water bottle pockets.
Waist Bag vs Sling Bag Comparison
| Feature | Waist Bag | Sling Bag |
|---|---|---|
| Strap Position | Around waist; can cross chest diagonally | Over one shoulder; runs diagonally |
| Typical Size | Small to medium (1–5 liters) | Medium (3–8 liters) |
| Access Speed | Fast—pack sits at front of waist | Moderate—bag must be rotated forward |
| Activity Suitability | Running, hiking, travel | Photography, light commuting |
| Style | Sporty, streetwear, casual | Urban, functional, fashion-forward |
Which Pockets and Compartments Improve Functionality?
Main Compartment vs Secondary Pockets:
- Primary Pocket: Should hold smartphone, wallet, or small camera—design dimensions accordingly (e.g., 6″ × 4″ inner pocket for iPhone sizing).
- Front Zipper Pocket: Ideal for quick-access items like keys, transit cards, or earbuds—recommend 6″ × 3″ size for easy reach.
- Hidden Back Pocket: Slim, on the side resting against the body—secure cash or passport from pickpockets.
- Interior Slip Pockets: Two or three slim slots for credit cards or small notebooks—linen or ripstop nylon lining for visibility.
Specialty Compartments:
- Water Bottle Sleeve: Elasticized side pocket holds small water bottles for runners/ hikers—use mesh nylon for breathability.
- Headphone Cord Exit: Small grommet hole near top seam allows headphone cord to pass through—common in fitness-oriented belts.
- Sunglasses Holder: Fleece-lined, short-depth pouch to tuck sunglasses without scratching—requires soft lining.
Organization Panels & Elastic Loops:
Pen Loops or Tool Straps: For multi-tool or pen storage—use elastic webbing tabs.
Key Leash: Short D-ring and strap to clip keys for easy retrieval.
Table: Recommended Pocket Layout
Pocket Type Dimensions Material Lining Ideal For Main Compartment 10″ × 6″ × 3″ 200D Ripstop Nylon Phone, Wallet, Small Camera Front Zipper Pocket 6″ × 3″ × 1″ Nylon Taffeta Keys, Earbuds, Cash Hidden Back Pocket 6″ × 3″ × 0.5″ 200D Ripstop Nylon Passport, Cards Interior Slip Pockets 4″ × 3″ each Polyester Lining Cards, ID, Small Notepad Elastic Tool Loops 1″ Wide Strips Elastic Webbing Pens, Multi-tool, Flashlight
How to Create an Ergonomic Belt Strap and Fit Adjustment?
Adjusted Length Range:
- Measurement: Typical waist sizes range from 28″ to 44″—design belt strap from 36″ to 50″ to cover most users plus 5″ extra for overlap.
- Micro Adjustment vs. Fixed Holes:
- Fixed Holes: Punch six holes spaced 1″ apart—simpler but less precise fit.
- Slide-Adjust (Cam Buckle): Allows infinite adjustment—ideal for running belts, accommodates variable layers (jacket vs. T-shirt).
- Elastic vs Static Webbing:
- Elastic Sections: Add 2–3″ of stretch to prevent bounce during runs—common in fitness waist belts.
- Static Webbing: More stable for travel or everyday carry—no stretch helps keep bag in place.
Belt Strap Width & Padding:
- Width: Standard of 1″ for minimalist look; 1.5″ for heavier loads or tactical designs.
- Padding Options:
- Foam Webbing Insert: 1/4″ thick foam between two webbing layers adds comfort—important for long wear.
- Neoprene Backing: Provides water resistance and extra cushioning—ideal for outdoor adventure belts.
- Edge Treatment:
- Folded and Sewn Edges: Fold raw webbing edges under and stitch to prevent fraying.
- Heat-Sealed Edges: After cutting, singe edges with candle flame to prevent unraveling.
Belt Connection to Bag Body:
- Side Interior Channels: Sew 1″ webbing loops onto back panel, insert belt through loops—removable belt allows customization.
- Sewn-In Belt Ends: Belt ends sewn permanently to side seams—simpler assembly but less customizable.
How to Cut and Prepare Fabric Pieces Correctly?
Accurate marking and cutting ensure panels align perfectly when sewn. Use tailor’s chalk or water-soluble fabric markers to trace pattern pieces with ¼” to ½” seam allowance. Employ rotary cutters or non-slip shears for clean edges. Interface key panels (main body, front panel, waist strap backing) with medium to heavyweight interfacing—ensuring bag retains shape and resists sag under load.
What Marking and Cutting Techniques Ensure Precision?
Pattern Paper & Tracing:
- Materials: Use translucent pattern drafting paper (50–70 gsm) for easy alignment over fabric.
- Marking Tools: Tailor’s chalk sticks, water-soluble fabric markers, or heat-erasable pens.
- Technique: Pin the pattern to fabric, trace outline carefully, removing pins as you go to avoid shifting.
Seam Allowance Considerations:
- Standard Seam Allowance: ¼”–½” depending on fabric thickness—smaller allowance for thick nylon, larger for thinner cotton.
- Edge Allowances: On curved areas (belt strap ends, rounded front panel), use 3/8″ to ½” to reduce puckering when sewn.
Cutting Tools:
- Rotary Cutter & Self-Healing Mat: Ideal for long straight cuts—provides smooth edges without fraying.
- Non-Slip Shears: For cutting heavy-duty canvas or multiple fabric layers—ensure blades are sharp to avoid jagged edges.
- Electric Fabric Cutter (Optional): Speeds up cutting for bulk production—investment of $200–$500 worth it for high-volume makers.
Layer Cutting & Precision:
- Stack & Cut: Layer fabric up to three plies and cut with shears or rotary cutter—maintains identical pieces for front and back panels.
- Single-Layer Cuts on Ripstop Nylon: Avoid multiple layers on slippery ripstop—cut single layer to maintain pattern accuracy.
Which Seam Allowances and Reinforcement Areas Matter Most?
Key Reinforcement Points:
- Stress Points: Corners where zippers meet, top corners of front pocket, where strap attaches—reinforce with bartack or box-x stitching.
- Strap Attachments: Add internal webbing reinforcements to distribute load—sew webbing to fabric before outer stitching.
- Zipper Ends: Use zipper stops or sew a square of fabric at zipper ends to prevent pull-out.
Seam Allowance Best Practices:
- Standard Side Seams: ¼” seam for light fabrics, ½” for thicker canvas or multiple layers.
- Curved Seams: Use 3/8″–½”; clip or notch curves before turning to reduce bulk.
- Topstitching Clearances: After primary seam, maintain 1/8″–1/4″ clear distance for topstitch for aesthetic and strength.
Interface & Stabilizer Placement:
- Main Body Panels: Use medium-weight fusible woven interfacing (e.g., Pellon SF101) to stabilize nylon or canvas—cut same shape as main panel.
- Strap Backing: Sew 1″ wide strip of 10 oz cotton canvas under main belt strap area to prevent stretch.
- Pocket Panels: Light fusible interfacing on interior pocket panels to prevent sag under weight; optional layer of 1/8″ foam for dimensional pockets.
How to Interface and Stabilize Panels for Structured Shape?
Types of Interfacing:
- Fusible Woven Interfacing: Medium-weight, iron-on—works on cotton canvas, polyester blends.
- Non-Woven Fusible Interfacing: Provides less grain definition—good under lighter fabrics like 210D nylon.
- Sew-In (Sanded) Interfacing: Stitched in rather than fused—ideal for heat-sensitive fabrics or where fusible residue is a concern.
Panel-Specific Strategies:
- Front Panel: Two layers—fusible interfacing plus optional 1/8″ foam between fabric and lining for a padded look.
- Back Panel (Against Body): A layer of mesh or breathable fabric to reduce sweat build-up; foam layer optional for comfort.
- Side Panels: Light interfacing to keep shape but avoid bulk in seams.
Testing Structure:
- Mock-Up Prototyping: Make a muslin version with similar weight fabric to test how interfacing changes drape—iterate until desired stiffness.
- Load Tests: Fill bag with typical items and observe sag or collapse—adjust interfacing in areas that deform under weight.
How Do You Sew and Assemble the Waist Bag Components?
Begin by stitching pockets and any front panel details first. Attach zippers next: sew the zipper tape to fabric panels using a zipper foot for precision. Assemble main body panels with interfacing inside, stitch right sides together leaving bottom open. Insert webbing into side seam channels, sew strap ends with bar-tack reinforcement. Finally, topstitch edges in a consistent 1/4″ from seam to hide raw edges.
Sewing a waist bag is like orchestrating a symphony: each component—pockets, zippers, straps—must come together in the right sequence. Skip a step or sew out of order, and you risk ripping out seams. Below is a detailed assembly plan that guides you from pocket creation to final topstitching.
What Order Should You Stitch Panels, Pockets, and Linings?
Step 1: Prepare Pockets and Accessories
- Front Pocket Assembly: Sew zipper to front pocket opening—first baste zipper tape, then use zipper foot to topstitch close to coil. Test zipper operation.
- Interior Slip Pockets: Place on lining panel, mark position, and sew around edges with 1/8″ seam—leave top open.
Step 2: Attach Front Panel to Lining
- Right Sides Together (RST): Align outer front fabric with lining, clip edges, and stitch along top edge where front pocket attaches—this forms the bag’s front-insert structure.
- Optional Topstitch: Turn RST batch right side out and topstitch 1/8″ from upper edge for durability and cleaner look.
Step 3: Main Body Construction
- Side Panels to Front & Back: RST, align side seams, clip, and sew 1/2″ seam allowance, ensuring lining and outer fabric match precisely.
- Bottom Panel Attachment: Sew bottom piece to front-back assembly, keeping seams aligned; press seams open or use seam roller for crisp edges.
Step 4: Insert Webbing Strap Anchors
- Side Panel Reinforcement: Before closing final side, insert 1″ webbing loops into side seams (RST), aligning top edge to bag’s top, with webbing extending 2″ beyond bottom seam to create strap anchor.
- *Stitch simultaneously when sewing side seams to reduce bulk.
Step 5: Lining Closure
- Leaving Opening: Sew outer bag completely, leaving bottom seam of lining open (~4″ gap).
- Turn Bag Right Side Out: Pull outer bag through lining gap, press edges flat.
Step 6: Final Topstitching and Strap Installation
- Topstitch Outer Edges: Sew a 1/4″ topstitch around all edges of outer bag—reinforces pockets, stabilizes seams, and hides raw edges.
- Secure Webbing Ends: Clip and fold webbing ends under so no raw edge is visible; topstitch securely (3x zigzag or box-x pattern) to fix strap length.
- Attach Buckles & Adjusters: Slide webbing through chosen buckle and tri-glide; adjust strap length and check operation.
Which Stitch Types and Thread Strength Are Recommended?
Stitch Types:
- Straight Stitch (Lockstitch): Standard for most seams; use length 2.5–3 mm for durability on thick fabrics.
- Zigzag Stitch: Ideal for securing raw edges on non-fusible lined seams; prevents fraying in nylon.
- Bar-Tack & Box-X Reinforcements: Use triple straight stitch (3x length) to reinforce stress points—where strap or belt attaches.
- Blind Hem Stitch (Optional): For hidden seams on interior lining, creating a clean finish.
Thread Selection:
- Bonded Nylon Thread: Tex 70–210; high tensile strength for heavy fabrics and multiple layers.
- Polyester Thread: UV resistant—useful for outdoor waist bags exposed to sun.
Needle Choice:
- Leather/Denim Needles (16/100, 18/110): Point designed to pierce thick materials without skipping.
- Universal Needles (14/90): For lighter fabrics (ripstop nylon, 210D) to avoid punching oversized holes.
Stitch Length & Tension:
- Stitch Length:
- 1.5–2 mm: For topstitching on heavy fabrics to create clean visible stitch lines.
- 2.5–3 mm: Standard seams on nylon and canvas—balances strength and minimal perforations.
- Tension Settings: Test on scrap fabric to adjust—high tension can break thread, low tension creates loopy stitches. Aim for balanced lockstitch with thread locking in middle of layers.
How to Install Zippers, Buckles, and Webbing Securely?
Zipper Installation Techniques:
- Zipper Tape Reinforcement: Sew a narrow strip of interfacing or nylon taffeta on backside of zipper tape to stabilize when sewing—prevents zipper from stretching.
- Aligning Zipper Ends: Mark zipper endpoints on fabric with chalk—accurate placement avoids bag puckering.
- Double Topstitch: After initial attachment, topstitch zipper 1/8″ from coil on both sides for extra strength and neat appearance.
Buckle & Webbing Attachment:
- Overlapping Webbing Fold: Fold webbing end under by 1″ and sew a box-x pattern to seal—prevents raw edges from fraying and the webbing from sliding out.
- Adjuster Placement: Sew adjusters in place with straight stitch across first, then secure with reinforcement stitches at edges.
- Swivel Buckle Considerations: If using a swivel buckle, ensure webbing slides smoothly through—test fit before finishing seams.
Using Heat-Set Tape for Edge Sealing:
- Purpose: Prevent fraying on cut nylon or canvas edges—apply fusible edge tape with iron (using press cloth).
- Placement: Along webbing edges or raw edge of fabric panels before reversing seams or topstitching.
What Finishing Steps Are Required for a Professional Waist Bag?
Professional finishing includes clean topstitching along all edges (¼” from seams), edge sealing with heat or binding to prevent fraying, and optionally adding waterproof or fireproof coatings. Press seams thoroughly and perform quality checks: test zipper operation, strap durability under load, and inspect for loose threads. Final wipe-down with appropriate fabric protector readies the waist bag for packaging.
How to Cleanly Topstitch Edges and Hide Raw Seams?
Pressing Techniques:
- Seam Roller Use: After sewing seams, press flat with a wooden or plastic seam roller—avoids flattening ripstop nylon.
- Iron Settings: Use medium heat with press cloth on canvas or waxed fabrics; use low heat and steam for nylon.
Topstitching Order:
- Pocket Zippers: Topstitch around zipper opening to secure pocket shape.
- Main Body Edges: Topstitch along entire top opening (bag mouth) to reinforce zipper attachment.
- Side Seams & Bottom: If visible, topstitch 1/4″ from side and bottom seams for aesthetic symmetry.
- Strap Ends: Topstitch 1/8″ around strap loops to hide raw edges and reinforce.
Hide Raw Seams:
- Bagging Out (Lining Method): Sew main body RST, sew lining RST, then insert bag into lining through bottom opening. After turning, inner lining covers raw outer seams.
- Binding Tape: Apply bias binding or webbing binding along interior seams—creates neat professional finish and hides cut edges.
- Seam Piping (Optional): Insert narrow fabric piping into seam—decorative and functional, keeps edges crisp.
Consistent Stitching:
- Stitch Foot Guide: Use the edge of zipper foot as a guide; practice on scraps to maintain a straight 1/4″ line.
- Thread Tension Check: Before topstitching final bag, test on scrap to ensure bobbin thread doesn’t show on top layer.
Which Techniques Ensure Waterproofing or Fireproofing?
Waterproof Seams & Fabric:
- Seam Sealing Tape: After assembly, apply heat-activated seam tape over interior seams to block water ingress—standard in dry bags and outdoor gear.
- DWR Reapplication: Use spray-on DWR finishes (e.g., Nikwax) on nylon panels post-assembly to renew water repellency—cost $10–$15 per spray can.
- Waxed Canvas Treatment: For canvas bags, rub melted natural wax (beeswax or paraffin blend) into fabric, then heat to melt evenly—yielding a water-resistant barrier.
Fireproofing (When Required):
- Fire-Retardant Coatings: Apply specialized fire-resistant sprays (e.g., Innotex Fire Block) inside bag—cost $20–$40 per 8 oz.
- Fireproof Lining Materials: Incorporate aramid fiber or Nomex lining panels ($10–$20 per yard) to protect contents from high heat—common for tool belts or industrial safety bags.
Quality Testing:
- Water Spray Test: Spray assembled bag lightly; observe areas around seams for signs of leakage—mark and reapply seam tape if needed.
- Heat Test: For fire-resistant bags, expose sample to high heat (e.g., small flame at safe distance) and ensure no rapid ignition—test in controlled environment with fire safety equipment.
How to Test Fit, Adjust Straps, and Perform Quality Checks?
Fit Tests:
- Wear Trials: Have individuals with different waist sizes (28″ to 42″) test strap adjustability and bag comfort.
- Movement Tests: Ask testers to walk, jog, and bend—observe if bag shifts, bounces, or pinches against body.
Quality Control Checklist:
- Stitch Inspection: Ensure no skipped stitches, consistent stitch length (2.5–3 mm), and secure bar-tacks at stress points.
- Hardware Operation: Test each zipper for smooth operation—no snags. Check that buckles release and secure easily.
- Strap Strength: Pull webbing vertically with 10–15 lbs force to confirm bar-tacks hold.
- Seam Integrity: Gently tug at seams to ensure no separation; inspect hidden interior seams for frays.
Aesthetic Checks:
- Color Consistency: Inspect all panels under natural light to ensure dye uniformity—especially important for fashion-oriented waist bags.
- Edge Uniformity: Edges should have consistent burnishing or sealing—no rough spots or peeling.
Packing Preparation:
- Cleaning: Remove any chalk or marker lines with a lightly damp cloth; brush off fabric lint.
- Shape Preservation: Stuff bag with tissue or plastic inserts to retain shape during shipping.
- Final Inspection: Use a bright LED light to spot any loose threads or glue spots—trim or clean before folding.
How Do You Customize and Brand a Waist Bag for Clients?
Customize a waist bag by integrating embroidery, screen printing, or heat-transfer logos on front or side panels. Offer branded woven labels or debossed leather patches for a luxurious feel. Enhance packaging with custom dust bags or branded hang tags. Low MOQ private label or OEM/ODM services allow small batches of branded waist bags, ensuring clients receive samples within 7–10 days for approval.
Customization isn’t just slapping on a logo; it’s a chance to deliver a brand experience that resonates with customers. From subtle debossed leather patches to elaborate embroidered designs, clients expect unique touches. Let’s explore customization methods, packaging ideas, and how to structure OEM/ODM offerings that accommodate low minimum order quantities.
What Embroidery, Screen Printing, or Heat-Transfer Options Exist?
Embroidery:
- Machine Embroidery: Use computerized embroidery machines (e.g., Brother PR1055X) for precise logos; minimum embroidery area ~2″ × 2″; thread colors cost $0.20–$0.50 per stitch.
- Benefits: Durable, high-end look—ideal for luxury or outdoor brands.
- Drawbacks: Limited to simple designs; excessive stitching can pierce waterproof coatings on nylon.
Screen Printing:
- Process: Apply plastisol or water-based inks through mesh screens; cost $5–$10 per color per bag at small batch sizes.
- Benefits: Cost-effective for bold, flat designs; works on cotton canvas and polyester.
- Drawbacks: Inks may crack over time if bag flexes frequently; less durable than embroidery.
Heat-Transfer Vinyl (HTV):
- Process: Cut vinyl design, apply with heat press; vinyl vinyl costs $1–$3 per square inch.
- Benefits: Allows complex, multi-color designs; fast turnaround.
- Drawbacks: May peel after repeated flexing; not ideal for heavy-duty or outdoor bags.
Debossed or Embossed Leather Patches:
- Debossing: Press custom logo into genuine leather patch; costs $3–$8 per patch for small quantities.
- Embossing: Raise logo design on leather or PVC patch—requires custom metal die ($100–$200 for die).
- Benefits: Premium appearance for leather-trimmed waist bags; durable.
- Drawbacks: Costly for small runs due to die creation; limited color variation.
Digital Printing (Sublimation):
- Process: Print full-color designs onto polyester-coated fabrics, then heat-press to transfer.
- Benefits: Unlimited color options, photorealistic prints; works only on polyester-based fabrics.
- Drawbacks: Colors may fade under UV exposure; limited to light-colored fabrics.
Customization Methods Comparison
| Method | Cost (USD/Bag) | Durability | Color Options | Best On Fabrics |
|---|---|---|---|---|
| Embroidery | $3–$7 | High | Moderate (thread colors) | Canvas, nylon |
| Screen Printing | $2–$5 | Medium | Moderate (separate screens per color) | Canvas, polyester |
| Heat-Transfer Vinyl | $3–$8 | Medium-Low | High | Nylon, polyester |
| Leather Deboss/Emboss | $3–$8 (patch) | Very High | N/A (leather only) | Leather accents |
| Sublimation Digital | $4–$10 | Medium | Unlimited | Polyester fabrics |
Which Labeling and Packaging Ideas Enhance Brand Appeal?
Woven Labels:
- Design Flexibility: Custom woven labels (1″ × 2″ or larger) sewn into interior seams; cost $0.30–$0.80 per label at MOQs of 200+.
- Benefits: Durable, high perceived value; shows brand care in hidden details.
Hang Tags & Hangcards:
- Materials: Sturdy cardstock (300–350 gsm) with matte or gloss finish; cost $0.50–$1 per tag at 500–1,000 units.
- Design Elements: Include product care instructions, material details, QR code linking to brand story.
Dust Bags & Protective Covers:
- Materials: Non-woven polypropylene or lightweight cotton drawstring bags; cost $1–$2 per dust bag.
- Purpose: Protect bag during shipping and storage; adds a premium unboxing experience.
Custom Poly Bags:
- Print Options: Clear polyethylene bags printed with brand logo; cost $0.20–$0.50 per bag at 1,000-unit MOQ.
- Benefits: Lightweight, low cost, allows customers to view product; protects during transit.
Box & Insert Packaging:
- Rigid Boxes: Small gift boxes (4″ × 7″ × 3″) with magnetic closures; cost $5–$10 per box at 500-unit MOQ.
- Kraft or Recycled Cardboard: Eco-friendly, printed wrap-around sleeve; cost $1–$2 per unit at 1,000 MOQ.
- Silk Paper Insert: White tissue or branded rice paper to wrap bag—adds unboxing delight; cost $0.10–$0.20 per sheet.
Packaging Component Costs
| Packaging Component | Cost (USD/unit) | MOQ | Key Benefit |
|---|---|---|---|
| Woven Label | $0.30–$0.80 | 200 units | Adds durability and brand identity inside bag |
| Hang Tag (Cardstock) | $0.50–$1 | 500 units | Conveys brand story, care instructions |
| Dust Bag (Cotton/PP) | $1–$2 | 500 units | Premium protection, unboxing experience |
| Poly Bag (Custom Print) | $0.20–$0.50 | 1,000 units | Protects product, lightweight branding |
| Rigid Box (Magnetic) | $5–$10 | 500 units | Luxury presentation, gift-ready |
| Kraft Sleeve | $1–$2 | 1,000 units | Eco-friendly, cost-effective |
| Tissue Paper Insert | $0.10–$0.20 | 1,000 sheets | Adds protective cushion, branded unboxing |
How to Offer Low MOQ Private Label or OEM/ODM Services?
Defining MOQ (Minimum Order Quantity):
- Small Batch MOQ: Szoneier Leather offers MOQs as low as 50 units for select designs—ideal for startups testing market demand.
- Mid-Range MOQ: 200–500 units for full custom designs with embroidery or leather patches.
- Large-Scale MOQ: 1,000+ units unlocks economies of scale—pricing drops significantly (up to 20% lower per unit).
OEM vs ODM:
- OEM (Original Equipment Manufacturer): Clients provide design files (CAD or tech pack), and factory produces exactly to spec—faster development, slightly higher cost per unit.
- ODM (Original Design Manufacturer): Clients choose from existing patterns; factory manages design tweaks, faster sampling, lower design fees.
Sample Production & Approval:
- Initial Sample Lead Time: 7–10 business days for fabric samples; 10–14 days for fully assembled prototype.
- Sample Cost: $50–$150 per sample, depending on complexity; credited back upon bulk order placement.
Communication & Collaboration:
- Tech Pack Essentials: Include dimensions, seam allowances, fabric swatches, hardware specs, and color codes (Pantone or RAL).
- Feedback Loop: Use video calls and high-resolution photos to refine samples; ensure color accuracy by requesting physical swatches or digital color griddles.
Quality Assurance Processes:
- Pre-Production Checks: Material certificates (e.g., GRS for recycled fabrics), hardware load tests, colorfastness tests.
- In-Line Inspections: Random sample checks every 50 units during production run to ensure consistency.
- Final Inspection: 100% visual checks for stitching, alignment, and functional testing (strap adjustment, zipper cycles).
What Are Common Challenges and How Can You Avoid Them?
Common waist bag challenges include distorted seams from inconsistent seam allowances, misaligned zippers due to poor marking, and strap slippage from weak bar-tacks. Using high-quality sewing machines, marking guides, and strong thread (bonded nylon) prevents these issues. Select hardware that matches webbing width to avoid webbing pull-through. Prototype extensively and conduct wear tests to catch fit or comfort complaints early.
How to Prevent Distorted Seams or Uneven Pockets?
Consistent Seam Allowance Practices:
- Use Seam Guides: Attach seam guides to sewing machines to maintain exact 1/4″ or 1/2″ seam allowances.
- Mark Stitch Lines: Draw stitch lines with water-soluble marker before sewing—especially on curved pocket openings to avoid waviness.
Stabilizing Fabrics During Sewing:
- Use Tissue Paper Layer: Place a strip of tissue paper under slippery nylon when sewing—prevents fabric from feeding inconsistently. After stitching, tear away tissue.
- Interfacing on Pocket Areas: Apply lightweight interfacing to pocket panels to make them stiffer—prevents pockets from collapsing or folding during assembly.
Pocket Placement & Alignment:
- Test Placement on Mock-Up: Use inexpensive muslin or scrap fabric to test pocket placement before cutting main panels.
- Measure Twice, Clip Once: Measure and clip pocket edges in place with 1″ spacing between clips to avoid shifting when sewing.
Which Materials or Hardware Often Cause Assembly Issues?
Cheap Zippers & Coils:
- Issue: Low-quality zippers may separate after a few uses or snag frequently.
- Solution: Invest in YKK or SBS zippers—perform a “zip-unzip” test with light force before committing to whole batch.
Incompatible Webbing & Buckles:
- Issue: Webbing thicker than recommended for a buckle can’t pass through, or too thin webbing slips under tension.
- Solution: Match webbing width exactly to buckle specifications—measure internal buckle width with calipers before ordering in bulk.
Poorly Bonded Fusible Interfacing:
- Issue: Interfacing that bubbles or peels away after stitching.
- Solution: Use sample swatches to test fusible on chosen fabric—follow recommended temperature and press time exactly.
Thread Breakage on Thick Seams:
- Issue: Sewing over multiple layers (zipper + heavy fabric + interfacing) causes skipped or broken stitches.
- Solution: Use-sized needles (16/100, 18/110) and bonded nylon thread; reduce stitch length slightly (2.2 mm) to allow thread to catch properly.
How to Troubleshoot Fit Problems and User Comfort Complaints?
User Feedback Collection:
- Prototype Testing: Distribute early prototypes to a diverse group—tall, short, different waist sizes—to gather feedback on fit and comfort.
- Comfort Surveys: Ask testers to rate fit from 1 (too tight) to 5 (too loose), and note specific discomfort areas or bounce points.
Common Fit Issues & Fixes:
- Strap Too Short/Too Long: Offer mid-range adjustable limits—design strap to accommodate waists 28″–44″ by including extra webbing and adjusters.
- Bag Sits Too Low/High: Add a chest strap or secondary anchor point for users to adjust bag height, especially when worn crossbody.
- Bag Bouncing: Introduce a sliding sternum strap or add silicone gripper strips to strap interior to reduce movement during running.
Weight Distribution Problems:
- Issue: Heavy contents cause bag to sag and shift to one side.
- Solution: Add internal divider or elastic webbing to hold items in place; recommend weight limits (e.g., no more than 1 lb) to users.
How to Scale Waist Bag Production Efficiently for Small and Large Orders?
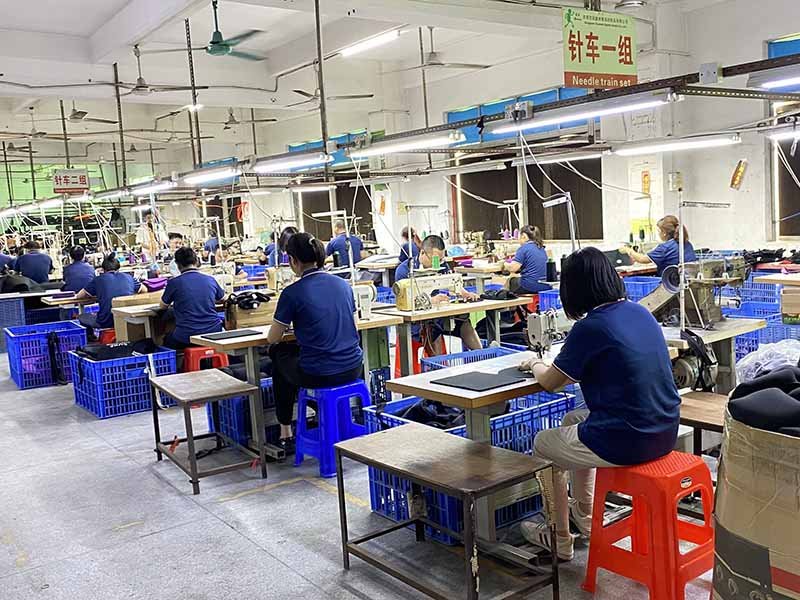
Scaling waist bag production requires standardized workflows: batch cut fabrics with nested patterns, assign dedicated sewing stations for repetitive tasks (pockets, zippers, strap assembly), and implement in-line quality checks every 25 units. Use production flowcharts to minimize downtime and cross-train staff for bottleneck tasks. For large orders, negotiate bulk material discounts (10–25%) and maintain buffer inventory for fast turnaround.
What Workflow Practices Improve Speed and Consistency?
Batch Production vs. Unit-by-Unit:
Batch Cutting: Cut all outer bag pieces, all lining pieces, and all interfacing layers in separate sessions—speeds up cutting and ensures uniformity.
Assembly Line Sewing: Assign each operator a specific task—Operator A sews pockets, Operator B installs zippers, Operator C attaches webbing—minimizes fabric handling time.
Batch vs. Unit Production Efficiency
Production Method Advantages Drawbacks Ideal Scale Batch Production Faster cutting, specialized tasks, lower error rates Requires coordination, initial setup time 100+ units Unit-by-Unit Greater flexibility for customization, easier to track individual unit Slower, higher error risk in repeated tasks Custom prototypes, <50 units
Standard Operating Procedures (SOPs):
- Document Every Step: Create visual guides showing seam allowances, stitch lengths, and tension settings. Use photos or short videos for clarity.
- Training Modules: Train new staff on one component until they reach 90% consistency before moving to next task—reduces rework.
Lean Manufacturing Principles:
- 5S Method (Sort, Set in Order, Shine, Standardize, Sustain): Keep workstations organized, label bins, and maintain tools—reduces wasted motion.
- Just-In-Time (JIT) Material Handling: Store only necessary amounts of fabric/hardware at each station—prevents clutter and inventory miscounts.
Time & Motion Studies:
- Measure Task Times: Use a stopwatch to record how long each operator spends on cutting, sewing, topstitch, and finishing.
- Identify Bottlenecks: If zipper installation takes 3 minutes per unit while pocket assembly is 1 minute, allocate more resources or optimize tools for zipper task.
Which Quality Control Metrics Ensure 100% Satisfaction?
In-Line Inspections:
- Operator-Level Checks: After each component is sewn (e.g., pocket, zipper), inspect for alignment and stitch quality. Use a simple checklist (zipper zips smoothly, pocket is square).
- Supervisor Audits: Every 25 units, a supervisor inspects full assembly—tests fit, strap adjustment, and final clean finish.
End-of-Line Testing:
- Wear & Load Test: Randomly select 5% of units to load with 2 lbs weight; wear for 30 minutes to simulate movement, then inspect seams for any signs of stress.
- Water Spray Test (for nylon): Lightly mist finished bags; check seams and zippers for leaks—ensures DWR or seam sealing is effective.
Defect Tracking & PO Corrections:
- Defect Log: Record defects by type (stitch skip, zipper snag, color variation) and location in production line—identify root causes.
- Corrective Action Plans: If a defect rises above 2% frequency, pause production to retrain operators on that task and adjust SOPs.
Client Sampling & Approval:
- Pre-Shipment Approval: Send 3–5 randomly selected units for client review—capture any requested tweaks before bulk shipment.
- Return & Feedback Analysis: Track reasons for returns; categorize by defect type (functional vs. aesthetic) for future improvement.
How to Manage Lead Times, Sampling, and Rapid Prototyping?
Lead Time Components:
- Design & Sampling: Initial pattern drafting, prototyping, and client revisions—typically 10–15 days.
- Material Procurement: Fabric, hardware, and interfacing lead times range from 5–20 days, depending on stock status.
- Production Run: Depending on volume, 100–500 units take 10–20 days; 1,000+ units may require 30–45 days.
- Shipping & Customs Clearance: 7–15 days for ocean freight; 3–7 days for air freight—varies by origin country.
Rapid Prototyping Strategies:
- 3D Printed Mocks (Optional): Use cardboard or inexpensive fabrics to create a quick physical mock-up—test strap angles and pocket placements without consuming actual materials.
- Digital Pattern Testing: Use software like Adobe Illustrator or dedicated bag design tools to simulate panel layout—spot potential errors before cutting physical samples.
- Accelerated Approval Workflow: Share photos and videos of prototypes via cloud platforms (Google Drive, Dropbox) for immediate client feedback—reduces back-and-forth email delays.
Buffer Planning:
- Safety Stock: Maintain a 10–15% buffer of key materials (fabric, webbing, zippers) to cushion against delays.
- Flexible Production Scheduling: Allocate 20% extra production time for contingencies—machine downtime, material shortages, or QC rework.
Conclusion
From selecting the right fabrics and hardware to mastering precision cutting, sewing, and finishing, making a professional waist bag requires attention to detail, structured workflows, and an understanding of both function and style. You learned which materials withstand daily wear, how “are waist bags in style” drives design choices, and the difference between a waist bag and a sling bag—crucial for proper pattern drafting.
Whether you want to create a sleek travel waist bag, a lightweight running belt, or a fashion-forward statement piece, Szoneier is ready to support your journey. From tote bags to dry bags and everything in between, our integrated supply chain and dedicated R&D ensure your custom waist bag meets every specification—from pocket layout to waterproof finishes. Contact Szoneier today to discuss your project, explore OEM/ODM possibilities, and get a competitive quote.
manufacturer Categories
- Custom Tote Bags Manufacturer
- custom backpacks Manufacturer
- custom travel bags& Duffle bags manufacturer
- custom makeup bags & toiletry bags manufacturer
- custom cooler bags manufacturer
- custom drawstring bags manufacturer
- custom makeup bags & toiletry bags manufacturer
- custom golf bags manufacturer
- custom fireproof bags manufacturer
- custom dry bags manufacturer
- custom ski bags manufacturer
- custom gym & sports bags manufacturer
- custom laptop bags manufacturer
- custom tactical bags manufacturer
- custom beach bags manufacturer
- custom medical bags manufacturer
- custom camera bags manufacturer
- custom wetsuits manufacturer
- custom leather goods manufacturer
- more personalized products
Can't find the answers?
No worries, please contact us and we will answer all the questions you have during the whole process of bag customization.
Make A Sample First?
If you have your own artwork, logo design files, or just an idea,please provide details about your project requirements, including preferred fabric, color, and customization options,we’re excited to assist you in bringing your bespoke bag designs to life through our sample production process.