 Skip to content
How to Add a Zipper to a Tote Bag: A Step by Step Guide for Custom and DIY Designs
- Eric
- October 31, 2025
- 9:39 am
Tote bags have become indispensable for both everyday users and modern brands — spacious, lightweight, and endlessly customizable. Yet, one common buyer concern persists: “Can a tote bag be closed securely?” The answer lies in one simple upgrade — adding a zipper. Whether you’re a fashion brand sourcing from a manufacturer or a designer creating prototypes, understanding how to add a zipper to a tote bag helps you ensure functionality and market appeal in every design.
Adding a zipper to a tote bag improves safety, structure, and style. By choosing the right zipper type (nylon, metal, or waterproof TPU) and sewing it with reinforced seams, you can enhance both usability and perceived value. For bulk buyers or brands, professional manufacturers like Szoneier integrate precise zipper installation to deliver durable, secure, and visually refined tote collections.
A zipper isn’t just a functional detail — it’s a quality signal. A zippered tote looks finished, feels premium, and meets customer expectations in retail, corporate gifting, or travel markets. In this guide, we’ll explore the most reliable zipper types, correct installation methods, and what professional factories like Szoneier do behind the scenes to make every tote both stylish and secure.
What Are the Benefits of Adding a Zipper to a Tote Bag?
Adding a zipper transforms a tote bag from casual to functional. It provides safety for personal items, shields contents from weather and spills, improves structure, and enhances overall brand value. For custom buyers, zippered totes attract higher resale margins and better customer reviews because they combine style, practicality, and professionalism in one design.
Security
One of the most obvious yet underestimated advantages of a zipper is protection. Open-top totes are convenient, but they expose wallets, electronics, and documents to accidental spills or theft. A zipper closure solves this instantly.
For daily users: It keeps valuables hidden and prevents items from falling out when the bag tips over in a car or airplane overhead bin. For brands: Security is a selling point. In product listings and retail packaging, “zippered closure” consistently ranks among the top five keywords driving conversions for tote bags, especially on Amazon and Etsy.
| Security Feature | Benefit to Buyer | Brand Advantage |
|---|---|---|
| Full zipper closure | Prevents theft & loss | Adds perceived durability |
| Inside pocket zipper | Extra layer of privacy | Supports premium design |
| Dual zipper pulls | Fast, ambidextrous access | Professional presentation |
Weather Resistance
A zippered tote isn’t just about privacy — it’s also about protection from the elements. When it rains or when coffee spills nearby, an open-top bag lets moisture in. Add a zipper, and you create a barrier that blocks dust, sand, and light rain.
For travel and outdoor use:
- TPU-coated or waterproof zippers can reach 98 % moisture resistance under ISO 811 testing.
- Canvas totes paired with coated zippers last 30–40 % longer in humid conditions.
Structural Integrity
Without a zipper, totes tend to lose their top structure, especially when made from soft canvas or cotton. A zipper panel creates a reinforced horizontal line that stabilizes the upper seam and distributes tension evenly.
Why this matters:
- Prevents “mouth gaping” when the tote is full.
- Keeps edges crisp for a professional silhouette.
- Reduces strain on side seams and handles.
For manufacturers like Szoneier, zippers are engineered as part of the bag’s load-bearing system, not merely decoration. They use reinforced zipper tapes (≥ 25 mm width) stitched with high-tensile polyester thread (≥ 30 N strength) to ensure the top rim stays symmetrical even after years of use.
Result:
- Longer life cycle → fewer returns.
- More consistent retail display → better shelf appeal.
Aesthetic Upgrade
A zipper subtly signals craftsmanship. When buyers evaluate sample quality, they unconsciously look for finishing details: top-stitch precision, zipper alignment, and puller style. These elements determine whether a tote looks mass-produced or boutique-made.
Visual Benefits:
- Clean closure line creates a polished silhouette.
- Metal or branded zipper pulls add visual weight and luxury.
- Contrast zippers can reinforce brand identity or color story.
Market Data Insight: According to Szoneier’s export records (2024), tote bags with zippers achieve 18–25 % higher average selling prices than open-top equivalents, with significantly lower complaint rates related to “bag deformation” or “item loss.”
Versatility
A simple zipper makes a tote suitable for many more environments.
- Work & Business: Keeps laptops, chargers, and notebooks discreet and organized.
- Travel: Acts as a personal item that passes airline “fully closed” carry-on rules.
- Beach or Gym: Prevents sand and water ingress.
- Retail Gifting: Adds polish for corporate clients or promotional campaigns.
For custom brands, a zippered tote opens doors to new categories: travel bags, weekenders, diaper totes, or even convertible backpacks. By upgrading the closure, the same pattern can serve multiple market segments — saving design cost while widening audience reach.
Durability
Zippers contribute structurally to a tote’s durability. The stitching used for zipper installation reinforces the top edge — the area most vulnerable to stress when users overfill their bags.
Technical Benefits:
- Stitch density around zipper tape distributes weight evenly.
- Zipper stop reinforcement prevents fabric tearing at endpoints.
- Edge top-stitching protects seam integrity during repeated opening/closing cycles.
In factory durability testing, Szoneier’s zippered totes withstand 10,000 open–close cycles without misalignment — meeting the standards expected in luggage-grade accessories.
Brand Differentiation
When buyers compare tote suppliers, small design features like the zipper often determine final selection. Custom pullers engraved with a logo, contrast zipper tape, or metallic finishes help your brand stand out without redesigning the entire bag.
Customization Options Offered by Professional Manufacturers:
- Pantone-matched zipper tape and thread
- Debossed metal pullers or leather tabs
- Dual zippers for wide access
- Waterproof or invisible zippers for specific markets
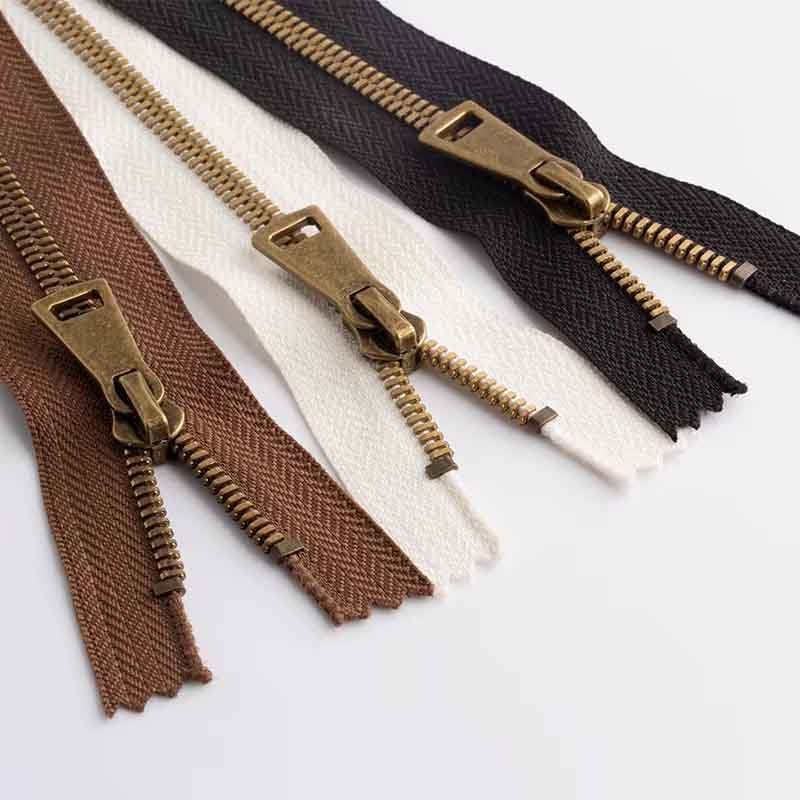
Which Type of Zipper Works Best for Tote Bags?
The best zipper for a tote bag depends on material, design style, and usage. Nylon coil zippers offer flexibility and smooth sewing for canvas or cotton totes, metal zippers provide premium aesthetics and durability for leather bags, and TPU waterproof zippers are ideal for outdoor or travel styles. For large-capacity or heavy-duty totes, choose #5–#8 gauge zippers with reinforced tape and double stitching to ensure long-lasting performance.
Understanding the Three Core Zipper Categories
In modern tote manufacturing, nearly all zippers fall into one of three core categories: nylon coil, metal, or TPU-coated waterproof. Each has its own strengths, price points, and brand positioning.
| Zipper Type | Durability | Flexibility | Water Resistance | Ideal For | Aesthetic Appeal |
|---|---|---|---|---|---|
| Nylon Coil | ★★★★☆ | High | Moderate | Canvas / cotton totes | Smooth & minimal |
| Metal (Brass, Nickel) | ★★★★★ | Medium | Low–Moderate | Leather / structured bags | Luxurious & classic |
| TPU Waterproof | ★★★★☆ | High | ★★★★★ | Outdoor / gym / travel totes | Sleek & modern |
1.Nylon Coil Zippers
Nylon coil zippers are made from interlocking polyester or nylon coils sewn onto a fabric tape. They are flexible, easy to sew, and ideal for lightweight or midweight totes. They resist corrosion, run smoothly, and come in wide color ranges — perfect for canvas, cotton, or promotional tote designs.
Technical Advantages
- Flexibility: Bends naturally with soft fabrics like canvas or polyester.
- Smooth Glide: Low friction, preventing fabric catching or seam stress.
- Color Variety: Available in over 200 Pantone-matched shades.
- Lightweight Construction: Adds minimal bulk; average weight 0.01–0.02 kg/m.
Ideal Applications
- Everyday canvas shoppers
- Recycled or eco cotton totes
- Promotional or low-MOQ custom runs
Cost and Performance
| Parameter | Specification |
|---|---|
| Gauge | #3–#5 recommended |
| Average Cost (OEM) | $0.25–$0.45 USD/unit |
| Pull Strength | ≥ 15 N |
| Durability | 6–10 years |
| Maintenance | No rust; washable |
2. Metal Zippers
Metal zippers, made from brass, nickel, or gunmetal, offer superior strength and timeless style. They add weight and rigidity to structured totes, especially in leather or PU models. Ideal for luxury and fashion brands, metal zippers convey craftsmanship, durability, and premium appeal.
Strength and Longevity
Metal teeth interlock precisely, delivering long-term durability even under tension.
- Lifespan: 10–15 years under regular use.
- Tensile resistance: 20–25 N, suitable for heavier materials.
- Heat tolerance: Withstands high pressing temperatures during production.
Design and Branding Impact
- The metallic shine adds instant perceived luxury.
- Available in finishes like gold, silver, gunmetal, antique brass, or matte black.
- Perfectly complements leather grain texture or waxed canvas patina.
| Finish Type | Visual Character | Best Pairing Fabric |
|---|---|---|
| Antique Brass | Vintage, rugged | Waxed canvas |
| Polished Nickel | Modern, sharp | PU or genuine leather |
| Matte Black | Minimal, urban | Nylon or dark cotton |
| Gold | Luxurious, statement | Premium leather |
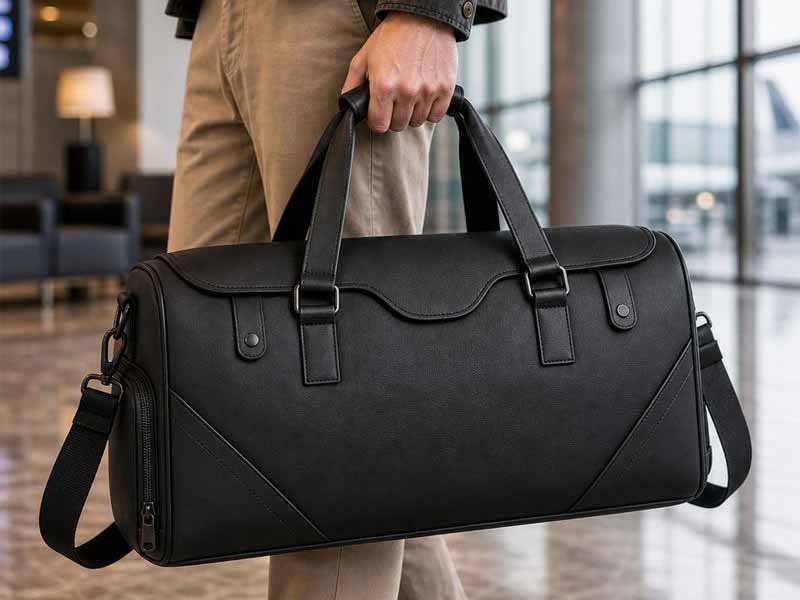
Use Cases
- Executive leather totes
- High-end fashion handbags
- Structured work bags and briefcase-style totes
Manufacturing Considerations
Metal zippers require industrial-grade sewing machines and needles (#16–18) to avoid tooth damage. They are best applied to thicker materials using edge reinforcement tape.
3. TPU-Coated Waterproof Zippers
TPU (Thermoplastic Polyurethane) waterproof zippers combine flexibility with full moisture protection. The outer TPU film seals the teeth, creating a smooth, modern appearance that blocks rain and dust. They’re ideal for gym, travel, and outdoor tote lines where performance matters as much as style.
Technical Highlights
- Waterproof Rating: 100% sealed — zero penetration under 10,000 mm hydrostatic pressure (ISO 811).
- Temperature Resistance: Stable from –30°C to +70°C.
- Maintenance: Wipe-clean, no rust or deformation.
- Visual Aesthetic: Seamless matte or semi-gloss surface that pairs with minimalist designs.
Ideal Use Cases
- Beach and gym totes
- Outdoor travel and camping bags
- Urban commuters needing spill protection
- Unisex, performance-focused lines
Key Specifications
| Property | TPU Zipper |
|---|---|
| Gauge | #5–#8 |
| Cost (OEM) | $0.60–$0.85 USD/unit |
| Tear Strength | ≥ 20 N |
| Water Resistance | 100 % |
| Appearance | Modern, technical, matte |
Choosing the Right Zipper Gauge and Tape Material
A zipper’s gauge (size of the teeth and width of tape) determines its strength, compatibility, and visual balance with the tote design.
| Zipper Gauge | Use Case | Suitable Bag Type |
|---|---|---|
| #3 | Light duty | Cosmetic or small totes |
| #5 | Medium duty | Standard canvas tote |
| #7 | Heavy duty | Leather or travel tote |
| #8 | Industrial duty | Tool or large-capacity tote |
Tape Materials:
- Polyester Tape: Flexible, cost-effective, suitable for cotton and nylon bags.
- Cotton Tape: Natural texture, preferred for eco or vintage aesthetics.
- Reinforced Tape (PU laminated): For waterproof or structured applications.
Szoneier uses dual-layer zipper tape — inner polyester for stability, outer PU coating for colorfastness — achieving a lifespan 30% longer than single-weave tape.
4. Specialty Zippers for Premium or Niche Tote Designs
Invisible Zippers
Hidden beneath the seam line, invisible zippers create a clean, modern finish suitable for minimalist or formal designs.
- Gauge: #3–#5
- Ideal for fabric totes with lining
- Drawback: Less durable under heavy loads
Reverse Coil Zippers
The teeth are placed on the underside, giving a flat, sleek appearance. Often used in technical or waterproof bags where visual smoothness matters.
Two-Way Zippers
Perfect for travel or oversized totes, allowing users to open from either side for easier packing. Reinforced stoppers are required to prevent separation.
Decorative Zippers
For fashion-forward brands, colored metal teeth or gradient tape add unique personality without complex sewing. Example: rose-gold zipper on black leather tote = immediate luxury visual.
Comparing Price vs Value for Buyers
| Zipper Type | Average OEM Cost | Expected Lifespan | Retail Appeal | Recommended Market |
|---|---|---|---|---|
| Nylon Coil | $0.25–$0.45 | 6–10 years | Everyday / Promotional | Casual, eco, budget |
| Metal | $0.60–$1.20 | 10–15 years | Premium / Executive | Luxury & fashion |
| TPU Waterproof | $0.60–$0.85 | 5–8 years | Modern / Functional | Gym, travel, outdoor |
| Invisible | $0.40–$0.60 | 3–6 years | Minimalist | Boutique & formal |
| Two-Way | $0.70–$1.00 | 8–10 years | Practical | Large totes, travel |
What Tools and Materials Do You Need?
To sew a zipper into a tote, prepare a zipper foot, pins or clips, scissors, matching thread, fabric lining, and interfacing. Choose compatible materials — cotton canvas, leather, or nylon — and always stabilize the zipper area for professional stitching.
Essential Tools
- Sewing machine with a zipper foot
- Fabric scissors or rotary cutter
- Pins or clips
- Iron and pressing board
- Ruler or measuring tape
- Seam ripper for adjustments
Fabric Preparation
Use mid- to heavyweight fabrics such as 12 oz canvas, 600D polyester, or PU leather. For thin fabrics, apply fusible interfacing (GSM 150–200) along the zipper area to prevent puckering.
Lining and Interfacing Options
Adding lining enhances structure and conceals zipper stitching. Common materials include:
- Polyester taffeta for water resistance
- Cotton twill for breathability
- Microfiber suede for premium texture
Szoneier integrates 3-layer reinforcement (outer + foam + lining) in OEM tote production to ensure smooth zipper alignment and crease resistance even after 500+ uses.
How to Sew a Zipper into a Tote Bag (Step-by-Step)
Measure the tote’s opening, stabilize the top edge, and align a zipper (slightly shorter than the opening). Baste or clip in place, then sew with a zipper foot 3–4 mm from the teeth. Reinforce both ends with backstitch or bar-tacks, add lining to enclose the tape, and topstitch for a crisp finish. Choose nylon coil for canvas, metal for leather, and TPU for waterproof builds. Press seams (or finger-press leather) to set the shape.
Before You Start: Settings, Tools, and Cut List
| Item | Canvas/Cotton | Nylon/Poly | PU/Leather |
|---|---|---|---|
| Needle | 90/14 Universal | 90/14 Microtex | 100/16 Leather |
| Thread | Tex 40 poly | Tex 40 poly | Tex 60 bonded poly |
| Stitch length | 2.8–3.0 mm | 3.0 mm | 3.2–3.5 mm |
| Foot | Zipper foot | Zipper foot (narrow) | Zipper + Teflon/walking |
| Interfacing (top edge) | Fusible woven, 150–200 GSM | Light fusible, 100–150 GSM | Non-fusible tape 10–15 mm |
| Top-stitch distance | 2.5–3.0 mm from seam | 2.5–3.0 mm | 3.0–3.5 mm |
Cut list (typical 40 cm opening tote):
- Zipper #5 (38–39 cm teeth; total 40–41 cm incl. tapes)
- Two facing/zipper guard strips: 40 × 5 cm (for recessed method)
- Lining panels to match body
- Optional zipper end tabs: 4 × 5 cm (2 pcs)
Step 1:Measure & Plan the Opening (Standard or Recessed?)
Decide your closure style early. Standard top-edge installs directly along the rim; recessed drops the zipper 1.5–2.5 cm below the rim for a sleeker look. Measure the finished mouth width and select a zipper 1–1.5 cm shorter than the clear opening to prevent wavy edges.
Pro notes:
- Add 4–6 mm seam allowance per side to any zipper panel pieces.
- For leather/PU, mark with silver pen; avoid pins—use clips or low-tack tape.
Step 2:Stabilize the Top Edge
Apply interfacing/facing where the zipper sits. This prevents tunneling and keeps the teeth straight.
- Canvas: Fuse woven interfacing (150–200 GSM) to the wrong side, 3–4 cm deep along the rim.
- Nylon: Use lighter fusible (100–150 GSM) or a 10 mm seam-stabilizing tape.
- Leather/PU: Use non-fusible twill tape or a thin skived strip cemented to the rim.
Target tolerance: edge straightness within ±2 mm across the full length.
Step 3:Prepare the Zipper (End Tabs & Centering)
If your zipper is longer than needed, bar-tack a new stop, trim, and add end tabs so metal stops don’t collide with seams.
- Fold tabs RST (right sides together), stitch short sides, turn, and sleeve them onto the zipper ends.
- Press or finger-press; baste at 2.5 mm seam to lock position.
Why it matters: end tabs give clean corners, reduce bulk, and avoid broken needles on metal stops.
Step 4:Align & Baste the Zipper
Lay the zipper face down onto the right side of the tote rim (standard) or onto a facing strip (recessed). Check that the slider sits 2–3 mm back from the side seam lines.
- Baste by hand (long stitches) or machine-baste at 4–5 mm stitch length.
- For leather/TPU, use double-sided seam tape—no pins.
Tip: Start sewing with the slider lowered out of the way; halfway through, needle down, lift foot, move slider past the foot, continue for a straight channel.
Step 5:Stitch with a Zipper Foot (Both Sides)
Switch to a zipper foot. Stitch the first side 3–4 mm from the teeth, maintaining even distance. Repeat for the opposite side.
- Canvas/nylon: 2.8–3.0 mm stitch length; backstitch 6–8 stitches at both ends.
- Leather/PU: 3.2–3.5 mm to avoid perforation; minimal backstitch—prefer bar-tacks.
Quality target: no ripples; seam-to-teeth parallelism within ±1 mm.
Step 6:Add the Lining & Enclose the Tape
With zipper attached to the outer, place lining RST aligning to the same rim, sandwiching the zipper tape. Stitch along the previous seam line to enclose the tape. Turn lining inside and press (finger-press for leather/PU).
Result: a clean interior with no exposed tape edges and a glide that won’t snag cosmetics or electronics.
Step 7: Reinforce Ends & Topstitch
Secure both ends with bar-tacks (3–4 mm width, short zig-zag) or tight backstitches. Then topstitch along the outer side 2.5–3.5 mm from the seam to lock the lining away from the teeth and give a professional, crisp edge.
- Use edge guide or magnetic seam guide for straightness.
- Match thread on canvas; contrast thread on leather for a premium look.
Step 8: Close Side Seams & Box the Corners
With zipper open halfway (so you can turn the bag later), stitch side seams through outer and lining as your pattern requires. If boxing corners, mark squares (typically 4–6 cm), cut, pinch, and stitch; keep zipper ends free of corner stress.
Check: zipper slider moves smoothly past side seams without distortion.
Recessed Zipper Method
Build Zipper Panel
Sew the zipper between two facing strips (e.g., 40 × 5 cm each), RST on both sides of the tape. Turn and topstitch both sides. You now have a neat zipper bridge.
Attach Panel to Tote
Drop this bridge 1.5–2.5 cm below the tote rim; stitch panel to the lining or to an inner facing. The outer rim remains clean; the zipper is invisible from front view.
Advantages & Use Cases
- Sleek, minimalist retail look
- Keeps the mouth tidy on soft fabrics
- Great for business/leather totes where a clean top edge sells the premium feel
Exposed Zipper Method
Show the Teeth
Top-apply a metal zipper so the teeth are fully visible. Use a narrow tape and align perfectly straight. Edge-stitch twice for symmetry.
When to Use
- Leather or waxed-canvas totes with luxury hardware
- Fashion lines where the zipper becomes a design feature
- When you want fast access and a bold, linear accent
Waterproof Zipper Build (TPU/Reverse Coil)
Seal Strategy
Use TPU-coated reverse coil. Pair with PU-laminated zipper tape and seam-sealing tape on the lining side. Avoid piercing the tape outside the stitch path; each extra hole reduces the moisture barrier.
Heat & Pressure
For industrial builds, heat-bond the seam tape (manufacturer’s temp curve, typically 120–140 °C) and use a roller to ensure full adhesion. In home sewing, keep stitch line tight and apply cold-seal tape where possible.
Troubleshooting
| Issue | Likely Cause | Quick Fix |
|---|---|---|
| Rippled zipper line | No interfacing; stitch too close to teeth | Add interfacing; sew 3–4 mm from teeth; press |
| Wavy mouth/side pull | Zipper too long; slider parked at seam | Shorten; add end tabs; move slider before stitching |
| Teeth rubbing lining | No topstitch | Topstitch 2.5–3.5 mm from seam |
| Puckering on leather | Stitch too short; no Teflon foot | Lengthen to 3.2–3.5 mm; use Teflon/walking foot |
| Snaggy glide | Skewed tape or tight tunnel | Re-stitch with even spacing; wax metal teeth lightly |
What Are Common Mistakes When Adding a Zipper?
Typical errors include uneven top seams, skipped reinforcement, or incompatible zipper size. Avoid sewing too close to the teeth, misaligned seams, and poor pressing — these affect both function and appearance.
Frequent Problems and Solutions
| Problem | Cause | Solution |
|---|---|---|
| Uneven alignment | Improper pinning | Baste and re-measure before stitching |
| Fabric puckering | No interfacing | Use fusible stabilizer on zipper area |
| Broken needle | Heavy zipper teeth | Use #16–18 needle and slow speed |
| Jagged top edge | Skipped top-stitch | Finish with visible edge stitching |
| Zipper misalignment | Unequal tension | Sew from both ends toward center |
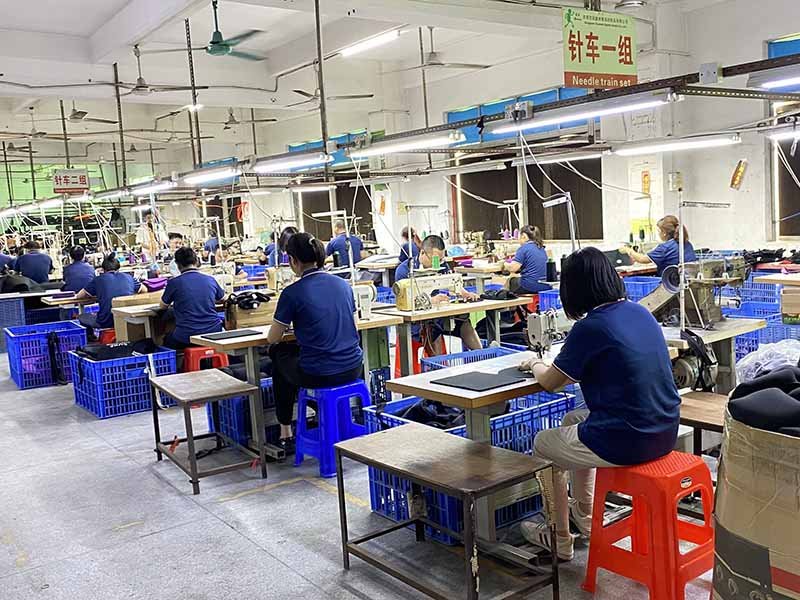
Szoneier trains its sewing teams on tight-tolerance stitching (±2 mm seam deviation) to ensure zipper precision in bulk production — critical for OEM and retail orders.
How to Maintain and Extend the Life of Your Zipper
Keep your zipper clean, lubricated, and aligned. Avoid overstuffing the tote and store it flat or hanging. For metal zippers, apply a thin layer of wax or silicone; for nylon or TPU, simply wipe with a damp cloth.
Cleaning and Lubrication
- Wipe dust or residue with a damp cloth.
- Use beeswax or zipper lubricant on metal versions.
- Avoid harsh cleaners that degrade TPU coating or stitching.
Repairing Loose Teeth or Misalignment
Gently realign using pliers and reseal ends with clear nail polish or seam glue. For broken sliders, replacements can be attached without removing the entire zipper.
Proper Storage
Avoid folding directly over the zipper area. For leather totes, store upright with silica gel packets to maintain material flexibility and prevent corrosion.
Conclusion
Adding a zipper to a tote bag is more than a sewing upgrade — it’s a design evolution. The right zipper not only safeguards belongings but also defines the product’s sophistication and market value. Whether you prefer minimalist hidden closures or bold metal zippers, mastering this detail turns a simple tote into a premium, functional accessory.
For brands and retailers, collaborating with a professional manufacturer ensures every zipper aligns perfectly, functions smoothly, and complements your brand identity.
Partner with Szoneier for Professional Tote Bag Production
manufacturer Categories
- Custom Tote Bags Manufacturer
- custom backpacks Manufacturer
- custom travel bags& Duffle bags manufacturer
- custom makeup bags & toiletry bags manufacturer
- custom cooler bags manufacturer
- custom drawstring bags manufacturer
- custom makeup bags & toiletry bags manufacturer
- custom golf bags manufacturer
- custom fireproof bags manufacturer
- custom dry bags manufacturer
- custom ski bags manufacturer
- custom gym & sports bags manufacturer
- custom laptop bags manufacturer
- custom tactical bags manufacturer
- custom beach bags manufacturer
- custom medical bags manufacturer
- custom camera bags manufacturer
- custom wetsuits manufacturer
- custom leather goods manufacturer
- more personalized products

Can't find the answers?
No worries, please contact us and we will answer all the questions you have during the whole process of bag customization.
Make A Sample First?
If you have your own artwork, logo design files, or just an idea,please provide details about your project requirements, including preferred fabric, color, and customization options,we’re excited to assist you in bringing your bespoke bag designs to life through our sample production process.