Skip to content

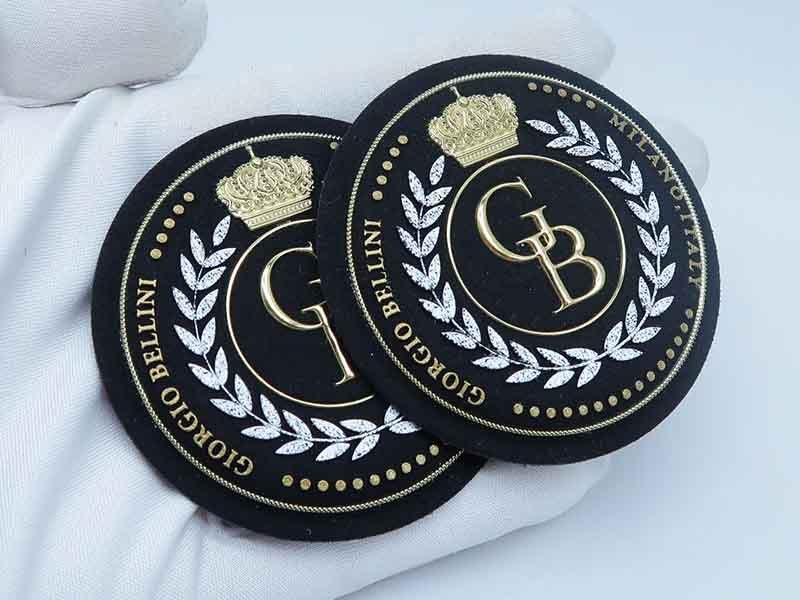
A rubber patch can change the character of a bag more than its size might suggest. A small molded badge on a backpack, cooler bag, gym bag, pet carrier, or tool bag adds depth, color, texture, and a stronger sense of product identity. Yet the process is not as simple as sending a logo file and asking a factory to “make it in rubber.” The patch material, finished dimensions, relief, color divisions, border shape, attachment method, bag fabric, placement, tooling, and production quantity all influence whether the result looks intentional or awkward once it is sewn onto a real product.
A good rubber patch logo should match the bag material, product style, logo complexity, finished size, attachment method, use environment, target cost, and production quantity. PVC is widely used for durable molded branding, while silicone offers a softer feel and different performance characteristics. The safest process is to approve the patch design, physical patch sample, and complete finished bag before bulk production begins.
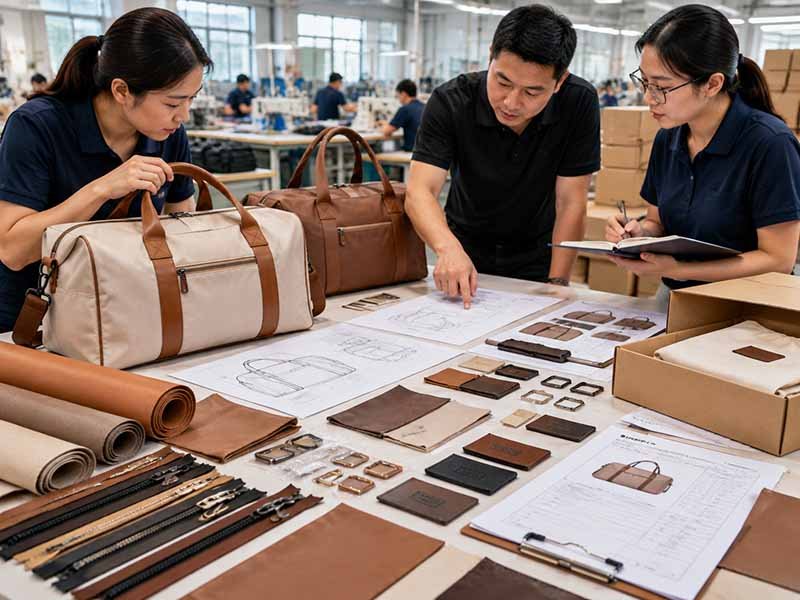
Many logo problems begin long before the sewing line. A 3D mark can look impressive when enlarged on a computer screen, yet the smallest lettering may disappear when the patch is reduced to 45 mm. A thick patch may feel premium when held in the hand but distort a lightweight front panel once attached. Experienced bag development therefore treats the patch as part of the product engineering rather than decoration added at the end. That mindset is what separates a convincing branded bag from a product that simply has a logo attached to it.
What Is a Rubber Patch Logo?

A rubber patch logo is a molded branding component attached to the outside of a bag. The industry term often covers flexible PVC patches as well as silicone patches, even though the materials are technically different. These patches can use flat 2D levels or sculpted 3D relief and are commonly chosen when a product needs stronger texture, clear color separation, weather-friendly performance, and a more dimensional appearance than printing or woven labels.
PVC, Silicone, and Rubber Terminology
The phrase “rubber patch” is used rather loosely in bag manufacturing, which is why material clarification should happen early. Many patches sold as rubber are actually flexible PVC because the finished material has a soft, rubber-like feel. Silicone patches are made from silicone elastomer and generally feel softer and more elastic. The two materials can look similar in product photos, but they do not behave exactly the same during molding, handling, heat exposure, or product use.
For many backpacks, cooler bags, gym bags, sports products, work bags, tactical bags, and children’s products, flexible PVC offers a practical balance of molded detail, color definition, durability, and cost. Silicone is commonly considered when a softer touch, cleaner premium feel, or compatibility with flexible products such as neoprene matters more. Szoneier’s manufacturing reference treats both rubber and silicone patches as distinct logo processes rather than interchangeable names.
A useful RFQ should therefore say more than “rubber logo.” It should indicate the intended bag material, approximate patch dimensions, desired softness, number of colors, whether the artwork should be 2D or 3D, expected quantity, and preferred attachment. When those variables are clear, the factory can recommend a suitable compound instead of simply quoting whichever molded patch is easiest to produce.
2D and 3D Construction
A 2D rubber patch normally uses separate raised and recessed levels with relatively flat surfaces. This construction works particularly well for wordmarks, clean geometric logos, sports emblems, icons, borders, initials, and other artwork where sharp color zones and readable edges matter more than sculpted depth. A 3D patch uses curved or rounded relief, allowing features such as mascots, faces, animals, equipment shapes, mountains, or rounded lettering to have a more dimensional appearance.
More depth does not automatically make a logo more premium. On a patch only 40–60 mm wide, excessive 3D shaping can soften the edges of letters or make small internal details difficult to distinguish. For compact wordmarks, a clean 2D structure often remains more readable. Larger icons and mascots have more physical room for gradual curves, deeper relief, and stronger sculpted features without losing recognition.
Szoneier’s working development reference recommends avoiding extremely fine molded detail. Small text is generally more practical at roughly 4–5 mm high or above, while narrow lines are commonly kept around 0.4–0.5 mm or wider. Complex gradients and very fine color divisions are poor candidates for ordinary molded rubber, and complex 3D artwork normally benefits from simplification. These figures should be treated as project references rather than universal limits because mold technology, compound behavior, patch dimensions, and relief depth can change what is achievable.
Where Rubber Patches Work Best
Rubber patches are especially natural on products where the visual language is functional, sporty, outdoors-oriented, youthful, or technical. Common applications include outdoor backpacks, school backpacks, cooler bags, gym bags, sports duffles, tool bags, tactical bags, pet carriers, children’s bags, motorcycle accessories, and equipment cases. Szoneier’s documented manufacturing guidance identifies polyester, nylon, Oxford, canvas, and neoprene among suitable material directions and lists backpacks, cooler bags, sports bags, pet bags, tactical bags, kids’ bags, and gym bags as typical applications.
The process is less convincing when the patch conflicts with the personality of the finished product. A thick technical-looking badge may feel out of place on an ultra-light foldable tote or a refined luxury leather handbag. Extremely small pouches also provide limited surface area, so a molded badge can dominate the design or create unwanted stiffness. In those cases, woven labels, embroidery, embossing, leather patches, printing, or metal branding may fit the product better.
The important question is therefore not whether rubber patches are “good.” It is whether molded branding supports the intended product. A patch that looks perfect on a 900D outdoor backpack can feel heavy and visually awkward on a 70-gram promotional pouch. Material, scale, surrounding hardware, zipper style, bag structure, and expected retail position should all be considered before the mold is opened.
Which Rubber Patch Is Best for Your Bag?

The best rubber patch is the one that fits the bag’s fabric, use environment, visual style, logo detail, expected order quantity, attachment method, and target price. PVC is commonly selected for rugged outdoor, sports, backpack, cooler, tactical, and work applications. Silicone can make more sense when a softer hand feel or cleaner premium appearance is required. Very thin materials and luxury products may be better served by another logo process.
Match the Patch to the Bag Type
Different bags create very different conditions for external branding. A cooler bag may be used near water, food, ice, sand, or outdoor surfaces. A tool bag can experience heavy friction against floors, shelves, vehicles, and equipment. A gym bag is handled frequently but usually needs a cleaner sports appearance, while a pet carrier may combine scratching, moisture, hair, and repeated cleaning. The logo process should reflect those real conditions instead of being chosen only from a catalog image.
Molded PVC patches are often a good fit for technical and functional products because the visual character naturally complements Oxford fabric, nylon, polyester, reinforced webbing, heavy zippers, buckles, padding, and other functional construction elements. Silicone can fit products that need a softer or more modern feel, especially premium sports accessories, neoprene products, lifestyle collections, children’s products, and some DTC-oriented designs.
Szoneier’s manufacturing files include a documented 1,000-piece cooler backpack project using 900D Oxford, thick foam, PEVA lining, and a rubber patch. The patch was selected not as an isolated decorative item but because its visual style matched the outdoor use of the product. That is a useful way to think about logo selection: the branding should reinforce what the bag is designed to be.
| Bag Type | Common Patch Direction | Main Reason to Consider It |
|---|---|---|
| Outdoor backpack | PVC rubber patch | Strong molded detail and technical appearance |
| Cooler bag | PVC or silicone | Suitable visual style for functional outdoor use |
| Gym bag | PVC or silicone | Sport-oriented tactile branding |
| Tool bag | PVC rubber patch | Works naturally with heavy-duty fabrics |
| Tactical backpack | PVC with hook-and-loop | Allows removable identification |
| Neoprene bag | Silicone often considered | Softer hand feel suits flexible construction |
| Kids backpack | PVC or silicone | Bright colors and shaped logos work well |
| Luxury leather bag | Often another method | Metal, leather, or embossing may fit better |
Match the Patch to the Fabric
Patch material is only half of the decision because the fabric underneath must support the weight, thickness, and attachment of the finished badge. Heavy Oxford, canvas, nylon, and polyester panels generally provide stable surfaces for sewn patches, while thin shell fabrics can ripple or deform around a thick molded piece. The correct evaluation should therefore use the patch attached to the actual production fabric rather than a loose patch inspected on a table.
Oxford fabric in 600D, 900D, or similarly structured constructions typically provides more support than a lightweight lining or thin foldable tote material. Canvas also works naturally because its body and surface texture can carry a molded badge without making the panel feel overloaded. Neoprene requires separate consideration because the substrate compresses and stretches, so the relative stiffness between the patch and the surrounding material becomes more visible when the bag bends.
Waterproof and coated fabrics add another concern. Sewing a patch through a coated panel creates needle holes, which may reduce the water resistance of that specific area. A molded patch itself can resist moisture very well while the attachment point becomes the weaker part of the construction. When water protection is important, patch location, internal reinforcement, seam treatment, or an alternative branding method may need to be considered during sampling.
For lightweight materials, practical solutions may include reducing patch size, reducing thickness, adding a small internal backing layer, moving the badge to a stronger panel, or switching to woven, printed, or heat-applied branding. Choosing a lighter logo method is sometimes better product engineering than forcing a molded patch onto a material that cannot support it cleanly.
Compare Rubber with Other Logo Methods
Rubber patches are only one tool in a broad bag-branding system. Embroidery creates a textile appearance and works naturally on canvas, cotton, polyester, and many lifestyle bags. Woven labels remain thin and can reproduce relatively fine lettering. Leather patches can bring a heritage or outdoor-lifestyle character, while metal plates are often used when cosmetic bags or fashion accessories need a cleaner polished appearance. Screen printing and heat transfer usually make more sense when the project is highly cost-sensitive or requires a larger printed area.
The cost structure also changes by method. Molded rubber typically involves tooling, so its economics improve when the same logo is used across larger quantities or repeat orders. Printing may have lower setup requirements for simpler artwork, while custom metal hardware can carry higher tooling and per-unit costs. A logo process should therefore be compared against the complete product budget rather than judged from the patch price alone.
Szoneier’s logo selection framework considers material, artwork detail, number of colors, MOQ, sample timing, durability, washing performance, cost, brand positioning, and bulk-production stability when matching a branding method to a product. That approach avoids the common mistake of assuming that one process is universally more premium or durable than another.
A 5,000-piece technical backpack program may justify opening a mold because the tactile branding contributes to the product and the tooling cost is spread over a meaningful volume. A 200-piece basic promotional drawstring bag may gain little from the extra complexity. The better question is not “Which logo process is best?” but “Which process creates enough product value to justify its cost, appearance, and manufacturing requirements?”
How Should You Design a Rubber Patch?

A rubber patch should be developed at its actual finished size, with readable text, controlled line widths, clear color boundaries, realistic relief, and enough space between small details. Compact wordmarks often perform better as clean 2D designs, while larger mascots and icons can support stronger 3D depth. Size, thickness, colors, border shape, attachment area, and placement should all be confirmed before tooling begins.
Size, Proportion, and Detail
A logo that looks large and perfectly readable on a computer monitor can become difficult to manufacture once reduced to the size used on a real bag. For this reason, artwork should be reviewed at 1:1 scale before mold development. Printing the logo at final size and placing it directly on the reference product is one of the simplest ways to judge whether the badge is visually balanced.
Imagine a backpack front panel approximately 300 mm wide. A 40 mm logo can appear understated, a 60–80 mm logo may become a clear branding feature, and a 120 mm badge can begin to dominate the entire front. Those dimensions are not universal rules, but they show why patch scale should be judged relative to the available panel rather than in isolation.
Thickness has a similar effect. Deeper molded relief can make a badge feel more substantial but also increases stiffness and projection from the surface. A thick patch that works well on 900D Oxford may create visible distortion on a lightweight polyester shell. A large patch may also interfere with curved pockets or flexible panels even when the dimensions look attractive in a flat drawing.
Szoneier’s current production reference provides practical starting points of approximately 4–5 mm minimum height for small lettering and 0.4–0.5 mm or wider for fine molded lines. It also notes that very complex gradients, extremely fine divisions, and over-detailed 3D artwork should usually be simplified. These are development guidelines rather than fixed industry laws, so actual capability should be confirmed against the artwork and selected patch process.
| Design Item | Practical Development Reference |
|---|---|
| Small text | Around 4–5 mm high or larger |
| Fine molded line | Around 0.4–0.5 mm or wider |
| Color count | 1–4 colors is relatively straightforward |
| Complex gradients | Normally better simplified |
| 3D details | Need more physical space than 2D |
| Overall size | Review at actual 1:1 scale |
| Thickness | Match the fabric and product structure |
Simplify Fine Artwork
Brand artwork developed for websites, packaging, catalogs, or large printed graphics often includes much more detail than a 40–70 mm molded patch can reproduce effectively. Tiny taglines, narrow gaps between letters, fine outlines, small registered symbols, complicated shadows, transparency, and closely separated color blocks may look excellent on screen but become crowded once converted into physical relief.
Trying to preserve every small detail can reduce the overall quality of the logo. Consider a mark containing a recognizable icon, five color zones, and a tagline only 3 mm high at final patch size. The icon may mold perfectly, but the tagline can become difficult to read and the tiny color divisions can make the badge look messy. Removing the smallest secondary elements can create a cleaner, more premium result even though the design is technically simpler.
This type of simplification is normal in manufacturing. A brand can keep the complete logo on packaging, hangtags, woven labels, or interior printing while using a simplified symbol on the external molded patch. The product then preserves full brand communication without forcing every piece of information into one small decorative component.
Successful molded logos usually share several characteristics: recognizable silhouette, enough space between separate elements, clear color boundaries, and details that remain visible from normal viewing distance. Most customers do not inspect a backpack logo from 50 mm away. They see it on a shelf, in a product photo, or when someone is wearing the bag. The patch should be designed for that real viewing environment.
Color and 3D Relief
Color control needs more attention than simply sending RGB or CMYK values. Screen colors vary from one device to another, and the same nominal color may look different when printed on paper, mixed into flexible PVC, or produced in silicone. Pantone references are therefore useful for communicating the intended target, but a physical sample remains the best way to confirm whether the molded color feels right beside the actual bag fabric.
Color count also affects manufacturing complexity. One-, two-, and three-to-four-color patches are common and relatively straightforward, while additional color zones can increase labor, tooling complexity, and the chance of narrow divisions becoming unclear. Szoneier’s manufacturing guidance notes that additional colors generally increase cost and that molded rubber is not the natural choice for photographic gradients or highly intricate image-based artwork.
Relief should be documented with the same level of clarity. Instructions such as “make it more 3D” are open to interpretation. A stronger specification identifies what should be raised, recessed, rounded, flat, matte, or textured. The background might remain at the base level, the main icon might rise above it, the border may sit at another level, and small facial or graphic details may be recessed rather than raised.
Complex 3D logos should ideally be reviewed from several angles before tooling. A front-view rendering may look excellent while the side profile reveals that the badge is unnecessarily thick or that the curved relief hides small text. Changes are much less expensive during digital review than after a physical mold has been completed.
How Is a Rubber Patch Attached to a Bag?

Sewing is normally the most reliable permanent attachment method for a rubber patch on a fabric bag. Hook-and-loop works well when removable identification is part of the product concept, especially on tactical or modular bags. Adhesive and heat-applied methods require much more material-specific testing because fabric texture, coatings, flexibility, temperature, patch compound, and real-life use can all affect attachment performance.
Sew-On Construction
For backpacks, cooler bags, tool bags, gym bags, sports bags, pet products, and similar sewn items, a permanent stitched attachment is usually the first option to evaluate. A good patch can be designed with a thinner outer border, defined sewing channel, or suitable stitch area so the sewing needle does not pass through important raised logo features.
Placement should be specified with measurable reference points rather than left to visual judgment. A tech pack that says “center the patch on the front pocket” can still produce visible variation across hundreds or thousands of bags. A more useful instruction gives the patch dimensions and defines its position from fixed finished seams, zipper lines, or panel edges.
For example, a project might specify a 65 × 40 mm patch with its center positioned 95 mm below a top seam and 150 mm from the finished side edge. The exact numbers are project-specific, but this type of instruction gives operators and inspectors a common standard.
The sewing sequence also deserves attention. In many constructions, attaching the patch to the front panel before pockets, lining, foam, and other layers are assembled makes the operation cleaner and easier to control. On other products, reinforcement may first need to be added behind the logo area. The correct sequence should be confirmed during sample development.
Szoneier identifies loose attachment and inaccurate sewing position among common rubber-patch failure points. The lesson is straightforward: a high-quality molded patch does not solve poor attachment engineering. Patch design, backing, fabric, stitch position, and sewing sequence all influence the finished result.
Hook-and-Loop Options
Hook-and-loop attachment is useful when the patch is intended to be removable, replaceable, collectible, or interchangeable. Tactical backpacks are the most familiar example, but the same construction can be useful for equipment bags, staff identification, emergency kits, sports teams, outdoor organization products, event programs, and seasonal branding.
The loop panel becomes a permanent visible feature of the bag, so its dimensions, shape, color, stitch line, and placement deserve the same attention as the patch itself. If a 70 × 45 mm removable badge is used, the loop area should be sized so the patch holds securely without leaving an unattractive border around the outside. The exact relationship depends on the desired appearance and hook-and-loop system.
Frequency of removal matters as well. A patch that is changed once per season creates a different level of stress from a tactical identifier that is removed several times each day. Repeated pulling places load not only on the hook-and-loop surface but also on the stitches attaching the loop panel to the bag.
Removable patches can also create commercial opportunities. Brands can release seasonal logos, event badges, regional editions, team identifiers, or collectible artwork without redesigning the main bag. In that case, the attachment method becomes part of the product concept and can extend the life of the base product rather than simply solving a manufacturing problem.
Adhesive, Heat, and Placement Risks
Adhesive attachment requires caution on textile products because woven surfaces provide less continuous contact area than smooth plastic or metal. The patch may appear secure when the sample is first produced, but repeated bending, heat, dust, moisture, and friction can gradually weaken the bond. An office test performed over one or two days is therefore not enough to prove that an adhesive patch will remain secure during normal bag use.
Heat-applied systems must also be treated as process-specific. Not every flexible PVC or silicone patch is designed for standard heat-press application, and excessive temperature can damage the patch, alter its surface, affect coated fabric, or create unwanted shine and deformation. Temperature, pressure, dwell time, patch backing, fabric coating, and material formulation should all be confirmed with the patch supplier before production.
Placement can create another group of failures even when the attachment itself is strong. Large molded badges should generally be kept away from fold lines, zipper teeth, heavily curved seams, unsupported thin fabric, frequently flexed corners, and high-friction bottom areas unless testing shows the construction can tolerate them.
A front panel that looks clear from the outside may also hide interior pockets, reinforcement pieces, foam, or lining seams. Patch location should therefore be reviewed on the pattern and construction drawing rather than chosen from the exterior appearance alone. The best position is one where the logo looks balanced and the sewing operation can be performed consistently without weakening another part of the product.
How Durable Are Rubber Patch Logos?
Rubber patch logos are commonly used where moisture resistance, abrasion performance, repeated handling, and tactile branding matter, but the patch itself is only one part of durability. Compound quality, pigment, thickness, stitching, fabric, placement, UV exposure, temperature, washing, and friction all influence long-term performance. The correct assessment should therefore test the complete patch-on-bag construction instead of relying only on a statement that the patch material is durable.
Water, Abrasion, and Daily Use
Molded PVC and silicone do not absorb water in the same way as paper labels or untreated textile decoration, which makes these materials attractive for cooler bags, sports products, outdoor backpacks, gym bags, pet products, and work equipment. However, saying that the patch is water-resistant does not automatically mean the finished bag has the same level of water protection.
A sew-on logo requires needle penetration through the bag panel. If the underlying fabric uses a PU, PVC, TPU, or other water-resistant coating, those needle holes can become the more important consideration. A patch can remain unaffected by rain while the surrounding seam or fabric becomes the potential path for moisture.
Abrasion performance also depends heavily on location. A front logo on a commuter backpack may mainly rub against clothing, chairs, and vehicle seats. A tool bag can repeatedly scrape across concrete floors, shelving, truck beds, and equipment. Raised details experience more direct contact than recessed areas, so a complex 3D surface can show wear differently from a flatter 2D badge.
Szoneier’s rubber-patch production guidance identifies several realistic long-term risks, including surface wear from repeated friction, poor stitching security, cracking in low-quality material, color variation between production batches, odor, and the need to evaluate high-frequency machine washing separately. These are more meaningful considerations than a vague claim that the material is simply “waterproof and durable.”
Practical Quality Control
Quality control is most efficient when defects are identified before the patch is sewn onto the finished bag. Incoming molded patches can be compared with the approved master for size, shape, color, relief, edge quality, surface finish, flexibility, odor, and backing condition. A problem discovered at this stage may require rejecting loose components, while the same problem discovered after final assembly may require opening finished bags, removing stitching, replacing patches, and repairing fabric.
After attachment, inspection should focus on placement, stitching, panel distortion, loose threads, patch movement, edge condition, and visual alignment. Where brand color is important, production lots should also be compared against the approved physical sample rather than only an electronic color value.
| QC Item | Practical Check |
|---|---|
| Patch dimensions | Measure against approved specification |
| Shape and relief | Compare with approved physical master |
| Color | Compare with signed color reference |
| Logo orientation | Confirm against artwork |
| Placement | Measure from fixed finished seams |
| Stitching | Check loose, skipped, or uneven stitches |
| Panel appearance | No severe puckering or distortion |
| Patch security | Flex and handle the finished panel |
| Surface quality | No obvious dirt, cracks, or molding defects |
| Bulk consistency | Compare random units with sealed sample |
The inspection standard should be agreed for the specific product because acceptable tolerances vary with logo size, bag structure, material, and target market. Szoneier’s broader quality-control system includes material inspection, accessory inspection, pre-production sample confirmation, cutting inspection, sewing-process inspection, semi-finished inspection, final-product inspection, and packaging inspection. That multi-stage approach is important because a good patch cannot compensate for poor sewing, and good sewing cannot correct the wrong patch material or incorrect artwork.
Sample-to-Bulk Consistency
A physical approval sample becomes valuable only when the details behind it are converted into production specifications. Writing “sample approved” in an email confirms the overall appearance but does not tell a production team exactly which details must remain unchanged. If the logo becomes slightly larger, the patch color shifts, the stitch position moves, or the relief changes, different people may still believe they are following the same approved design.
A better production record keeps the artwork version, patch material, physical patch master, Pantone references, dimensions, relief type, attachment method, thread color, placement measurements, complete approved bag, and packaging requirements together. This creates a traceable standard that production and inspection teams can follow.
A practical patch specification might define a finished size of 62 × 38 mm, a three-color 2D construction, a perimeter sew-on attachment, an approved placement measured from a zipper seam, and a specific sealed sample reference. The exact tolerance should be agreed with the factory rather than assumed, but the principle is to turn subjective approval into measurable information.
Szoneier’s documented sampling process includes material confirmation, accessory confirmation, logo-process matching, pattern development, sample sewing, internal review, photo and video confirmation, customer feedback, revisions, final approval, sealed-sample control, pre-production sampling, and production-document archiving. This type of process helps reduce the common gap between a strong development sample and inconsistent repeat production.
Bulk variation can come from different patch batches, pigment mixing, mold wear, separate sewing lines, new operators, or changes introduced during repeat orders. Retaining the physical approval sample and production records is therefore particularly important when a brand expects to reorder the same product six or twelve months later.
How Do Buyers Order Rubber Patch Logos?
A rubber patch project should begin with the bag reference, logo artwork, target patch size, colors, material preference, 2D or 3D effect, attachment method, finished quantity, packaging, and target market. Because molded patches normally involve tooling, the commercial discussion should also cover mold cost, sampling, patch quantity, complete bag MOQ, mold storage, ownership, reorder policy, and final approval before bulk production is released.
Cost, Tooling, and MOQ
Rubber patch pricing usually has a development component and a unit-production component. Tooling is influenced by overall dimensions, shape, thickness, number of colors, 2D or 3D structure, complexity of relief, small artwork detail, and any special backing or attachment requirement. A simple rectangular two-color badge and a large multi-level mascot do not have the same tooling cost even when both are described as rubber patches.
Unit economics become more favorable as the production quantity rises because mold and setup costs are distributed across more patches. Szoneier’s manufacturing reference notes that 300–500 pieces is often a more practical range for custom rubber patches, while smaller quantities may still be evaluated but can carry a higher effective unit and tooling cost.
The patch quantity and finished bag quantity do not always have to be identical. A project may use 200 finished bags while producing 300 patches, leaving spare pieces for sample replacement, QC reserves, photography, or a later reorder. This arrangement can sometimes be more practical than forcing the patch manufacturer to produce exactly the first bag quantity.
Szoneier’s general custom-bag MOQ can start from 200 pieces for selected projects, with the actual quantity depending on fabric availability, logo process, accessories, colors, packaging, product structure, and whether special tooling or testing is required. For this reason, patch MOQ and final product MOQ should be discussed as two related but separate parts of the quotation.
When comparing offers, check what is actually included. One factory may quote a low patch unit cost but list mold development, sampling, attachment, and freight separately. Another may combine several of those costs. A useful comparison therefore separates mold fee, patch sample cost, patch unit cost, sewing cost, complete bag sample, packaging, shipping, and any future tooling reuse.
RFQ Information
Accurate quotations depend on accurate input. A supplier can estimate far more efficiently when the project information arrives together rather than through a long series of short messages. At minimum, send a clear bag reference, approximate product dimensions, main material direction, logo file, patch size, quantity, number of colorways, desired 2D or 3D appearance, and destination market.
A complete tech pack can provide even more useful control by defining bag dimensions, fabric, lining, foam, reinforcement, zipper specifications, logo dimensions, Pantone colors, placement coordinates, attachment method, packaging, quantity, and target delivery timing. Vector artwork in AI, EPS, SVG, or editable PDF format is preferable because the mold engineer can inspect curves, spacing, text size, and color divisions precisely.
Not every project begins with complete documentation. A reference bag, clear photos, rough dimensions, logo artwork, and target quantity are often enough to start a development discussion. The important point is to give the factory enough context to understand what the patch will be attached to and what the finished product needs to achieve.
For complex logos, manufacturability should be reviewed before tooling is approved. A responsible development team may recommend increasing a small wordmark, widening narrow lines, simplifying a gradient, reducing the number of colors, moving the logo to a stronger panel, or changing the logo method entirely. Those recommendations are valuable because the least expensive molded patch is not useful if the artwork becomes unreadable on the finished product.
Sampling and Mold Approval
Sampling is especially important when the molded logo is a visible part of the product identity. In many projects, it makes sense to approve the patch itself before judging it on the complete bag. The loose patch can be checked for material, dimensions, thickness, colors, relief, lettering, shape, flexibility, edge condition, and surface quality without other product features distracting from the logo.
The next approval should be the patch installed on the actual bag. This step reveals issues the loose patch cannot show, including whether the badge is visually too large, too thick, poorly positioned, difficult to stitch, or causing the surrounding fabric to pucker. It also lets the customer judge the relationship between patch color and bag fabric under real lighting.
Szoneier’s manufacturing reference gives approximately 7–10 working days for ordinary rubber-patch sampling and indicates that more complex 3D patches can require around 10–15 working days, depending on design and process. The complete bag sample may require additional time because fabric, hardware, sewing, structure, lining, and packaging also need to be prepared.
A change made after mold approval can affect both cost and timing. Adjusting the outer dimensions, changing the logo shape, increasing text size, or modifying the 3D structure may require new tooling. For that reason, digital artwork review and 1:1 size checking should happen before the factory starts the mold.
Reorders and Mold Control
Mold management becomes increasingly important when the logo is expected to appear across multiple products or repeat production runs. Before the first tooling payment, the commercial agreement should clarify who owns the mold, where it is stored, how long it will be retained, whether there is any storage fee, whether it can be reused for repeat orders, and what happens if it is damaged or lost.
Not every design change requires the same response. Changing only the patch color may sometimes allow the same physical mold to be reused if the geometry remains identical. Changing the overall size, outer shape, lettering, icon proportions, or 3D relief usually affects the tooling and may require a new mold. These conditions should be confirmed with the actual patch producer instead of assumed.
Brands planning several bag colorways can often use the same logo geometry across the range. A 60 mm molded badge might appear in one color combination on a black backpack and another on an olive outdoor pack while retaining the same dimensions and relief. This can simplify development and improve visual consistency across the collection.
A useful long-term record should include the mold reference number, artwork revision, patch dimensions, material type, approved colors, approval date, physical reference sample, last production batch, and any attachment instructions. These details can feel administrative during the first order, but they become extremely valuable when a repeat order arrives months later and the original development team needs to reproduce exactly the same logo.
Conclusion
A rubber patch can be an excellent branding choice for backpacks, cooler bags, sports bags, gym bags, tool bags, tactical products, pet carriers, children’s bags, and many other functional soft goods, but the best results come from treating it as part of the whole product rather than an isolated decoration. Patch material, artwork scale, 2D or 3D relief, color count, thickness, fabric compatibility, attachment, placement, tooling, quality control, and reorder planning all influence the final result.
The most important decisions often happen before any production material reaches the sewing line. A simplified 2D PVC logo on a reinforced Oxford panel may deliver a stronger commercial result than a highly detailed 3D design that is too small to read. A soft silicone badge may suit a premium neoprene sports bag, while a woven or leather label can be the better answer for a lightweight or more refined product. Choosing the correct method means balancing appearance, use, manufacturability, cost, and repeatability rather than selecting a process because it looks attractive in isolation.
Szoneier supports multiple branding methods for custom bags and soft goods, including rubber patches, silicone patches, woven labels, embroidery, leather patches, printing, metal plates, debossing, reflective branding, jacquard webbing, and custom logo components. The practical value is not simply having many choices, but being able to review the logo together with the material, bag structure, target quantity, sample requirements, production stability, and expected use before committing the project to bulk manufacturing.
FAQ
Are Rubber Patches Good for Backpacks?
Yes. Rubber patches are particularly well suited to many backpacks because common backpack materials such as polyester, nylon, Oxford fabric, canvas, and some neoprene constructions provide a stable base for molded branding. They work especially naturally on outdoor, sports, school, cooler, tactical, and technical backpacks. The patch still needs to be matched to fabric weight, placement, thickness, and attachment so that the front panel remains flat and the logo does not interfere with pockets, zippers, or waterproof areas.
Is a PVC Patch the Same as a Rubber Patch?
Not technically. PVC is polyvinyl chloride, while true rubber materials have a different chemical structure. However, the bag and patch industries commonly use terms such as “rubber patch,” “PVC rubber patch,” and “soft PVC patch” for flexible molded PVC badges because their finished texture feels rubber-like. When requesting a quotation, it is better to confirm whether the proposed material is flexible PVC, silicone, or another elastomer so that appearance, softness, heat performance, cost, and production method are clearly understood.
Is Silicone Better Than PVC for Bag Logos?
Silicone is not automatically better; it is better for certain product requirements. Silicone generally offers a softer and more elastic feel and can suit premium sports, neoprene, children’s, pet, or lifestyle applications. Flexible PVC is widely used when clear molded definition, technical styling, durability, and practical cost are priorities. Silicone patches usually sit at a somewhat higher cost level, so the choice should consider the bag material, desired feel, visual positioning, temperature requirements, quantity, and expected retail price rather than material reputation alone.
How Small Can a Rubber Patch Logo Be?
The overall patch can be relatively small, but readability is usually limited by the smallest text, lines, and gaps inside the artwork rather than the outside dimensions. As a practical development reference, Szoneier commonly evaluates small molded lettering around 4–5 mm high or larger and fine lines around 0.4–0.5 mm or wider. Complex 3D relief usually needs more space than simple 2D artwork, so very small logos often benefit from simplified icons or a different branding method.
Do Rubber Patch Logos Need a Mold?
Custom molded rubber, flexible PVC, and silicone patches normally require tooling because the mold creates the final outer shape, raised and recessed areas, lettering, and surface detail. The mold cost depends on factors such as dimensions, 2D or 3D structure, thickness, number of colors, logo complexity, and special shapes. If the logo geometry remains unchanged, the mold may be reusable for repeat production, but the storage, ownership, and reuse policy should be confirmed before the first order.
Can Rubber Patches Be Sewn onto Waterproof Bags?
They can be sewn onto many coated or water-resistant fabrics, but the sewing itself creates needle holes through the panel. This means a water-resistant patch does not automatically preserve the original waterproof performance of the bag. For products where water protection is an important claim, the patch location, backing, seam treatment, internal construction, and testing should be reviewed during development. In some cases, another branding position or attachment process may provide a better balance between visual branding and water resistance.
What Should Be Approved Before Bulk Production?
The safest approval covers both the molded patch and the complete finished bag. The final standard should define patch material, dimensions, thickness, shape, colors, 2D or 3D relief, logo detail, attachment, thread color where applicable, placement measurements, and the approved physical reference. The complete bag sample should then confirm that the patch does not distort the panel, interfere with other components, or look out of proportion. Keeping a sealed sample and production record also makes repeat orders easier to control.