Skip to content

A custom bag can look excellent in factory photos and still create expensive problems after delivery. A zipper may run smoothly when the bag is empty but catch the lining when it is filled. A shoulder strap can look straight on a table yet twist when carried. A carton may contain perfectly manufactured products but carry the wrong SKU label, creating receiving problems at a retail warehouse or fulfillment center. This is why pre-shipment inspection should never be reduced to a quick visual check of a few finished pieces. It is the final opportunity to compare the actual production lot with what was approved before the goods move beyond the point where correction is relatively easy.
Custom bags should be inspected before shipment against an approved sample, current specifications, material requirements, measurement tolerances, artwork, functional expectations, packaging instructions, label files, and an agreed defect standard. A practical inspection checks quantity, materials, dimensions, stitching, seams, zippers, hardware, handles, straps, logos, packaging, barcodes, cartons, and shipping information, then uses an agreed sampling plan to decide whether the lot can be released, reworked, reinspected, or held.
The strongest inspection process starts long before the inspector opens the first carton. It begins when the sample is approved and the specification is frozen. If those standards are vague, the final inspection becomes an argument about opinion. If they are clear, measurable, and shared by everyone involved, the inspection becomes a straightforward comparison between what was ordered and what was actually produced. For brands placing hundreds or thousands of custom bags, that difference can determine whether a shipment arrives ready to sell or arrives with a problem that must be fixed thousands of kilometers away.
What Should Be Ready Before a Bag Inspection?

A useful bag inspection begins with an agreed reference standard. Before the inspector checks finished goods, the approved sample, latest technical specifications, measurement tolerances, material information, artwork, packaging requirements, purchase order, and SKU allocation should all be available. Without these references, inspection becomes subjective, especially when teams disagree about dimensions, colors, logo position, workmanship, or whether a production variation is acceptable.
Approved Sample and Specifications
The approved sample is usually the most practical physical benchmark because it shows how the final bag is expected to look, feel, and function. It helps the inspector understand overall shape, material appearance, lining, zipper style, hardware finish, strap construction, logo treatment, and general workmanship. However, a physical sample should not stand alone. Handmade development samples can contain small variations that were accepted for sampling purposes but were never intended to become the permanent production tolerance for every future order.
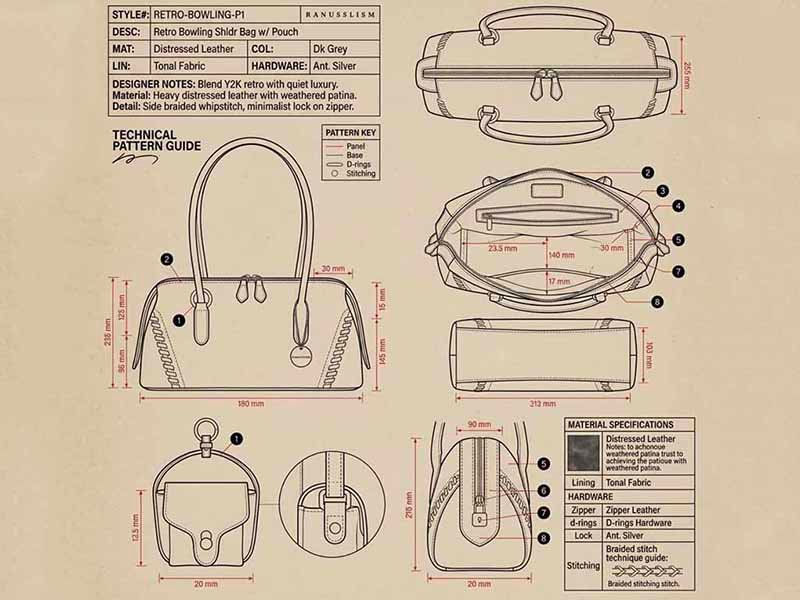
The strongest approach is to freeze the approved sample together with a written specification. The document should define major measurements such as overall width, height, depth, handle drop, shoulder strap length, zipper opening, pocket dimensions, and logo position. It should also identify important materials such as outer fabric, lining, webbing, foam, reinforcement board, zipper type, hardware finish, thread, labels, and packaging materials. When these details are written clearly, the inspector can compare actual production against measurable requirements rather than personal preference.
Tolerance should be selected according to product structure rather than copied from an unrelated style. A soft duffle bag naturally behaves differently from a small structured cosmetic case, and a padded backpack can measure differently depending on whether it is flattened, stuffed, or suspended. Logo placement may also need tighter control than the overall body because a few millimeters of movement can be visually obvious even when the flexible body dimensions remain acceptable.
For repeat orders, the previous production sample should not automatically become the current standard. Materials, colors, trims, artwork, packaging, or dimensions may have changed between seasons. The most recent approved version should be clearly identified before the final inspection starts so the inspector is not comparing new production against an outdated sample.
Inspection Documents
A well-prepared inspection file should allow the inspector to answer three questions without contacting several departments: what was ordered, what was approved, and how much variation is acceptable. The more fragmented the reference information is, the more likely it becomes that a correct detail is rejected or an incorrect detail passes unnoticed.
| Reference | What It Controls | Risk If Missing |
|---|---|---|
| Approved sample | Overall construction and appearance | Subjective quality decisions |
| Tech pack or specification | Dimensions, structure, and details | Incorrect measurements |
| BOM | Fabrics, trims, and hardware | Material substitution |
| Artwork file | Logo size, color, and position | Branding errors |
| Packing specification | Individual pack and carton method | Packaging inconsistency |
| Purchase order | Quantity and commercial details | Quantity mismatch |
| SKU matrix | Color, size, style allocation | Mixed SKUs |
| Revision record | Latest approved changes | Old version used in production |
Revision control is particularly important in custom bag development because many important changes happen during sampling. A logo may move several millimeters after brand review, a zipper size may change after a functional test, or a metal buckle may be replaced with a lighter plastic version after a freight-cost discussion. If the final inspector receives an earlier drawing, perfectly correct bulk production can appear nonconforming even though the factory followed the latest approval.
A simple version number, approval date, and revision note can prevent this type of confusion. For larger projects with multiple colors or sizes, each SKU should also be tied to the correct artwork, material combination, packaging version, and order quantity. This becomes increasingly important when a single order contains different retail destinations, barcode systems, or channel-specific packaging.
Inspection Timing
Pre-shipment inspection should happen late enough for the goods to represent actual mass production but early enough to leave time for corrective action. Inspecting too early creates a risk that the inspected units do not represent the full production lot. Inspecting after cartons have already been loaded creates the opposite problem: even a genuine quality failure becomes difficult to correct without disrupting the shipment schedule.
For many custom bag orders, a useful final inspection point is when production is complete or almost complete and most products are already individually packed. The inspector should also have access to representative master cartons so carton quantity, packing method, marks, dimensions, and labels can be checked. The exact timing depends on the project, but the inspection should never be scheduled so close to departure that the only practical decision is to ship regardless of the result.
A realistic schedule should allow time for inspection, reporting, factory review, segregation of affected units, rework, internal rechecking, and reinspection when necessary. Retail launches, Amazon replenishment programs, seasonal products, promotional events, and other date-sensitive programs benefit from even more planning because a failed inspection can affect airfreight cost, warehouse appointments, product launch dates, or stock availability.
Szoneier approaches quality control as a sequence rather than a single final event, with checks during materials, production, finished goods, packaging, and outgoing shipment preparation. That structure reduces the chance that the final inspection becomes the first time a major production problem is discovered.
How Do You Inspect Finished Custom Bags?

Finished bag inspection should move systematically through materials, dimensions, workmanship, construction, function, branding, and appearance. The inspector should not judge only whether a bag “looks good.” Zippers need to be operated, straps need to be examined at their attachment points, measurements need to follow defined methods, and branding needs to match approved artwork. The finished bag should be evaluated both visually and in realistic use where appropriate.
Materials and Measurements
Material verification should happen early in the inspection because excellent sewing cannot compensate for an incorrect fabric, lining, foam, webbing, or hardware specification. Compare production with the approved material reference for surface texture, weave, coating, thickness, hand feel, color, and finish. If several material lots were used during production, compare products from different cartons because shade variation may be difficult to notice when only one group of bags is examined.
Color consistency deserves particular attention when multiple components are intended to appear coordinated. Black polyester, black webbing, black zipper tape, and black molded hardware may all come from different suppliers and can show different undertones under natural light. The same issue occurs with navy, beige, gray, olive, and other colors that rely heavily on supplier dye lots. If exact matching matters to the product appearance, the approval standard should define which components must match closely and which can accept normal material variation.
Measurements should follow fixed measurement points and one consistent method. Common bag checkpoints include overall width, height, depth or gusset, base width, zipper opening, handle drop, shoulder strap length, strap adjustment range, pocket width, pocket height, laptop compartment dimensions, and logo position. Flexible products should be laid or supported consistently so measurement results can be compared fairly across the sample.
A useful inspection sheet does not simply state that dimensions are “approximately correct.” It records the nominal measurement, allowed tolerance, and actual result. If the front pocket width is specified as 245 ± 5 mm and the measured result is 233 mm, the inspector can document a clear deviation instead of writing a vague comment such as “pocket slightly small.”
Stitching and Construction
Stitching inspection should focus on both appearance and structural reliability. Loose thread trimming may affect presentation, but seam opening, skipped stitches, incorrect reinforcement, and poor thread tension can affect the actual life of the product. Inspect seam lines for broken threads, skipped stitches, inconsistent tension, puckering, needle damage, open seams, uneven binding, twisted piping, and areas where seam allowance has not been captured correctly.
Load-bearing points deserve much more attention than ordinary decorative seams. Backpack shoulder straps, tote handles, duffle side handles, D-ring tabs, luggage sleeves, compression straps, and removable shoulder-strap anchors experience repeated stress during use. Bartacks, box stitches, reinforcement patches, and folded webbing ends should therefore be checked for both position and construction. A reinforcement stitch can look neat while still missing part of the underlying webbing, which reduces the strength of the attachment.
Symmetry is another useful indicator. Compare left and right shoulder straps, pocket positions, handle locations, front panel alignment, and zipper placement. A bag can technically remain inside individual measurement tolerances while still looking twisted if several small deviations occur in the same direction. This is especially noticeable on structured backpacks, symmetrical totes, laptop bags, and products with centered logos.
The inside of the bag should receive the same attention as the exterior. Internal pockets, lining seams, zipper ends, binding, reinforcement, unfinished thread tails, and hidden fabric marks are commonly overlooked because they are less visible during packing. For many consumers, however, the inside is where problems such as lining tears, snagging zipper tape, or loose internal seams first become obvious.
Zippers, Hardware and Straps
Zippers should be opened and closed across their full operating range. A zipper that moves smoothly for the first few centimeters may still catch the lining around a corner, bind near a thick seam, or separate near the end stop. Check slider movement, zipper tape alignment, teeth or coil condition, puller attachment, end stops, sewing position, and any tendency for lining fabric to enter the slider path.
Hardware should also be operated rather than simply viewed. Buckles need to lock and release correctly, snap hooks should close fully, strap adjusters should hold webbing without slipping, and magnetic snaps should align cleanly. Metal hardware should be checked for visible scratches, plating inconsistency, rough edges, corrosion, incorrect color, and poor orientation. Custom hardware carrying a logo should be compared with the approved artwork because even a small orientation mistake can become highly visible on a branded product.
Straps need both dimensional and functional checks. Compare left and right shoulder straps, adjustment range, handle drop, attachment position, and general alignment. A backpack may appear symmetrical when placed flat but lean noticeably when carried because one strap anchor is positioned differently from the other. Similarly, a removable shoulder strap can meet the specified length yet still perform poorly if the hardware rotates incorrectly or the adjuster slips under load.
For products expected to carry meaningful weight, strength testing should be planned during development rather than left to visual judgment during final inspection. Final QC can confirm that reinforcement details match the approved construction, while more demanding load, pull, fatigue, or seam-strength tests should be agreed earlier when the product or sales channel requires them.
Logos and Appearance
Branding errors can turn otherwise functional products into commercially unusable inventory. The inspector should compare the production logo with approved artwork for size, position, orientation, spelling, color, clarity, and application method. This is especially important on private-label products where the logo is often the most visible difference between a generic factory item and a finished branded product.
Embroidery should be reviewed for thread coverage, outline clarity, density, thread color, distortion, and loose ends. Screen printing should be checked for opacity, registration, cracking, smudging, or unwanted ink marks. Heat transfers need attention around edges, where lifting and bubbling can appear. Rubber patches, woven labels, leather patches, metal plates, embossing, and custom zipper pullers each have their own practical inspection points and should be compared directly with the approved sample.
The overall product should then be checked for cleanliness and presentation. Oil marks, chalk marks, glue residue, scratches, fabric contamination, dust, loose threads, and unusual odor can affect customer perception even when construction is correct. Light-colored bags, leather or PU surfaces, polished metal fittings, and premium retail products are particularly sensitive to visible marks during packing and handling.
The purpose of finished-product inspection is not to demand unrealistic perfection from a sewn product. Fabric, foam, stitching, and hand assembly naturally create some variation. The purpose is to make sure that normal manufacturing variation stays within the quality level the brand approved and does not affect use, appearance, or commercial acceptance.
Which Bag Defects Are Critical, Major, or Minor?

Bag defects should be classified according to their effect on safety, compliance, function, appearance, and saleability. Critical defects create unacceptable safety or compliance risk. Major defects can significantly reduce function or commercial value, while minor defects usually involve limited cosmetic or workmanship variation. Agreeing these categories before inspection prevents small visual issues from being treated the same as failures that could make the product unsafe or unusable.
Defect Severity
Defect classification gives inspection results practical meaning. Without severity categories, a loose thread and a failed load-bearing strap can both appear as one “defect,” even though their impact is completely different. The goal is to distinguish issues that require immediate action from issues that may be acceptable within a defined sampling plan.
| Defect Level | Typical Bag Example | Likely Impact |
|---|---|---|
| Critical | Sharp exposed metal | Possible injury |
| Critical | Prohibited or unsafe component | Compliance risk |
| Major | Broken zipper | Product cannot function normally |
| Major | Open load-bearing seam | Structural failure |
| Major | Wrong material | Product differs from approval |
| Major | Incorrect prominent logo | Product may be unsaleable |
| Major | Strap attachment failure | Serious functional problem |
| Minor | Small loose thread | Limited cosmetic issue |
| Minor | Slight stitch variation in non-critical area | Appearance issue |
| Minor | Small mark in hidden area | Low customer impact |
The same physical issue can be classified differently depending on the product and sales channel. A small scratch on hidden internal hardware may be minor, while a similar scratch across a large polished logo plate on a premium handbag can be commercially major. Visible presentation usually matters more on premium retail products than on basic promotional items, even when the underlying function is identical.
Critical defects are commonly treated with extremely strict acceptance because safety-related problems cannot be balanced against cosmetic tolerance in the same way as ordinary workmanship variation. The exact defect definitions should still be agreed before inspection so that everyone understands how the product will be judged.
Product-Specific Defects
Different bag categories create different quality risks, so one generic checklist cannot fully cover every product. A backpack should place more emphasis on shoulder-strap anchoring, zipper function, laptop compartment dimensions, padding, reinforcement, and load-bearing seams. A cooler bag may require closer attention to lining condition, insulation placement, internal seam integrity, zipper closure, handle construction, and cleanliness.
Cosmetic bags are often more sensitive to zipper smoothness, lining quality, internal cleanliness, logo appearance, and overall finish because customers interact closely with small interior spaces. Tool bags typically need stronger focus on reinforced handles, structural stitching, pocket construction, heavy webbing, and hardware. Pet carriers may require attention to ventilation areas, mesh condition, zipper security, internal attachments, and structural stability.
Instead of giving every checkpoint equal importance, an inspection team can rank risk in a more practical order:
- Safety and compliance.
- Core product function.
- Load-bearing construction.
- Critical dimensions.
- Branding accuracy.
- Visible appearance.
- Packaging and channel requirements.
- Minor cosmetic workmanship.
This hierarchy helps the inspector spend more time on features that could create returns, complaints, compliance concerns, or brand damage rather than treating every cosmetic variation as equally important.
Defect Records
A useful defect record needs enough detail for another person to understand the issue without being present during inspection. Comments such as “bad sewing” or “logo wrong” are too vague to support corrective action. The report should identify the SKU, defect type, severity, location, quantity found, and supporting evidence.
Measurement failures should show the required result, tolerance, and actual result. Functional failures should describe what happened during the test. For example, “zipper failed” is less useful than “main zipper slider catches lining at left corner on 4 of 20 tested units.” That level of information helps the production team identify whether the issue comes from zipper installation, lining allowance, seam thickness, or another process.
Photographs should normally include both a close-up and a wider view. The close-up shows the defect, while the wider image shows where it appears on the bag. Repeated defects should also be tracked by carton, color, production batch, or SKU where practical because clustering can indicate whether the issue is random or systematic.
A strong inspection record usually includes the order number, lot quantity, sample quantity, defect counts, measurement results, functional test findings, packaging observations, photographs, and the inspector’s conclusion. These records are especially useful after rework because the second inspection can focus on whether the original failure pattern was truly corrected.
How Does AQL Work for Custom Bag Inspection?
AQL uses statistical sampling to evaluate a production lot without checking every unit. The order quantity and selected inspection level determine a sample size, while agreed limits for critical, major, and minor defects determine the acceptance or rejection result. AQL should not be interpreted as a simple percentage of defective products that the customer agrees to receive; it is a structured sampling and decision method.
Sampling Basics
AQL is frequently misunderstood because figures such as 2.5 and 4.0 look like simple percentages. In practice, AQL inspection follows a sampling table. The lot size and inspection level lead to a code letter and sample size, while the selected AQL values establish acceptance and rejection numbers for different defect categories.
General Inspection Level II is commonly used as a normal starting point for many consumer-product inspections, although a different level can be selected depending on product risk, previous performance, order value, and customer requirements. Under ISO 2859-1 style sampling logic, the sample quantity increases as the total lot becomes larger, but it does not rise in direct proportion to the full production quantity.
| Production Lot | Typical General Level II Sample Size |
|---|---|
| 91–150 units | 20 |
| 151–280 units | 32 |
| 281–500 units | 50 |
| 501–1,200 units | 80 |
| 1,201–3,200 units | 125 |
| 3,201–10,000 units | 200 |
| 10,001–35,000 units | 315 |
These figures are useful reference points rather than a universal rule for every project. The actual plan should be confirmed according to the agreed inspection standard, product requirements, and contract. Higher-risk products, premium programs, or customers with strict retail standards may require tighter inspection or additional targeted tests.
Random selection is essential. Inspecting the cartons that are easiest to reach is not the same as random sampling. The inspected pieces should represent the available production lot as fairly as possible.
AQL Levels
Common examples seen in general consumer-product inspection include critical defects at zero acceptance, major defects around AQL 2.5, and minor defects around AQL 4.0. These values are often used as reference points, but they should not be treated as mandatory standards for all custom bags.
A premium retail program may use stricter cosmetic expectations. A basic promotional project may tolerate slightly more visual variation while remaining perfectly functional. Products involving safety-sensitive features, specialized functional requirements, or previous quality failures may require different inspection limits or additional tests beyond ordinary AQL workmanship sampling.
The most important point is that acceptance criteria should be agreed before production is finished. Changing the defect standard after the inspector reports the result creates unnecessary conflict. If a logo-placement deviation is considered major, that should be clear before bulk production. If a certain loose thread is considered minor, that should also be understood in advance.
AQL works best when it is paired with a clear defect classification list and realistic product specifications. Statistical sampling cannot resolve disagreement when the factory and the brand do not agree on what counts as a major or minor issue.
Random Sampling
Sampling needs to represent the production lot rather than only one convenient area of the warehouse. For a large order, the inspector should normally draw units from different cartons and, where relevant, different colors, sizes, production batches, or SKU groups.
Suppose a 4,000-piece order contains 2,500 black bags, 1,000 navy bags, 400 gray bags, and only 100 red bags. A purely proportional sample may include very few red units. If the red version is an important retail SKU or uses a different material lot, the customer may reasonably request additional targeted checks even if the overall statistical sample has already been met.
The same principle applies when several production lines are involved. If one line produced a particular color or one material batch was used for part of the order, sampling across those groups can reveal variations that would be missed by looking only at finished cartons in one location.
Good statistical inspection therefore combines randomness with practical knowledge of the production structure. The goal is not simply to reach the required sample number. The goal is to make that sample representative enough to support a useful shipment decision.
AQL or 100% Inspection
AQL inspection is efficient for stable mass production, but it is not automatically the best choice for every project. A more extensive or 100% inspection can be appropriate when the order quantity is small, the unit value is high, the previous inspection failed, every item carries unique information, or one specific defect would make the product commercially unusable.
Branding is a good example. A factory may use AQL for overall workmanship but scan 100% of barcodes because one wrong code can cause warehouse problems. A high-risk zipper may receive additional functional checks. A serialized product may require every label to be verified even though sewing quality is inspected by sampling.
A stronger inspection plan can therefore combine several methods:
- AQL sampling for general workmanship.
- 100% barcode or SKU verification.
- Defined measurement checks.
- Larger-sample functional checks.
- Laboratory testing for material performance.
- Additional inspection of high-risk features.
Even 100% inspection does not guarantee zero defects. Human inspectors can become fatigued, and certain material or structural properties require proper testing equipment rather than visual examination. The best method is the one that controls the actual commercial and functional risk efficiently.
How Do You Inspect Packaging and Shipping Details?

Packaging inspection should verify individual packs, retail presentation, barcodes, SKU labels, carton quantity, carton marks, carton dimensions, weight, and shipment allocation. A perfectly manufactured bag can still become commercially unusable if the wrong label, mixed SKU, or incorrect carton configuration prevents normal warehouse receiving. Product quality and shipment preparation should therefore be inspected as one connected process.
Individual Packaging
The inspection should continue after the product itself has passed. Depending on the project, individual packaging may include polybags, dust bags, retail boxes, gift boxes, tissue, stuffing, protective foam, paper wraps, hangtags, care cards, instruction cards, warning labels, and promotional inserts.
Check whether the packaging matches the approved version and whether it protects the product adequately during transport. Structured bags should not be compressed so tightly that they develop permanent creases or distortion. Metal fittings may need protective film or wrapping to prevent scratches. Light-colored materials often require better isolation from dirty cartons, printing ink, or metal components.
Packaging condition also matters. Torn polybags, crushed retail boxes, wrinkled sleeves, dusty dust bags, and damaged gift packaging can affect customer experience even when the bag itself is correct. For direct-to-consumer brands, this can directly affect unboxing quality and reviews. For wholesale or promotional projects, simpler packaging may be acceptable, but it should still match the agreed specification.
Szoneier’s packaging workflow can include individual packing, hangtags, barcodes, FNSKU labels, carton marks, retail packaging, and shipment preparation according to project requirements. The practical value is not the presence of many packaging options, but the ability to keep the selected version consistent across the order.
Barcodes and Labels
Label mistakes are among the easiest problems to prevent before shipment and among the most frustrating problems to correct after goods arrive at a warehouse. The inspector should verify individual product labels, barcodes, SKU information, color and size information, FNSKU labels where required, carton numbers, shipping marks, and destination labels.
Where practical, barcodes should be scanned rather than checked only visually. A label can look perfectly printed while encoding the wrong product number. It can also contain correct data but be attached to the wrong color, size, or SKU. This is why label verification should connect the physical product, SKU record, individual label, and master-carton label.
Label position can also affect usability. A correct barcode folded around a curved surface, covered by another sticker, or placed where packaging seams interfere with scanning may still create receiving problems. Marketplace and retail programs should therefore include placement as part of the packaging specification rather than reviewing only the printed information.
Multi-address shipments require even tighter control because the products can be correct while the logistics allocation is wrong. Destination labels, carton sequences, SKU groups, and shipping instructions should be checked before cartons are moved into the final loading area.
Cartons and Quantity
Master cartons are the final physical link between factory production and the customer’s warehouse. Inspect carton quantity against the packing specification and randomly verify the number of units inside representative cartons. If the standard pack is 40 units per carton, several cartons should be opened and counted rather than assuming that the carton label is correct.
Gross weight is a useful secondary check. A carton that weighs noticeably less than comparable cartons can indicate missing units, while an unusually heavy carton may contain extra units, a different SKU, or additional packaging. Carton dimensions should also be checked when freight cost depends heavily on dimensional weight because small increases in carton size can multiply into significant logistics cost across hundreds of cartons.
Inspect carton strength, sealing, tape adhesion, shipping marks, carton numbering, punctures, crushing, and signs of moisture. Products with metal fittings, structured frames, or easily marked surfaces may also require internal protection to prevent rubbing during long-distance transport.
For multi-SKU programs, verify carton assortment instead of checking only total order quantity. An order can contain the correct number of products overall while still creating warehouse problems if colors, sizes, or styles are packed under the wrong SKU labels.
Shipping Reconciliation
Before the goods are released, production quantity, packed quantity, and shipment-document quantity should be reconciled. If production records show 6,000 units, the packing list shows 5,960, and shipment documents show 6,000, the 40-unit difference should be explained before loading.
Split shipments require additional checks. A program may allocate part of the order to air freight for an urgent launch and the remainder to sea freight, or divide cartons between different regional warehouses. If those cartons are mixed, the total order quantity may still be correct while the logistics plan fails.
The final review should therefore confirm the relationship between physical goods, carton allocation, SKU quantities, shipping marks, and documents. For Amazon FBA, retail distribution, overseas warehouses, and multi-address programs, this step is part of quality control because downstream systems depend on accurate product identification.
A bag is not truly shipment-ready merely because sewing is complete. It is shipment-ready when the product, packaging, labels, cartons, quantity, and shipping information all match the approved order.
What Should You Do If the Shipment Fails Inspection?
A failed inspection should trigger a controlled corrective process rather than an immediate argument about whether the order is good or bad. The defect pattern should be reviewed, affected goods isolated, root cause identified, and the necessary rework or replacement completed. If the original failure suggests a broader production problem, reinspection should confirm that the corrective action worked before the shipment is released.
Rework and Root Cause
The first response to a failed inspection should not be to repair only the defective units found in the sample. A statistical sample represents a larger production lot, so repeated defects may indicate that many uninspected units have the same problem.
If eight sampled bags have the same zipper problem, repairing those eight pieces does not prove that the remaining production is acceptable. The factory should investigate whether the issue came from zipper installation, lining allowance, sewing-machine adjustment, incorrect work instructions, material variation, or another production factor.
Common causes of failure can include incorrect machine settings, operator misunderstanding, mixed components, outdated artwork, wrong cutting templates, inconsistent material batches, incorrect packaging instructions, or weak process inspection. Corrective action should be matched to the cause rather than applied generically.
A useful correction process is:
- Confirm the inspection finding.
- Identify affected SKUs or production batches.
- Isolate suspect goods.
- Investigate root cause.
- Define rework or replacement.
- Complete corrective work.
- Conduct internal verification.
- Arrange reinspection where necessary.
- Obtain shipment-release approval.
Structured quality systems make this process easier because incoming inspection, process inspection, finished-product inspection, and outgoing checks create more information about where the defect may have entered production.
Reinspection
Reinspection is particularly useful when the original failure indicates a systematic problem rather than a few isolated defects. Major defects above the agreed limit, repeated structural failures, widespread packaging errors, mixed labels, or consistent measurement problems normally deserve a second review after corrective action.
The second inspection should not simply repeat the first one without considering the original failure. If zipper function caused the first rejection, the reinspection should pay particular attention to zipper operation. If incorrect carton labels caused the failure, label and carton verification should become a priority.
The factory should also provide evidence of what was corrected. Depending on the project, this can include rework quantities, photographs, corrected measurements, internal QC records, new label samples, segregation records, or revised packing information.
The goal of reinspection is not simply to produce a new “PASS” result. It is to confirm that the process responsible for the original failure has been brought under control and that the remaining production risk is acceptable.
Reject or Release
A shipment should not automatically be rejected because any defect is found. The final decision should consider defect severity, agreed acceptance limits, contractual requirements, product risk, and the scale of the problem.
Critical safety or compliance issues normally require immediate escalation. A shipment may also need to be held, reworked, or rejected when major defects exceed the agreed limit, the wrong material has been used systematically, important dimensions affect function, branding is incorrect across a significant portion of production, or load-bearing construction is unreliable.
Minor isolated defects do not necessarily justify rejecting the entire lot when they remain within the agreed inspection standard. The purpose of a sampling plan is to create a consistent decision method rather than react emotionally to individual defects.
It is also important to distinguish inspection findings from the final commercial decision. An inspector reports conformity, defects, measurements, test results, and the pass or fail outcome according to the agreed standard. The brand, sourcing team, or authorized quality representative usually decides whether to accept, reject, rework, or negotiate a concession.
Clear quality agreements made before production reduce pressure at this stage because everyone already understands what constitutes an acceptable shipment.
Third-Party Inspection
Independent inspection can add useful verification when the customer cannot visit the factory or when additional confidence is needed. It is often considered for first orders, new manufacturers, high-value shipments, large programs, strict retail requirements, previous quality failures, or time-sensitive launches where a major problem would create substantial commercial loss.
Third-party inspection should complement factory quality control rather than replace it. If an outside inspector is expected to discover every material, sewing, functional, or packaging problem at the end of production, defects have already been allowed to accumulate too far. A stronger manufacturing system catches problems during materials, cutting, sewing, assembly, finished-goods checking, and packaging.
The independent inspector then becomes another verification layer rather than the only quality-control mechanism. Szoneier can support internal quality inspection together with customer or third-party inspection when the project requires independent confirmation.
Before shipment approval, the customer should ideally be able to answer several straightforward questions: what was inspected, how many units were sampled, what defects were found, whether the defects were corrected, and whether the final result meets the agreed release standard. If those questions can be answered with records and evidence rather than promises, the inspection process is doing its job.
Conclusion
Pre-shipment inspection is not simply the last visual check before cartons leave a factory. It is the final stage of a quality system that should already have controlled the product through sample approval, material confirmation, production, finished-goods review, and packaging preparation. When specifications are clear and inspection criteria are agreed before production, the final inspection becomes much more objective and much less likely to turn into a dispute.
For custom bags, the most important checks usually involve materials, measurements, stitching, reinforcement, zippers, hardware, straps, branding, packaging, labels, carton quantities, and shipment allocation. The exact priorities should change according to the product. A backpack, cooler bag, cosmetic pouch, travel bag, pet carrier, and tool bag should not all be inspected with exactly the same emphasis because their functional risks are different.
Szoneier works with this broader manufacturing logic by connecting sample approval, material control, sewing production, quality inspection, packaging, and shipment preparation within the same custom bag program. For brands developing products for retail, e-commerce, wholesale, promotional, or other commercial channels, that continuity is often more useful than a generic promise of “strict quality control.”
Before choosing how an order will be inspected, ask five practical questions: what specification will the finished goods be compared against, which features carry the highest risk, how will defects be classified, what sampling method will be used, and what evidence will be available before shipment release. Clear answers to those questions provide a much better picture of manufacturing control than attractive production photos alone.
FAQ
What is checked during a custom bag pre-shipment inspection?
A custom bag pre-shipment inspection normally checks order quantity, materials, dimensions, construction, stitching, seams, zippers, hardware, handles, shoulder straps, pockets, logos, overall appearance, individual packaging, barcodes, labels, carton quantities, carton marks, and shipping details. The exact checklist should follow the approved sample and specification because different products have different risks. A backpack, for example, requires more attention to load-bearing straps than a small cosmetic pouch.
What AQL level is commonly used for bag inspection?
General consumer-product inspections commonly reference examples such as AQL 2.5 for major defects and AQL 4.0 for minor defects, while critical safety defects are often handled with extremely strict or zero-acceptance criteria. These figures should not be treated as universal requirements for every bag order. The correct inspection level depends on product risk, brand standards, order value, previous quality performance, sales channel, and any contractually agreed inspection requirements.
How many bags should be inspected before shipment?
The number depends on the production lot and the selected sampling level rather than on a fixed percentage of the order. Under commonly used General Inspection Level II sampling logic, a lot of 1,201–3,200 pieces may use a sample size of 125 units, while a lot of 3,201–10,000 pieces may use 200 units. The final quantity should be confirmed against the sampling plan and any customer-specific requirements before inspection begins.
Is an approved sample enough for final bag inspection?
An approved sample is extremely useful, but it should be supported by written specifications. The sample shows construction, appearance, materials, hardware, and overall workmanship, while written documents define measurements, tolerances, artwork, packaging, and revisions more precisely. Using both prevents subjective decisions. The strongest inspection reference normally combines an approved physical sample, current tech pack, material information, artwork files, packaging instructions, and a revision record showing the latest approved changes.
Should custom bags receive 100% inspection instead of AQL sampling?
Not always. AQL sampling is efficient for stable mass production, while 100% inspection can be useful for small quantities, high-value goods, barcode verification, individualized labels, previous quality failures, or features where even one incorrect unit can create a serious commercial problem. Many professional quality plans combine methods instead of choosing only one. General workmanship may be sampled while barcodes, serialized labels, or particularly high-risk features receive more extensive checking.
What happens if a pre-shipment inspection fails?
A failed inspection should normally place the shipment on hold while the problem is reviewed. The factory should identify the defect pattern, determine the affected production scope, isolate suspect units, investigate root cause, and complete appropriate rework or replacement. If the failure was systematic or exceeded agreed acceptance limits, reinspection may be needed. Shipment should be released only after the responsible customer, quality team, or authorized party has reviewed the corrective evidence and accepted the final result.
Do I need a third-party inspection for custom bags?
Third-party inspection can be useful for a first order, a new manufacturer, a high-value shipment, a large retail program, a previous quality failure, or any situation where the customer needs independent verification. It should not replace the factory’s internal quality system. The strongest arrangement is internal control during materials and production, followed by final factory inspection and an independent inspection when the commercial risk or customer requirements justify an additional verification layer.