Skip to content
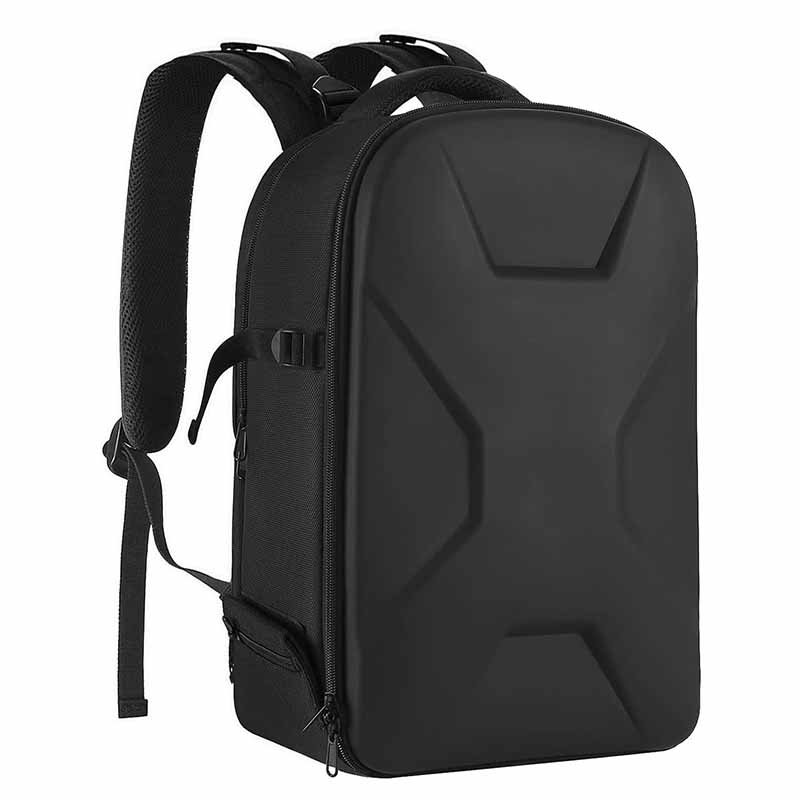
A camera bag with tripod holders looks like a simple product until a real photographer starts using it. Then every small detail becomes important. A zipper that opens from the wrong angle slows down shooting. A divider that bends too easily lets lenses knock into each other. A tripod strap that is too loose swings while walking. A bottom panel without enough support starts to collapse after repeated loading. For a photography brand, outdoor gear company, content creator label, or private label project, these details decide whether the product feels professional or forgettable.
A well-manufactured camera bag with tripod holders should protect cameras, lenses, batteries, memory cards, laptops, drones, and small accessories while keeping the tripod stable outside the bag. Good manufacturing requires shock-absorbing padding, adjustable compartments, reinforced stitching, durable outer fabric, balanced tripod placement, reliable buckles, comfortable straps, and practical access points that match how photographers actually shoot.
The market has changed because photography is no longer limited to studios or professional crews. A single user may shoot travel videos, wedding content, product photos, outdoor landscapes, short-form videos, and social media reels with the same bag. That means modern camera bags need to work across more scenes. They must be protective, organized, lightweight, good-looking, weather resistant, and easy to carry for long hours.
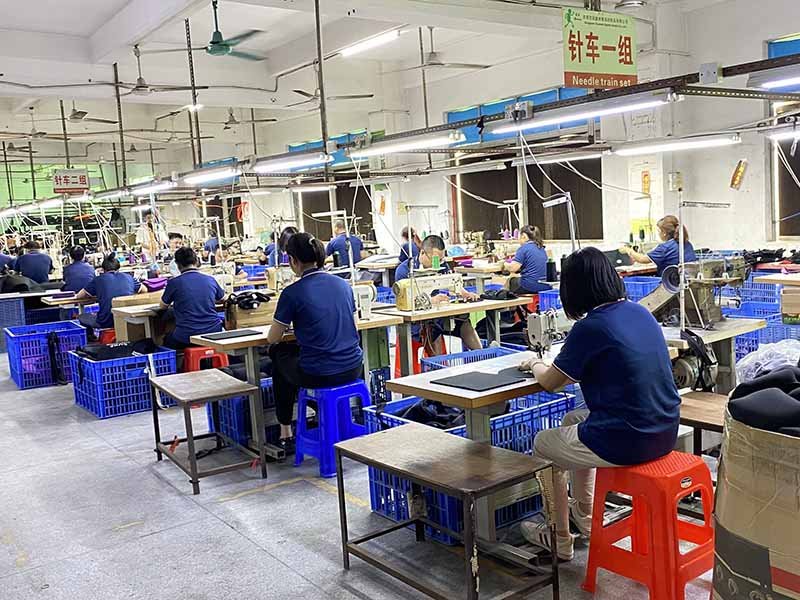
For Szoneier, camera bag manufacturing with tripod holders is not only about sewing fabric into a backpack shape. With over 18 years of experience in neoprene material development, bag production, OEM/ODM customization, low MOQ projects, fast sampling, free design support, and private label manufacturing, Szoneier can help brands turn product ideas into practical, market-ready camera bags. The best camera bag does not start from appearance alone. It starts from equipment, carrying habits, user pain points, and the small problems that appear during real shooting.
What Is Camera Bag Manufacturing?
Camera bag manufacturing is the process of designing and producing protective carrying products for cameras, lenses, tripods, laptops, batteries, drones, and photography accessories. Compared with ordinary bags, camera bags require stronger shock protection, smarter inner storage, better load balance, faster access, weather-resistant materials, and reinforced structures. When tripod holders are added, the bag must also control external weight, movement, and long-term stress on stitching and fabric.
A normal backpack can tolerate soft items moving inside. Clothes, books, chargers, and daily items are not easily damaged by light pressure. A camera bag is different. Camera bodies, lenses, filters, flash units, microphones, hard drives, and drones are expensive, fragile, and often irregular in shape. If the internal space is too loose, equipment shifts. If padding is too thin, pressure transfers directly to the gear. If compartments are poorly sized, users cannot organize equipment efficiently.
Camera bag manufacturing also needs to consider how fast users need to work. A photographer may see a perfect street shot for only three seconds. A wedding shooter may need to change lenses quickly during a ceremony. A travel vlogger may need to take out the camera while standing in an airport, on a train platform, or beside a busy road. Good camera bag design protects gear without making access slow or frustrating.
Tripod holders add another layer of engineering. A tripod is long, hard, and external. It changes the way the bag sits on the body. If the tripod is attached to one side, the bag may lean. If it is attached too low, it may hit the user’s leg. If the strap is weak, it may loosen during movement. If the fabric behind the holder is not reinforced, the stitching area can tear after repeated use.
For custom brands, the manufacturing process usually includes concept review, material selection, structure design, compartment planning, logo method selection, sampling, testing, adjustment, bulk production, inspection, and packing. Each stage affects the final product’s value.
A practical camera bag project should answer these questions early:
- What type of camera will the bag carry?
- How many lenses should fit inside?
- Will the user carry a laptop or tablet?
- What size tripod should the holder support?
- Should the bag be waterproof, water resistant, or only splash resistant?
- Does the product need a premium retail look or a more outdoor technical style?
- What logo method best matches the brand image?
- What target price range does the product need to reach?
- What MOQ and lead time are acceptable for the project?
For Szoneier customers, these questions are not formalities. They help the factory recommend suitable materials, padding thickness, zipper grade, webbing width, tripod holder position, divider structure, and packaging solution before the first sample is made.
What Makes a Camera Bag Different?
A camera bag is different because it must protect fragile equipment while keeping the user mobile. The inside of the bag is often more important than the outside. A stylish exterior may attract attention online, but photographers judge the product by how well it holds their gear. If the camera body moves too much, if lenses touch each other, or if the tripod shifts while walking, the product quickly loses trust.
The most important difference is the internal protection system. Camera bags usually need padded walls, soft lining, adjustable dividers, reinforced bottoms, and pressure-resistant panels. These parts help separate equipment and reduce impact from drops, bumps, or sudden movement. For lightweight models, foam and neoprene inserts can provide flexible protection. For larger camera backpacks, thicker foam, EVA panels, or PE boards may be needed to improve shape and support.
Another difference is access design. A normal bag may only need one main zipper. A camera bag may need top access, side access, back access, front access, or a combination of several openings. Each access style serves a different shooting habit. Side access is useful for quick camera removal. Full back opening is better for organizing multiple lenses. Top access works well for shoulder bags and daily camera backpacks.
The third difference is load density. Camera gear is heavy for its size. A small bag loaded with one camera body, two lenses, batteries, and a compact tripod may weigh several kilograms. If shoulder straps, handles, stitching, and back panels are not designed correctly, the user feels discomfort quickly.
Common camera bag structure features include:
- Adjustable padded dividers for different camera layouts
- Reinforced bottom panel for standing stability and impact protection
- Soft lining to reduce scratches on camera bodies and lenses
- Laptop or tablet sleeve for creators and travel users
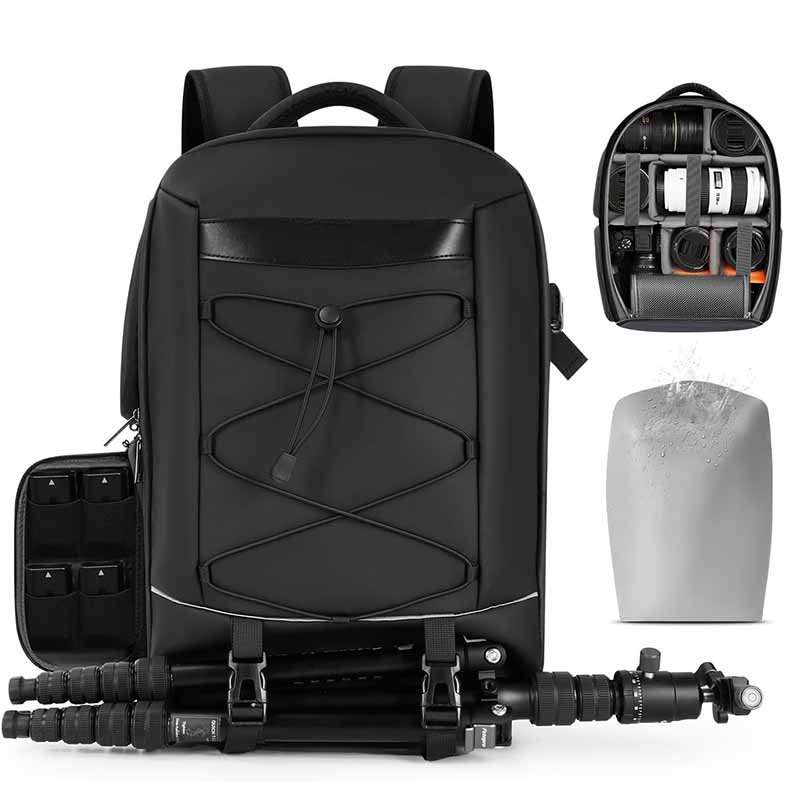
- Tripod holder with bottom pocket and upper locking straps
- Water bottle or accessory side pocket
- Quick-access zipper for faster shooting
- Hidden pocket for passport, wallet, or memory cards
- Breathable back panel for long carrying time
- Rain cover pocket or water-resistant outer fabric
For Szoneier, neoprene can be used in many protective areas because it is flexible, soft, cushioning, and suitable for camera sleeves, padded inserts, lens wraps, divider surfaces, and soft accessory pockets. When combined with nylon, polyester, oxford fabric, EVA foam, mesh, waterproof coating, and reinforced webbing, the bag can balance protection, weight, appearance, and cost.
Why Add Tripod Holders?
Tripod holders are added because many photographers and creators need stable shooting support but do not want to carry a tripod by hand. Tripods are used for landscape photography, night photography, product shooting, real estate photography, travel content, livestream setups, interviews, video recording, and long-exposure work. Without a proper holder, the tripod becomes an inconvenient extra item.
A good tripod holder does more than attach a tripod to the outside of the bag. It must hold the tripod firmly, reduce movement, and keep the bag balanced. The most common structure includes a lower support pocket or loop to hold the tripod feet and one or two upper straps to lock the tripod body. This two-point or three-point control prevents the tripod from sliding downward or swinging sideways.
Tripod holder design should consider several points:
- Tripod length
- Tripod folded diameter
- Tripod weight
- Side or front placement
- Strap width
- Buckle strength
- Elastic or non-elastic webbing
- Reinforced stitching area
- Bag body size
- User movement style
For a compact creator bag, the tripod holder may only need to support a lightweight tabletop tripod or small travel tripod. For an outdoor camera backpack, the holder may need to support a longer aluminum or carbon fiber tripod. These two designs should not use the same construction. A small tripod holder can be clean and minimal. A heavy tripod holder needs stronger webbing, thicker stitching, larger attachment points, and better balance.
The placement also changes the user experience. A side tripod holder is easy to access and keeps the front panel clean. However, if the tripod is heavy, one side of the bag may pull down. A front tripod holder keeps the weight closer to the center of the body, but it can block the front pocket or make the bag look more technical. The right choice depends on the target user.
A practical tripod holder structure can be compared like this:
| Tripod Holder Type | Best Use | Strength | Possible Problem |
|---|---|---|---|
| Side holder with bottom pocket | Travel camera backpacks, outdoor bags | Easy to use, clean front design | May create side imbalance |
| Front center holder | Hiking camera backpacks, larger bags | Better weight balance | May block front pocket access |
| Bottom strap holder | Shoulder bags, compact camera bags | Simple and space-saving | Not suitable for heavy tripods |
| Elastic side pocket plus strap | Lightweight creator bags | Flexible and easy to produce | Less stable for long tripods |
| Dual webbing strap holder | Professional outdoor camera bags | Stronger control and durability | Needs reinforced sewing points |
For Szoneier projects, tripod holders can be customized by webbing width, buckle type, elastic strength, pocket depth, stitching density, bartack reinforcement, and position. This allows the bag to match real usage rather than simply adding a decorative strap.
Is Custom Manufacturing Worth It?
Custom manufacturing is worth it when a brand wants a camera bag that fits a real market instead of selling another similar-looking product. Many camera bags online appear attractive in pictures, but users often complain about the same problems: poor divider layout, uncomfortable straps, weak tripod holders, limited space, difficult access, thin padding, or fabric that does not feel durable enough.
Custom manufacturing gives the brand control over these details before production. Instead of accepting an existing shape, the brand can decide the size, style, material, padding level, compartment layout, tripod holder design, logo position, zipper color, lining color, label type, packaging, and target price range.
For example, a travel creator brand may want a compact camera backpack that fits a mirrorless camera, one lens, a 14-inch laptop, a small tripod, charger, power bank, and personal items. A wedding photography brand may want a larger bag with fast access, silent zipper pulls, stronger shoulder support, and organized memory card storage. A drone accessory brand may want removable dividers that fit a drone body, controller, batteries, propellers, and landing accessories. A sports content brand may need water-resistant materials, stronger bottom panels, and an external tripod or monopod holder.
Custom manufacturing also helps with market positioning. A low-cost product may use standard polyester, basic foam, and simple webbing. A mid-range product may use higher-density polyester or nylon, better padding, branded zipper pulls, removable dividers, and improved lining. A premium product may use water-resistant nylon, EVA support, molded back panels, high-quality hardware, custom rubber logos, coated zippers, and retail packaging.
A simple positioning comparison:
| Product Level | Material Direction | Structure Direction | Suitable Market |
|---|---|---|---|
| Entry level | Polyester, basic foam, standard lining | Simple dividers, basic tripod strap | Starter camera kits, online value products |
| Mid-range | Nylon or oxford, thicker foam, soft lining | Laptop sleeve, side access, stronger tripod holder | Travel creators, hobby photographers |
| Premium | Water-resistant nylon, neoprene, EVA, air mesh | Modular dividers, reinforced structure, comfort back panel | Outdoor photography, private label gear brands |
| Professional | Heavy-duty fabric, molded panels, premium hardware | Advanced access, large capacity, load-bearing tripod system | Photographers, videographers, outdoor crews |
Szoneier supports custom camera bag manufacturing for brands that need flexible development instead of rigid standard products. Customers can start from sketches, reference photos, product samples, technical drawings, or even a clear market idea. The factory can help refine structure, suggest materials, develop samples, and adjust details before bulk production.
What Should Brands Check First?
Before starting camera bag manufacturing with tripod holders, brands should first check the target user, gear size, tripod size, carrying style, selling price, MOQ, branding needs, and product positioning. These early decisions save time and reduce sample changes. A camera bag is a functional product, so unclear requirements often lead to repeated revisions.
The most important question is: who will use the bag? A beginner photographer, travel vlogger, wedding photographer, drone user, outdoor shooter, and studio worker do not carry the same equipment. Their comfort expectations are also different. A beginner may care about price and simple organization. A professional may care more about access speed, load comfort, durability, and weather protection.
Brands should also confirm the equipment list. Camera bags should be designed around real gear dimensions. A DSLR body is usually bulkier than a mirrorless body. Large lenses need deeper compartments. Drone controllers may require custom divider spacing. A laptop sleeve must match common laptop sizes such as 13-inch, 14-inch, 15.6-inch, or 16-inch. Tripod length and folded thickness must also be measured before deciding holder placement.
The tripod is especially important because it sits outside the bag. A bag designed for a 35 cm folded tripod may not work well for a 55 cm tripod. If the holder is too short, the tripod moves. If the holder is too loose, it shakes. If the lower pocket is too shallow, the tripod feet slip out.
Brands should prepare these details before sampling:
| Information Needed | Recommended Details | Why It Matters |
|---|---|---|
| Bag type | Backpack, sling, shoulder bag, insert bag | Defines structure, access, and carrying system |
| Camera gear | Camera body size, lens count, drone or accessories | Defines inner compartment layout |
| Tripod size | Folded length, folded diameter, weight | Defines holder height, strap position, and reinforcement |
| Laptop size | 13-inch, 14-inch, 15.6-inch, 16-inch | Defines sleeve dimensions and back panel support |
| Protection level | Light, medium, heavy-duty | Defines foam, neoprene, EVA, and wall thickness |
| Weather needs | Indoor use, travel use, outdoor use | Defines fabric coating, zipper choice, and rain cover |
| Branding method | Woven label, rubber patch, printing, embroidery | Defines logo effect, MOQ, and cost |
| Target price | Entry, mid-range, premium | Helps control materials and construction choices |
| Quantity plan | Trial order, small batch, repeat order | Affects MOQ, cost, and production planning |
For brands still developing their first camera bag, Szoneier can help review product ideas from a manufacturing angle. This includes checking whether the target structure is realistic, whether the tripod holder can carry the expected load, whether the material matches the price point, and whether the logo method fits the product style.
Which Camera Bag Style Works Best?
The best camera bag style depends on the user’s equipment, shooting scene, carrying time, and tripod size. Backpacks are best for heavier gear and outdoor use. Sling bags work well for light kits and fast access. Shoulder bags are suitable for urban shooting and short-distance use. For stable tripod carrying, camera backpacks usually provide the best balance, capacity, and structure.
Choosing the right bag style is one of the most important decisions in camera bag manufacturing. Many brands start by asking what style looks popular. A better question is what style solves the user’s daily carrying problem. A camera bag with tripod holders is not only a fashion item. It must support real equipment and real movement.
A camera backpack is usually the most complete option. It gives enough space for padded compartments, laptop sleeves, personal items, and tripod holders. It also distributes weight across both shoulders, which is helpful when users carry dense camera equipment. Backpacks are especially suitable for outdoor photography, travel, hiking, drone shooting, event photography, and professional content creation.
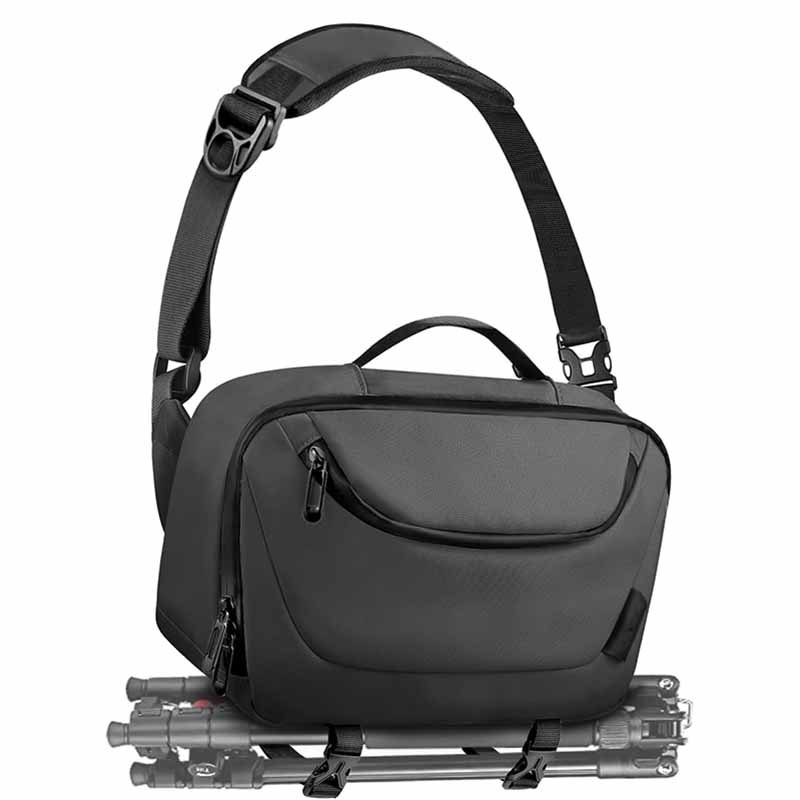
A sling camera bag is lighter and faster. It can rotate from back to front, allowing quick camera access without fully removing the bag. This style is popular with street photographers, vloggers, and casual creators. However, it has limited load capacity because all the weight sits on one shoulder. A compact tripod holder can work, but a heavy tripod may make the bag uncomfortable.
A shoulder camera bag is easy to open and often looks more casual. It works well in cities, studios, and short shooting sessions. It can carry cameras and lenses efficiently, but tripod carrying is usually limited to small tripods. If a full-size tripod is attached to a shoulder bag, the bag may pull heavily on one side and feel awkward.
A good custom project should match style with scene:
- Outdoor photography usually needs a camera backpack.
- Street photography often works well with a sling bag.
- Studio work may suit a shoulder bag.
- Travel content creation often needs a backpack or sling backpack.
- Drone storage usually needs a backpack with deeper compartments.
- Lifestyle camera products may use cleaner shoulder or crossbody shapes.
- Professional gear carrying usually needs reinforced backpack construction.
For Szoneier customers, style selection also affects manufacturing cost. Backpacks usually require more materials, more stitching, more hardware, and more production steps. Sling bags may use less material but require careful shaping and strap engineering. Shoulder bags may look simple but still need good internal padding and structure.
Which Style Fits Tripod Holders?
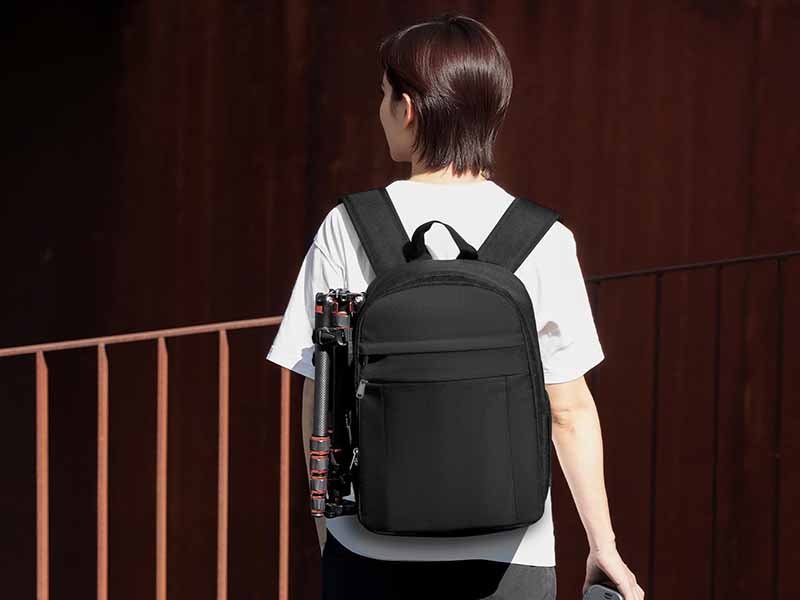
Camera backpacks fit tripod holders best because they have more surface area, stronger structure, and better load balance. A tripod holder needs enough height to control the tripod and enough reinforcement to handle repeated stress. Backpacks give the factory more space to design a lower support pocket, upper locking straps, and reinforced attachment points.
The most common backpack tripod holder is placed on one side of the bag. It usually includes an elastic or fabric side pocket at the bottom and one or two webbing straps above. This structure is simple, practical, and easy for users to understand. It works well for travel tripods, compact tripods, and many daily shooting needs.
For heavier tripods, a front center holder may be better. The tripod sits closer to the center of the user’s back, which reduces side pulling. This design is often seen in hiking or outdoor camera backpacks. However, it changes the appearance of the bag and may limit front pocket access. Brands should choose this structure only when the target user values function more than a clean front look.
Sling bags and shoulder bags can include tripod holders, but they need realistic limits. A small tripod or monopod can be attached with bottom straps or side loops. A large tripod may not be suitable because the bag body is not tall enough and the carrying system is not balanced enough.
Tripod holder suitability can be viewed like this:
| Bag Style | Tripod Holder Suitability | Recommended Tripod Type | Manufacturing Focus |
|---|---|---|---|
| Camera backpack | High | Compact to full-size tripod | Reinforced side or front holder |
| Sling camera bag | Medium | Compact tripod, mini tripod | Anti-swing strap control |
| Shoulder camera bag | Low to medium | Small tripod, tabletop tripod | Bottom strap or front strap support |
| Camera waist pack | Low | Mini tripod only | Lightweight elastic loop |
| Camera insert bag | Very low | Not recommended | Focus on internal protection |
For custom brands, the best decision is to define the tripod first. Once the tripod size and weight are clear, the holder style becomes much easier to design.
Are Backpacks Better?
Backpacks are better for most camera bag manufacturing projects with tripod holders because they provide capacity, balance, comfort, and design flexibility. They can carry more equipment while spreading the load across both shoulders. This matters because camera gear is compact but heavy. A bag may not look large, yet it can become tiring after one or two hours of walking.
A camera backpack can include multiple zones. The lower section can hold camera gear with padded dividers. The upper section can hold clothes, chargers, snacks, or personal items. The back panel can include a laptop sleeve. Side areas can hold tripods, water bottles, umbrellas, or quick-access pockets. The front panel can hold filters, cables, notebooks, and small accessories.
Backpacks also allow more professional support structures. A good design can include padded shoulder straps, chest strap, breathable back mesh, luggage strap, reinforced handle, rain cover pocket, and thicker bottom panel. These details are important for travel, outdoor shooting, and professional use.
For Szoneier manufacturing, backpack projects can be developed in different directions:
- Lightweight creator camera backpack
- Outdoor waterproof camera backpack
- Neoprene padded camera backpack
- DSLR camera backpack with tripod holder
- Mirrorless camera backpack with laptop sleeve
- Drone camera backpack with modular dividers
- Travel camera backpack with anti-theft pocket
- Private label camera backpack for retail brands
A backpack also gives more freedom for branding. Logos can be placed on the front panel, rubber patch, woven label, zipper pull, shoulder strap, lining, inner label, or packaging. For mid-range and premium products, small details like custom zipper pulls, matte hardware, contrast lining, and molded rubber patches can make the product feel more polished.
However, backpacks should not be overbuilt without reason. Too much padding adds weight. Too many pockets increase cost. Too many straps may make the design look messy. A successful camera backpack should feel useful, not complicated.
Do Sling Bags Work?
Sling bags work well for users who want fast access, light carrying, and a cleaner daily look. They are especially suitable for mirrorless cameras, compact cameras, small lenses, action cameras, microphones, batteries, and creator accessories. Many users like sling bags because they feel less bulky than backpacks and can move easily from back to chest.
The biggest advantage of a sling camera bag is speed. Users can rotate the bag forward, open the main compartment, take out the camera, and start shooting quickly. This makes it useful for street photography, travel walks, city shooting, short videos, and casual content creation. For users who do not carry heavy equipment, a sling bag can feel more natural than a large backpack.
For tripod holders, sling bags need careful design. Because the bag rests on one shoulder, the tripod should be compact and lightweight. A heavy tripod can pull the sling out of position. If the holder is placed too low, the tripod may hit the hip. If it is placed too far outward, it may swing during walking. The best solution is usually a slim side or bottom strap system designed for small tripods.
Sling camera bags can be improved with:
- Neoprene padded camera zone
- Adjustable divider for mirrorless camera and lens
- Anti-slip shoulder strap pad
- Quick-access side zipper
- Compact tripod strap
- Hidden pocket for wallet or memory cards
- Waterproof or water-resistant outer fabric
- Lightweight foam structure
- Clean logo placement
- Soft lining to reduce scratches
For Szoneier customers targeting creators, vloggers, travel users, and lifestyle photography markets, sling bags can be a strong custom product direction. They are lighter, easier to style, and often more suitable for daily use than large professional camera backpacks.
What About Shoulder Bags?
Shoulder camera bags work well for urban photographers, studio users, casual creators, and customers who want quick top access. They are easy to open, easy to place on a table, and often look more natural in daily life. A good shoulder camera bag can feel like a normal lifestyle bag while still protecting camera equipment inside.
This style is especially useful when the user does not need to carry too much gear. A small to medium shoulder bag can hold one camera body, one or two lenses, batteries, memory cards, cables, and small personal items. The wide top opening makes it easy to see and remove equipment. For city photography, café shooting, short events, and product photography, this can be more convenient than a backpack.
Tripod holders on shoulder bags should stay modest. A compact tripod can be attached to the bottom or front using webbing straps. Some designs use side loops or flap straps. However, full-size tripod carrying is usually not ideal because the bag weight sits on one shoulder. If the tripod is too large, the user may feel pulling, swinging, or uneven pressure.
The manufacturing focus for shoulder camera bags should be:
- Strong but soft body structure
- Comfortable shoulder strap
- Reinforced bottom
- Protective inner dividers
- Smooth top access
- Scratch-resistant lining
- Compact tripod strap if needed
- Clean branding
- Good shape retention
- Lightweight construction
Shoulder camera bags are often a good direction for brands that want a stylish product instead of a technical outdoor look. They can be designed with polyester, nylon, canvas-like fabric, neoprene inserts, PU details, metal hardware, or rubber logo patches. For private label projects, the appearance can be adjusted toward minimalist, retro, urban, outdoor, or premium lifestyle styles.
Camera Bag Style Comparison
| Bag Style | Best Use Scenario | Gear Capacity | Tripod Holder Performance | Comfort Level | Main Design Risk |
|---|---|---|---|---|---|
| Camera backpack | Travel, outdoor, drone, professional use | High | High | High | Can become bulky if overdesigned |
| Sling camera bag | Street shooting, creators, short travel | Medium | Medium | Medium | Heavy tripod may cause shoulder fatigue |
| Shoulder camera bag | Studio, city, lifestyle photography | Medium | Low to medium | Medium | Large tripod feels unbalanced |
| Camera insert bag | Modular storage inside another bag | Low to medium | Very low | Depends on outer bag | Limited standalone function |
| Camera hard case | Transport and storage protection | High | Low | Low for daily carry | Less comfortable and less stylish |
A strong camera bag product is not created by choosing the most popular shape. It is created by matching the shape to the way people shoot. If the customer walks long distances, choose a backpack. If they need fast access, consider a sling bag. If they shoot in cities and want a clean everyday look, a shoulder bag may work better. If tripod carrying is a major selling point, the safest starting point is usually a backpack with reinforced tripod holder construction.
For Szoneier, each style can be customized through material, size, padding, compartment layout, logo method, color, lining, strap design, tripod holder structure, and packaging. This gives brands the flexibility to create camera bags for different market levels, from lightweight creator bags to premium outdoor photography backpacks.
How Are Tripod Holders Built?
Tripod holders are built as external load-control systems, not simple decorative straps. A reliable tripod holder usually needs a lower support point, one or two upper locking straps, reinforced stitching, durable webbing, stable buckle hardware, and correct placement on the bag body. The goal is to keep the tripod secure, reduce shaking, protect the bag fabric, and maintain carrying balance during walking, travel, and outdoor shooting.
A tripod holder may look like a small feature, but it is one of the most important functional parts of a camera bag. Many users do not notice it when the bag is empty. They notice it when they walk for twenty minutes with a tripod attached. If the holder is loose, the tripod knocks against the bag. If the strap angle is wrong, the tripod slides down. If the side pocket is too shallow, the tripod feet slip out. If the stitching is weak, the holder starts pulling away from the outer shell.
For brands developing custom camera bags, tripod holder design should begin with the actual tripod size. A compact phone tripod, travel tripod, carbon fiber tripod, aluminum tripod, monopod, and video tripod all have different folded lengths, weights, and tube diameters. A holder designed for a 30 cm mini tripod cannot properly secure a 55 cm outdoor tripod. That is why Szoneier usually recommends confirming the folded tripod length, folded diameter, and expected weight before finalizing holder position.
The strongest tripod holder designs usually use two or three contact points. The lower point supports the tripod feet. The upper point controls the tripod body. A second upper strap can improve stability for longer tripods. This structure prevents the tripod from swinging and reduces pressure on a single sewing point. For outdoor camera backpacks, this matters because users may walk, climb stairs, ride bicycles, pass through airports, or shoot on uneven ground.
The tripod holder also affects the entire bag layout. A side holder may compete with a water bottle pocket. A front holder may block a front zipper. A bottom holder may affect how the bag stands on the ground. These conflicts should be solved during product development, not after bulk production.
For Szoneier projects, tripod holders can be customized through webbing width, buckle type, elastic strength, holder position, pocket depth, bartack stitching, reinforced patches, rubber tabs, and adjuster hardware. A good holder should feel simple to the user, but behind that simplicity there should be a clear manufacturing logic.
What Holds the Tripod Firmly?
A tripod is held firmly by combining vertical support and horizontal locking. The lower support keeps the tripod from sliding down. The upper strap keeps it close to the bag body. When both parts work together, the tripod becomes stable enough for walking, travel, and outdoor use.
The lower support can be designed in several ways. A fabric pocket is the most common choice for camera backpacks because it can hold the tripod feet securely. An elastic mesh pocket works for compact tripods and water bottles, but it may stretch over time if used with heavier equipment. A webbing loop is lighter and cleaner, but it gives less surface support. A foldable hidden pocket is useful for premium designs because it can be tucked away when not in use.
The upper locking system is usually made with adjustable webbing straps, side-release buckles, ladder locks, Velcro, elastic straps, or a combination of these parts. For stronger bags, adjustable webbing with a buckle is more reliable than simple elastic. Elastic feels convenient, but it can lose tension after repeated stretching. For lightweight creator bags, elastic can still work well if the tripod is small.
A stable tripod holder should control four movements:
- Downward sliding
- Side-to-side swinging
- Outward pulling
- Rotation during walking
For camera backpacks with larger tripods, Szoneier often recommends using a lower pocket plus two adjustable webbing straps. This construction improves stability and makes the holder more adaptable to different tripod diameters. For smaller sling bags, a lower strap and one upper elastic or webbing strap may be enough.
| Holder Part | Main Function | Recommended Material | Best Use |
|---|---|---|---|
| Lower pocket | Supports tripod feet | Nylon, polyester, elastic mesh, oxford fabric | Backpacks and outdoor bags |
| Upper strap | Locks tripod body | PP webbing, nylon webbing | Most camera bags |
| Side-release buckle | Fast opening and closing | Plastic buckle, nylon buckle | Travel and outdoor bags |
| Ladder lock | Length adjustment | Plastic or metal adjuster | Adjustable holder system |
| Reinforced patch | Reduces fabric tearing | Oxford, EVA layer, extra fabric panel | Heavy tripod zones |
| Bartack stitching | Strengthens stress points | High-density sewing thread | Load-bearing straps |
A common mistake is making the holder look strong but not controlling movement. A wide strap alone does not guarantee stability. The tripod must be supported from below and tightened from above. The holder should also sit close enough to the bag body so the tripod does not swing outward.
Which Strap Design Is Safer?
The safer strap design depends on tripod weight and user movement. For most custom camera backpacks, adjustable webbing straps with buckle closure are safer than simple elastic bands because they give stronger control, better adjustability, and longer service life. For compact creator bags, elastic straps can be used when the tripod is lightweight.
Strap width is an important detail. Narrow straps may look clean, but they create more pressure on a small sewing area. Wider straps distribute pressure better and are easier to handle. For lightweight tripods, 20 mm webbing may be enough. For medium camera backpacks, 25 mm webbing is common. For heavier outdoor bags, 30–38 mm webbing can improve load security, especially when combined with reinforced sewing points.
The buckle also matters. A low-quality buckle may become loose or break under repeated stress. For camera bags, the buckle does not need to be oversized, but it should match the tripod weight and product level. A premium outdoor camera bag should not use thin hardware that feels cheap in hand. Users may not know the technical grade of a buckle, but they immediately feel whether it is solid or flimsy.
A safer strap system usually includes:
- Adjustable webbing length
- Strong buckle or ladder lock
- Tight stitching at both ends
- Reinforced fabric under the strap base
- Proper strap angle around the tripod
- Enough friction to prevent sliding
- Smooth edges to avoid scratching the tripod
For Szoneier, strap safety can be improved with bartack reinforcement. Bartack stitching is often used at high-stress points such as handles, shoulder straps, webbing anchors, and tripod holder connections. It helps distribute force and reduces the chance of seam failure. For larger camera backpacks, reinforced patches can be added under the outer fabric where the tripod holder is sewn.
A simple strap design comparison:
| Strap Design | Stability | Cost Level | Suitable Product |
|---|---|---|---|
| Elastic band only | Low to medium | Low | Mini tripod bags, lightweight sling bags |
| Webbing strap with Velcro | Medium | Low to medium | Casual camera bags |
| Webbing strap with buckle | High | Medium | Travel camera backpacks |
| Dual webbing straps | Very high | Medium to high | Outdoor and professional camera bags |
| Hidden foldable strap system | Medium to high | High | Premium lifestyle camera backpacks |
For brands, the safest approach is to match the strap design to the tripod promise. If the product marketing says “outdoor camera backpack with tripod holder,” the strap system should be stronger than a basic elastic loop. If the product is a lightweight city sling bag, a compact and clean holder may be more appropriate.
How to Keep Balance?
Balance is controlled by tripod position, bag structure, user body contact, and load distribution. A tripod holder should not make the bag lean too much to one side or pull away from the body. Good balance makes the bag feel lighter, even when the actual weight stays the same.
Side tripod holders are popular because they are simple and convenient. The user can reach the tripod quickly, and the front panel remains clean. However, side placement creates a natural imbalance. If the tripod weighs 0.8–1.5 kg and the opposite side is empty, the bag may pull toward the tripod side. For short walks, this may not matter. For travel or hiking, it becomes noticeable.
There are several ways to improve balance:
- Place the tripod holder closer to the back panel instead of too far outward.
- Use a deeper lower pocket to keep the tripod feet stable.
- Add two upper straps for longer tripods.
- Design an opposite side pocket for water bottle or accessories.
- Use a chest strap to reduce shoulder shifting.
- Keep the tripod center aligned with the bag height.
- Avoid attaching the tripod too low where it hits the leg.
- Avoid attaching it too high where it affects shoulder movement.
Front tripod holders offer better center balance, especially for larger backpacks. The tripod sits in the middle of the bag body, which reduces side pull. This is useful for outdoor photography and hiking camera backpacks. The downside is visual and functional. The front panel becomes more technical, and some pockets may be harder to access.
For custom production, Szoneier can help test holder position during sampling. Even a 2–3 cm change in strap position can improve how the tripod sits. This is why sample testing is important. A design may look correct in a drawing but feel awkward when worn with a real tripod.
Balance should also consider the inside layout. If the camera compartment is on one side and the tripod is on the same side, the weight may become uneven. A better layout may place heavier lenses closer to the center and laptop weight closer to the back panel.
| Balance Factor | Better Practice | Problem If Ignored |
|---|---|---|
| Tripod position | Keep close to bag body | Tripod swings outward |
| Holder height | Match tripod folded length | Tripod hits leg or shoulder |
| Lower support | Use pocket or fixed loop | Tripod slides downward |
| Internal layout | Keep heavy gear centered | Bag leans during walking |
| Shoulder straps | Use padded, adjustable straps | Neck and shoulder fatigue |
| Chest strap | Add for outdoor models | Bag shifts when moving |
A balanced bag feels professional. Users may not describe it with technical words, but they will say, “It feels comfortable,” “It does not swing,” or “It carries better than expected.” That is the kind of product experience that helps a brand earn repeat customers.
What Weight Can It Carry?
The tripod holder weight capacity depends on fabric strength, webbing width, buckle quality, stitching method, reinforcement, and bag structure. A lightweight holder may support a small tripod under 0.5 kg, while a reinforced backpack holder can support heavier travel tripods around 1–2 kg when properly designed. For professional products, testing should be based on the target tripod and real use conditions.
Brands should be careful with weight claims. Saying a tripod holder can carry a certain load is not only a marketing sentence. The construction must support that claim. A holder may hold weight when the bag is standing still, but walking creates repeated pulling, swinging, and twisting. This dynamic stress is harder on stitching and fabric than static hanging weight.
For custom camera bags, Szoneier can design tripod holders according to product level. An entry-level model may use a standard side pocket and one strap. A mid-range model may use stronger webbing and reinforced stitching. A premium outdoor model may use dual straps, stronger buckle hardware, reinforced backing fabric, and heavier-duty bartack stitching.
A practical weight planning reference:
| Tripod Type | Approx. Folded Length | Approx. Weight Range | Suggested Holder Design |
|---|---|---|---|
| Mini tripod | 15–25 cm | 0.1–0.4 kg | Elastic loop or small strap |
| Creator tripod | 25–40 cm | 0.3–0.8 kg | Side pocket plus one strap |
| Travel tripod | 35–50 cm | 0.8–1.3 kg | Lower pocket plus adjustable strap |
| Outdoor tripod | 45–60 cm | 1.2–2.0 kg | Lower pocket plus dual straps |
| Video tripod | 55 cm+ | 2.0 kg+ | Needs special reinforced structure |
For most retail camera backpacks, designing for compact and travel tripods is more practical than designing for very heavy video tripods. A heavy video tripod may require a larger technical backpack with special reinforcement. If the target customer is a casual creator, overbuilding the tripod holder can increase cost and weight without improving sales.
Testing should include:
- Static hanging test
- Walking simulation
- Strap pull test
- Buckle opening and closing test
- Stitching stress check
- Side swing observation
- Fabric tearing inspection
- Full-load comfort check
A good factory does not only ask, “Can the holder carry the tripod?” It asks, “Can the holder carry the tripod repeatedly without damaging the bag or annoying the user?” That is the difference between basic production and real product development.
What Materials Protect Gear?
Camera bag materials protect gear by absorbing shock, resisting abrasion, reducing scratches, controlling moisture exposure, and keeping the bag structure stable. Good material selection usually includes durable outer fabric, shock-absorbing padding, soft inner lining, reinforced bottom material, reliable zipper hardware, and optional water-resistant coating. Neoprene is especially useful for flexible cushioning, camera sleeves, lens protection, and soft divider areas.
Material choice is where many camera bag projects either become practical or disappointing. From the outside, two bags may look similar. After several weeks of use, the difference becomes obvious. Better fabric holds shape. Better padding protects lenses. Better lining feels smoother. Better webbing does not twist easily. Better zippers open more smoothly. Better bottom construction keeps the bag standing instead of sagging.
Camera equipment needs layered protection. One material cannot solve everything. Outer fabric protects against abrasion and weather. Padding absorbs shock. Lining protects against scratches. Reinforcement improves load-bearing areas. Webbing and buckles control external attachments. Zippers protect access points. Mesh improves comfort on the back panel or shoulder straps.
For Szoneier, neoprene experience creates a useful advantage because neoprene is widely used in protective products, sports supports, wetsuits, koozies, laptop sleeves, and soft cases. In camera bag manufacturing, neoprene can be used as a cushioning layer, internal sleeve material, divider surface, lens wrap, side protection panel, or soft accessory pouch. It is flexible, elastic, smooth, and protective, which makes it suitable for products that need both softness and structure.
However, neoprene should be used correctly. A full neoprene camera backpack may not always be the best choice because the product may need stronger outer shell fabric and better shape retention. The smarter method is often to combine neoprene with nylon, polyester, oxford cloth, EVA foam, PE board, air mesh, and water-resistant coatings. This gives the bag a better balance of protection, appearance, cost, and durability.
Material decisions should always match the target market. A low-price online camera bag cannot use the same materials as a premium outdoor photography backpack. A city creator sling bag does not need the same heavy-duty fabric as a hiking camera backpack. A drone bag may need more structural support than a simple mirrorless camera bag.
Is Neoprene a Good Choice?
Neoprene is a good choice for camera bag manufacturing when the product needs flexible cushioning, scratch reduction, soft touch, and lightweight protection. It works especially well for camera inserts, lens sleeves, divider covers, laptop sleeves, side protection panels, and accessory pockets. For full bag construction, it is usually best combined with stronger outer fabrics.
The biggest advantage of neoprene is its soft protective feel. It can wrap around equipment more gently than hard plastic or rough woven fabric. For cameras and lenses, this matters because users worry about scratches and pressure marks. Neoprene also has natural flexibility, so it can adapt to slightly different gear shapes without feeling too rigid.
Neoprene is also useful for private label products because it can create a clean, smooth, modern look. It works well for minimalist camera sleeves, compact camera pouches, protective lens bags, and soft inserts that can be placed inside larger bags. For brands selling accessories alongside camera backpacks, neoprene products can create a matching product line.
Common neoprene uses in camera products include:
- Camera body sleeves
- Lens pouches
- Soft divider covers
- Padded insert bags
- Laptop or tablet sleeves
- Memory card pouches
- Cable and charger organizers
- Protective inner wall panels
- Shoulder strap comfort pads
- Compact camera carrying cases
For Szoneier, neoprene thickness can be selected based on protection needs. Thinner neoprene may be used for soft lining or lightweight sleeves. Medium thickness can be used for pouches and inserts. Thicker neoprene can be combined with foam or fabric for stronger protection.
| Neoprene Use | Suggested Direction | Main Benefit |
|---|---|---|
| Lens pouch | Soft neoprene body | Scratch and bump reduction |
| Camera sleeve | Neoprene with binding edge | Lightweight daily protection |
| Divider cover | Neoprene surface over foam | Softer gear contact |
| Strap pad | Neoprene plus mesh | Better shoulder comfort |
| Laptop sleeve | Neoprene with foam layer | Flexible device protection |
| Accessory pouch | Thin to medium neoprene | Clean storage for small items |
The limitation of neoprene is that it may not provide enough rigid structure by itself for large camera backpacks. If the bag needs to stand upright, carry heavy gear, or support a large tripod, it should be combined with stronger panels, foam, and outer fabrics. In short, neoprene is excellent as a protective and comfort material, but the full bag design should use a layered construction.
Which Fabric Is Stronger?
Stronger camera bag fabrics usually include nylon, high-denier polyester, oxford fabric, ripstop fabric, and coated woven materials. Nylon is often valued for strength and abrasion resistance. Polyester is cost-effective and stable. Oxford fabric gives a thicker, durable hand feel. Ripstop fabric helps reduce tearing. Coated fabrics improve water resistance and surface durability.
Fabric strength should not be judged only by thickness. A fabric may feel thick but still perform poorly if yarn quality, weaving density, coating, and finishing are weak. Another fabric may feel lighter but have better tear resistance because of ripstop construction or higher-quality yarn. For camera bags, the right choice depends on product level and usage.
For entry-level camera bags, polyester can be a practical choice because it controls cost while still offering acceptable durability. For mid-range and premium camera backpacks, nylon or high-density oxford fabric may create a stronger product feel. For outdoor camera bags, water-resistant coating and abrasion-resistant bottom fabric become more important.
The bottom panel deserves special attention. Camera bags are often placed on floors, rocks, grass, concrete, car trunks, studio floors, and outdoor ground. A weak bottom material can wear quickly. A reinforced bottom can use thicker oxford fabric, coated fabric, EVA support, rubberized material, or an extra protective layer.
Outer fabric selection can be compared like this:
| Fabric Type | Strength Level | Cost Level | Best Use |
|---|---|---|---|
| Standard polyester | Medium | Low | Entry-level camera bags |
| High-density polyester | Medium to high | Medium | Mid-range camera backpacks |
| Nylon | High | Medium to high | Premium camera bags |
| Oxford fabric | High | Medium | Outdoor and travel bags |
| Ripstop nylon/polyester | High tear resistance | Medium to high | Hiking and outdoor camera bags |
| Coated fabric | Depends on base fabric | Medium to high | Water-resistant camera bags |
Szoneier can help customers choose fabric based on target price, appearance, durability, and market positioning. A brand selling a clean urban sling bag may prefer smoother polyester or nylon. A brand selling an outdoor camera backpack may prefer oxford or ripstop fabric with water-resistant treatment. A brand selling soft protective accessories may use neoprene as the main material.
How Much Padding Is Needed?
Padding thickness depends on the equipment value, bag size, product positioning, and expected use scene. A small camera pouch may only need light padding, while a professional camera backpack may need thicker foam, reinforced panels, and structured dividers. Good padding should protect gear without making the bag unnecessarily heavy or bulky.
More padding is not always better. Over-padding can reduce internal space, increase weight, raise cost, and make the bag feel stiff. Under-padding creates protection risk. The goal is to place the right padding in the right zones. Camera walls, divider panels, bottom sections, laptop sleeves, and side impact areas usually need different levels of protection.
For example, the bottom panel should usually be stronger than the side wall because it absorbs impact when the bag is placed down. The laptop sleeve should have enough padding near the back panel and bottom edge. Divider panels should be firm enough to separate lenses but not so hard that they scratch or press into equipment. Shoulder straps need comfort padding, not the same dense impact foam used in the camera compartment.
A practical padding guide:
| Bag Area | Suggested Protection Focus | Common Material Direction |
|---|---|---|
| Main camera wall | Shock absorption | PE foam, EVA, neoprene composite |
| Bottom panel | Impact and pressure resistance | EVA, thick foam, reinforced fabric |
| Dividers | Separation and flexibility | Foam core with soft fabric or neoprene cover |
| Laptop sleeve | Flat pressure protection | Foam, neoprene, soft lining |
| Shoulder straps | Comfort | Foam plus air mesh |
| Back panel | Comfort and airflow | Foam, mesh, molded panel |
| Tripod holder base | Load stress control | Reinforced fabric, webbing, bartack stitching |
For many custom camera backpacks, foam thickness between 5 mm and 15 mm may be used in different areas depending on the design. Thin foam can work for light protection. Medium foam is suitable for dividers and side walls. Thicker or denser foam is better for bottom protection and larger gear bags. EVA can be used when stronger shape support is needed.
Szoneier can adjust padding based on sample testing. If the bag feels too bulky, padding can be reduced in lower-risk areas. If the bottom feels weak, support can be added. If dividers bend too easily, foam density can be improved. This type of adjustment is one of the advantages of custom manufacturing.
Are Waterproof Layers Useful?
Waterproof and water-resistant layers are useful because photographers often work outdoors, travel in changing weather, and carry expensive electronics. However, brands should describe water protection honestly. Many camera bags are water resistant, not fully waterproof. A water-resistant fabric can handle light rain or splashes, while a fully waterproof construction requires more advanced sealing and different production methods.
For most camera bags, water-resistant fabric is enough for daily use. This can be achieved through PU coating, TPU coating, PVC coating, water-repellent finishing, coated zippers, rain covers, or laminated fabric. The goal is to slow down water penetration and protect equipment during light rain, travel, or accidental splashes.
The weakest points are usually zippers, seams, and openings. Even if the outer fabric has coating, water can still enter through zipper gaps or stitch holes. That is why outdoor camera bags often include rain covers. A rain cover is cost-effective and gives users extra protection during heavier rain. It can be stored in a bottom or hidden pocket.
Water protection levels can be planned like this:
| Protection Level | Product Meaning | Suitable Use |
|---|---|---|
| Splash resistant | Handles small splashes and brief moisture | Daily city use |
| Water resistant | Handles light rain for short periods | Travel and outdoor casual use |
| Rain-cover protected | Extra protection during rain | Outdoor photography |
| Waterproof fabric | Fabric resists water penetration better | Premium outdoor bags |
| Fully waterproof construction | Requires sealed seams and special structure | Dry bags or technical cases |
For Szoneier camera bag manufacturing, waterproof direction depends on the product category. A lifestyle camera sling bag may only need water-resistant fabric. An outdoor camera backpack may need coated fabric plus rain cover. A neoprene camera sleeve may offer soft protection and some moisture resistance, but it should not be marketed as a fully waterproof case unless the construction supports that claim.
Brands should also consider customer trust. Overstating waterproof performance can lead to complaints. It is better to explain the protection level clearly and design the product to match the claim.
Material Selection Table for Custom Camera Bags
| Product Type | Recommended Material Mix | Protection Focus | Best Market Position |
|---|---|---|---|
| Lightweight camera sling bag | Polyester or nylon outer, neoprene insert, soft lining | Fast access and daily protection | Creators, city users, travel light |
| Outdoor camera backpack | Oxford or nylon outer, EVA, foam, mesh, rain cover | Load support and weather resistance | Hiking, travel, landscape photography |
| Neoprene camera sleeve | Neoprene body, binding edge, soft lining | Scratch and bump protection | Accessories, retail add-on products |
| DSLR camera backpack | High-density polyester or nylon, foam dividers, reinforced bottom | Shock protection and organization | Hobby and professional photography |
| Drone camera bag | Nylon or oxford, EVA panels, modular dividers | Structured storage and impact control | Drone users, video creators |
| Premium private label bag | Water-resistant nylon, neoprene details, custom hardware | Appearance, comfort, durability | Mid-high-end brand market |
Material selection should not be based only on what looks good in a photo. It should be based on how the product will be carried, what equipment it will protect, how much the customer expects to pay, and what kind of brand image the product needs to create. A smart material plan helps control cost while improving real user experience.
For Szoneier customers, the value of custom manufacturing is that these choices can be adjusted before production. The outer fabric, neoprene thickness, foam density, lining touch, zipper grade, webbing width, buckle style, and logo method can all be developed around the target product. This makes the final camera bag more than a storage item. It becomes a product that feels designed for the way photographers and creators actually work.
How Is the Inside Designed?
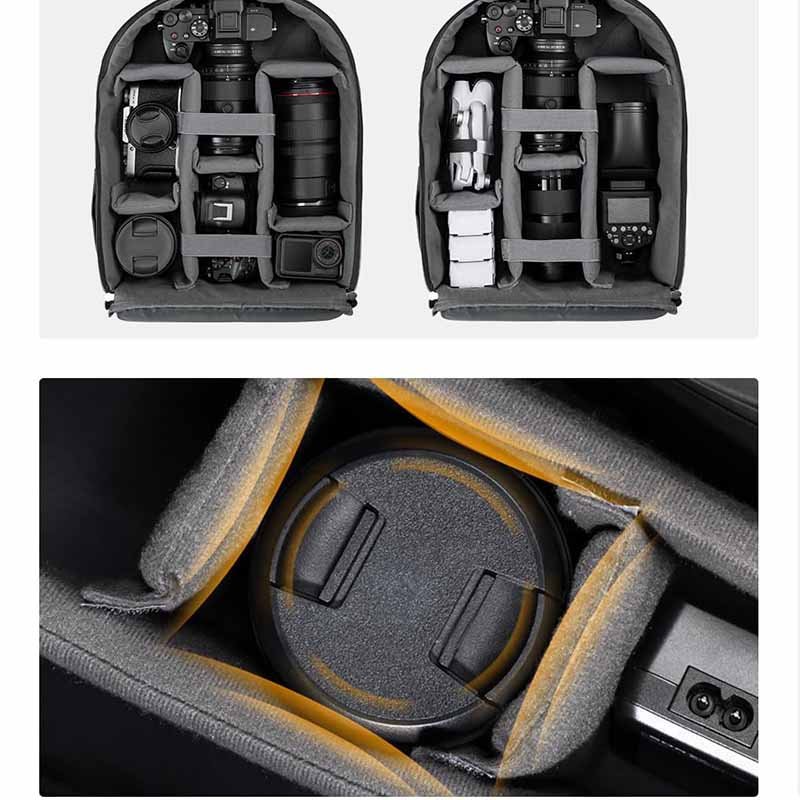
The inside of a camera bag is designed around equipment protection, storage efficiency, and shooting speed. A good internal layout should hold cameras, lenses, laptops, batteries, memory cards, cables, drones, and personal items without wasting space or creating pressure points. The best camera bag interior is not the one with the most pockets. It is the one that helps users find, protect, and remove gear quickly.
The inside of a camera bag is where real product value appears. Many customers are first attracted by the outside design, but they decide whether to keep using the bag after opening it several times. If the dividers are easy to adjust, the camera body fits naturally, the lens does not roll, the laptop slides in smoothly, and small accessories have their own places, the bag feels professional. If everything feels cramped or confusing, the customer quickly becomes disappointed.
Camera bag interior design should begin with the target gear list. A bag for mirrorless cameras does not need the same depth as a DSLR camera backpack. A drone camera bag needs different divider spacing than a lens-focused photography bag. A creator bag may need microphone storage, tripod plate pockets, power bank space, and cable organization. A travel photography backpack may need a personal item area above the camera compartment.
For custom brands, the challenge is balance. Too much structure can make the bag heavy and rigid. Too little structure can make the gear move around. Too many pockets can confuse users. Too few pockets can make the bag feel unfinished. A strong design gives each important item a logical position.
Szoneier can customize camera bag interiors through compartment size, divider thickness, Velcro layout, lining material, laptop sleeve size, mesh pocket placement, zipper pocket depth, elastic loops, removable insert design, and soft neoprene protection. These details help brands create products for specific markets such as travel creators, outdoor photographers, drone users, online camera accessory stores, private label photography brands, and lifestyle gear labels.
What Gear Should Fit Inside?
The gear inside a camera bag depends on the target user. A beginner may carry one camera body and one extra lens. A travel creator may carry a mirrorless camera, small tripod, microphone, charger, power bank, laptop, and personal items. A professional photographer may carry two camera bodies, several lenses, flashes, batteries, filters, and a larger tripod. A drone user may carry a drone, remote controller, battery set, charger, propellers, and memory cards.
This is why a custom camera bag should not be designed from a random size. It should be designed from a real packing list. When the equipment list is clear, the inner dimensions become more accurate. The bag can avoid two common problems: wasted empty space and compartments that are too tight.
Common equipment groups include:
- Camera body
- Standard lens
- Telephoto lens
- Wide-angle lens
- Flash or LED light
- Microphone
- Camera cage or grip
- Batteries
- Charger
- Memory cards
- Filters
- Cable kit
- Hard drive
- Laptop or tablet
- Drone and controller
- Compact tripod
- Cleaning cloth
- Personal items
For custom projects, brands should define whether the bag is made for DSLR cameras, mirrorless cameras, action cameras, drones, or mixed equipment. DSLR cameras are usually larger and deeper. Mirrorless cameras are more compact but often paired with multiple lenses and creator accessories. Drone kits need more rectangular compartments. Action camera bags need smaller modular pockets.
A practical gear planning table:
| Target User | Common Gear | Interior Design Focus |
|---|---|---|
| Beginner photographer | 1 camera, 1–2 lenses, charger, small accessories | Simple dividers, easy access, affordable structure |
| Travel creator | Mirrorless camera, lens, laptop, microphone, power bank | Lightweight layout, laptop sleeve, fast-access pockets |
| Outdoor photographer | Camera body, multiple lenses, filters, tripod, rain cover | Strong dividers, weather-ready compartments, centered weight |
| Drone user | Drone, controller, batteries, propellers, charger | Deep modular compartments, shock control, cable storage |
| Wedding photographer | 2 bodies, several lenses, batteries, memory cards | Fast access, strong dividers, high-capacity organization |
| Lifestyle user | Camera, personal items, tablet, small tripod | Clean layout, removable insert, daily-use flexibility |
A good camera bag should not force users to fight the layout. The layout should feel obvious the moment the bag opens. That is one reason adjustable dividers are so important. They allow the same bag to fit different gear combinations and reduce the risk of poor fit after purchase.
How Do Dividers Protect Gear?
Dividers protect gear by separating equipment, absorbing light impact, and stopping lenses or camera bodies from colliding inside the bag. They are usually made with foam cores covered by soft lining, brushed fabric, polyester, nylon, or neoprene surface material. Adjustable dividers often use Velcro so users can change the layout based on their gear.
The divider system is one of the most important parts of a camera bag. If the dividers are too thin, they fold under pressure. If they are too hard, they may feel rough against equipment. If the Velcro is weak, the layout shifts during movement. If the divider height is wrong, gear may still move above the partitions.
The best divider design depends on the bag type. A compact sling bag may need thin but firm dividers to save space. A DSLR backpack may need thicker dividers with stronger foam. A drone camera bag may need deeper and more structured dividers. A premium camera backpack may use a mix of standard dividers, foldable dividers, lens-support dividers, and removable insert systems.
Divider quality should be judged by:
- Foam density
- Divider thickness
- Surface softness
- Edge binding quality
- Velcro holding strength
- Flexibility
- Shape recovery
- Compatibility with different gear layouts
- Long-term deformation resistance
For Szoneier projects, neoprene can be used on divider surfaces to create a softer contact area. This is useful when the brand wants the inside of the bag to feel more protective and premium. Foam provides structure, while neoprene or soft lining improves touch and reduces scratching risk.
A useful divider reference:
| Divider Type | Best Use | Main Benefit |
|---|---|---|
| Standard flat divider | General camera bags | Flexible layout and basic separation |
| Thick foam divider | DSLR and larger lenses | Better impact protection |
| Foldable divider | Mixed gear layouts | Can support different camera shapes |
| Neoprene-covered divider | Premium soft-touch interiors | Better scratch reduction and clean feel |
| Removable insert system | Lifestyle camera bags | Converts camera bag into daily bag |
| Deep drone divider | Drone and controller storage | Better structure for rectangular devices |
Dividers should also support real user behavior. Many photographers do not pack gear perfectly every time. They may place a lens quickly after shooting. They may adjust equipment while standing. They may carry the bag half full. A good divider system gives enough tolerance for these imperfect real-life habits.
Is Laptop Space Needed?
Laptop space is needed for many modern camera bags because photographers, creators, drone users, and travel workers often edit, transfer, review, or upload content on the move. A laptop sleeve can increase product value, especially for camera backpacks and creator bags. For smaller sling bags or compact shoulder bags, a tablet sleeve may be more practical than a full laptop compartment.
The laptop sleeve should not be treated as an afterthought. A poorly designed laptop space can make the bag uncomfortable or unsafe. If the sleeve is too loose, the laptop moves. If it is too tight, users struggle to insert it. If there is no bottom padding, the laptop edge may hit the ground when the bag is placed down. If the laptop sits too far from the back panel, the bag feels heavier.
For backpacks, the best position is usually close to the back panel. This keeps the laptop weight closer to the body and improves carrying comfort. The sleeve should have padding on the front, back, and bottom. A false bottom design is helpful because it lifts the laptop slightly above the bottom edge of the bag, reducing impact when the bag is placed on hard surfaces.
Common laptop sleeve sizes include:
- 13-inch laptop sleeve
- 14-inch laptop sleeve
- 15.6-inch laptop sleeve
- 16-inch laptop sleeve
- Tablet sleeve
- Dual laptop and tablet sleeve
For custom brands, laptop size should match the target market. A compact urban creator bag may only need a 13- or 14-inch sleeve. A travel camera backpack may need 15.6-inch or 16-inch space. A professional photography backpack may need a larger padded sleeve plus document or tablet storage.
Laptop compartment planning table:
| Laptop Size | Suitable Bag Type | Design Recommendation |
|---|---|---|
| Tablet only | Small sling bag, shoulder bag | Thin padded sleeve, easy top access |
| 13-inch | Compact backpack, creator sling | Lightweight sleeve, soft lining |
| 14-inch | Travel creator bag | Balanced size for modern users |
| 15.6-inch | Standard camera backpack | Stronger back panel and bottom padding |
| 16-inch | Premium creator or professional backpack | Wider sleeve, reinforced support, better zipper opening |
Szoneier can customize laptop sleeve size, padding thickness, lining material, Velcro closure, elastic band, zipper access, and back panel support. This helps brands avoid one of the most common customer complaints: “My laptop does not fit as expected.”
Are Quick Pockets Helpful?
Quick pockets are helpful because photographers and creators often need small items faster than large equipment. Batteries, memory cards, filters, lens caps, cables, keys, wallets, cleaning cloths, and microphones can easily disappear inside a poorly organized bag. Quick pockets reduce search time and make the bag feel more useful in daily shooting.
A good quick pocket is not just an extra pocket. It has a purpose. A memory card pocket should be small and secure. A battery pocket should be easy to identify. A side quick-access camera pocket should open smoothly without dumping the contents. A front organizer pocket should separate cables, pens, chargers, and small tools.
Common quick pocket types include:
- Side camera access pocket
- Front accessory pocket
- Hidden back pocket
- Mesh zipper pocket
- Memory card pocket
- Battery pocket
- Cable organizer pocket
- Filter pocket
- Lens cap pocket
- Passport or wallet pocket
- Water bottle pocket
- Rain cover pocket
Placement is important. If the pocket is placed in the wrong area, it may interfere with the tripod holder or make the bag uncomfortable. For example, a side pocket may need to serve either a tripod or a water bottle. Trying to make it do both at the same time can work for small items, but it may not work for larger tripods. A front pocket may look useful, but if the tripod is attached to the front, access becomes harder.
A practical pocket planning table:
| Pocket Type | Best Position | Customer Benefit |
|---|---|---|
| Side camera access | Left or right side panel | Faster camera removal |
| Memory card pocket | Inner flap or small zipper pocket | Prevents loss of tiny items |
| Battery pocket | Inner mesh or elastic pocket | Keeps batteries organized |
| Laptop charger pocket | Front organizer area | Separates cables from camera gear |
| Hidden wallet pocket | Back panel or rear side | Better travel security |
| Rain cover pocket | Bottom or hidden lower pocket | Easy weather protection |
| Lens cap pocket | Small inner pocket | Reduces missing lens caps |
| Water bottle pocket | Opposite side of tripod holder | Helps balance external load |
For Szoneier custom manufacturing, pocket layout can be adjusted during sampling. The factory can help brands check whether the pocket size matches real accessories, whether the zipper direction feels natural, and whether the pocket position affects tripod carrying. Small adjustments can make a big difference in customer satisfaction.
How Does Custom Manufacturing Work?
Custom camera bag manufacturing usually starts with product requirements, then moves through design review, material selection, sample development, fitting adjustment, logo confirmation, bulk production, inspection, and packaging. A professional factory should help brands turn ideas into manufacturable products while balancing function, appearance, cost, MOQ, lead time, and quality expectations.
Many brands begin with an idea rather than a complete technical file. That is normal. A customer may have a sketch, a reference bag photo, a competitor sample, a mood board, or a list of desired features. The factory’s job is to translate those ideas into a practical product plan. This includes deciding which parts need structure, which materials are suitable, where the tripod holder should sit, how the interior should be divided, and how the logo should appear.
For camera bag manufacturing with tripod holders, sampling is especially important. The bag needs to be tested with real camera gear and a real tripod. A sample that looks nice on a table may still need adjustment after loading. The tripod holder may need to move slightly. The strap may need stronger webbing. The divider may need thicker foam. The laptop sleeve may need a wider opening. The shoulder strap may need more padding.
Szoneier supports OEM and ODM customization for brands that need camera bags, neoprene camera accessories, padded protective bags, outdoor bags, and private label gear products. With over 18 years of experience in neoprene materials and bag manufacturing, Szoneier can help customers develop products from reference ideas, design files, sketches, samples, or market requirements.
What Files Should Brands Prepare?
Brands can prepare sketches, reference photos, product samples, size requirements, logo files, material preferences, target price, target quantity, and equipment dimensions. A complete technical file is helpful, but it is not always required at the beginning. The more practical details the brand provides, the faster the factory can evaluate structure, cost, sampling, and production feasibility.
For a camera bag with tripod holders, the most useful information includes bag size, camera gear list, tripod size, laptop size, preferred style, logo method, color direction, target market, and expected order quantity. These details help Szoneier recommend the right materials and avoid unnecessary sample changes.
Brands can prepare:
- Product sketch or design drawing
- Reference bag photos
- Physical sample, if available
- Desired bag dimensions
- Camera body and lens dimensions
- Tripod folded length and weight
- Laptop or tablet size
- Preferred material
- Color reference
- Logo file in AI, PDF, SVG, or high-resolution format
- Packaging requirements
- Target price range
- Estimated order quantity
- Selling market or customer group
A practical project preparation table:
| Project Detail | Best Format | Why It Helps |
|---|---|---|
| Bag concept | Sketch, photo, sample | Helps define product direction |
| Size | Length, width, height | Helps calculate capacity and material use |
| Gear list | Camera, lens, laptop, tripod details | Helps design compartments |
| Logo | AI, PDF, SVG, PNG | Helps confirm branding method |
| Material idea | Fabric name or reference photo | Helps match appearance and cost |
| Target price | Price range | Helps control material and structure choices |
| Quantity | Estimated MOQ or order plan | Helps quote more accurately |
| Packaging | Polybag, box, hangtag, label | Helps prepare retail-ready solution |
If the brand is not sure about structure, Szoneier can provide suggestions based on product use. For example, if the customer wants a lightweight creator camera bag, the factory may recommend a sling or compact backpack. If the customer wants outdoor use, the factory may recommend stronger fabric, rain cover, reinforced tripod holder, and breathable back panel.
How Fast Is Sampling?
Sampling time depends on product complexity, material availability, logo method, and the number of custom parts. Simple neoprene camera sleeves or accessory pouches can usually be sampled faster than a complex camera backpack with tripod holders, multiple compartments, laptop sleeve, custom hardware, and special packaging. For many custom bag projects, sample development often takes several days to a few weeks depending on details.
For camera bags, the first sample is rarely the final product. This is normal. The first sample helps check shape, capacity, material feel, tripod holder position, divider layout, zipper direction, strap comfort, and logo effect. After reviewing the sample, the brand may request adjustments. These changes may include increasing pocket size, moving a strap, changing foam thickness, adjusting the laptop sleeve, improving the tripod holder, or revising the logo position.
A clear sampling process may look like this:
| Step | Main Work | What the Brand Checks |
|---|---|---|
| Requirement review | Confirm style, size, materials, tripod needs | Is the project direction correct? |
| Design and structure planning | Define compartments, straps, holder, logo | Does the layout match the target user? |
| Material preparation | Select fabric, lining, foam, webbing, zipper | Does the material fit the price and quality level? |
| First sample | Produce prototype | Does the bag function as expected? |
| Sample review | Check fit, comfort, appearance, tripod stability | What needs to be improved? |
| Revised sample | Adjust structure and details | Is it ready for production approval? |
| Pre-production confirmation | Confirm final specs | Can bulk production begin? |
Szoneier supports fast sampling and flexible customization, especially for brands that need to test the market with lower MOQ. Speed is important, but the sample should not be rushed blindly. A camera bag is a functional product. If the sample is not tested properly, problems may appear after mass production.
During sample review, brands should test the bag with real items:
- Load the camera body
- Load lenses
- Insert the laptop
- Attach the tripod
- Walk with the bag
- Open and close all access points
- Adjust the dividers
- Check zipper smoothness
- Test shoulder comfort
- Place the bag on the ground
- Check whether the tripod holder shakes
- Check whether the bag stands properly
This kind of real-use review is much more valuable than only checking photos.
Can Logos Be Added?
Logos can be added to custom camera bags in many ways, including woven labels, rubber patches, embroidery, screen printing, heat transfer printing, leather patches, metal badges, custom zipper pulls, lining logos, hangtags, and packaging. The best logo method depends on the product style, material, order quantity, budget, and brand positioning.
For camera bags, the logo should look professional without making the product feel cheap. A large printed logo may work for promotional products, but premium camera bags often use more subtle branding. Rubber patches, woven labels, embossed PU patches, and custom zipper pulls can create a cleaner retail look.
Common logo options:
| Logo Method | Best For | Visual Style |
|---|---|---|
| Woven label | Most camera bags | Clean, simple, cost-effective |
| Rubber patch | Outdoor and premium bags | Modern, durable, dimensional |
| Embroidery | Fabric panels, lifestyle bags | Soft, textured, classic |
| Screen printing | Promotional or simple designs | Clear and economical |
| Heat transfer | Smooth surfaces, small batches | Clean and flexible |
| PU leather patch | Lifestyle and urban bags | Premium and casual |
| Metal badge | High-end limited products | Strong brand presence |
| Custom zipper pull | Premium private label bags | Small detail, strong identity |
| Inner label | Retail and private label products | Professional finishing |
| Custom packaging | Gift and retail channels | Improves unboxing experience |
Logo placement should be considered together with bag function. If the tripod sits on the front panel, the logo should not be hidden behind the tripod. If the side pocket is used for tripod carrying, the logo should not be placed where straps rub against it. If the bag uses a minimalist design, the logo can be smaller and more refined.
Szoneier can help customers choose logo techniques based on material and order quantity. For example, neoprene camera sleeves may work well with heat transfer, printing, woven labels, or rubber patches. Outdoor camera backpacks may look better with rubber patches, woven labels, custom zipper pulls, and branded lining. Shoulder camera bags may work well with embroidery, PU patches, or metal details.
How Is Quality Checked?
Quality is checked through material inspection, cutting accuracy, stitching control, structure review, load testing, zipper testing, tripod holder testing, compartment checking, logo inspection, packing review, and final product inspection. For camera bags with tripod holders, quality control should pay special attention to stress points, padding consistency, divider fit, and external holder strength.
Camera bags are more demanding than simple promotional bags because customers use them to carry expensive equipment. A small quality problem can create a big trust issue. If a zipper jams, the user may miss a shot. If a seam opens, the bag may fail under load. If a tripod holder tears, the tripod may fall. If the divider collapses, a lens may be damaged.
Key quality control points include:
- Fabric color consistency
- Fabric surface defects
- Cutting accuracy
- Foam thickness consistency
- Divider size and Velcro strength
- Stitching density
- Bartack reinforcement
- Strap strength
- Buckle function
- Zipper smoothness
- Tripod holder stability
- Bottom panel support
- Logo position and clarity
- Lining cleanliness
- Final shape
- Packing accuracy
For tripod holder testing, the bag should be checked with a realistic load. The holder should not loosen easily. The lower pocket should support the tripod feet. The upper strap should hold the tripod close to the bag body. Stitching points should not show tearing or distortion after stress testing.
A practical inspection table:
| Inspection Area | What to Check | Why It Matters |
|---|---|---|
| Outer fabric | Color, coating, defects, stains | Affects appearance and durability |
| Padding | Thickness, placement, softness | Affects gear protection |
| Dividers | Size, firmness, Velcro strength | Affects equipment organization |
| Tripod holder | Strap strength, pocket depth, stitching | Affects external carrying safety |
| Zippers | Smooth opening, alignment, puller strength | Affects daily user experience |
| Shoulder straps | Padding, stitching, adjustability | Affects comfort and load support |
| Bottom panel | Reinforcement, shape, abrasion resistance | Affects durability and standing stability |
| Logo | Position, color, clarity, attachment | Affects brand image |
| Packing | Label, polybag, carton, hangtag | Affects retail and shipping presentation |
Szoneier’s custom manufacturing process can include quality checking from sample stage to bulk production. For private label brands, this is important because the product carries the customer’s logo. A quality issue does not only affect one order. It affects customer reviews, repeat sales, brand trust, and long-term market performance.
Custom Production Process
A clear production process helps brands understand how a camera bag idea becomes a real product. While each project is different, most custom camera bag manufacturing follows a similar path.
| Production Stage | Main Purpose | Customer Benefit |
|---|---|---|
| Idea review | Understand the product direction | Avoids unclear development |
| Design support | Refine structure, style, and function | Turns concept into manufacturable plan |
| Material selection | Choose fabric, padding, lining, webbing | Balances cost, durability, and appearance |
| Sample making | Create the first physical product | Allows real testing before bulk order |
| Sample adjustment | Improve fit, function, and details | Reduces production risk |
| Logo confirmation | Approve branding method and position | Protects brand image |
| Pre-production sample | Confirm final version | Locks details before mass production |
| Bulk manufacturing | Produce approved design | Ensures consistency |
| Quality inspection | Check function and appearance | Reduces complaints |
| Packaging and shipment | Prepare goods for delivery | Supports retail or warehouse needs |
The most successful projects are usually the ones where the customer and factory work together closely during the early stage. A camera bag with tripod holders has many details that affect user experience. When these details are discussed before sampling, the project moves faster and the final product becomes stronger.
Build Your Custom Camera Bag with Szoneier
A camera bag with tripod holders is not just a bag with one extra strap. It is a protective carrying system for people who move, shoot, travel, create, and trust their gear to the product on their back. The tripod holder must stay stable. The padding must protect equipment. The inside must feel organized. The fabric must handle daily wear. The straps must feel comfortable. The logo must look right. Every detail matters because camera users notice details.
For brands, the opportunity is clear. More creators, photographers, travelers, drone users, and outdoor content makers need camera bags that fit their work style. Many customers are no longer satisfied with generic bags that look good but fail in real use. They want smarter compartments, better protection, lighter materials, cleaner branding, and tripod carrying that actually works.
Szoneier helps brands develop custom camera bags with tripod holders through OEM and ODM manufacturing, neoprene material expertise, custom bag production, free design support, low MOQ customization, fast sampling, free sample support, private label branding, and quality-controlled production. Whether you need a lightweight camera sling bag, outdoor camera backpack, neoprene camera sleeve, DSLR camera bag, drone gear bag, or premium private label photography bag, Szoneier can help turn your idea into a practical product.
To start your custom camera bag project, you can prepare:
- Product idea or reference photos
- Target bag style
- Camera and lens size
- Tripod folded length and weight
- Laptop or tablet size
- Preferred material
- Logo file
- Color direction
- Target quantity
- Packaging requirements
- Expected market positioning
If you are planning to develop a camera bag with tripod holders for your brand, Szoneier can help review your design, recommend suitable materials, make samples, adjust structure, and support bulk production. Send your project details to Szoneier and start building a custom camera bag that photographers and creators will actually enjoy using.