Skip to content
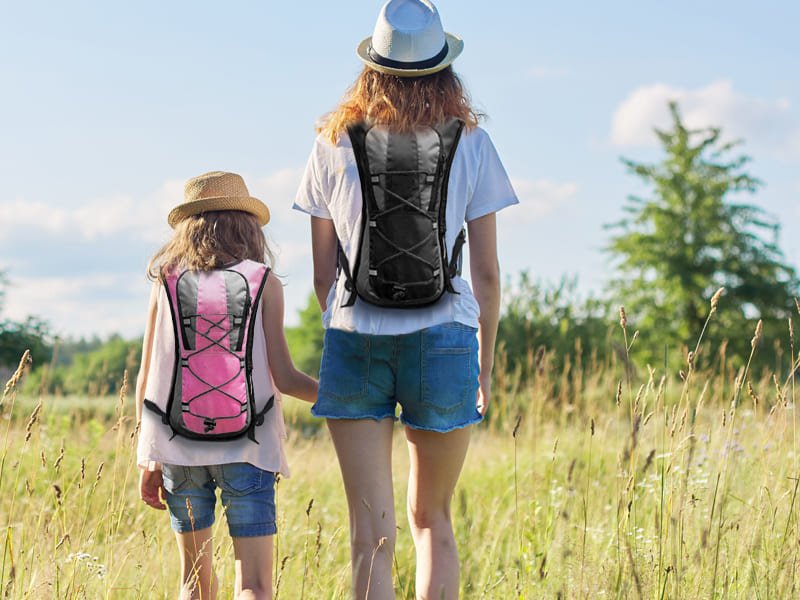
When you’re out hiking, biking, or running, staying hydrated is key to maintaining performance and preventing fatigue. But carrying a water bottle or constantly stopping to sip water can slow you down. This is where hydration backpacks come in,the hands-free hydration solution for active individuals. But how do they work, and what’s the best way to use them effectively?
A hydration backpack is a convenient, hands-free hydration system perfect for outdoor activities. It keeps you hydrated without interrupting your momentum. Learn how to properly use a hydration pack, drink from it, and care for it to ensure peak performance on your adventures.
Curious about how a simple backpack can make your outdoor adventures smoother? Let’s explore the ins and outs of hydration backpacks.
Are Hydration Backpacks Worth It?
Are hydration backpacks worth the investment? Absolutely, especially if you’re someone who enjoys outdoor activities and needs to stay hydrated over long periods of time. These packs are incredibly convenient, lightweight, and designed to provide continuous hydration without slowing you down.

Why Hydration Packs are Worth It:
- Hands-Free Hydration: No more stopping to pull out a bottle.
- Convenient for Long Activities: Perfect for long hikes, biking trips, or running marathons.
- Lightweight & Comfortable: Most hydration packs are designed with comfort in mind and won’t slow you down.
However, if you’re someone who only needs to hydrate during short activities, a simple water bottle may still suffice.
What Is a Hydration Backpack?
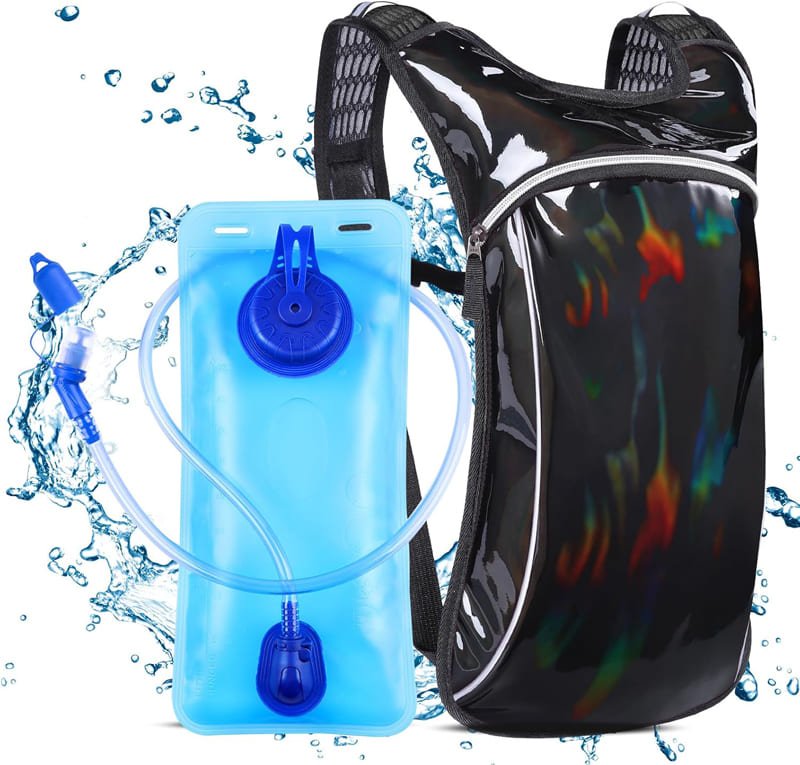
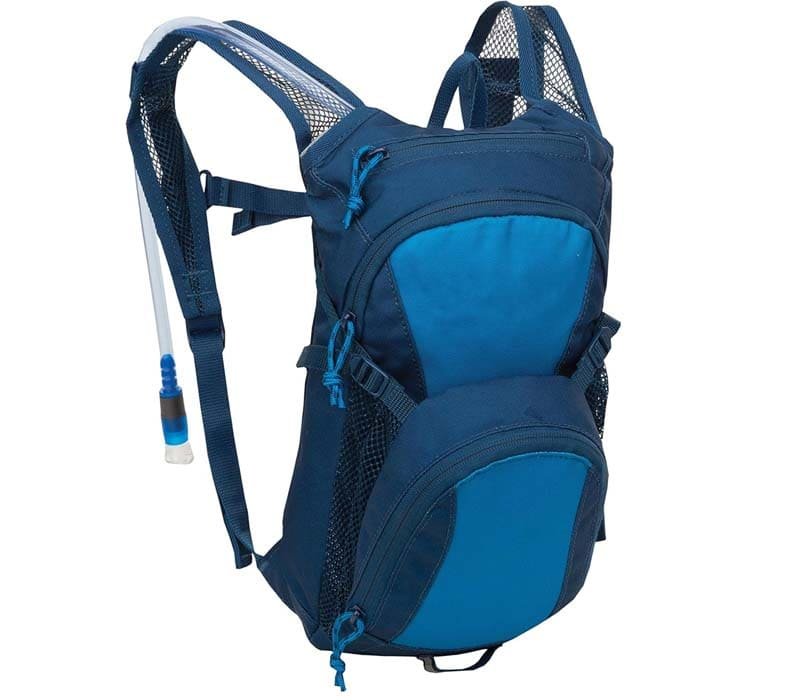
A hydration backpack is a specialized bag that includes a water reservoir (often called a bladder), a hose, and a bite valve that lets you drink while keeping your hands free. These packs are worn on your back, making them ideal for outdoor activities like hiking, running, biking, and even skiing.
What Is the Purpose of a Hydration Backpack?
The main purpose of a hydration backpack is to offer a convenient, hands-free method for hydration during physical activities. Whether you’re hiking, biking, or running, the hydration pack is designed to be worn on your back, giving you easy access to water at all times.
Why it’s perfect for active lifestyles: Imagine running a trail marathon or biking through an intense terrain. A hydration pack keeps the water flowing without the need for frequent stops, unlike water bottles that can be cumbersome and often require you to pause or slow down to access them.
What Are the Benefits of Using a Hydration Backpack?
Hydration backpacks offer more than just convenience,they provide numerous benefits that make them a must-have for athletes and outdoor enthusiasts. Here’s why you should consider using one:
- Better Hydration Efficiency: With hands-free hydration, you stay more consistent with your water intake, which helps improve endurance and reduces fatigue.
- Convenience and Comfort: Unlike water bottles, which can be cumbersome to carry, hydration backpacks distribute weight evenly across your body, making them much more comfortable.
- Multi-purpose: Many hydration backpacks come with additional storage for other items like food, gear, or a phone.
Comparison with Water Bottles
| Feature | Hydration Pack | Water Bottle |
|---|---|---|
| Hands-free hydration | Yes | No |
| Easy to carry | Yes (on your back) | No, bulky and heavy |
| Storage capacity | Can store water + other essentials | Only water |
| Convenience for long activities | Ideal for long hikes or cycling | Requires stopping to drink |
How Do Hydration Backpacks Work?
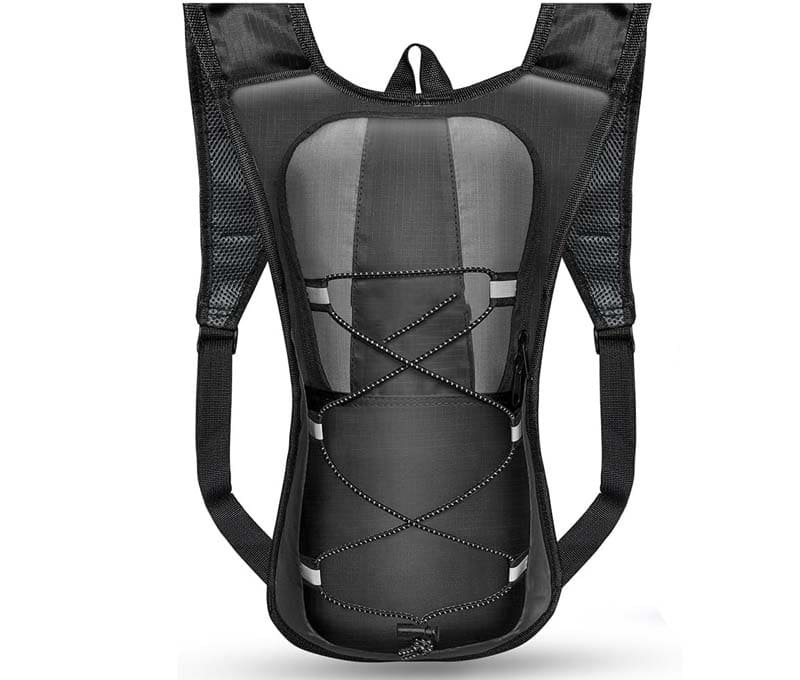
Hydration backpacks are designed to be as practical and efficient as possible. Water is stored in a flexible, insulated bladder that rests in the main compartment of the backpack. The bladder connects to a long tube that ends with a bite valve. The tube runs through the pack and can be positioned for easy drinking.
Key Benefits
- Hands-free hydration: Simply bite the valve, and you’re drinking while running or cycling.
- Easy access: The hose runs across your chest or shoulder, allowing you to easily drink without stopping.
- Convenient storage: Extra compartments in the pack can hold snacks, first aid kits, or your phone, making it a multi-functional accessory.
How to Use a Hydration Backpack Correctly?
Adjust the Straps for Comfort and Stability
Before using your hydration pack, take the time to adjust the straps properly. This step ensures comfort, reduces bouncing, and helps distribute the weight evenly across your shoulders and hips.
- Shoulder Straps: Tighten the shoulder straps so the pack sits snugly against your back. Avoid making them too tight, as this can cause discomfort.
- Chest Strap: Adjust the chest strap to prevent the pack from shifting as you move. The strap should be positioned comfortably across your sternum.
- Hip Belt: If your hydration pack has a hip belt, tighten it around your hips to distribute the weight and relieve pressure from your shoulders.
Once the straps are adjusted, take a quick walk or jog around to ensure the pack feels comfortable and stable.
Tip: Keep your hydration pack snug, but not too tight. It should sit firmly on your back without causing chafing or discomfort during physical activity.
Fill the Reservoir Correctly
Properly filling the reservoir is crucial to avoid leaks and ensure you have an adequate water supply for your outdoor adventure.
- Clean the Reservoir: Before filling, make sure your reservoir is clean and dry. If you haven’t used the pack in a while, rinse it out to avoid any bacteria buildup.
- Fill with Water: Open the reservoir cap, and fill it with fresh water. Be mindful not to overfill it, as the water may leak from the hose during use. Leave some space at the top for the water to move freely.
- Seal the Reservoir: Once filled, securely close the cap to prevent any leaks. Double-check that the seal is tight before you start your activity.
Tip: Consider using filtered or electrolyte-infused water if you’re hiking or biking in hot weather. These can help maintain hydration levels more effectively than regular water.
Position the Hose and Bite Valve
The hose and bite valve are the essential components that allow you to drink while keeping your hands free. Here’s how to set them up for optimal use:
- Position the Hose: Make sure the hose is positioned comfortably near your shoulder, so you can easily reach it while in motion. Most hydration packs have clips or straps to secure the hose in place.
- Adjust the Bite Valve: Position the bite valve near your mouth, either by clipping it to the shoulder strap or using an adjustable clip. The bite valve should be positioned in a way that you can easily access it without moving the pack.
Tip: If the bite valve is too stiff or difficult to operate, try lubricating it with a small amount of water to ensure it opens easily when you bite down.
Drink Efficiently
Now that everything is set up, it’s time to drink from your hydration pack. The key to using your hydration pack correctly is learning how to drink efficiently without interrupting your activity.
- Bite the Valve: To release water, gently bite down on the bite valve. This will open the valve and allow the water to flow through the hose.
- Suck to Drink: Once the valve is open, suck on the hose to draw water into your mouth. Don’t try to suck too hard; just a steady pull will get the job done.
- Close the Valve: After drinking, bite down again to close the valve and prevent any leakage.
Tip: Practice drinking from the bite valve while walking or running before heading into a challenging outdoor activity. This helps you get used to drinking while staying active and prevents spills.
Maintain Hydration Throughout Your Activity
One of the main benefits of using a hydration pack is that it allows you to drink easily while on the move, so make the most of it!
- Sip Regularly: Don’t wait until you’re thirsty to drink. Sip water regularly, especially if you’re engaging in strenuous activity, as it’s easy to forget when you’re focused on the task at hand.
- Monitor Your Water Levels: Pay attention to the water level in your hydration pack. If you’re on a long hike or bike ride, it might be a good idea to bring a backup water bottle or plan for refills along the way.
Tip: For longer activities, consider bringing an electrolyte replacement in your hydration pack to help maintain energy and prevent dehydration.
Keep It Clean After Use
A key part of using a hydration backpack correctly is proper care. After you’ve finished your activity, cleaning your hydration pack is essential for hygiene and longevity.
- Rinse the Reservoir: Empty out the water and rinse the reservoir with warm water. Use a mild soap if needed, but avoid harsh detergents that could damage the bladder.
- Dry the Bladder: Once clean, make sure the bladder is thoroughly dried to prevent mold buildup. Hang it upside down in a dry space or use a cleaning brush to air it out.
- Store Properly: When storing your hydration pack, keep it in a cool, dry place. Don’t store it with water still inside, as this can lead to unpleasant smells and mold.
Tip: Use hydration bladder cleaning tablets or cleaning brushes to ensure that your pack stays free of bacteria and odors.
Troubleshoot Common Issues
Despite their simplicity, hydration backpacks can sometimes have minor issues. Here’s how to address common problems:
- Leaks from the Bite Valve: If the bite valve leaks, check if it’s properly closed. If it still leaks, inspect the hose for cracks or leaks. Replacing a damaged bite valve or hose is an easy fix.
- Bad Taste or Smell: If your hydration pack starts to taste or smell bad, try soaking the bladder in a solution of water and vinegar or using special cleaning tablets designed for hydration bladders.
- Kinks in the Hose: If the hose gets kinked and restricts water flow, straighten it out gently. Store the hose in a way that avoids sharp bends to keep it functioning properly.
Tip: If you notice leaks, stop using the pack immediately to avoid wasting water. Often, simple fixes like tightening the bite valve or cleaning the bladder can resolve the issue.
How to Drink from a Hydration Pack?
Drinking from a hydration pack is different than using a water bottle, but it’s surprisingly easy once you get the hang of it.
Steps for Drinking from a Hydration Pack:
- Find the Bite Valve: The bite valve is usually located on the hose, near your shoulder.
- Bite to Open: Gently bite down on the valve to open it. This releases the water inside.
- Suck to Drink: As you bite, suck gently on the valve to start the flow of water.
- Stop Biting to Close: Once you’re done drinking, stop biting the valve. It automatically closes, preventing water from leaking out.
The best part? You don’t have to stop your activity to drink, just keep moving!
How Long Can You Keep Water in a Hydration Pack?
Water can typically stay fresh in a hydration bladder for about 24 hours, but it’s important to clean the bladder regularly to prevent bacteria build-up. Leaving water in your pack for too long can lead to a stale taste or even mold growth.
Typical Lifespan of Water in a Hydration Pack:
- Fresh Water: In general, it’s best to consume the water within 24 to 48 hours of filling your pack. Water can taste stale if left too long, and bacteria can start to grow if the pack isn’t cleaned properly.
- Dirty or Warm Conditions: If you’re in hot weather, or if the pack has been exposed to dirt, you may want to drink the water sooner.
Helpful Tip:
If you’re planning on storing your hydration pack for a longer period, empty it, clean it thoroughly, and dry it to prevent bacteria build-up.
Are Hydration Backpacks Healthy?
Hydration packs are generally healthy, as they encourage frequent hydration, which is essential for maintaining energy levels during physical activity. However, proper care and cleaning are crucial to avoid bacteria build-up in the bladder or tube, which could lead to contamination.
Health Benefits
- Improved hydration: Regular sipping prevents dehydration, which can affect performance.
- No more heavy bottles: This reduces strain on your body, especially during extended activities.
- Bacteria prevention: Cleaning your hydration pack helps avoid harmful bacteria and mold growth, ensuring that the water remains safe to drink.
Tips for Healthy Hydration:
- Use Clean Water: Always fill the hydration pack with clean, potable water.
- Clean After Every Use: Wash the bladder and tubing with warm water and mild soap after each use.
- Dry Thoroughly: Ensure that the bladder and tube are fully dry before storing them.
How Do You Dry a Hydration Pack Bladder?
After each use, it’s essential to clean and dry the bladder to prevent mold or mildew buildup. Here’s how you can dry your bladder properly:
- Turn the bladder inside out: If possible, turn the bladder inside out and let it air dry for a few hours.
- Use a drying rack: You can purchase a hydration bladder drying rack or use a simple clothespin to hang it upside down for airflow.
- Clean regularly: Clean the bladder thoroughly with mild soap or specific cleaning tablets designed for hydration systems.
Cleaning Tips
- Avoid dishwashers unless specified by the manufacturer.
- Use specialized cleaning tablets to remove odors or buildup that regular soap cannot eliminate.
How to Choose the Right Hydration Pack for You
When choosing the right hydration pack for your needs, consider:
- Capacity: How much water do you need? Choose a pack that holds enough water for your activity, typically ranging from 1.5 to 3 liters.
- Fit & Comfort: Make sure the pack fits snugly and comfortably on your back. Adjustable shoulder straps and a waist strap can help ensure comfort.
- Durability & Features: Look for a pack made from high-quality, durable materials. Some packs also come with extra compartments for storing gear.
Whether you’re a hiker, cyclist, runner, or simply someone who enjoys the outdoors, a hydration backpack is a great companion for ensuring you stay hydrated without missing a beat. From the convenience of hands-free hydration to its efficiency during long activities, it’s a must-have for anyone on the go.
If you’re looking for a custom hydration backpack tailored to your specific needs, don’t hesitate to reach out to Szoneier. We specialize in designing and manufacturing high-quality hydration packs that can be customized for your personal or business requirements. Contact us today for more information!