Skip to content
Leather is one of the most luxurious and durable materials, but it’s not impervious to the wear and tear of daily life. Whether it’s a favorite leather jacket, a high-end handbag, or a timeless piece of furniture, leather can get scuffed, cracked, or faded with use. The good news is that leather restoration is possible and can bring your beloved items back to life, often better than ever.
In this comprehensive guide, we’ll tell you through everything you need to know about restoring leather. From understanding the different types of leather to detailed step-by-step instructions on how to repair, clean, condition, and protect your leather items, you’ll be equipped with all the knowledge you need to bring your leather products back to life.
Let’s dive deeper now!
Why Leather Restoration is Important?
Before we get into dive deeperly how to restore leather, it’s important to understand why leather needs restoration in the first place and how it affects your leather products. Leather, after all, comes from animal skin, and just like your own skin, it can suffer from drying out and cracking over time.
Think about what happens to your skin when it gets too dry,it becomes rough, stiff, and can even crack if you don’t take care of it. The same principle applies to leather. Leather products, whether it’s your favorite leather jacket, wallet, or couch, are susceptible to this natural aging process.
Leather restoration is about bringing that dried-out leather back to life. By properly cleaning and conditioning your leather, you help to restore its softness, smoothness, and overall durability. When you take the time to care for your leather items, you’re essentially giving them a new lease on life, extending their lifespan for many more years of use.
What Are The Leather Types?

Knowing about the different kinds of leather and the specific care they need can help you restore them effectively.
Full-Grain Leather
What is Full-Grain Leather?
Full-grain leather is the highest-quality leather available. It’s made from the top layer of the hide and retains all its natural characteristics, including imperfections and scars. This leather is incredibly durable and ages beautifully, developing a rich patina over time.
Restoration Tips:
- Full-grain leather doesn’t need a lot of restoration, just regular cleaning and conditioning.
- Over-conditioning can make it too soft, so use leather conditioners sparingly.
- A simple wipe-down with a damp cloth, followed by a quality leather conditioner, should suffice.
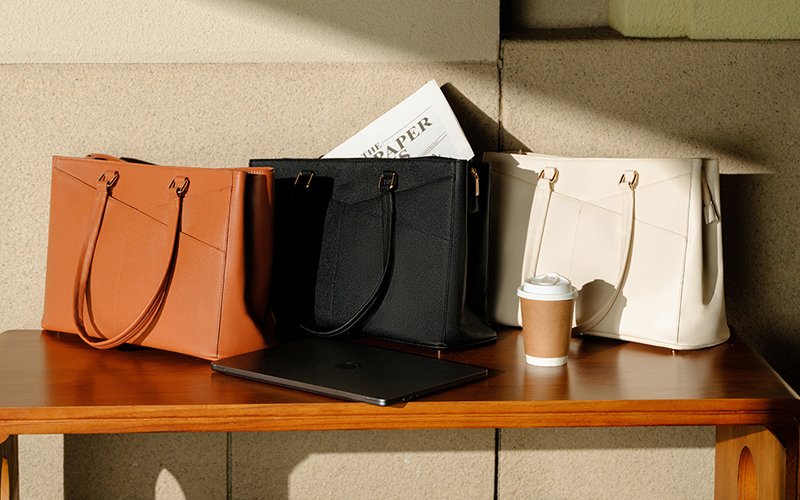
At Szoneier, we only use full grain leather in our bags, so you know you’re getting the best quality possible.
Top-Grain Leather
What is Top-Grain Leather?
Top-grain leather is made from the second layer of the hide and is slightly processed to remove imperfections. It’s thinner than full-grain but still durable and often used in high-quality products like bags, belts, and furniture.
Restoration Tips:
- Like full-grain, top-grain leather benefits from regular cleaning and conditioning.
- However, since it’s thinner, it may need more frequent moisturizing to prevent drying out.
- Leather repair kits work well for fixing any scratches or scuffs.
Genuine Leather
What is Genuine-Grain Leather?
Despite the name, “genuine leather” refers to leather made from the lower layers of the hide or processed leather that’s been treated to look and feel like premium leather. It’s commonly used for budget-friendly leather products.
Restoration Tips:
- Genuine leather is more prone to cracking and wear.
- It can be restored using leather cleaners and conditioners, but the results may not be as dramatic as with higher-quality leathers.
- For deep cracks or tears, a leather repair kit will be necessary.
Bonded Leather
What is Bonded Leather?
Bonded leather is made from leather scraps that are bonded together with a polyurethane or latex backing. It’s the least durable and is often used in lower-end products like certain office furniture.
Restoration Tips:
- Bonded leather is hard to repair because it’s prone to peeling and cracking.
- While you can attempt to patch it up with leather adhesive or filler, it might not last as long as other leather types.
- For severe damage, replacing the item may be the best option.
Essential Tools and Products for Leather Restoration
Before starting your restoration project, ensure you have the necessary tools and products. Having the right supplies can make a huge difference in the outcome.
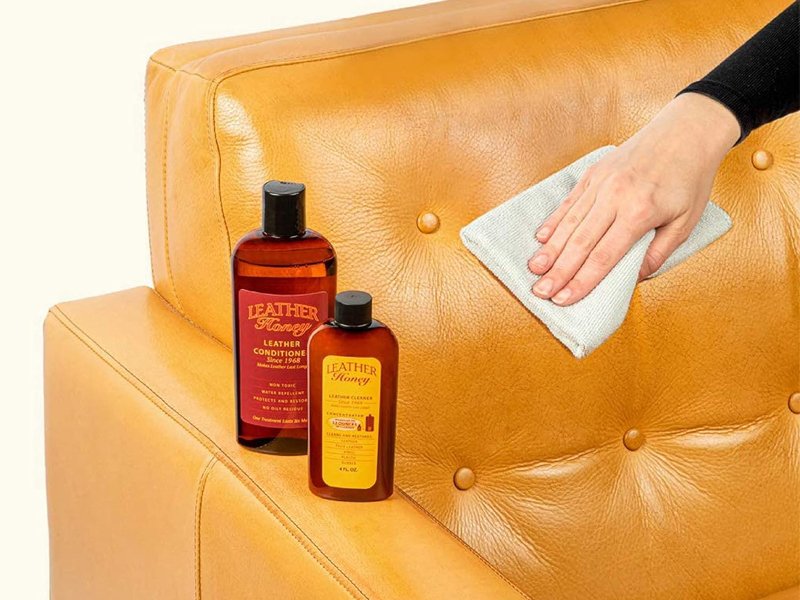
1. Leather Cleaner and Conditioner
Leather cleaners help remove dirt, oils, and grime from the surface, while conditioners help restore moisture and prevent cracking. Look for products that are specifically designed for leather to avoid damaging the material.
Top Products:
- Leather Honey Leather Cleaner: Deep cleans without drying out the leather.
- Mink Oil Leather Conditioner: Excellent for conditioning and softening leather.
2. Leather Repair Kit
A leather repair kit is essential for fixing tears, holes, and cracks in your leather. These kits typically include a filler, adhesive, and sometimes dye to help restore the leather’s color.
Top Products:
- Fiebing’s Leather Repair Kit: Includes everything you need for small repairs.
- Tarrago Leather Repair Kit: Great for fixing cracks and surface damage.
3. Brushes and Sponges
Soft brushes or microfiber cloths are great for cleaning leather without scratching or damaging the surface. You’ll also need a soft sponge for applying conditioner or cleaner.
Recommendation:
- Microfiber Cloths: Gentle on leather, great for cleaning and buffing.
- Soft Brush: For scrubbing seams or textured areas.
4. Leather Dye and Color Restorer
If your leather has faded, a dye or color restorer will help bring it back to its original hue. It’s essential to choose a dye that matches the leather’s natural color.
Top Products:
- Angelus Leather Dye: Ideal for deep color restoration.
- Tarrago Color Dye: Works well for rejuvenating faded leather.
Step by Step Process for Restoring Leather
Now that you know the tools and materials, it’s time to start the restoration process. Below is a detailed, step by step guide for restoring your leather items.
Step 1: Clean the Leather
Start with a thorough cleaning to remove dirt, oils, and other contaminants. This helps ensure that your leather restoration products will work effectively.
How to Clean:
- Dusting: Use a dry microfiber cloth to gently wipe away any dust or loose dirt.
- Deep Cleaning: Apply a small amount of leather cleaner onto a damp sponge or cloth. Rub gently in circular motions to lift dirt and grime from the leather.
- Wipe and Dry: Use a clean, damp cloth to remove excess cleaner, and allow the leather to air dry completely. Never use heat (like a hair dryer), as it can dry out the leather.
Tip: Never use soap, water, or harsh chemicals to clean leather, as they can damage the material.
Step 2: Assess the Damage
Once the leather is clean, assess the damage. Look for scratches, cracks, discoloration, or deep gouges. If the leather is only surface-level dirty, a good cleaning and conditioning should restore it. However, if the leather has deeper issues, such as cracks or tears, it will need repair.
Step 3: Repairing Cracks and Tears
If your leather has visible cracks or holes, you’ll need to use a leather repair kit.
How to Repair:
- Clean the Area: Ensure the damaged area is clean and dry.
- Apply Filler: Use a spatula to apply leather filler into any cracks or holes. Smooth it out so it blends with the surrounding leather.
- Let It Dry: Allow the filler to dry completely. This may take 24 hours, depending on the product.
- Buff and Sand: After it dries, gently sand the area until it’s smooth and flush with the rest of the leather.
Tip: When repairing deep cuts or tears, it may be best to seek professional help, especially for valuable items.
Step 4: Condition the Leather
Leather conditioners restore moisture to the material and prevent it from cracking. Over time, leather can dry out due to environmental factors, so conditioning it regularly is essential.
How to Condition:
- Apply a small amount of conditioner onto a clean cloth.
- Gently rub the conditioner into the leather in small, circular motions.
- Let it absorb for 15-20 minutes.
- Wipe off excess product and buff the leather with a dry cloth to restore its natural shine.
Tip: For deeply dried-out leather, you may need to repeat this process several times.
Step 5: Dyeing and Color Restoration
If your leather has faded or discolored, use a leather dye to restore its original hue.
How to Dye:
- Test the dye on a small, hidden area first to make sure it matches the color.
- Apply the dye evenly with a cloth or sponge. Work in sections and be sure to cover the entire area.
- Allow the dye to dry, and apply additional coats if necessary.
- Once dried, apply conditioner to restore moisture to the dyed leather.
Step 6: Polishing and Protecting
To finish, you can polish your leather to give it a beautiful, smooth shine. You should also apply a protective layer to help prevent future damage.
How to Protect:
- Apply a water-repellent leather protectant to shield the leather from moisture and stains.
- Buff the leather with a clean, dry cloth.
- Let it dry completely before using it again.
Tip: Regular use of a leather protector can help maintain the restored look and prolong the life of your leather products.
Leather Restoration Maintenance: Keeping Leather in Top Shape
Once you’ve restored your leather item, regular maintenance will keep it looking great for years to come.
1. Clean Regularly
Wipe down your leather items weekly with a dry microfiber cloth to remove dust and dirt. Regular cleaning prevents buildup and keeps the leather looking fresh.
2. Condition Every Few Months
Condition your leather every 3-6 months, or more frequently if it’s exposed to harsh environments. Conditioning helps prevent the leather from drying out and cracking.
3. Avoid Sunlight and Heat
Direct sunlight and heat sources can dry out leather and cause it to fade or crack. Store leather items in a cool, dry place away from direct sunlight.
4. Store Properly
When not in use, store leather items in a dust bag or cover them with a cloth. For leather bags, stuff them with tissue paper to help maintain their shape.
How To Fix Faux Leather
Faux leather is a popular, affordable alternative to genuine leather. It’s commonly used in clothing, furniture, accessories, and more, thanks to its ethical and eco-friendly appeal. However, while it’s generally durable, faux leather can still suffer from wear and tear over time. Cracking, peeling, fading, or becoming stiff are common issues. Thankfully, faux leather can be restored at home with the right approach. However, there are some important considerations to keep in mind before you begin the repair process.
Key Considerations Before Fixing Faux Leather
- Know Your Material: Faux leather is typically made from synthetic materials like polyurethane (PU) or polyvinyl chloride (PVC). These materials have a different texture and flexibility compared to genuine leather. Before beginning any repairs, it’s crucial to identify the specific type of faux leather you’re working with, as this will influence the products and techniques you use for repair.
- Test Cleaning Products First: Before applying any cleaning or conditioning product, test it on a small, inconspicuous area of the faux leather. Faux leather can be sensitive to certain cleaners or oils, so it’s important to ensure that the product you’re using won’t discolor, damage, or degrade the material.
- Avoid Using Heat Directly: While heat can be effective in smoothing out wrinkles or softening the material, never apply direct heat like a hot iron or hair dryer directly to faux leather. High heat can cause the synthetic material to melt or become deformed. Always use a gentle steam method or keep a safe distance when using any form of heat.
- Choose the Right Repair Kit: Not all repair kits are made the same, and using the wrong one can lead to unsatisfactory results. Make sure the kit you choose is specifically designed for faux leather or synthetic materials. A standard leather repair kit made for real leather might not work well on faux leather and can lead to further damage.
- Use a Gentle Cleaner: When cleaning faux leather, avoid harsh chemicals or abrasive cleaners. Instead, opt for a mild soap solution or a cleaner designed for synthetic leather. Harsh chemicals can break down the surface of faux leather, causing it to lose its color or texture.
- Work in Small Sections: When performing repairs, especially for cracks, peeling, or recoloring, it’s best to work in small sections. This allows you to focus on specific areas without spreading the repair products too thinly. Small, controlled steps will yield the best results and ensure that your repair looks seamless.
- Conditioning is Key: Faux leather can dry out, especially after cleaning or repairing. After fixing cracks or peeling, always apply a conditioner designed for synthetic leather. This will keep the material supple and help prevent future damage. However, be careful not to over-condition, as too much conditioner can cause the surface to become sticky or attract dirt.
- Give It Time to Dry: After applying any repair products, such as patching compounds, dyes, or conditioners, always allow the material to dry completely. Rushing this process may cause uneven results or compromise the effectiveness of the product. Follow the manufacturer’s instructions for drying time, which can vary depending on the product used.
- Recoloring Faded Faux Leather: Recoloring faux leather can be tricky. If your faux leather item has faded or the color has been worn down, use a dye or paint specifically designed for synthetic materials. Regular fabric dye or paints intended for other fabrics might not adhere properly to faux leather, so always double-check the product specifications before use.
- Regular Maintenance: To keep your faux leather in good condition for longer, make regular maintenance a habit. Cleaning, conditioning, and storing faux leather items properly can help minimize the need for major repairs down the line. When storing, avoid placing faux leather items in humid or excessively dry environments, as these conditions can cause the material to crack or become brittle.

Conclusion
Leather is a durable, beautiful material that can stand the test of time if properly cared for. Whether it’s your favorite leather accessories,clothing,leather jacket, a cherished bag, or an heirloom piece of furniture, restoring leather is an achievable and satisfying process. By following the steps outlined in this guide, you can bring your leather products back to life and enjoy them for years to come.
Remember, the key to leather restoration is patience, the right products, and regular maintenance. With a little effort, you can keep your leather goods looking as good as new and sometimes, even better than before!
As a professional bespoke leather goods manufacturer and supplier,If you have questions about leather care or need product recommendations, feel free to reach out. We’re always here to help!
More FAQs About How To Restore Leather
Can damaged leather be restored?
Yes, damaged leather can often be restored, depending on the severity of the damage. For cracks and dryness, applying a leather conditioner can rehydrate and soften the material. Scuffs and scratches can often be buffed out or repaired with leather polish or specialized repair kits. Stains can be removed with proper leather cleaners, but it’s best to treat them quickly to avoid permanent marks. For faded leather, color restorers or dyes can help revive the material’s original appearance. Regular cleaning and conditioning can also prevent future damage, extending the life of your leather items.
How Do You Revive Genuine Leather?
Reviving genuine leather is simpler than you might think. All you need is a good leather cleaner to remove dirt and grime, followed by a leather conditioner to restore moisture and keep it soft and pliable. These two steps can do wonders for your leather goods.
How To Restore Leather At Home?
Restoring leather at home is simple with the right steps. Start by cleaning the leather with a mild soap or leather cleaner to remove dirt and grime. Next, apply a leather conditioner to hydrate the material and prevent cracking. For scratches, use a leather polish or balm to buff them out, and for deep scuffs, consider a leather repair kit. If the leather has faded, use a color restorer or leather dye to bring back its vibrancy. Finally, regularly clean and condition your leather to maintain its condition and prevent future damage.
How Do You Clean and Rejuvenate Leather?
To clean and rejuvenate leather, follow our simple guide above. It’ll walk you through the best methods to clean, condition, and bring your leather back to life, so it’s looking and feeling like new again.