Skip to content

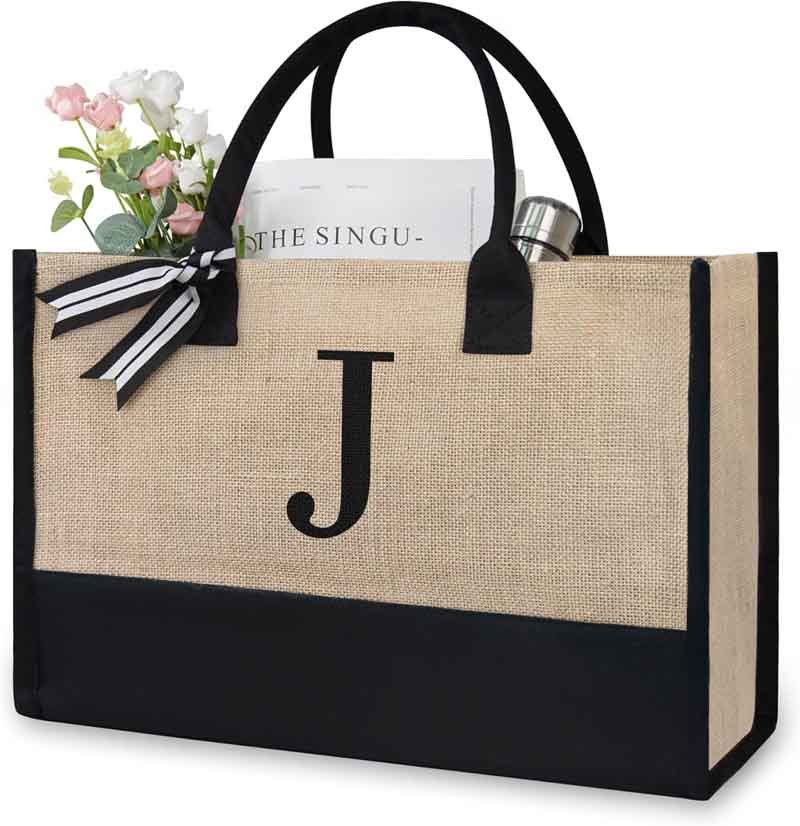
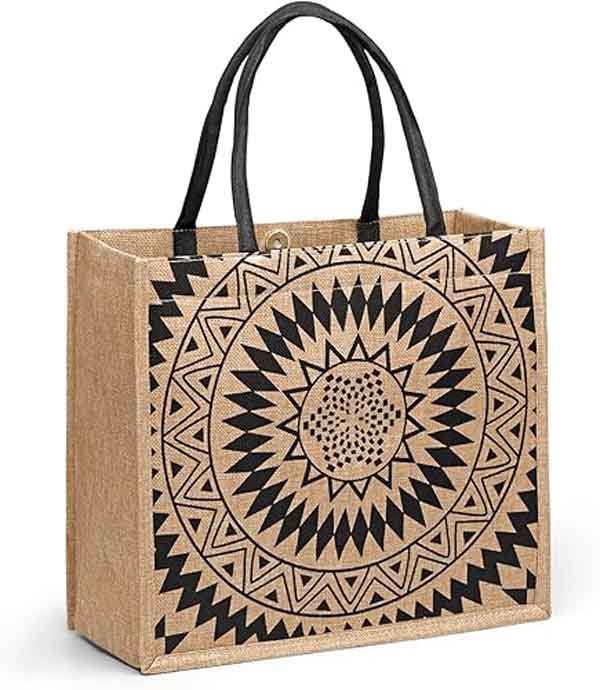
In a world where fast fashion clogs landfills and plastic pollution chokes oceans, jute bags emerge as a sigh of relief,biodegradable, sturdy, and naturally stylish. These rustic-looking carriers have surged in popularity among eco-conscious shoppers and brands alike. But beyond their aesthetic appeal, jute bags represent a journey of craftsmanship: from raw plant fiber to a finished tote that proudly carries groceries, laptops, or promotional swag.
To make a jute bag, start by selecting a high-quality, medium-weight jute fabric (9–12 oz per square yard) and complementary lining (cotton or canvas). Draft a pattern for your desired shape (tote, shopper, or drawstring), adding a ½-inch seam allowance and reinforced corners. Cut panels, interface where needed, then sew side seams, bottom gusset, and handles in logical order. Finish raw jute edges with overlocking or zigzag stitching. Press seams, inspect hardware, and optionally treat fabric for water resistance.
What Are Jute Bags?
Jute bags are made from the long fibers of the jute plant, offering a biodegradable, strong alternative to plastics. These bags are breathable, can carry heavy loads (up to 20–30 pounds), and develop a charming patina over time. Choosing jute reduces environmental impact, supports sustainable agriculture, and aligns with growing consumer demand for eco-friendly products.
What Is Jute and What Are Its Environmental Benefits?
Origins of Jute Fiber:
- Botanical Profile: Jute comes from the Corchorus genus, primarily Corchorus olitorius and Corchorus capsularis. Grown predominantly in India and Bangladesh, jute thrives in warm, humid climates without excessive fertilizers or pesticides.
- Harvest Cycle: Within 4–6 months of planting, jute plants are ready to harvest. Their rapid growth and minimal chemical requirements make jute one of the world’s most eco-friendly fibers.
Environmental Advantages:
- Biodegradability: Unlike synthetic fibers, jute decomposes naturally in soil within 1–2 years, returning nutrients to the earth.
- Carbon Sequestration: Jute crops absorb significant carbon dioxide—up to 2.4 tons of CO₂ per hectare annually—while releasing oxygen.
- Minimal Water Footprint: Compared to cotton, which can require 2,700 liters of water to produce one T-shirt, jute cultivation consumes far less, relying mostly on monsoon rains.
- Zero Waste Potential: Jute by-products (like leaves and white jute sticks) feed livestock or generate biofuel.
Broad Applicability and Economic Impact:
- Global Relevance: Approximately 1.5 million tons of jute fiber are produced worldwide each year, primarily for sacks, rugs, and bags.
- Rural Livelihoods: Over three million farming families in South Asia depend on jute cultivation, driving rural economies and preserving traditional agricultural practices.
How Do Jute Bags Compare to Cotton or Canvas Bags?
Strength and Load Capacity:
- Tensile Strength: Jute fibers have a tensile strength of about 4.5–5.5 g/denier, roughly comparable to cotton but less stretchy—ideal for rigid shapes like totes.
- Weight-Bearing: A well-constructed jute bag can carry 20–30 lbs comfortably; cotton canvas (10 oz) manages similar loads but tends to stretch under heavy weight.
Hand Feel and Aesthetics:
- Jute Fabric Texture: Coarse, nubby surface—conveys rustic charm. Over time, jute softens slightly but retains character.
- Canvas Texture: Smoother, supple; available in multiple weights (8 oz–18 oz), making it more versatile for high-fashion or casual bags requiring a more polished look.
- Style Implications:
- Jute’s Organic Look: Appeals to “farm-to-market” or bohemian brand aesthetics—pair with rope or bamboo handles for artisanal flair.
- Canvas’s Versatility: Works across streetwear, luxury, and utilitarian styles—easier to dye vivid colors.
Environmental Footprint:
- Cotton vs. Jute Water Usage: Cotton cultivation demands up to 11,000 liters of water per kilogram of fiber; jute relies mostly on rainfall.
- Carbon Emissions: Jute’s lower input requirements result in a smaller carbon footprint per kilogram—up to 50% less than cotton.
- End-of-Life Disposal: Both jute and cotton biodegrade, but jute’s rapid decomposition (12–18 months) gives it an edge.
Price and Market Positioning:
- Jute Fabric Cost: Typically $4–$8 per yard for medium-weight (9–12 oz) jute, depending on origin and finish.
- Canvas Fabric Cost: Ranges $6–$15 per yard for 10 oz–18 oz canvas—higher for specialty weaves or waxed finishes.
Are There Different Types of Jute Fabric for Bags (e.g., Plain, Sacking)?

Plain Weave Jute (Hessian Cloth):
- Features:
- Weave Type: Simple plain weave (over one, under one), producing a coarse texture with pronounced crosshatch.
- Weight: Typically 9–12 oz per square yard.
- Applications: Ideal for grocery totes, promotional bags, and decor (wall hangings, table runners).
- Aesthetic & Performance:
- Pros: Strong, breathable, and naturally UV-resistant.
- Cons: Tendency to fray, surface lint, limited print clarity on large logo areas.
Sacking or Gunny Bag Jute:
- Characteristics:
- Weave Type: Looser weave with larger yarn diameter; often used for agricultural sacks (grain, potatoes).
- Weight: Heaviest jute option, around 14–16 oz per square yard.
- Applications: Best suited for rugged, heavy loads (e.g., 50+ lb sacks). Less common for handbags due to stiffness and coarse hand.
- Aesthetic & Performance:
- Pros: Extremely durable under rough conditions; low cost (around $3–$5 per yard).
- Cons: Rough texture—not ideal for hand-held bags; poor print surface.
Blended Jute Fabrics (Jute-Cotton or Jute-Polypropylene):
- Features:
- Weave Type: Mixed yarns with cotton or polypropylene; yields smoother surface and varied colors.
- Weight: 8–14 oz per square yard, depending on blend ratio.
- Applications: Launderable jute home decor or more fashion-oriented totes.
- Aesthetic & Performance:
- Pros: Softer hand, better drape, more dye options.
- Cons: Compromises full biodegradability if using polypropylene blends; potential confusion for eco-conscious consumers.
Jute Fabric Types and Characteristics
| Fabric Type | Weave & Weight | Pros | Cons | Typical Use Cases |
|---|---|---|---|---|
| Plain Weave Jute | Plain weave, 9–12 oz | Sustainable, UV-resistant | Frays easily, coarse hand | Grocery totes, eco-friendly packaging |
| Sacking (Gunny) | Loose weave, 14–16 oz | Extremely durable, low cost | Very rough, heavy | Industrial sacks, heavy-duty totes |
| Jute-Cotton Blend | Plain/weave, 8–14 oz | Softer, colorful, moderate cost | Partial biodegradability (if PP blended) | Fashion totes, home decor |
| Jute-Polypropylene Blend | Twill/plain, 10–12 oz | Water-resistant, smooth | Not fully biodegradable, cost higher | Reusable shopping bags, promotional bags |
Which Materials and Tools Do You Need to Make a Jute Bag?
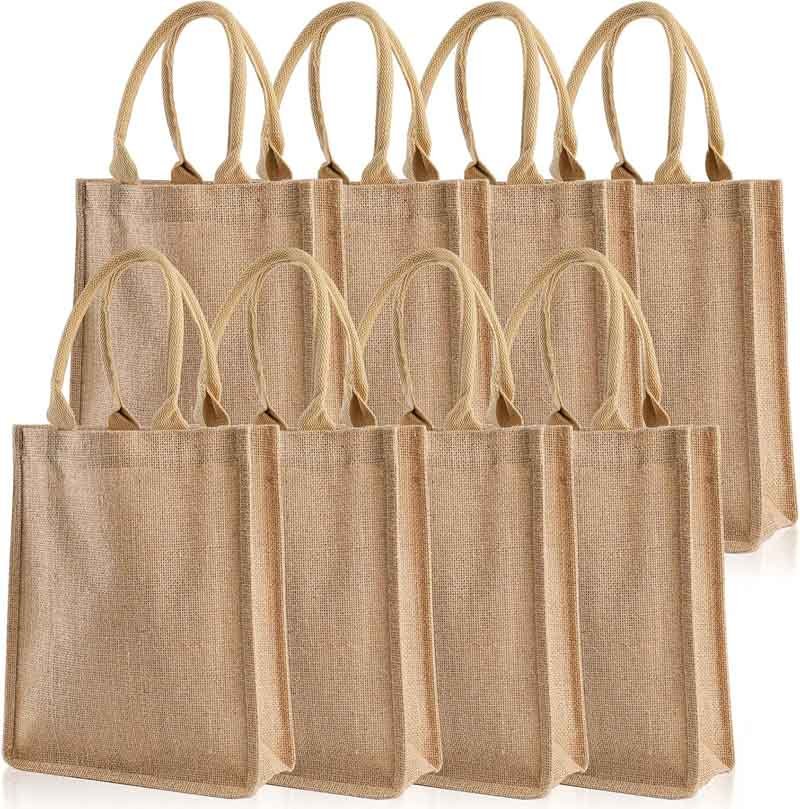
To make a durable jute bag, you need medium-weight jute fabric (9–12 oz per sq yd), a coordinating lining fabric (cotton canvas 8–10 oz), and sturdy thread (polyester-wrapped). Use a heavy-duty sewing machine with a denim/jeans needle (size 90/14 or 100/16). Essential tools include sharp non-slip shears, chalk or washable markers for jute, clips instead of pins, and measuring tools (rulers, yardstick).
Equipping yourself with the right materials and tools is half the battle. A dull pair of scissors or the wrong needle can turn a straightforward sewing project into an exercise in frustration. Conversely, investing in quality essentials ensures that every stitch in your jute bag stands up to daily wear. Below, we dissect each component—from fabric weights to hardware choices—so you can confidently assemble a complete toolkit.
What Weight and Weave of Jute Fabric Works Best for Durability?
Ideal Weight Range:
- 9–12 oz per Square Yard:
- Trade-Off: Lightweight (<9 oz) jute tears more easily; heavier (>12 oz) jute becomes too stiff and bulky for comfortable tote bags.
- Recommended Use: Standard consumer totes, promotional bags, and grocery carriers.
- 10.5 oz Common Option:
- Strikes balance between strength (to handle 20+ lbs) and manageable hand feel.
Preferred Weave Types:
- Twill vs. Plain Weave:
- Twill Jute: Diagonal pattern, slightly tighter weave—resists fraying better, drapes slightly smoother, works well for fashion-forward bags.
- Plain Weave Jute (Hessian): More rustic look, breathable, often less expensive—ideal for basic totes, craft markets.
Pre-Treatment and Finishes:
- Pre-Washed vs. Unwashed Jute:
- Unwashed: Colorful jute may bleed dye on first wash—pre-wash or pre-shrink is recommended if machine washability is desired.
- Pre-Washed: Slightly softer, less shrinkage, ready for sewing.
- Coated/Calendered Finishes:
- Application: Jute fabric can be coated with PU or laminated with a thin waterproof film—enhances water resistance but reduces breathability.
- Cost Impact: Adds 15–30% to fabric cost—evaluate whether end-users require waterproofing (e.g., outdoor market bags).
Sourcing and Cost Considerations:
- Bulk Pricing: Ordering 100–500 yards of jute fabric directly from manufacturers in China or India can reduce cost to $4–$6 per yard (9–12 oz).
- Small Batch (Sample) Pricing: Specialty prints or custom weaves often cost $8–$12 per yard for orders under 50 yards.
Which Sewing Machines and Needles Are Recommended for Jute?
Sewing Machine Types:
- Industrial Heavy-Duty Machines (Walking-Foot):
- Models: Juki DDL-5550 or Consew 206RB for heavy fabric—handles multiple jute layers without skipping stitches.
- Advantages: Adjustable presser foot pressure, strong motor, and large bobbin capacity.
- Heavy-Duty Home Machines:
- Models: Singer Heavy Duty 4452, Janome HD3000—suitable for small-batch jute bag production (up to 4–5 layers).
- Limitations: May struggle when over 6 layers of thick jute converge at seam intersections.
Recommended Needles:
- Denim/Jeans Needles: Size 90/14 or 100/16—sharp point and reinforced shank to pierce dense jute fibers.
- Leather Needles (Alternative): Can work on very heavy or coated jute but may leave larger holes—use sparingly.
- Needle Change Frequency: Replace needles every 8–10 hours of sewing heavy jute to prevent skipped stitches and needle breakage.
Thread Selection:
- Polyester-Wrapped Core Thread: Tex 70 or Tex 90—high tensile strength resists breakage on jute seams.
- Cotton-Wrapped Polyester Thread: Slightly less strong than core-spun but offers a matte finish that blends with jute’s matte look.
- Topstitching Thread: 30-weight polyester for decorative topstitch—visible yet durable.
- Bobbin Thread: 100% polyester Bobbin master or L-type for smooth feeding in heavy-duty machines.
Additional Tools & Accessories:
- Cloth Clips Over Pins: Pins leave visible holes in jute; use ¾”–1″ plastic or metal quilting clips to hold thick layers together.
- Non-Slip Scissors or Rotary Cutter: Jute frays easily; sharp, non-slip shears prevent jagged edges. A large, 60mm rotary cutter with self-healing mat speeds up cutting multiple layers.
- Chalk or Water-Soluble Marker: Jute’s rough surface doesn’t accept permanent ink well—use tailor’s chalk or water-soluble pens to mark seam allowances.
- Measuring Tools: 24″ or 30″ Quaker rulers for straight lines; flexible curve rulers for rounded corners.
- Seam Roller: Handy for pressing jute seams while sewing—wooden seam rollers flatten thick jute without needing an iron.
What Hardware (Handles, Rivets, Zippers) Complements a Jute Bag?
Handles and Straps:
- Material Options:
- Jute Webbing Handles: Continuity of material—matching aesthetic; slightly less comfortable if used on shoulder for long durations.
- Cotton Canvas Handles: Softer, more comfortable; pair well with jute and can be dyed to match or contrast.
- Leather Handles or Accents: Adds a premium touch—beefy cow leather straps cost $3–$5 per pair; look stylish but increase COGS.
- Attachment Methods:
- Stitching Reinforcement: Use bartack or box-x stitching at handle bases for extra strength.
- Rivets or Grommets: Brass or nickel grommets at handle anchor points distribute stress and prevent jute tearing—cost $0.20–$0.40 per grommet.
Closure Hardware:
- Magnetic Snaps:
- Use Case: Top closure for shopper or tote bags; easy for quick access.
- Installation: Requires cutting a small slit in jute and sandwiching snap halves between jute and lining; cost $0.50–$1 per snap.
- Zippers:
- Types:
- Metal Teeth Zippers: Industrial look; more durable, but heavier.
- Nylon Coil Zippers: Lighter, flexible—blend seamlessly with fabric.
- Invisible Zippers: For a clean exterior look; costlier and more challenging to sew.
- Placement: Top opening or interior pockets; standard lengths range from 8″ to 14″ depending on bag design.
- Cost: $2–$5 per zipper, depending on length and type.
- Types:
Rivets & Eyelets:
- Functionality: Reinforce stress points, attach straps, or create decorative accents.
- Materials & Finishes:
- Brass Rivets: Rustic look, corrodes slightly for an aged patina—perfect match for jute’s earthy tone.
- Antique Nickel or Gunmetal: Industrial aesthetic; suits urban or street-style jute bags.
- Installation Tools: Simple hand rivet setter or a lightweight arbor press—cost $30–$80.
- Cost: $0.10–$0.25 per rivet or eyelet; kits with setter and 50 rivets run $15–$30.
Lining and Pocket Hardware:
- Clip-On Hooks & D-Rings:
- Use Case: Attach removable keychains or interior pouches.
- Material Options: ½” brass D-ring, $0.25 each; clips $0.50 each.
- Snap Fasteners for Pockets: ½” nylon or metal snaps—easy closure for interior or exterior pockets; cost $0.10–$0.30 per snap.
- Label Holders or Name Tag Windows: Add a small TPU or PVC window for business cards—cost $0.50–$1 per pocket.
Common Hardware and Approximate Costs
| Hardware Type | Material & Size | Approx. Cost (USD/unit) | Use Case |
|---|---|---|---|
| Jute Webbing | 1″ wide, 18″ length | $0.50–$1 | Handles for small tote bags |
| Cotton Canvas Strap | 1.5″ wide, reinforced | $1–$2 | Shoulder straps or crossbody options |
| Leather Handle | 1″ wide, 20″ length | $3–$5 | Premium accent or long-lasting handles |
| Brass Grommet | ¼” inner diameter | $0.20–$0.40 | Reinforce handle anchor points |
| Magnetic Snap | ½” diameter | $0.50–$1 | Top closure for tote bags |
| Nylon Coil Zipper | 12″ length | $2–$3 | Main compartment closures |
| Antique Nickel Rivet | 5 mm diameter | $0.10–$0.25 | Decorative accents or reinforcements |
| D-Ring | ½” width, brass | $0.25 | Clip-on accessories or straps |
| Snap Fastener | ½” nylon | $0.10–$0.30 | Interior/exterior pocket closures |
How Do You Create a Jute Bag Pattern and Cut Fabric Pieces?
To draft a jute bag pattern, decide on bag dimensions (e.g., 15″ wide × 14″ tall × 4″ deep for a standard tote) and add ½” seam allowances. Use pattern paper or digital tools to outline front, back, bottom panel, and side gussets. Account for handle placement (e.g., 4″ from side seams). Transfer pattern onto jute with chalk, then cut each piece precisely using non-slip shears.
How to Determine the Bag Dimensions (Tote, Shopper, Drawstring)?
Tote Bag Sizing:
- Standard Tote:
- Dimensions: 15″ wide × 14″ tall × 4″ gusset.
- Use Case: Everyday tote that fits a 13″ laptop, notebook, and a small water bottle.
- Pattern Pieces:
- Front/Back Panels: 15″ × 14″ each.
- Bottom Gusset: 15″ × 4″.
- Side Gussets (Optional): 14″ tall × 4″ wide each (two pieces) to create a boxed bottom.
- Handle Attachment Points: 4″ in from each side on top edge; allows comfortable shoulder fit.
Large Shopper:
- Dimensions: 18″ wide × 16″ tall × 6″ gusset.
- Use Case: Grocery runs, beach trips—fits a loaf of bread, produce, and beach essentials.
- Pattern Pieces:
- Front/Back: 18″ × 16″.
- Bottom Gusset: 18″ × 6″.
- Side Gussets (Optional): 16″ × 6″.
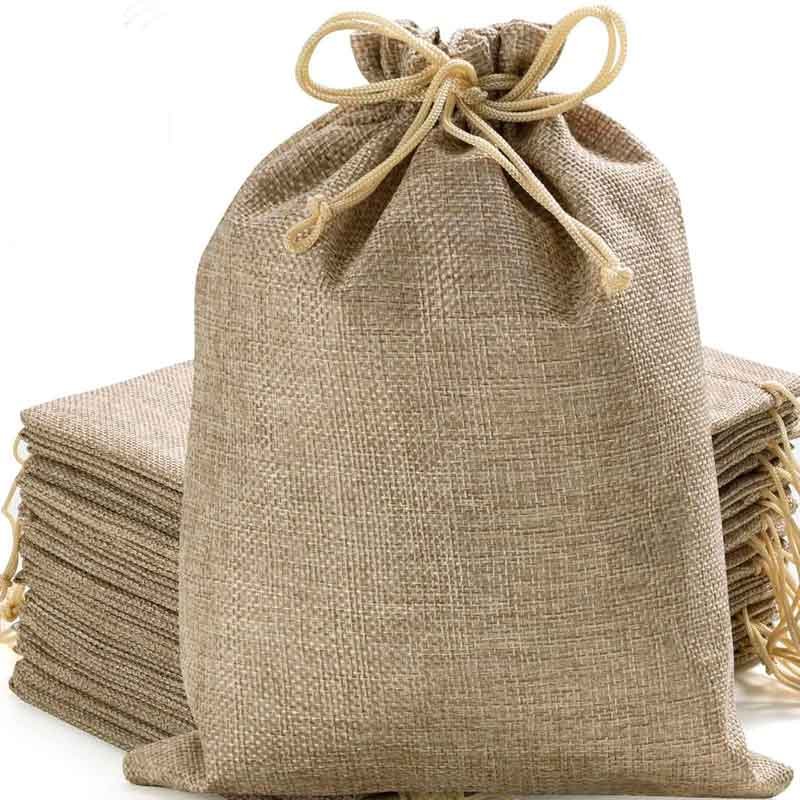
Drawstring Jute Bag Sizing:
- Small Drawstring Pouch:
- Dimensions (Flat): 10″ wide × 12″ tall; finished size ~9″ × 11″.
- Use Case: Gift pouches, small produce bags, cosmetic cases.
- Pattern Pieces:
- Main Panel (Folded): 20″ × 12″—fold in half for a 10″ × 12″ bag.
- Drawstring Casing (2″ height): 10″ × 2″ piece.
- Drawstring Cord Length: 20″–24″ per side for comfortable opening.
Large Drawstring Sack:
- Dimensions (Flat): 18″ wide × 24″ tall; finished ~17″ × 23″.
- Use Case: Laundry bag, overnight bag, or promotional swag sacks.
- Pattern Pieces:
- Main Panel (Folded): 36″ × 24″ for an 18″ × 24″ bag.
- Drawstring Casing: 18″ × 3″.
- Drawstring Cord: 36″ length to allow double pull.
What Seam Allowances and Reinforcements Are Critical for Jute?
Seam Allowance Standards:
- ½” Seam Allowance:
- Reasoning: Jute frays easily; a narrower seam (¼”) risks unraveling, while a wider seam (⅝” or ¾”) adds bulk. A consistent ½” (1.25 cm) seam works best.
- Implementation: Mark seam lines clearly on jute with chalk before sewing; double-check both front and back before cutting.
Reinforcing High-Stress Areas:
- Bottom Corners & Gussets:
- Technique: Cutting small triangles (1″ base × 1″ height) out of corner seams relieves bulk—fold edges inward and topstitch to reinforce.
- Alternative: Double-stitch ¼” from edge on bottom seams and gusset edges to strengthen.
- Handle Anchor Points:
- Bartack or Box-X Stitch: Use a dense zigzag or bar-tack stitch at handle bases—reinforces vertical stress points.
- Interface Behind Handles: Add a 3″ × 3″ square of cotton canvas inside at each handle anchor to distribute load and protect jute fibers from wear.
Preventing Fraying:
- Overlocking (Serger) Finish: Use a 3-thread overlock stitch along raw jute edges—minimum 1/8″ coverage to capture loose fibers.
- Zigzag Stitch: On machines without a serger, set to a 3 mm width and 1.5 mm length zigzag on raw edges—prevents fraying but adds slight bulk.
- Binding with Bias Tape (Optional): Fold 1″ bias tape over raw edge of top opening—protects edge from abrasion and hides frayed ends.
Do You Need Interface or Lining to Stabilize Jute Panels?
Reasons to Interface Jute:
- Shape Retention: Jute alone can sag under load; a lightweight fusible interfacing (e.g., 1.5 oz woven) on front and back panels adds structure without bulk.
- Prevent Stretching: Jute lining in gusset areas can stretch over time—interfacing maintains bag shape and keeps seams straight.
- Print Clarity: If you plan screen printing or heat transfer logos, backing jute with a thin muslin or fusible interfacing ensures a smoother surface for printing.
Types of Interfacing:
- Fusible Woven Interfacing: Medium-weight, easily ironed onto jute—ideal for tote fronts.
- Sew-In Interfacing (Buckram): Heavy-duty, doesn’t rely on heat—suitable for jute bags meant for high humidity environments (PU coatings may not adhere well).
- Stabilizer for Lining: For interior pockets, use a non-woven stabilizer to maintain pocket shape even when stuffed with small items.
Lining Options and Techniques:
- Unlined Jute Bag (No Lining):
- Pros: Maximum breathability, lightweight, fully biodegradable.
- Cons: Exposed interior seams, less polished look, items (e.g., small keys) can poke through.
- Single-Layer Lining:
- Material: 8–10 oz cotton canvas or lightweight cotton poplin, bath-friendly polygons or nylon taffeta for water resistance.
- Application: Sew lining panels (front, back, bottom) separately, then insert into jute shell—leave a 3″ opening at bottom to turn bag right side out.
- Benefit: Hides raw seams, adds interior pockets, enhances durability.
- Double-Layer or Padded Lining:
- Material: Add thin foam or batting (1/8″) between outer jute and lining for padded effect—great for laptop or camera tote.
- Trade-Off: Adds bulk and sewing complexity; costs $2–$5 extra per bag for materials.
Interfacing and Lining Choices
| Option | Material & Weight | Benefits | Drawbacks |
|---|---|---|---|
| No Lining | N/A | Ultra-lightweight, fully eco-friendly | Exposed seams, reduced polish |
| Fusible Interfacing (1.5 oz) | Woven, fusible | Adds structure, easier printing | Heat required, may peel in heat/humidity |
| Sew-In Interfacing (Buckram) | Non-woven, heavy-duty | Strong shape retention, no heat needed | Adds stiffness, increased bulk |
| Single-Layer Lining (Canvas) | 8–10 oz canvas | Hides seams, adds pockets, cleaner look | Adds weight, cost for fabric and sewing |
| Padded Lining (Foam + Fabric) | 1/8″ foam + cotton poplin | Protective for electronics, premium feel | Increased complexity, heavier bag |
How Do You Sew and Assemble the Jute Bag Components?
First, sew any interior pockets to the lining. Next, align and stitch front and back panels to side and bottom gussets with a ½” seam allowance, using a denim needle and polyester thread. Attach handles by sewing through an interfacing square and reinforcing with bartack or box-X stitches. If lined, sew lining pieces similarly, turn bag through a lining opening, then close lining seam by hand or machine before final topstitching.
What Order Should You Stitch Side Seams, Bottom Panel, and Handles?
Step 1: Prepare Pockets and Lining (if applicable):
- Interior Pocket Assembly:
- Pattern Placement: Mark pocket position 4″ down from top of lining panel. Fold ½” hem at pocket top and topstitch.
- Attachment: Place pocket RST (right sides together) on lining panel, pin or clip edges, then sew ¼” from pocket edges—leave top open.
- Reinforcement: Backstitch at start and end of pocket seams to avoid stress-related tearing.
Step 2: Join Front & Back Panels to Gussets:
- Gusset Preparation: If using separate side and bottom gussets:
- Cut: Two side gussets (height × depth) and one bottom gusset (width × depth).
- Mark Center Points: Mark midpoint of each panel and each gusset to ensure even alignment.
- Sew Front Panel to Side Gusset:
- Alignment: Place front panel RST with side gusset, matching top edges and side center marks. Pin or clip along the 14″ (or design) seam.
- Stitch: Sew ½” seam, removing clips as you go. Backstitch at start/end.
- Repeat for Back Panel: Attach back panel to other side gusset section.
- Sew Side Gusset to Bottom Gusset: Once side seams are complete, sew side gusset bottom edge to bottom gusset edge (matching corner points).
- Close Remaining Seams: Finally, stitch bottom of front panel to bottom gusset; repeat with back panel.
Step 3: Attach Handles to Outer Shell:
- Handle Placement: Mark 4″ in from each side on top edge of both front and back panels.
- Interface Square Placement: Fuse or tack a 3″ × 3″ square of cotton canvas behind jute at handle anchor to distribute load.
- Pin/Clip Handles: Place handles in position (folded flat), clip ends to jute and interfacing square, ensuring no twists.
- Stitch Handles: Use a rectangular box-X stitch with 0.2″ bar-tack width—run one rectangle (¼” from edge) then an X through center for reinforcement.
- Perspective: Consider adding a small horizontal strap or “halter” connecting handles across top edge for extra stability—adds $0.50–$1 in hardware cost but prevents handles from flopping down.
Step 4: Construct Lining (If Lined):
- Sew Lining Panels: Mirror outer shell assembly—attach side and bottom gussets to front and back lining panels. Leave a 4″–6″ opening at bottom of lining to turn bag later.
- Attach Lining to Outer Shell:
- Right Sides Together: Insert outer shell into lining (RST), aligning top edges. Clip or pin top edge completely around.
- Stitch Around Top: Sew ½” seam around entire top perimeter, backstitching at start/end and across handle base points for extra strength.
- Turn Bag Right Side Out: Gently pull outer shell through lining opening. Use a knitting needle or chopstick to push seams flat at top opening.
- Close Lining Opening: Pin the lining opening closed, then topstitch ¼” from edge or hand-stitch with ladder stitch for an invisible finish.
Step 5: Final Topstitching and Pressing:
- Topstitch All Seams: Sew ¼” topstitch around the top edge, including handle base areas, to anchor lining and shell seams. Switch to topstitch or 30-weight polyester thread for visible stitching—use contrasting color if desired.
- Press Seams: Use a steam iron with medium heat on jute (use a press cloth to prevent shine)—press side seams and gusset seams flat.
- Final Inspection: Check inside for stray threads, verify gusset angles are square, and ensure handles stand upright.
Which Stitch Types and Thread Strength Work Best on Thick Jute?
Stitch Length & Type:
- Straight Lockstitch:
- Length: 3–3.5 mm to maximize seam strength and minimize perforations.
- Needle & Thread Tension: Use a slightly higher tension than for lighter fabrics—test on scrap jute to avoid thread loops or puckering.
- Zigzag Stitch (Fray Prevention):
- Settings: Width 3–4 mm, length 1.5–2 mm; ideal for overcasting raw jute edges.
- Alternative: If your machine has a three-thread overlock function, use that for cleaner overcast edges—but note: jute’s coarse nature may clog the looper, so frequent cleaning is required.
Thread Selection:
- Tex 70 Core-Spun Polyester Thread: Balanced strength and flexibility—resists breaking under jute’s friction.
- 30-Weight Polyester Topstitch Thread: Provides an eye-catching stitch line; durable and holds up to outdoor wear.
- Bobbin Thread: 100% polyester L-type—finer thread prevents bulk beneath seams.
How to Install Lining or Pockets inside a Jute Bag?
Creating Interior Pockets (Optional):
- Patch Pocket:
- Cut Lining Pocket Piece: 8″ × 6″ (for a standard tote) in lining fabric. Fold ½” hem at top and press.
- Placement: Measure and mark 4″ down from top edge on back lining panel’s wrong side. Align pocket hem with mark. Pin or clip along sides and bottom, then sew ¼” seam around sides and bottom—backstitch at top corners.
- Reinforcement: Add a horizontal topstitch ¼” from top edge of pocket for extra strength.
- Zippered Pocket:
- Cut Lining & Pocket Facings: Two fabric rectangles—8″ × 6″ (lining) and 8″ × 2″ (zipper facing).
- Attach Zipper Facing to Lining: Place zipper RST on pocket facing, align top edge, pin, then stitch using zipper foot. Flip zipper and pocket facing to wrong side, press flat, then topstitch around zipper opening.
- Attach Pocket to Lining: With right sides together, align pocket to back lining panel, pin, and sew around side and bottom edges.
Lining Installation Recap:
- If including pockets, complete pocket sewing before joining lining panels.
- Sew lining side and bottom seams exactly as outer shell, ensuring pocket seams align with seams.
- When inserting lining into shell, make sure pocket is on the internal back panel, not twisted or caught in seam allowances.
What Finishing Techniques and Quality Checks Are Essential?
After assembly, finish raw jute edges with an overlock or zigzag stitch to prevent fraying. Apply a light coat of water-repellent spray (e.g., 303 Fabric Guard) if needed. Press all seams to lie flat and topstitch edges ¼” from seam for a polished look. Inspect handles, gussets, and bottom seams for uniform stitch density (3–3.5 mm) and test load capacity to ensure durability.
How Do You Overlock or Zigzag Stitch Jute Edges to Prevent Fraying?
Overlock (Serge) Stitch:
- Machine Settings: Use a 3-thread overlock, with differential feed dial set to 1.0–1.2 to gently stretch jute as it feeds—prevents puckering.
- Overedge Coverage: Adjust width to ⅜”–½” so the loopt stitch grabs enough raw edge without excess fabric bulk.
- Tension Tweaks: Test on scrap jute—tension should be balanced, with loops encasing raw edge and no loops hanging loose on either side.
- Maintenance Tip: Clean looper area hourly while serging jute—lint buildup leads to skipped stitches.
Zigzag Stitch (Home Machine Alternative):
- Stitch Settings: Width 3–4 mm, length 1.5–2 mm—dense zigzag holds edge fibers firmly.
- Application: Sew just over the raw edge (approximately ⅛”–¼” from the cut line), feeding jute steadily to prevent puckers.
- Edge Trim: After zigzagging, trim excess jute fibers close to the stitches to neaten.
Binding with Bias Tape (Optional):
- Selecting Bias Tape: Choose 1″–1½” wide cotton or polyester bias tape—folded bias tape obscures raw edge and adds color contrast.
- Construction: Open one side of the bias tape, align raw edge with jute edge, sew ⅛” from edge, fold tape over, and topstitch ⅛” from the folded edge.
- Considerations: While binding adds a polished finish, it can hide jute’s natural charm—only bind top edge if a cleaner look aligns with your brand.
What Treatments (Water-Repellent, Fireproof) Can Enhance Jute Bags?
Water-Repellent Sprays:
- Product Options:
- 303 Fabric Guard: Dupont-tested to maintain breathability while resisting water and oil-based stains.
- Nikwax Cotton Proof: Wax-based treatment originally for cotton, can be used on jute for moderate water resistance.
- Application Process:
- Clean Surface: Remove dust and debris with a soft brush.
- Spray Evenly: Hold can 6–8″ from fabric, apply two light coats, allowing 30 minutes drying time between coats.
- Final Cure: Let bags sit 24 hours before use to ensure full binding of treatment.
- Limitations:
- Effect on Breathability: Some water-repellents can slightly stiffen jute and reduce breathability—test on scrap samples first.
- Reapplication: Recommend reapplying every 6–8 months for outdoor-use bags; communicate this to customers.
Fire-Resistant Coatings (If Needed):
- Use Cases: Industrial or retail settings where flame retardancy is essential (e.g., promotional bags in factories, circus supplies).
- Product Options:
- Innotex Fire Block: Clears flame retardant for textiles—cost $30–$50 per liter; not common for everyday jute bags.
- Application: Spray or dip jute panels prior to sewing; allow 48 hours to cure; always follow manufacturer’s safety guidelines.
- Regulatory Compliance: Check local standards (e.g., California TB117-2013) if marketing as fire-retardant.
Anti-Mildew or Mold-Resistant Treatments:
- Importance: Jute bags stored in damp conditions (basements, garages) can develop mildew.
- Product Options:
- Vapor Barrier Coatings: Clear silicone or vapor barrier paint applied sparingly on inside of lining.
- Silver Ion Sprays: Brands like Microban offer antimicrobial sprays to reduce mold growth—apply after assembly.
- Considerations:
- Breathability Impact: Excessive coatings can suffocate jute fibers, causing brittleness. Use sparingly and target high-moisture-use cases.
How to Inspect Seams, Handles, and Hardware for Longevity?
Seam Inspection:
- Visual Check: Run a bright LED light along all seams—look for skipped stitches, uneven stitch lengths, or loose threads.
- Tactile Check: Gently tug along seams—feeling for any give or separation. Thread tension should feel taut without puckering.
- Measurement Check: Ensure seams are consistently sewn at ½” seam allowance—measure 3–5 points per seam to confirm accuracy.
Handle Strength Testing:
- Load Test: Hang a 20–30 lb weight from handles for 60 seconds and observe if any seam loosens or handle shifts.
- Stitch Density Check: At handle anchors, confirm at least 6–8 stitches per inch (SPI) in both straight and bartack or box-X patterns.
- Material Wear Check: Inspect interfacing or reinforcement behind handles for signs of fiber crushing or tearing.
Hardware Examination:
- Zipper Function: Zip and unzip 10+ times—ensure smooth, snag-free operation. If gap between teeth appears, consider switching to a metal-tooth zipper.
- Magnetic Snap Strength: Test magnets by placing 1–2 lbs weight in bag and checking if snap holds edge closed.
- Rivet & Grommet Security: Tug on rivets/eyelets—ensure they don’t loosen or pull through jute. Check for burrs or sharp edges that could tear lining.
Fabric Inspection:
- Weave Integrity: Examine jute panels for thin spots or loose weaves that could tear under load.
- Color Consistency: Under natural light, ensure no visible dye streaks or color mismatches between front and back panels.
- Finish Check: After water-repellent or other treatments, look for uneven coating, sticky spots, or discoloration.
Final Quality Audit:
- Checklist Format:
- Seam Consistency: All seams straight, uniform SPI, secure backstitch at ends.
- Handle Symmetry: Handles aligned evenly on both sides, same length, and no twisting.
- Hardware Operation: Zippers, snaps, and rivets function properly.
- Edge Finish: Overlock or zigzag stitches intact, no loose fibers.
- Overall Appearance: No visible stains, loose threads, or fabric pulls.
How Do You Customize and Brand Jute Bags for Clients?

Customize jute bags using screen printing for bold, durable logos; heat transfer vinyl for full-color designs; or embroidery for a premium touch. Add woven tags or printed labels inside. Offer custom sizes, handle materials, and accent colors. With Szoneier’s low minimum order quantities (MOQ), clients can request private label or OEM/ODM services—choose custom jute blends, handle options, hardware finishes, and packaging to reflect their brand identity.
What Printing Methods (Screen Print, Heat Transfer) Work on Jute?
Screen Printing:
- Process Overview: Push plastisol or water-based ink through a fine mesh screen that’s coated with a stencil of the desired design.
- Ink Types:
- Plastisol Ink: Durable and opaque; sits atop jute fibers, offering vivid color but slight rigidity.
- Water-Based Ink: Soaks into jute for a softer hand; can require multiple passes for full coverage on coarse jute.
- Cost Considerations:
- Setup: $50–$100 per screen for custom designs; $5–$10 per tote for two-color prints at 500-unit runs.
- Ongoing Costs: $0.30–$0.70 per color per bag; economies of scale kick in at 1,000 units+.
- Pros & Cons:
- Pros: Long-lasting prints, large coverage areas, relatively low per-unit cost at scale.
- Cons: Initial screen setup time and cost; limited to 4–6 spot colors before costs rise significantly.
Heat Transfer Vinyl (HTV) & Digital Transfers:
- Process Overview: Cut vinyl designs with a plotter or print digitally on transfer paper, then use a heat press (300°F for 15–20 seconds) to affix to jute.
- Vinyl Types:
- Block-Color PU Vinyl: Bold, opaque colors; looks sharp on jute’s matte surface.
- Eco-Friendly Water-Based Transfers: Thinner, more breathable—but may fade faster with multiple washes.
- Cost Considerations:
- Setup: Minimal—digital files can be used repeatedly; low MOQ of 50–100 units feasible.
- Per-Unit: $1–$3 per bag, depending on design complexity and transfer type.
- Pros & Cons:
- Pros: Quick turnaround, full-color designs possible, ideal for low-volume or on-demand custom orders.
- Cons: Transfers can crack over time, especially if bag is frequently washed; not as eco-friendly as direct water-based screen inks.
Direct-to-Garment Printing (DTG) on Jute:
- Process Overview: High-resolution inkjet printer sprays water-based inks directly onto fabric—rare for jute due to coarse texture.
- Challenges:
- Ink Penetration: Inks may not bind well to jute’s uneven surface—results in faded or splotchy prints.
- Pre-Treatment Needed: Apply a fabric pre-treatment solution to help ink adhere—adds cost and complexity.
- Use Cases: Limited; best for small, detailed designs on jute-cotton blends rather than pure jute.
Which Labeling Options (Woven Tags, Embroidery) Add Value?
Woven Labels & Tags:
- Process guide: Narrow woven loom produces labels (1″×2″ or custom shapes) featuring brand name, logo, or care instructions—sewn into side seam or interior lining.
- Cost & MOQ: $0.30–$0.80 per label at an MOQ of 200–500 labels.
- Brand Impact: Conveys a polished, professional look—woven edges prevent fraying and add durability.
- Application: Sewn into interior side seam, hidden when bag is empty; can also be sewn onto exterior pocket for visible branding.
Embroidered Patches & Logos:
- Process Overview: Embroider a patch with brand logo, then stitch or iron-glue onto jute bag.
- Patch Types:
- Merrow-Edged Patches: Durable, rounded edges; cost $2–$4 per patch at 500-unit orders.
- Twill Backed Embroidered Direct to Bag: Stitch directly onto jute with embroidery machine—requires stable backing to prevent jute fibers from shifting; cost $1.50–$3 per bag.
- Pros & Cons:
- Pros: High perceived quality, tactile appeal, color depth.
- Cons: Adds rigidity to bag structure, raised embroidery may catch on rougher fabrics; not ideal near high-wear areas.
Heat-Pressed PVC Badges or Leather Labels:
- Process Overview:
- PVC Badges: Soft rubber PVC badge with debossed brand logo—heat press to adhere using high-temp adhesive backing; cost $0.50–$1 each.
- Leather Labels: Small embossed or debossed leather patch (1″×2″) stitched onto jute—cost $1–$3 per label.
- Aesthetic Impact: Premium look—especially for brands positioning as high-end or artisanal.
- Longevity: These materials resist moisture and abrasion well; however, leather labels require occasional conditioning to maintain appearance.
How to Offer Private Label or OEM/ODM Services with Low MOQ?
Understanding Private Label vs. OEM/ODM:
- Private Label: Client provides brand name and design preferences; Szoneier handles production.
- OEM (Original Equipment Manufacturer): Client supplies design files and tech packs, Szoneier manufactures to specification.
- ODM (Original Design Manufacturer): Szoneier offers existing jute bag designs; client selects from catalog and brands accordingly.
Low MOQ Strategies:
- MOQ as Low as 50 Units: Szoneier can produce 50–100 units for private label orders—ideal for startups or small boutiques.
- Shared Production Runs: Combine multiple small orders with similar base specifications (e.g., same bag shape, different logos) to achieve cost efficiencies.
- Simplified Customization Options: Offer limited choices in jute weight (e.g., only 10 oz), handle type (jute webbing or cotton canvas), and hardware finish (brass or nickel) to keep setups minimal.
Tech Pack Essentials for OEM Orders:
- Pattern Files: Provide vector PDFs or DXF files with exact dimensions and seam allowances.
- Material Specs: Specify jute weight (e.g., 10 oz plain weave), lining fabric type (e.g., 10 oz cotton canvas), thread details (e.g., Tex 70).
- Hardware Specs: Include part numbers and finishes (e.g., “Brass grommet, 5 mm ID, expands to 6 mm”).
- Artwork Files: High-resolution (300 DPI) PNG or vector EPS for screen printing or vinyl cutting.
Workflow and Lead Times:
- Design Confirmation (3–5 days): Review mock-up sample (digital or physical) with client to confirm pattern, hardware, and printing.
- Sampling (7–10 days): Create one physical prototype based on finalized tech pack for client approval.
- Bulk Production (10–15 days): Upon sample sign-off, produce remaining units—subject to jute fabric availability and machinery schedules.
- Shipping & Delivery (10–20 days): Air freight for small batches, ocean freight for larger orders—tracking provided at each stage.
Quality Assurance for Low MOQ Orders:
- Initial Pre-Production Sample: Client approves before entire run.
- In-Line Inspections: Inspect every 10th bag during cutting and every 20th bag during sewing.
- Final 100% Visual Check: Verify appearance, handle attachment, printing clarity, and packaging specifications.
Conclusion
From choosing the right jute fabric type and weave weight, to investing in appropriate sewing machines and needles, and applying rigorous finishing and quality control, crafting a professional jute bag involves many carefully orchestrated steps. You learned what makes jute eco-friendly, how jute differs from canvas or cotton, and why interfacing or lining can elevate your design. By following systematic pattern drafting, assembly sequences, and batch production best practices, you can scale from handcrafted prototypes to efficient runs without sacrificing craftsmanship.
Whether you want a simple plain-weave tote or a fully lined, water-resistant jute shopper with custom prints, Szoneier is ready to partner with you. From sourcing the finest jute fibers to delivering finished bags with branded packaging, our integrated supply chain ensures every detail aligns with your brand vision. Contact Szoneier today to discuss your jute bag project, request a quote, and discover how we can bring your eco-friendly bag line to life.