Skip to content
Walk into any modern boutique or scroll through a designer catalog, and you’ll notice one thing — quilted bags are everywhere. From soft cotton totes to sleek PU travel duffles, the quilted texture has become a universal symbol of comfort, craftsmanship, and understated luxury. It’s not just a passing trend — it’s a design philosophy that blends utility and artistry.
Whether you’re a DIY maker exploring fabric design or a brand owner developing your next custom line, learning how to make a quilted bag means understanding the harmony between function, material, and form. A perfectly quilted bag doesn’t just carry your belongings — it tells a story of skill, texture, and timeless appeal.
A quilted bag is made by stitching multiple fabric layers — outer material, padding, and lining — in decorative patterns to create texture and structure. To make one, choose durable fabrics, layer them with batting, and sew evenly to achieve the padded design. Quilted bags are popular for their softness, durability, and luxury look, used in both casual and high-end collections.
Think of the Chanel 2.55, Vera Bradley’s patterned totes, or the minimalist puffer bags trending on social media — each has its own identity, but all share the same foundational craftsmanship: quilting. So, what makes a quilted bag truly stand out? And how can you create (or produce) one that feels as good as it looks? Let’s uncover every layer — literally — from fabric selection to finishing touches, with guidance from Szoneier, a trusted bag manufacturer with over 18 years of experience crafting quality custom designs.
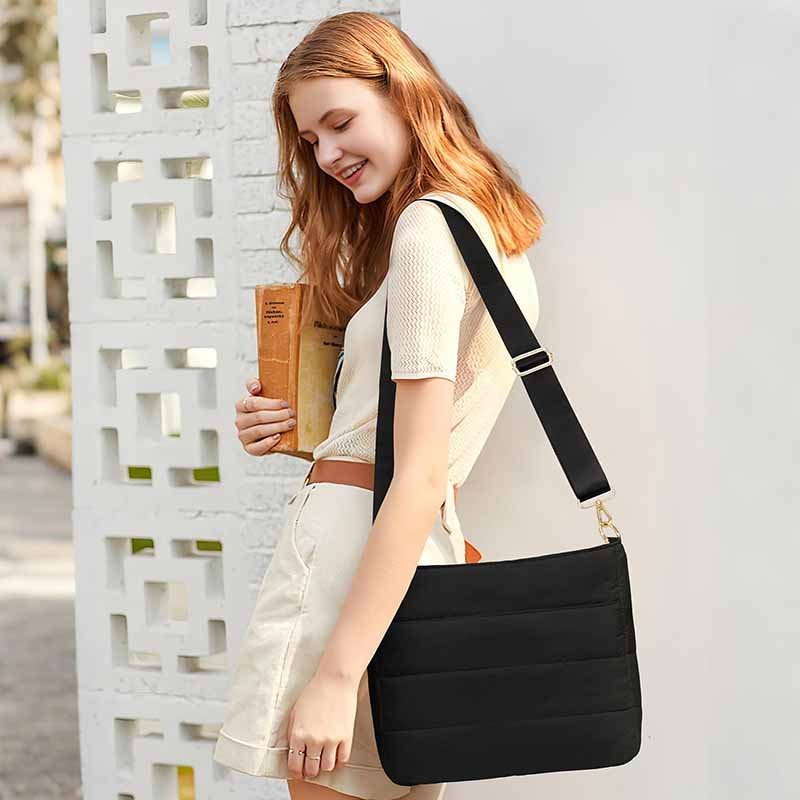
What Is a Quilted Bag and Why Are They Popular?
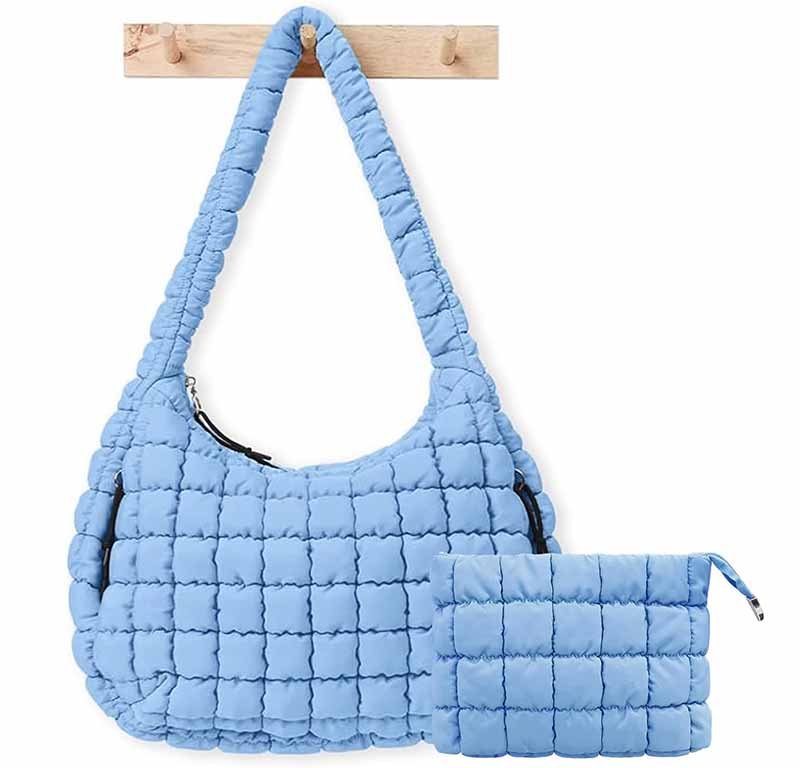
A quilted bag is far more than just a fabric accessory — it’s a fusion of craftsmanship, comfort, and class. Traditionally made by layering fabric, batting (padding), and lining, then stitching them in decorative patterns, quilted bags have evolved into one of the most recognized styles in both fashion and utility design. Their texture, dimension, and structure instantly distinguish them from flat-fabric bags.
A quilted bag is crafted by stitching multiple fabric layers — an outer shell, soft batting, and inner lining — into geometric or decorative patterns. This technique creates a padded, dimensional texture that enhances durability, comfort, and aesthetics. Quilted bags are popular because they combine luxury appeal with everyday practicality, offering lightweight strength, insulation, and timeless fashion versatility.
Definition and Structural Foundation
A quilted bag typically consists of three main components:
- Outer Fabric – The visible material that defines the bag’s style, such as cotton canvas, nylon, or PU leather.
- Batting (Padding Layer) – Usually made of polyester or cotton, providing softness and cushioning.
- Lining – The interior fabric that adds comfort, hides seams, and protects the bag’s structure.
These layers are stitched together — often in diamond, chevron, or linear patterns — to form a padded surface. The stitching not only adds texture but also locks the layers in place, improving strength and preventing shifting or wrinkling.
The Dual Nature of Quilted Bags
Quilted bags sit perfectly between fashion and function.
- Functional: The padding gives the bag structure and insulation, protecting items like makeup, electronics, or travel gear.
- Aesthetic: Quilted stitching brings depth, elegance, and a signature visual appeal — instantly recognizable across high-end and casual collections alike.
The soft, tactile surface feels luxurious, while its durability makes it practical for daily use.
Why Quilted Bags Are Trending
In 2025, quilted bags are witnessing a resurgence thanks to the “comfort couture” movement — a blend of minimalism, texture, and softness dominating global fashion.
- Runway Influence: Brands like Chanel, Bottega Veneta, and Prada reinterpret quilting with new materials such as recycled nylon and vegan leather.
- Sustainability Appeal: Many modern quilted bags use recycled polyester batting or organic cotton layers, aligning with eco-conscious buying behavior.
- Casual Meets Luxury: Consumers appreciate designs that are both elevated and easy to wear — quilted bags bridge that gap beautifully.
Google search data shows a 45% increase in “quilted tote” and “puffer shoulder bag” queries between 2024–2025, reflecting this crossover appeal between fashion and utility.
Are Quilted Bags Still in Fashion?
Yes — and not just in luxury boutiques. Quilted textures have expanded into every lifestyle segment: from office-ready totes and gym duffles to minimalist crossbody bags. Designers now play with tone-on-tone stitching, color gradients, and oversized quilting, offering a softer, more modern aesthetic. Even sportswear brands incorporate quilting into nylon weekenders and hybrid backpacks, showing that this trend transcends categories.
Are Quilted Bags Good?
Absolutely. Quilted bags combine strength, softness, and sophistication in one product. Here’s why users love them:
| Feature | Benefit |
|---|---|
| Padded Construction | Protects fragile contents like laptops or cosmetics |
| Lightweight Yet Durable | Batting adds volume without extra weight |
| Tactile Comfort | Feels pleasant and premium to the touch |
| Visual Depth | Quilting gives texture and luxury perception |
| Thermal Benefit | Natural insulation for travel and storage |
For manufacturers like Szoneier, quilting also enhances the structural integrity of a bag — allowing lighter fabrics to perform like heavy-duty ones.
Quilted Bags in Everyday Life
The beauty of quilting is in its versatility:
- Fashion Bags: Elegant crossbody or shoulder bags for urban lifestyles.
- Travel Bags: Soft duffles or carry-ons with added protection.
- Tote Bags: Perfect balance of professional and relaxed aesthetics.
- Tech Accessories: Quilted sleeves for tablets, laptops, or cameras.
From Chanel’s timeless diamond pattern to Vera Bradley’s cheerful prints, quilting adapts to every lifestyle and identity — which explains why it never truly goes out of style.
Which Materials and Tools Do You Need to Make a Quilted Bag?
Before stitching begins, every successful quilted bag project starts with material intelligence — knowing what fabrics, padding, and tools will determine the final look, feel, and durability of your design. The right combination of materials ensures your bag keeps its shape, feels soft to the touch, and stands up to daily use without fraying or collapsing.
To make a quilted bag, prepare three key materials — outer fabric, batting (padding), and inner lining. Choose durable yet pliable fabrics such as cotton canvas, nylon, or PU leather. Use polyester or cotton batting for volume and stability, plus a smooth lining to protect seams. Essential tools include a sewing machine, quilting ruler, cutting tools, marking chalk, thread, and clips. Quality materials and precise tools define the bag’s structure, comfort, and professional finish.
1. Outer Fabric — The Personality of Your Bag
The outer layer defines both the aesthetic and structural identity of the quilted bag. It should be durable, easy to sew, and compatible with quilting stitches.
| Fabric Type | Texture & Look | Advantages | Best Used For |
|---|---|---|---|
| Cotton Canvas | Matte, soft, breathable | Easy to cut, accepts quilting well | Everyday totes, DIY bags |
| Nylon or Polyester | Smooth, semi-gloss | Water-resistant, lightweight | Travel or gym bags |
| PU (Vegan) Leather | Textured, sleek | Luxurious look, durable surface | Designer handbags |
| Denim or Twill | Coarse, structured | Adds rugged strength | Work or commuter bags |
| Velvet / Corduroy | Plush, tactile | Rich depth and softness | Winter fashion or luxury series |
Tip: For production, Szoneier often uses 210D nylon, 600D polyester, or 1.2 mm PU leather, depending on the bag category. Each fabric undergoes pre-quilting lamination and surface testing to ensure even stitching and long-term resilience.
2. Batting — The Heart of the Quilting
The batting, or padding, gives the bag its signature quilted texture and “puff.” Selecting the right type and thickness of batting affects the weight, warmth, and structure.
| Batting Type | Thickness | Material | Key Properties |
|---|---|---|---|
| Cotton Batting | 2 mm | Natural fibers | Breathable, soft, lightweight |
| Polyester Batting | 3 – 4 mm | Synthetic | Lofty, durable, resists moisture |
| Foam Interfacing (EVA / PE) | 4 – 5 mm | Foam | Adds shape and firmness |
| Blended Batting | 3 mm | Cotton + Poly mix | Balanced softness + durability |
For structured handbags or duffles, a thicker batting (4 mm +) maintains volume. For foldable totes or accessories, a thin cotton batting ensures flexibility.
3. Lining Fabric — The Inner Protection
The lining keeps the interior tidy and reinforces seams. It should be smooth, colorfast, and low-friction so contents slide easily inside.
Recommended Options:
- Polyester taffeta (190T–210T): Lightweight, silky, and easy to clean.
- Cotton poplin: Breathable, ideal for handmade or eco-friendly bags.
- Nylon oxford (210D): Durable for travel or outdoor bags.
Lining fabric also offers a branding opportunity — custom prints or contrasting colors can subtly enhance the overall aesthetic.
4. Threads, Needles, and Hardware
Thread
Choose polyester or nylon thread (Tex 40 – 60) for high strength. Cotton thread may break easily during dense quilting. Use a matching or slightly darker shade to conceal seams and provide depth.
Needles
- For cotton or canvas: size 14 / 90.
- For nylon or PU: size 16 / 100 with a leather-point tip. Replace needles frequently — dull ones skip stitches and damage the fabric surface.
Hardware
Include zippers, buckles, D-rings, rivets, and snaps. Metal hardware adds a luxury feel, while nylon or plastic components reduce weight for sporty designs.
5. Essential Tools for Sewing and Quilting
| Tool | Purpose | Recommended Size / Spec |
|---|---|---|
| Sewing Machine | Core stitching and quilting | With walking foot or quilting guide |
| Rotary Cutter / Scissors | Clean, straight cutting | 45 mm rotary blade preferred |
| Quilting Ruler & Mat | Precise measurement | Acrylic ruler + self-healing mat |
| Fabric Clips / Basting Pins | Secure layers while quilting | Avoids shifting or bunching |
| Marking Chalk / Pen | Trace quilting lines or patterns | Washable or heat-erasable |
| Iron / Pressing Cloth | Flatten seams | Medium heat with moisture spray |
Choosing the Right Material Combinations
When planning your quilted bag, balance style, performance, and budget.
| Use Scenario | Outer Fabric | Batting | Lining | Hardware |
|---|---|---|---|---|
| Luxury Tote | PU leather | Foam 4 mm | Polyester taffeta | Gold metal |
| Travel Duffle | 600D nylon | Polyester 3 mm | Oxford 210D | YKK zipper |
| Casual Everyday Bag | Cotton canvas | Cotton 2 mm | Poplin | Plastic |
| Eco-Friendly Line | Recycled RPET | Blended 3 mm | Organic cotton | Recycled metal |
| Winter Fashion Bag | Velvet | Foam 5 mm | Satin | Brushed brass |
How to Prepare Fabric and Pattern Before Quilting
If the materials are the foundation of a quilted bag, then fabric preparation and pattern planning are the blueprint. A well-prepared layout ensures your stitching lines are precise, seams align perfectly, and your finished bag holds its intended shape. Many beginners (and even small workshops) underestimate this stage — but in professional manufacturing, 90% of the final quality is determined before the first stitch is ever made.
Before quilting, pre-wash and iron the fabrics, cut each layer according to your bag pattern, and align the outer fabric, batting, and lining. Mark stitching lines with chalk or heat-erasable pen. Secure the layers using basting pins or fabric clips to prevent shifting. Accurate preparation ensures consistent quilting lines, clean edges, and a professional bag structure that keeps its shape after sewing.
1. Pre-Washing and Conditioning the Fabric
Quilted fabrics often contain multiple layers — which can shrink, warp, or wrinkle differently during sewing or washing. Pre-treating your materials ensures dimensional stability.
Steps:
- Pre-wash cotton or canvas fabrics in cold water to remove factory sizing and prevent future shrinkage.
- Air dry naturally (avoid high heat that can distort weave tension).
- Iron smooth using medium steam.
- For nylon or PU leather, skip washing — instead, wipe the surface with a damp cloth to remove any coating dust.
2. Cutting and Layering Techniques
Precision cutting defines the symmetry of your quilting pattern and the alignment of your seams later.
| Layer | Cutting Allowance | Purpose |
|---|---|---|
| Outer Fabric | +1 inch (2.5 cm) larger than final pattern | Allows for quilting shrinkage |
| Batting | Same as outer fabric | Maintains uniform padding |
| Lining | 0.5 inch smaller | Prevents bulk at seams |
Cutting Tips:
- Use a rotary cutter and acrylic ruler on a self-healing mat for clean, non-frayed edges.
- Always cut on-grain — never diagonally — to maintain pattern stability.
- If you plan to do diagonal quilting, still align your cuts straight to the fabric’s weave.
3. Transferring the Bag Pattern onto Fabric
Now that your layers are cut, it’s time to map out your bag pattern — this includes quilting lines, seam allowances, fold zones, pocket placements, and handle anchors.
Tools for Marking:
- Heat-erasable pens: Ideal for visible lines on cotton or canvas.
- Chalk pencils: Great for dark or textured fabrics.
- Tracing paper and wheel: Useful for fine, consistent patterns.
Process:
- Trace your paper or cardboard pattern onto the outer fabric layer only.
- Include notches, darts, or fold markers where structure changes.
- If quilting will follow a diamond or geometric pattern, mark those lines lightly now — evenly spaced (e.g., every 1.5–2 inches).
4. Layer Alignment and Basting
To ensure the three layers (outer fabric, batting, and lining) stay together while sewing, you must baste them. Misalignment here leads to the most common quilting defects: wrinkles, uneven puffing, and distorted seams.
Methods:
- Pin Basting: Use fine safety pins every 4–6 inches to hold layers securely.
- Spray Basting: Apply temporary adhesive spray evenly between each layer — fast and ideal for small pieces.
- Hand Basting: For detailed work, use large stitches across the fabric to lock layers before removing them after quilting.
5. Managing Fabric Grain and Direction
Each fabric has a grain — the direction of its weave. Cutting and quilting against the grain can cause twisting or puckering.
| Fabric Type | Preferred Quilting Direction |
|---|---|
| Cotton Canvas | Parallel to warp and weft (straight) |
| Nylon / Polyester | Diagonal crosshatch is acceptable |
| PU / Leather | Vertical or horizontal — avoid diagonal stretch |
| Velvet / Corduroy | With nap (direction of fibers) |
Ensure your quilting lines run parallel to the grain when possible. For patterned fabrics (floral, stripes, etc.), match patterns between panels for a clean, professional appearance.
6. Testing Before Final Quilting
Never start quilting your main panels without a quick test swatch.
Why Testing Matters:
- Confirms correct stitch length and tension.
- Ensures batting compresses evenly under pressure.
- Reveals if any materials cause skipped stitches or needle drag.
Sew a 6×6 inch sample first using your selected layers. Examine:
- Stitch depth and spacing
- Thread pull balance (no loops on underside)
- Pucker or wave presence
Once you’re satisfied, proceed with confidence on the real panels.
Common Preparation Mistakes
| Mistake | Consequence | Fix |
|---|---|---|
| Skipping pre-wash | Shrinkage, distortion | Pre-wash and press fabrics |
| Uneven cutting | Misaligned seams | Use cutting ruler and rotary blade |
| Ignoring grain | Twisted panels | Align pattern with fabric weave |
| Over-thick batting | Machine jamming | Choose appropriate density |
| Loose basting | Wrinkled quilting | Use more pins or adhesive spray |
Quality Control in Industrial Preparation
In professional OEM production, like Szoneier’s facility, every step of preparation is standardized to guarantee precision.
QC Checkpoints Include:
- Fabric Inspection: Color consistency, weave integrity, and thickness tolerance.
- Pre-Cutting Audit: Patterns matched to CAD layouts for waste optimization.
- Alignment Validation: Laser alignment before multi-needle quilting.
- Batch Labelling: Each set of fabric layers labeled to ensure pairing during assembly.
These small steps prevent downstream issues such as off-center quilting or inconsistent panel sizing — two of the most common errors in lower-grade quilted bag manufacturing.
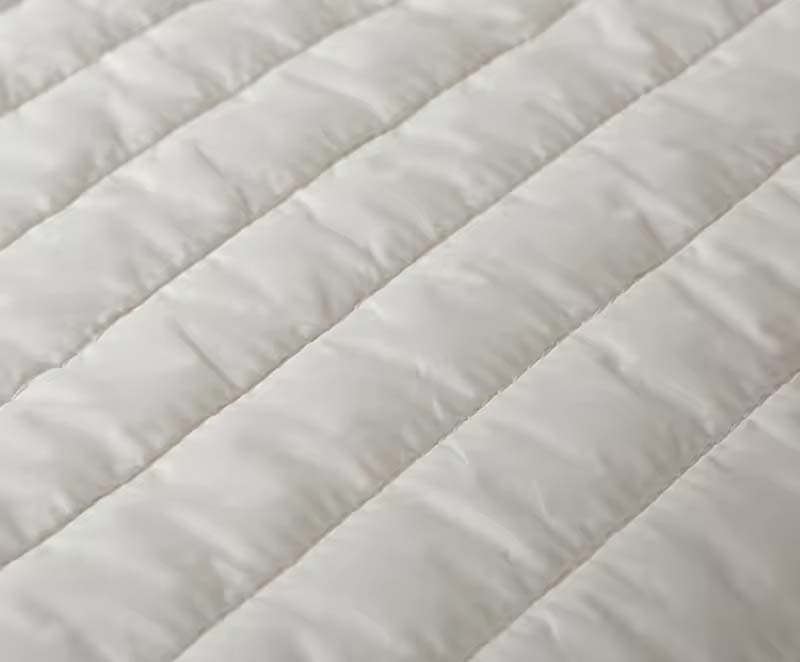
How to Quilt the Fabric: Step by Step Process
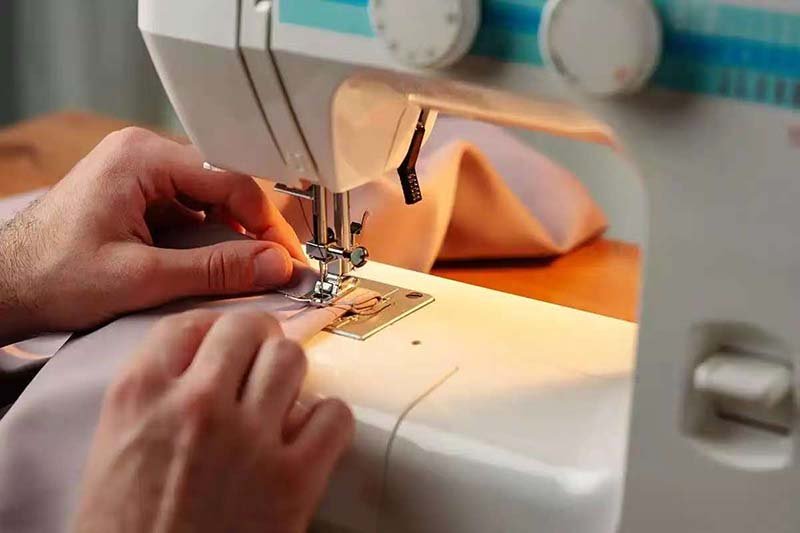
Once your fabric layers are cut, marked, and aligned, you’re ready to bring the quilted texture to life. Quilting is where art meets engineering — a precise process of stitching multiple layers together to create the padded, dimensional design that defines quilted bags. The technique determines not only how your bag feels but also how long it lasts and how professional it looks.
To quilt bag fabric, layer the outer fabric, batting, and lining, then stitch them together in a consistent pattern — such as diamond, parallel, or wave quilting. Secure the layers using pins or basting spray, mark your stitch lines, and sew slowly with a walking foot to prevent slipping. Even tension, clean spacing, and accurate alignment are key to achieving a professional quilted texture that’s durable and visually balanced.
1. Preparing the Quilting Sandwich
Before sewing, you need to form the “quilt sandwich” — the combination of layers stitched into one solid textile.
| Layer Order (Bottom → Top) | Material | Purpose |
|---|---|---|
| Base Surface | Lining (face down) | Interior finish |
| Middle Layer | Batting | Padding and structure |
| Top Layer | Outer fabric (face up) | Visible surface |
Assembly Steps:
- Lay your lining fabric flat on a clean surface (or cutting mat).
- Place the batting on top, smoothing it evenly to remove air pockets.
- Align the outer fabric above it, right side facing up.
- Secure all layers with fabric clips, safety pins, or spray adhesive every 4–6 inches.
Tip: If working on slippery fabrics (nylon, satin, PU), use temporary basting spray instead of pins to prevent marks and maintain perfect flatness. At Szoneier, automated vacuum tables are used to stabilize multi-layer fabrics before machine quilting — achieving precision alignment within ±0.5 mm.
2. Marking Quilting Lines and Patterns
Before stitching, you’ll need to mark your quilting lines — these act as guides for your stitches. The pattern you choose defines the style of the bag: modern, classic, or minimalist.
Common Quilting Patterns
| Pattern | Look / Feel | Ideal Use Case | Skill Level |
|---|---|---|---|
| Diamond (Crosshatch) | Elegant, timeless | Fashion handbags, luxury totes | Beginner – Intermediate |
| Channel (Straight Lines) | Modern, structured | Laptop sleeves, travel bags | Beginner |
| Wave / Curved Lines | Soft and dynamic | Lifestyle bags, kid’s designs | Intermediate |
| Box / Grid | Architectural, minimal | Backpacks, organizer bags | Advanced |
| Free Motion (Custom) | Artistic, organic | Bespoke or artistic collections | Expert |
How to Mark:
- Use a washable fabric pen or chalk wheel.
- Start from the center of the fabric and work outward to avoid distortion.
- Mark evenly spaced lines (typically 1.5″ – 2″ apart for small bags; 2.5″ – 3″ for large panels).
3. Stitching the Quilting Lines
Now comes the most critical stage — the actual quilting. This is where your fabric transforms into a unified, padded material with strength and style.
Step-by-Step Quilting Process
- Start from the center of your panel to distribute tension evenly.
- Sew along your first line using a walking foot to prevent layer shifting.
- Continue quilting parallel lines, alternating directions (left/right or top/bottom).
- For crosshatch or diamond patterns, rotate the fabric 45° and repeat in the opposite direction.
- Backstitch at the beginning and end of each line to lock the seams.
Key Machine Settings:
| Setting | Recommended Value |
|---|---|
| Stitch Length | 3.0 – 3.5 mm |
| Thread Tension | Medium (3–5) |
| Needle Type | Size 14/90 (universal) or 16/100 (leather tip) |
| Speed | Moderate — ~600 spm for home, 1200 spm for industrial |
Tip: Don’t rush quilting. A steady, even feed prevents wrinkling or skipped stitches. Professional machines at Szoneier use multi-needle synchronized systems, producing 8–12 perfectly parallel stitches simultaneously — ideal for mass production of diamond or channel quilting.
4. Controlling Fabric Movement and Stitch Consistency
One of the biggest challenges in quilting is preventing the “push and pull effect” — when the top fabric shifts against the batting or lining, creating waves or mismatched lines.
Solutions:
- Use a walking foot attachment — it feeds all layers evenly.
- Quilt with hands lightly guiding the fabric, never pushing.
- Keep the presser foot pressure low for thick materials.
- Always test your tension on a scrap piece before starting.
5. Securing and Finishing the Quilted Fabric
After stitching all your lines, inspect and finish your quilted panels.
Trimming:
- Trim excess batting and lining flush with the outer fabric using a rotary cutter.
- Leave at least ½ inch seam allowance for bag assembly.
Pressing:
- Lightly press your quilted fabric from the lining side using a pressing cloth.
- Avoid direct heat on PU or nylon surfaces — use low temperature or a Teflon sheet.
Edge Reinforcement:
For factory-grade durability, Szoneier reinforces each quilted panel with nonwoven backing or edge taping before final assembly — this prevents unraveling and improves structural integrity in travel or duffle bag applications.
Comparing Hand Quilting vs Machine Quilting
| Method | Advantages | Drawbacks | Best For |
|---|---|---|---|
| Hand Quilting | Unique texture, artisanal appeal | Time-consuming, less consistent | Luxury custom collections |
| Machine Quilting | Fast, uniform stitches, scalable | Less tactile variation | OEM manufacturing & retail |
| Multi-Needle Machine | Perfect symmetry, industrial precision | High setup cost | Mass production, branded orders |
Szoneier Application Example:
Luxury handbag lines may combine machine-quilted panels for precision with hand-finished top stitching for a bespoke feel — a hybrid approach balancing efficiency and artistry.
Quality Checks During Quilting
Professional quilting includes continuous quality control checkpoints to ensure consistent results:
| QC Point | Inspection Focus | Tolerance |
|---|---|---|
| Stitch Spacing | Equal line gaps | ±1 mm |
| Thread Tension | No puckering or loose loops | Visual check per 30 cm |
| Alignment | Lines remain parallel, centered | ±1° |
| Surface Smoothness | No bulges or wrinkles | Flat texture test |
| Colorfastness | No dye transfer under heat | Dry press test |
At Szoneier, each batch of quilted fabric undergoes lightbox surface inspection and seam strength testing (≥ 25 N/cm) to meet ISO textile performance standards.
Troubleshooting Common Quilting Issues
| Issue | Possible Cause | Solution |
|---|---|---|
| Puckering or Wrinkles | Uneven tension or unbasted layers | Reduce tension, secure with more clips |
| Skipped Stitches | Dull or wrong needle | Replace with sharp size 14/16 needle |
| Thread Breakage | Poor-quality thread or excessive tension | Use high-grade polyester thread |
| Crooked Lines | Rushing or misaligned markings | Sew slowly, use seam guide |
| Uneven Puffing | Batting folded or compressed unevenly | Re-baste layers, use fresh batting |
How to Assemble and Sew the Quilted Bag
Once your quilted fabric panels are stitched and trimmed, you’ve completed the most intricate part of the process. Now comes the stage that transforms flat, padded panels into a three-dimensional, functional product — assembly and sewing. This step defines how professional your bag looks, how it performs under daily use, and how long it lasts. Whether you’re crafting by hand or coordinating mass production, the assembly stage requires precision, patience, and structural understanding.
To assemble a quilted bag, sew the quilted panels together with a ½-inch seam allowance, aligning corners and edges carefully. Attach the base panel, handles, and zipper or closure before finishing the lining. Reinforce stress points such as strap joints and corners, and press seams for a clean, structured look. Professional assembly ensures the bag’s durability, shape retention, and premium finish — essential for both handmade and commercial quilted bags.
Understanding Bag Construction Basics
Most quilted bags, from totes to duffles, follow a similar structural principle:
- Front and Back Panels – the main quilted faces.
- Gusset or Side Panels – give width and depth.
- Bottom/Base Panel – supports the bag’s weight.
- Handles or Straps – attached at reinforced points.
- Lining – conceals inner seams and adds polish.
2. Trimming and Preparing Quilted Panels
Before joining any parts, ensure that:
- All panels are equal in size after quilting (quilting can shrink fabric by 2–5 mm).
- Edges are trimmed straight with a rotary cutter.
- Corners are squared and notched if the design requires rounded seams.
If you plan to include reinforcement foam or stabilizers, insert them at this stage — between the outer quilted panel and lining, or as separate inserts for base reinforcement.
| Panel Type | Recommended Reinforcement | Purpose |
|---|---|---|
| Bottom | 2–3 mm EVA / PP board | Load-bearing strength |
| Sides | Non-woven interfacing | Prevents collapse |
| Handles | Nylon webbing core | Shape retention |
Tip: Always align the quilted stitch direction of front and back panels before sewing. Mismatched patterns make even high-quality bags look unbalanced.
3. Joining the Panels: Step by Step
Step 1: Assemble Front, Back, and Sides
- Place panels right sides facing in (lining outward).
- Pin or clip the edges together along seam allowances (typically ½ inch / 1.2 cm).
- Stitch slowly from the bottom corners upward, reinforcing both ends.
- Repeat for the opposite side.
For curved gussets, sew in segments of 2–3 inches at a time, slightly easing the fabric to maintain smooth curves.
Step 2: Attach the Base Panel
- With panels still inside out, align the bottom piece between side seams.
- Clip corners precisely; if necessary, snip seam allowance notches to fit curves neatly.
- Sew all around with consistent seam width.
- Backstitch at corners to reinforce the bag’s structural “pressure zones.”
Step 3: Turn Right-Side Out
- Trim seam allowances to reduce bulk.
- Gently turn the bag right-side out and press seams open with low heat.
- Inspect corners for symmetry and smoothness.
4. Attaching Handles, Straps, and Hardware
Handles define both functionality and identity of the bag. Depending on the design, these may be quilted, webbed, or leather-wrapped.
Handle Options:
| Handle Type | Material | Attachment Method | Use Case |
|---|---|---|---|
| Fabric Handles | Quilted same fabric | Sewn directly into top edge | Totes, casual bags |
| Leather Straps | PU or genuine leather | Box-X reinforced stitching | Fashion handbags |
| Webbing Straps | Nylon or cotton | Bar-tacked ends | Gym / travel bags |
| Adjustable Shoulder Straps | Nylon + buckle | D-ring + slider | Crossbody designs |
Installation Steps:
- Mark strap positions symmetrically (usually 4–5 inches from side seams).
- Reinforce the inside of the panel with extra interfacing patches or PU leather tabs.
- Stitch using box-X reinforcement or rivet hardware for load-bearing strength.
5. Adding Zippers or Closures
Closures transform open totes into secure, travel-ready bags.
Zipper Installation:
- Choose a nylon coil or YKK metal zipper slightly longer than the bag’s opening.
- Sew zipper tape between the outer quilted edge and lining, using a zipper foot.
- Press seams away from the teeth and top-stitch for a neat finish.
- Optionally, add zipper end covers or fabric tabs for cleaner aesthetics.
Alternative Closures:
- Magnetic snaps: Elegant and easy for daily totes.
- Velcro: Lightweight, budget-friendly, ideal for kids’ or sports bags.
- Drawstring top: Adds softness and volume, popular in quilted puffer styles.
Tip: Always test zipper glide after sewing; bulky batting can pinch teeth if seam allowances aren’t pressed flat.
6. Sewing and Attaching the Lining
A well-constructed lining hides raw edges and gives the bag its polished, professional finish.
Steps:
- Cut the lining panels slightly smaller (by ¼ inch / 6 mm) to fit snugly.
- Sew side and base seams of the lining separately from the outer bag.
- If desired, insert inner pockets or zip pouches now.
- Place lining inside the bag, wrong sides together, aligning top edges.
- Secure by top-stitching around the opening or finishing with bias binding.
Optional Finish: French Seams or Binding
- For a premium touch, enclose all interior seams in cotton bias tape.
- Szoneier uses nylon edge binding for heavy-duty products to prevent fraying during extended use.
7. Reinforcing Stress Points
Critical load points — such as strap bases, corners, and zipper ends — endure the most strain. Reinforce them with:
- Box-X stitching patterns
- Backstitching over key seams
- Additional PU patches or fabric tabs
8. Final Pressing and Edge Finishing
Once the bag is fully assembled:
- Turn right-side out and gently shape corners using a blunt tool.
- Press all seams flat — use a pressing cloth for heat-sensitive fabrics.
- Top-stitch edges (⅛ inch / 3 mm) to secure layers and sharpen the silhouette.
- For leather or PU materials, use an edge-painting agent to seal raw sides and prevent peeling.
Common Assembly Mistakes
| Mistake | Result | Solution |
|---|---|---|
| Misaligned panels | Twisted shape | Mark seam centers before sewing |
| Uneven seam width | Distorted base | Use seam guides or edge markers |
| Puckering near zippers | Bulk under teeth | Reduce batting thickness near seams |
| Weak strap attachment | Handle tearing | Reinforce with interfacing patches |
| Visible raw edges inside | Unprofessional look | Add lining or bias tape finish |
How to Add Style and Functionality to Your Quilted Bag
Quilting alone gives a bag texture and structure, but true craftsmanship is shown in the details — the finishing touches, the thought behind each feature, and the way design meets function. A great quilted bag doesn’t just look beautiful; it’s comfortable to carry, intelligently organized, and unmistakably branded.
In this stage, you’ll decide how your bag speaks — through aesthetic elements like piping and embroidery, or through functional upgrades like compartments, reinforcements, and custom labels. For professionals, this is where brand identity and usability merge into a market-ready product.
To enhance a quilted bag, combine decorative details such as piping, embroidery, or custom stitching with practical features like reinforced handles, inner pockets, and durable hardware. Functional improvements — such as water-resistant linings or adjustable straps — increase usability, while branding elements like logo patches or metal tags build recognition. Balancing aesthetics and performance transforms a simple quilted design into a sophisticated, versatile product.
1. Balancing Form and Function
The beauty of a quilted bag lies in its ability to look soft yet perform tough. While aesthetics catch the eye, functionality earns loyalty. A thoughtfully designed bag must meet four key expectations:
| Design Goal | Aesthetic Element | Functional Purpose |
|---|---|---|
| Elegance | Quilting pattern alignment | Visual harmony and symmetry |
| Comfort | Soft padded structure | Ease of carrying |
| Utility | Compartments & closures | Organization and security |
| Brand Identity | Embossed logos or colors | Recognition and trust |
2. Decorative Elements — Defining Your Bag’s Character
A. Piping and Edging
Piping outlines a bag’s silhouette, giving definition and a clean, professional contour.
- Material Options: Faux leather, cotton cord, contrast-colored nylon.
- Function: Reinforces edges, reduces fraying, and enhances dimensionality.
- Style Tip: Use metallic piping for a modern look, or tonal piping for subtle luxury.
B. Embroidery and Appliqué
Embroidery transforms a simple quilted surface into an artistic canvas.
- Direct Embroidery: Stitched patterns integrated before quilting for depth.
- Appliqué: Layered fabrics or patches add color contrast.
- 3D Embroidery: Popular in streetwear and youth-oriented brands for a bold tactile feel.
If quilting lines form geometric patterns (e.g., diamonds), embroidery can accentuate intersections, creating a luxury hand-crafted aesthetic reminiscent of designer heritage brands.
C. Contrasting Stitching
Using contrasting thread colors adds subtle character — black-on-cream or gold-on-navy combinations highlight the craftsmanship of the quilting process. Ensure high colorfastness thread to prevent bleeding during washing or exposure to sunlight.
D. Logo Placements
Strategically placed branding elevates perceived value. Options include:
- Metal plates or embossed leather patches (for luxury branding).
- Woven or heat-transfer labels (for sport or travel collections).
- Embossed logo quilting (achieved with Szoneier’s CNC heat-press molds).
Tip: Modern consumers prefer discreet branding — tone-on-tone logos feel premium and timeless.
3. Functional Additions — Making the Bag Smarter
While design draws attention, functionality ensures satisfaction. A well-built quilted bag should be as practical as it is beautiful.
A. Interior Pockets and Compartments
- Zipper Pockets: For valuables like phones or wallets.
- Elastic Mesh Pockets: Ideal for cosmetics or accessories.
- Divider Panels: Add internal structure and organization.
Design Recommendation: Always balance pocket quantity with bag size — overcrowding reduces flexibility.
B. Hardware Upgrades
Hardware is both functional and ornamental. It contributes to the tactile feel and the perceived value of your product.
| Hardware Component | Material | Recommended Finish | Purpose |
|---|---|---|---|
| Zippers | YKK metal or nylon | Matte nickel, antique brass | Main closure |
| D-rings | Zinc alloy | Black nickel | Strap connectors |
| Rivets | Copper / Steel | Gold / Gunmetal | Reinforcement |
| Buckles / Hooks | Aluminum / Steel | Gloss silver | Adjustability |
Premium hardware instantly enhances both durability and brand image. Szoneier uses electroplated anti-rust hardware, tested for 72-hour salt spray resistance, ensuring performance in humid or coastal climates.
C. Reinforcements and Structural Enhancements
A quilted bag must retain its shape even under weight. Add reinforcements in critical zones:
- Bottom Panels: Use EVA or PP board for structure.
- Handle Anchors: Double-stitched or riveted.
- Zipper Ends and Corners: Add PU patches or folded tabs.
Szoneier Standard: Each reinforcement layer undergoes pull-strength tests (≥20 kg) to guarantee stability for travel and daily wear.
D. Water-Resistant or Protective Features
Modern quilted bags often integrate performance functions:
- Waterproof coatings (PU, TPU laminations).
- Anti-dirt or antibacterial inner linings.
- Padded laptop sleeves with foam-backed compartments.
- Hidden back pockets for security.
These upgrades turn your product from casual to commercially competitive, fitting both fashion and utility markets.
4. Material Combinations That Enhance Visual Appeal
You can enhance visual depth and differentiate your design by mixing textures and tones:
- PU Leather + Nylon Quilting: Achieves luxury-sport fusion.
- Canvas + Denim: Creates a rugged lifestyle look.
- Velvet + Satin Lining: Evokes high-end evening aesthetics.
- Recycled RPET + Reflective Trim: Adds eco and tech identity
5. Color and Pattern Design
Color is one of the most powerful storytelling tools in bag design.
Tips:
- Monotone Quilting: Elegant and timeless (ideal for business and minimal collections).
- Two-Tone Quilting: Playful, perfect for lifestyle and youth markets.
- Digital Print Over Quilting: Achieves dimensional graphics while preserving texture.
- Metallic or Iridescent Fabric: Adds futuristic fashion appeal.
For brands, color continuity across product lines helps establish recognition — e.g., Szoneier’s premium clients often select signature hues (camel, navy, forest green) combined with tailored quilting patterns.
6. Branding Ideas — Turning a Product into an Identity
A. Custom Quilting Patterns
Instead of generic diamond lines, brands can incorporate signature quilt shapes — initials, logos, or symbols. Szoneier’s computer-controlled quilting machines allow pattern customization, letting clients embed their logo or brand motif directly into the fabric.
B. Private Label Enhancements
- Logo metal tags or engraved pullers add tactile value.
- Branded lining prints reinforce authenticity.
- Custom packaging (dust bags, swing tags) complete the retail presentation.
C. Limited-Edition Embellishments
For high-end drops or collaborations, small details like contrast stitching, serial-numbered patches, or embroidery signatures add exclusivity and collectibility.
7. The Ergonomic Element — Comfort in Use
Design isn’t just what you see; it’s what you feel. The padded nature of quilted bags naturally provides comfort, but ergonomic details elevate the carrying experience:
- Curved handle bases reduce wrist pressure.
- Adjustable crossbody straps distribute weight evenly.
- Padded back panels improve comfort for backpacks.
Szoneier often integrates EVA shoulder pads and foam inserts within straps to merge aesthetic design with all-day usability.
Common Mistakes in Style-Function Integration
| Mistake | Effect | Correction |
|---|---|---|
| Overdecorating | Distracts from clean silhouette | Limit to 2–3 accents per bag |
| Heavy hardware on soft fabric | Causes sagging | Reinforce internal seams |
| Misaligned quilting & logo | Reduces visual harmony | Align during pattern drafting |
| Poor color coordination | Cheapens perception | Use color palette hierarchy |
| Ignoring ergonomics | Discomfort in use | Test handle length & strap width |
Are Quilted Bags Good for Commercial or Custom Production?
Yes, quilted bags perform exceptionally well in both retail and custom markets. Their premium appearance, soft touch, and versatile style appeal to luxury, lifestyle, and eco-conscious consumers alike. With modern manufacturing methods, quilted bags can be mass-produced efficiently while maintaining artisanal quality.
Why Quilted Bags Appeal to Luxury and Lifestyle Brands
They offer a high perceived value due to craftsmanship and material quality. Their structure allows premium finishes while remaining lightweight — ideal for designer, boutique, or sustainable collections.
How OEM Factories Like Szoneier Produce Quilted Bags Efficiently
Szoneier uses computer-guided quilting machines and multi-needle stitching technology, allowing precise, repeatable quilting in custom patterns. Our in-house team handles everything — from pattern drafting to fabric lamination and final assembly — ensuring a consistent finish across all product lines.
Choosing the Right Quilting Design for Your Brand Identity
| Brand Style | Recommended Pattern | Material |
|---|---|---|
| Minimalist | Linear or channel quilting | Matte nylon |
| Luxury | Diamond or chevron | PU or leather |
| Sporty | Crosshatch | RPET polyester |
| Artistic | Free-motion | Cotton canvas |
Conclusion
In the world of fashion and function, quilted bags are more than a design trend — they are a statement of craftsmanship, texture, and timeless appeal. Whether they appear in a luxury boutique or a travel accessory line, quilted designs tell a story of comfort meeting elegance, softness meeting structure, and tradition meeting innovation.
Whether you’re handcrafting your first quilted tote or launching a global bag line, quilting blends design sophistication with durability.
From cotton totes to luxury PU quilted handbags, Szoneier turns creative ideas into finished products — seamlessly blending artistry, precision, and trust. Start your custom quilted bag project today and bring your design vision to life with a partner who understands every stitch.