Skip to content
In today’s digital age, your laptop isn’t just a device,it’s your lifeline for work, study, and creativity. Have you ever found yourself frustrated with generic laptop sleeves that don’t quite fit or reflect your personal style? So How To Make a Laptop Sleeve? This comprehensive guide not only answers the fundamental questions about laptop sleeves but also walks you through creating a customized, durable, and stylish sleeve that perfectly fits your laptop and showcases your unique flair.
Making a laptop sleeve involves selecting the right materials, accurate measurements, and precise sewing techniques. This step by step guide covers everything from choosing fabrics and tools to stitching and adding personalized touches, ensuring you create a functional and stylish sleeve that perfectly fits your laptop and reflects your unique style.
Are laptop sleeves worth it?
Absolutely! Investing time and effort into making a laptop sleeve ensures a perfect fit, personalized style, and reliable protection for your device. A custom-made sleeve can enhance your laptop’s safety while reflecting your unique aesthetic.
What Is a Laptop Sleeve?
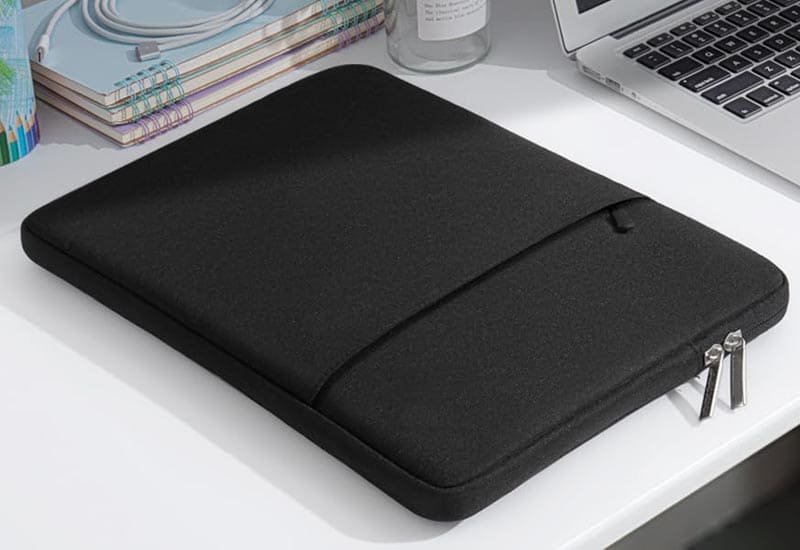
A laptop sleeve is a protective cover designed to encase and safeguard a laptop from physical damage, such as scratches, bumps, and spills, while also offering a stylish way to carry it.
Purpose and Benefits
Laptop sleeves serve multiple functions that go beyond mere protection. Here’s why they are a valuable accessory for any laptop owner:
- Protection: Shields the laptop from scratches, dust, and minor impacts, extending its lifespan.
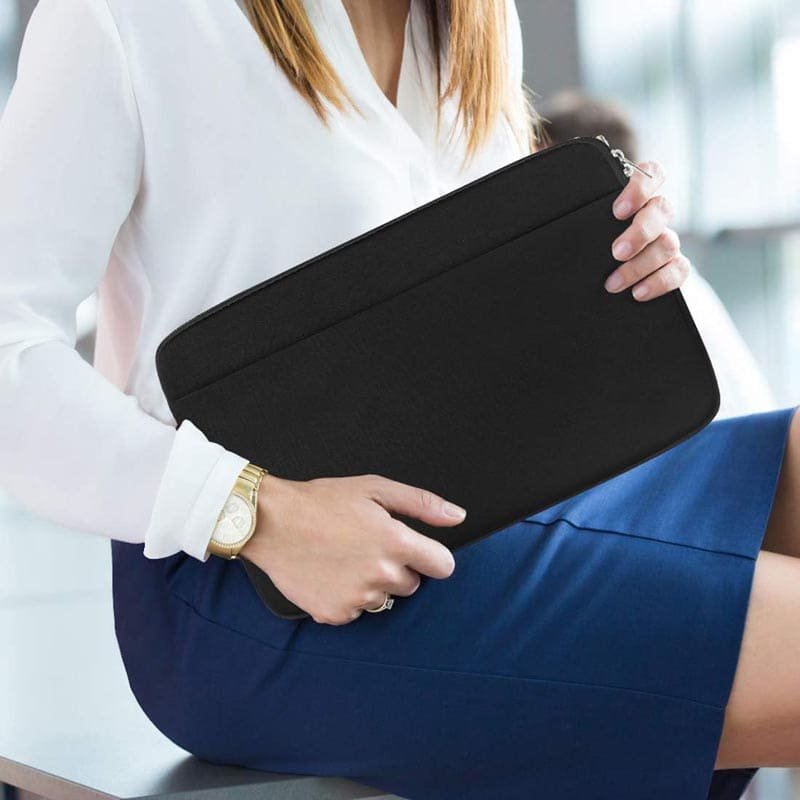
- Portability: Makes carrying the laptop easier and more convenient, especially when combined with other bags.
- Style: Enhances the aesthetic appeal with customizable designs, allowing you to express your personal style.
- Cost-Effective: Prevents costly repairs or replacements by minimizing damage, offering great value for money.
Types of Laptop Sleeves
Understanding the different types of laptop sleeves can help you choose one that best fits your needs:
- Basic Sleeves: Simple designs focusing solely on protection, perfect for minimalists.
- Padded Sleeves: Extra cushioning for enhanced protection against drops and impacts, ideal for frequent travelers.
- Multi-Functional Sleeves: Includes additional pockets for accessories like chargers, cables, and notebooks, providing extra storage.
- TSA Ready Laptop Sleeves: Designed to comply with TSA regulations, allowing easy security checks without removing the laptop.
What is a Laptop Sleeve Called?
Laptop sleeves are known by various names depending on their design and functionality:
- Alternative Names: Laptop case, laptop cover, laptop protector, and laptop pouch.
- Terminology Variations: Depending on the region or specific features, laptop sleeves may be referred to differently, but their core function remains the same.
Choosing the Right Sleeve
Selecting the perfect laptop sleeve involves considering several factors:
- Size Compatibility: Ensures the sleeve fits the specific laptop model, preventing movement and potential damage.
- Material Quality: Impacts durability and protection level, with high-quality materials offering better longevity.
- Design Preferences: Aligns with personal style and usage needs, whether you prefer something sleek, colorful, or understated.
What Materials Do You Need to Make a Laptop Sleeve?
Creating a laptop sleeve requires selecting appropriate fabrics, interfacing, lining materials, and necessary sewing supplies to ensure durability and protection.
Choosing the right materials is crucial for crafting a laptop sleeve that is both functional and stylish. Here’s a closer look at the essential materials you’ll need:
Outer Fabric
The outer fabric not only determines the sleeve’s durability but also its appearance.
Durable Options:
- Canvas: Known for its ruggedness, ideal for a casual, sturdy look.
- Denim: Offers a trendy, durable finish, perfect for everyday use.
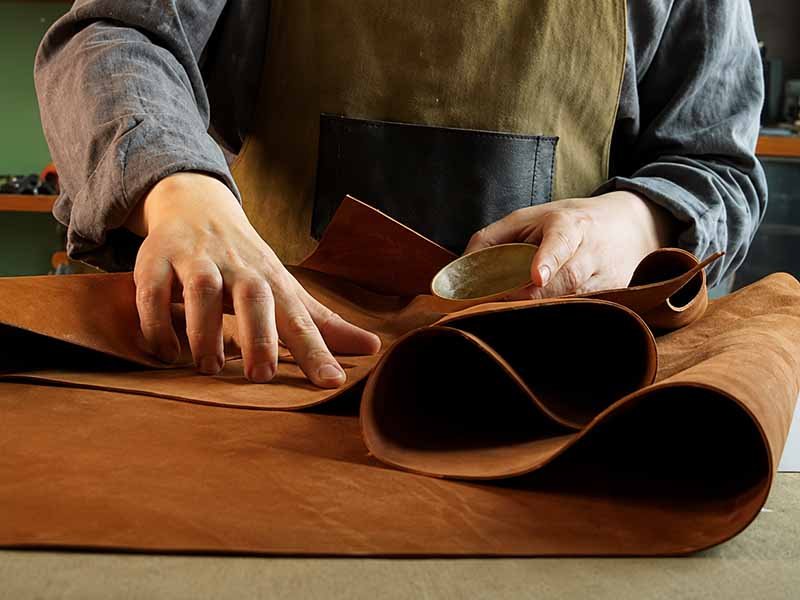
- Leather: Provides an elegant and professional appearance with high durability.
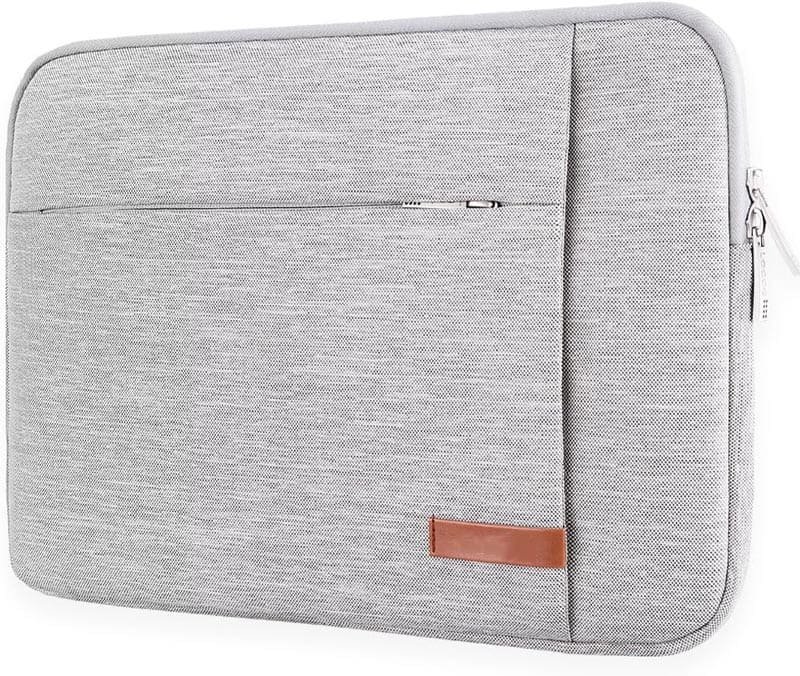
- High-Quality Polyester: Lightweight and versatile, suitable for various styles.
Water-Resistant Fabrics: Protects the laptop from spills and moisture, ensuring your device stays dry. Options include coated canvas and treated polyester.
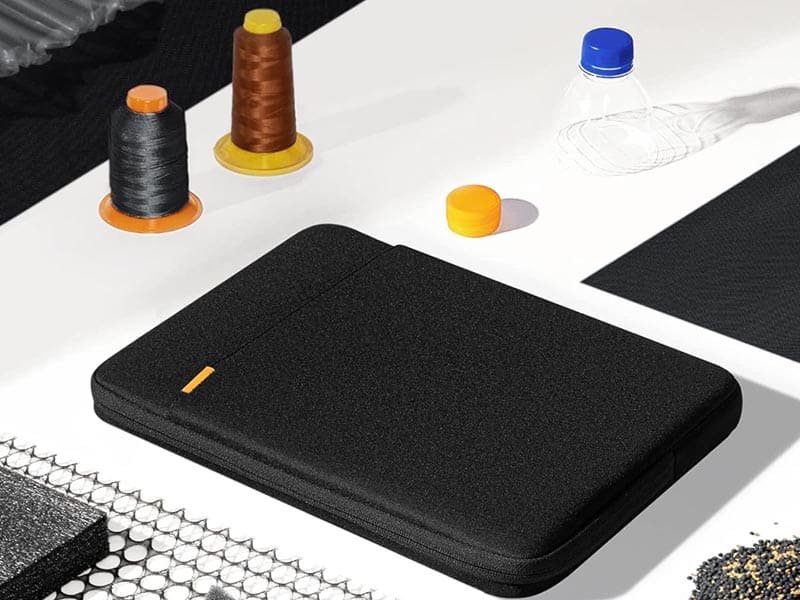
Neoprene vs Polyester:
Is neoprene better than polyester for laptop sleeves? It depends on your needs:
- Neoprene: Offers excellent cushioning and flexibility, making it ideal for shock absorption. It’s also water-resistant and provides a sleek, modern look.
- Polyester: Lightweight, durable, and often more affordable. It offers versatility in styles and colors, making it a popular choice for many.
Lining Material
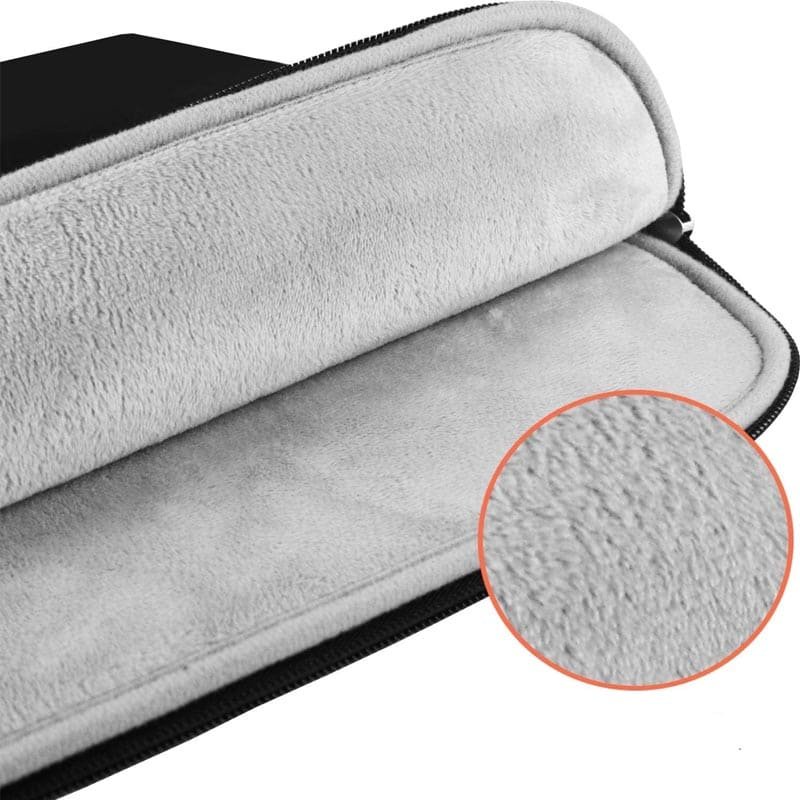
The lining protects the laptop’s surface and adds a layer of softness.
Soft Fabrics:
- Felt: Provides a smooth surface, preventing scratches.
- Fleece: Adds extra cushioning and warmth.
- Microfiber: Offers a sleek, protective layer with a soft touch.
Breathable Materials: Allows air circulation, preventing moisture buildup and keeping your laptop dry.
Eco-Friendly Options: Organic cotton or recycled polyester for sustainable choices, reducing environmental impact.
Materials Comparison for Laptop Sleeves
| Material | Durability | Water-Resistance | Aesthetic Appeal | Cost |
|---|---|---|---|---|
| Canvas | High | Moderate | Casual, rugged | Affordable |
| Leather | Very High | High | Elegant, professional | Expensive |
| Polyester | High | High | Versatile, modern | Moderate |
| Neoprene | Very High | High | Sleek, sporty | Moderate to High |
| Fleece | Moderate | Low | Soft, cozy | Affordable |
| Microfiber | High | Moderate | Sleek, smooth | Moderate |
| Recycled Fabrics | Varies | Varies | Eco-friendly, unique | Varies |
Interfacing
Interfacing adds structure and keeps the sleeve flat and snug around the laptop.
- Stiffening Agents: Provides stability to the sleeve, ensuring it maintains its shape and offers a secure fit.
- Non-Woven Interfacing: Easy to work with and adds minimal bulk, perfect for maintaining a sleek design.
Additional Supplies
These elements ensure your laptop sleeve is functional and secure.
- Zippers or Velcro: For secure closures, preventing the laptop from slipping out.
- Thread: Strong, matching thread ensures durability and longevity of the seams.
- Sewing Machine and Needles: Ensures precise stitching, especially important for high-stress areas.
- Decorative Elements: Embroidery threads, appliques, or patches for personalization and added style.
| Material | Purpose | Recommended Types |
|---|---|---|
| Outer Fabric | Provides durability and protection | Canvas, denim, leather, polyester, neoprene |
| Lining Material | Prevents scratches and adds softness | Felt, fleece, microfiber, organic cotton |
| Interfacing | Adds structure and shape | Fusible interfacing, non-woven stabilizer |
| Closure Mechanism | Secures the laptop inside the sleeve | Zippers, Velcro |
| Thread | Holds the sleeve together | Strong polyester thread |
| Sewing Tools | Facilitates the construction process | Sewing machine, needles, scissors |
| Decorative Elements | Personalizes the sleeve | Embroidery threads, appliqués, patches |
Which Tools Are Required for Making a Laptop Sleeve?
Having the right tools on hand can make the sewing process smoother and more efficient. Here’s a detailed look at the tools you’ll need:
Sewing Machine
A reliable sewing machine is the cornerstone of your project.
Features to Consider:
- Adjustable Stitch Length: Allows for different types of stitches based on fabric thickness.
- Straight and Zigzag Stitches: Essential for creating strong seams and adding decorative elements.
- Walking Foot: Helps feed thick fabrics like neoprene evenly through the machine.
Alternative Options:
- Hand Sewing: For those without access to a machine, though it may be more time-consuming and less precise.
Cutting Tools
Precision in cutting ensures your sleeve fits perfectly.
Fabric Scissors:
- Sharp and Dedicated: Ensures clean, straight edges without fraying.
Rotary Cutter:
- Precision Cutting: Ideal for cutting straight lines and curves with ease.
Measuring Tools
Accuracy in measurements is crucial for a snug fit.
Measuring Tape:
- Flexible and Durable: Essential for recording the exact dimensions of your laptop and sleeve.
Ruler or Straight Edge:
Consistency: Helps in drawing straight lines and ensuring uniform cuts.
Marking Tools
Transferring your pattern accurately onto fabric is key.
Fabric Chalk or Marking Pens:
- Non-Permanent Marks: Allows for precise pattern placement without leaving permanent stains.
Pins and Clips
Holding fabric layers in place ensures accurate stitching.
Straight Pins:
- Fine and Secure: Ideal for smaller pieces of fabric.
Binder Clips:
- Alternative to Pins: Useful for larger pieces, preventing pins from poking through thick fabrics.
Iron and Ironing Board
Pressing seams creates a professional finish.
Pressing Tool:
- Essential for Ironing Seams and Fabric: Ensures crisp, clean edges and smooth layers.
How to Measure and Cut Fabric for Your Laptop Sleeve
Accurate measurements are the foundation of a well-fitting laptop sleeve. A sleeve that’s too tight can make it difficult to insert or remove your laptop, while one that’s too loose may not provide adequate protection. Additionally, precise measurements ensure that any added design elements or customization features align perfectly with your laptop’s dimensions.
Step by Step Guide to Measuring and Cutting Fabric
1. Measuring Your Laptop
Before you begin cutting fabric, you need to determine the exact dimensions of your laptop. Here’s how to do it effectively:
Width, Height, and Depth:
- Width: Measure the widest part of your laptop from left to right.
- Height: Measure from the bottom to the top.
- Depth: Measure the thickness, especially if your laptop has protruding parts like a CD/DVD drive.
Additional Space:
- Ease of Insertion and Removal: Add approximately 1 inch (2.5 cm) to each dimension (width, height, and depth) to allow for easy insertion and removal of your laptop.
- Closure Mechanism: If you plan to add closures like zippers or Velcro, consider the additional space these will occupy.
Example Measurements:
| Dimension | Laptop Size (cm) | Additional Space (cm) | Total Measurement (cm) |
|---|---|---|---|
| Width | 35 | 2.5 | 37.5 |
| Height | 25 | 2.5 | 27.5 |
| Depth | 3 | 2.5 | 5.5 |
2. Creating a Pattern
A pattern serves as the blueprint for your sleeve, ensuring consistency and precision in your cuts.
Basic Shape:
- Rectangular Pattern: Start by drawing a rectangle based on your total measurements. For the example above, the rectangle would be 37.5 cm (width) x 27.5 cm (height).
Seam Allowance:
- Adding Seam Allowance: Add at least 0.5 inches (1.3 cm) around all sides of your pattern to account for sewing. This ensures that your sleeve is sturdy and the seams are strong.
Final Pattern Dimensions:
| Measurement | Value (cm) |
|---|---|
| Width | 37.5 + 2 (seam allowance) = 39.5 cm |
| Height | 27.5 + 2 (seam allowance) = 29.5 cm |
| Depth | 5.5 + 2 (seam allowance) = 7.5 cm |
3. Cutting the Fabric
With your pattern ready, it’s time to cut the fabric. Precision here ensures a perfect fit and professional finish.
Double Layers:
- Outer Fabric: Cut two identical pieces based on your pattern. These will form the front and back of your sleeve.
- Lining Fabric: Cut two identical pieces for the lining, ensuring they match the outer fabric in size and shape.
Interfacing:
- Cutting Interfacing: Cut interfacing pieces slightly smaller than your outer fabric pieces (approximately 0.5 cm less on each side). This prevents bulkiness and maintains a sleek appearance.
Example Cutting Layout:
| Fabric Type | Number of Pieces | Dimensions (cm) |
|---|---|---|
| Outer Fabric | 2 | 39.5 x 29.5 |
| Lining Fabric | 2 | 39.5 x 29.5 |
| Interfacing | 2 | 38 x 28 |
4. Marking and Layout
Proper marking and layout are crucial to ensure all pieces align correctly during sewing.
Layout Planning:
- Right Sides Together: Place the outer fabric pieces with their right sides facing each other. Do the same with the lining fabric.
- Symmetry: Ensure that all pieces are aligned symmetrically to avoid uneven seams.
Pinning:
- Secure the Layers: Use straight pins or binder clips to hold the fabric layers together. Start pinning from one end to the other to prevent shifting.
Using Weights:
- Alternative to Pins: If you prefer not to use pins, place small weights or use spray adhesive for temporary holding.
Common Mistakes to Avoid
- Incorrect Measurements: Skipping the measurement step or taking inaccurate measurements can result in a sleeve that doesn’t fit your laptop properly. Always take the time to measure accurately.
- Ignoring Seam Allowances: Forgetting to add seam allowances can make your sleeve too small. Always include at least 0.5 inches (1.3 cm) around all sides of your pattern.
- Not Pre-Washing Fabric: If your fabric needs to be pre-shrunk, wash and dry it before cutting. This prevents the sleeve from shrinking after it’s sewn, ensuring a proper fit.
- Cutting Uneven Pieces: Uneven cuts can lead to crooked seams and a lopsided sleeve. Use sharp scissors and a rotary cutter for precision.
- Poor Layout and Pinning: Misaligned layers can result in uneven seams and a distorted sleeve. Take your time to lay out and pin fabric accurately.
- Skipping the Lining: A proper lining not only protects your laptop but also gives the sleeve a polished look. Don’t skip this step for a more professional finish.
Sample Measurement and Cutting Process
Let’s walk through a sample process for a 15-inch laptop:
Step 1: Measure Your Laptop
- Width: 38 cm
- Height: 26 cm
- Depth: 2 cm
Step 2: Add Additional Space
- Width: 38 + 2.5 = 40.5 cm
- Height: 26 + 2.5 = 28.5 cm
- Depth: 2 + 2.5 = 4.5 cm
Step 3: Create the Pattern
- Rectangle Dimensions: 40.5 cm (width) x 28.5 cm (height)
- Add Seam Allowance: 0.5 inches (1.3 cm) around each side
Step 4: Cut the Fabric
- Outer Fabric: 2 pieces of 42 x 30 cm
- Lining Fabric: 2 pieces of 42 x 30 cm
- Interfacing: 2 pieces of 40.5 x 28.5 cm
Step 5: Layout and Pin
- Lay out the outer fabric pieces right sides together.
- Lay out the lining fabric pieces right sides together.
- Pin the fabric layers securely.
Calculating Fabric Needs for Multiple Sleeves
If you plan to create multiple laptop sleeves, it’s essential to calculate your fabric needs accurately to avoid wastage.
Outer Fabric Required:
- 2 pieces per sleeve x 5 sleeves = 10 pieces
- Each piece: 42 x 30 cm
- Total Area: 10 x (42 x 30) = 12,600 cm²
Lining Fabric Required:
- 2 pieces per sleeve x 5 sleeves = 10 pieces
- Each piece: 42 x 30 cm
- Total Area: 10 x (42 x 30) = 12,600 cm²
Interfacing Required:
- 2 pieces per sleeve x 5 sleeves = 10 pieces
- Each piece: 40.5 x 28.5 cm
- Total Area: 10 x (40.5 x 28.5) = 11,542.5 cm²
Total Fabric Needed:
| Fabric Type | Number of Pieces | Dimensions (cm) | Total Area (cm²) |
|---|---|---|---|
| Outer Fabric | 10 | 42 x 30 | 12,600 |
| Lining Fabric | 10 | 42 x 30 | 12,600 |
| Interfacing | 10 | 40.5 x 28.5 | 11,542.5 |
| Total | 36,742.5 |
Tip: When purchasing fabric, always buy a little extra to account for any mistakes or pattern mismatches. A good rule of thumb is to add an additional 10% to your total fabric requirements.
Using Pattern Paper or Templates
Creating templates can help maintain consistency, especially when making multiple sleeves or experimenting with different designs.
- Pattern Paper: Use pattern paper to draw and adjust your sleeve patterns before cutting into the fabric. This allows you to make changes easily without wasting fabric.
- Templates: Create reusable templates for your sleeve pieces. This is especially useful for businesses or frequent DIYers who need to produce multiple sleeves consistently.
Advantages of Using Templates:
| Advantage | Description |
|---|---|
| Consistency | Ensures each sleeve is identical in size and shape. |
| Efficiency | Saves time when cutting multiple pieces. |
| Flexibility | Easily adjust patterns by modifying the template. |
Incorporating Design Elements During Cutting
If you plan to add design elements like pockets or decorative stitching, consider how these will affect your fabric cutting.
Adding Pockets:
- Measurement: Determine the size and placement of pockets before cutting the main sleeve pieces.
- Cutting Separate Pocket Pieces: Cut additional fabric pieces for pockets based on your design specifications.
Decorative Stitching:
- Marking Stitch Lines: Use fabric chalk to mark where decorative stitches or patterns will be added.
- Consistent Spacing: Ensure even spacing for a professional look.
Example of Adding a Front Pocket:
| Pocket Feature | Description |
|---|---|
| Size | 10 x 15 cm |
| Placement | Centered on the front panel of the sleeve |
| Attachment | Sew the pocket pieces onto the outer fabric before assembling the sleeve |
Final Checklist Before Cutting
Before you start cutting your fabric, run through this checklist to ensure you’re fully prepared:
- Final Measurements:
- Double-check all measurements of your laptop and pattern to ensure accuracy.
- Pattern Placement:
- Ensure that patterns are placed correctly on the fabric grain to prevent distortion.
- Pin or Clip Fabric Layers:
- Secure fabric layers together to prevent shifting during cutting.
- Use Cutting Tools Correctly:
- Ensure scissors or rotary cutters are sharp and functioning properly.
- Have a Clean Work Area:
- A tidy workspace minimizes mistakes and makes the cutting process smoother.
Troubleshooting Common Cutting Issues
Even with careful planning, you might encounter some challenges during the cutting process. Here are common issues and how to resolve them:
Fabric Shifts During Cutting:
- Solution: Use pins or clips to hold fabric layers securely. Cutting in small sections can also prevent shifting.
Uneven Edges:
- Solution: Use a ruler or a cutting guide for straight lines. For curves, a rotary cutter can provide more control.
Pattern Mismatches:
- Solution: Carefully align patterns before pinning and cutting. Using pattern weights can help keep patterns in place without shifting.
Fabric Fraying:
- Solution: Use pinking shears or finish raw edges with a serger to prevent fraying.
Utilizing Technology for Precision
Modern technology can significantly enhance the accuracy and efficiency of measuring and cutting fabrics.
Digital Measuring Tools: Digital measuring tapes provide precise measurements and are easier to read, especially for small dimensions.
Pattern Making Software: Software like Adobe Illustrator or specialized pattern-making programs can help create accurate and adjustable patterns.
Laser Cutters: For advanced users, laser cutters can provide extremely precise cuts, especially for intricate designs.
Benefits of Using Technology:
| Technology | Benefit |
|---|---|
| Digital Measuring Tools | Increased accuracy and ease of use |
| Pattern Making Software | Easy adjustments and scalability for multiple sizes |
| Laser Cutters | Precision cutting for complex and detailed designs |
How to Sew the Laptop Sleeve: Step by Step
1. Assemble the Outer Fabric
Start by sewing the outer fabric pieces together.
- Right Sides Together: Place the two outer fabric pieces with their right sides facing each other. This alignment ensures that the seams are hidden when the sleeve is finished.
- Sewing Edges: Sew along the sides and bottom using a straight stitch, leaving the top open for turning. This creates the main structure of the sleeve.
2. Assemble the Lining
Repeat the sewing process with the lining fabric.
- Right Sides Together: Place the lining fabric pieces right sides together and sew along the sides and bottom, leaving the top open.
- Bottom Seam: Sew the bottom seam and leave the top open to match the outer fabric assembly.
3. Attach Interfacing
Add structure to your sleeve by attaching interfacing.
- Ironing: Apply interfacing to the outer fabric pieces according to the manufacturer’s instructions. This step is crucial for maintaining the sleeve’s shape.
- Pressing: Ensure the interfacing is securely attached by ironing it flat. This creates a sturdy base for your sleeve.
4. Combine Outer and Lining
Merge the outer fabric with the lining.
- Align Layers: Place the outer fabric (with interfacing) and lining with their right sides facing each other. This prepares the sleeve for the final assembly.
- Pin and Sew: Sew along the top edge, leaving a small opening to turn the sleeve right side out. Use pins or clips to hold the layers in place.
5. Turn and Press
Flip the sleeve to its right side and press it for a clean finish.
- Turning Right Side Out: Carefully turn the sleeve right side out through the opening, ensuring all edges are neatly aligned.
- Pressing: Iron the sleeve flat, making sure all seams are smooth and the sleeve maintains its shape.
6. Add Closure Mechanism
Secure your laptop inside the sleeve.
- Zipper Installation: If using a zipper, sew it into the top opening for secure closure. Follow the zipper manufacturer’s instructions for best results.
- Velcro or Snaps: Alternatively, attach Velcro strips or snaps for easy access and closure. This option is great for a more casual look.
7. Final Touches
Enhance the sleeve’s appearance and durability.
- Topstitching: Add topstitching around the top edge for a polished look and added strength. This also helps prevent fraying.
- Inspect Seams: Ensure all seams are secure and there are no gaps or loose threads. A thorough inspection guarantees a durable and professional finish.
Sewing Steps
| Step | Action | Tips |
|---|---|---|
| 1. Assemble Outer | Sew outer fabric pieces right sides together | Use a straight stitch for strong seams |
| 2. Assemble Lining | Sew lining fabric pieces right sides together | Ensure matching alignment for uniformity |
| 3. Attach Interfacing | Iron interfacing onto outer fabric | Follow manufacturer’s instructions precisely |
| 4. Combine Layers | Sew outer and lining with right sides facing each other | Use pins or clips to hold layers in place |
| 5. Turn and Press | Turn the sleeve right side out and iron flat | Use a point presser foot for sharp edges |
| 6. Add Closure | Install zipper, Velcro, or snaps | Test closure mechanism before final sewing |
| 7. Final Touches | Topstitch and inspect seams | Reinforce high-stress areas for durability |
What Design Features to Consider for Your Laptop Sleeve?
Design features play a crucial role in making your laptop sleeve not only protective but also stylish and user-friendly. Here are key design considerations to keep in mind:
Padding and Protection
Ensuring your laptop is well-protected is the primary function of a sleeve.
- Cushioned Interiors: Add extra padding to absorb shocks and protect the laptop from impacts. Materials like foam or quilted fabric can provide this cushioning.
- Corner Protection: Reinforce the corners for added durability and protection against drops. This can be achieved by using thicker fabric or additional stitching in these areas.
Organization and Storage
Keeping your accessories organized enhances the sleeve’s functionality.
- Pockets and Compartments: Include additional pockets for accessories like chargers, cables, pens, and even a small notebook. This prevents clutter and makes it easy to find what you need quickly.
- Dedicated Laptop Sleeve: Ensure a snug fit with a dedicated compartment that holds the laptop securely. This prevents movement within the sleeve, reducing the risk of scratches or damage.
Aesthetic Elements
Your sleeve should reflect your personal style or brand identity.
- Color and Pattern Choices: Select colors and patterns that reflect your personal style or brand identity. Whether you prefer bold colors, subtle tones, or unique patterns, the right choice can make your sleeve stand out.
- Embellishments: Add decorative elements like embroidery, appliqués, or prints for a unique look. These details can personalize your sleeve and make it uniquely yours.
Functionality Enhancements
Enhancing functionality ensures your sleeve meets all your needs.
- Handles and Straps: Consider adjustable shoulder straps or handles for versatile carrying options. This allows you to carry your sleeve comfortably whether you prefer a handheld or shoulder-mounted style.
- Water-Resistance: Incorporate water-resistant materials or coatings to protect the laptop from spills and moisture. This feature is especially useful for those who commute or travel frequently.
- TSA Ready Features: Design sleeves that comply with TSA regulations, allowing easy security checks without removing the laptop. This is a significant convenience for frequent travelers.
Customization Options
Personalizing your sleeve can make it truly unique.
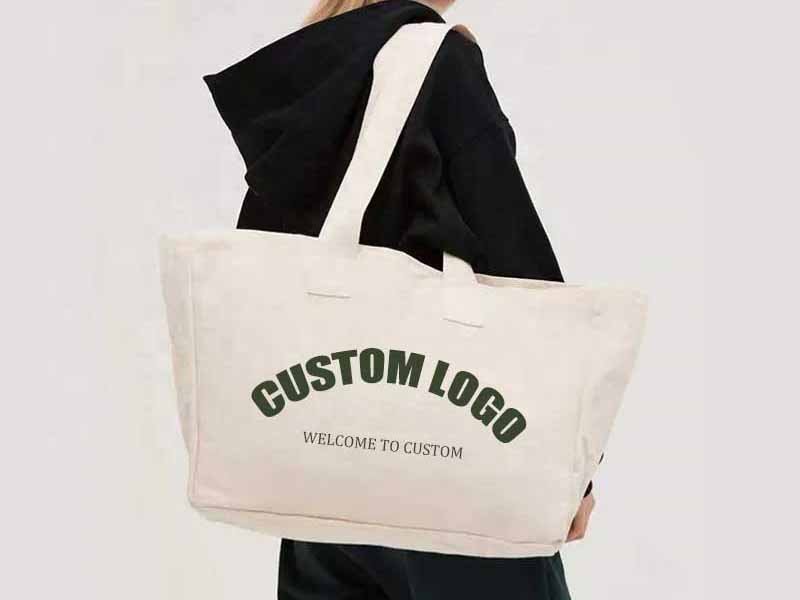
- Logo Placement: Designate areas for branding, such as embossing or printing your logo. This is ideal for businesses looking to promote their brand.
- Personalization: Offer options for adding names, initials, or custom designs to make the sleeve uniquely yours. Personalized sleeves make great gifts and add a special touch to your device.
How to Customize Your Laptop Sleeve with Logos or Designs
Personalizing your laptop sleeve with logos or unique designs can elevate its appearance and make it a true reflection of your style or brand identity.
Customization adds a personal touch to your laptop sleeve, making it stand out and align with your aesthetic or branding needs. Here are effective methods to achieve customization:
1. Embroidery
A classic method for adding logos and designs.
- Techniques: Use thread embroidery to stitch logos, initials, or decorative patterns onto the sleeve. Machine embroidery offers precision, while hand embroidery adds a unique, artisanal touch.
- Benefits: Adds a textured, professional look that is durable and visually appealing. It’s perfect for subtle branding or intricate designs.
2. Screen Printing
Ideal for bold, colorful designs.
- Process: Apply ink-based designs onto the fabric using a screen printing technique. This involves creating a stencil (screen) and using it to apply layers of ink onto the fabric.
- Benefits: Allows for vibrant, full-color designs that are perfect for intricate logos and patterns. It’s highly durable and can cover large areas with detailed artwork.
3. Applique
Adds a layered, tactile dimension to your sleeve.
- Method: Sew fabric pieces onto the sleeve to create designs or logos. This can include shapes, letters, or decorative elements stitched on top of the base fabric.
- Benefits: Adds a layered, tactile element to the sleeve, enhancing its visual and structural appeal. It allows for creative, three-dimensional designs.
4. Heat Transfer Vinyl (HTV)
Perfect for precise and multi-colored designs.
- Application: Use HTV to cut out designs and apply them to the fabric with heat. This involves placing the vinyl design on the fabric and using a heat press or iron to bond it.
- Benefits: Offers precise, durable designs that can include multiple colors and intricate details. It’s ideal for personalized text or simple logos.
5. Digital Printing
Best for high-resolution, detailed images.
- Technique: Use digital printers to apply high-resolution images directly onto the fabric. This method captures fine details and complex color gradients.
- Benefits: Ideal for complex and detailed designs, providing a high level of customization. It’s versatile and can reproduce virtually any image or artwork.
| Customization Method | Technique | Advantages | Best For |
|---|---|---|---|
| Embroidery | Stitching designs with thread | Durable, textured look | Logos, initials, decorative patterns |
| Screen Printing | Applying ink through a screen | Vibrant colors, suitable for complex designs | Full-color logos and intricate patterns |
| Applique | Sewing fabric pieces onto the sleeve | Layered, tactile designs | Unique logos, artistic designs |
| Heat Transfer Vinyl | Cutting and applying vinyl with heat | Precise, multi-colored designs | Detailed logos, personalized text |
| Digital Printing | Printing images directly onto fabric | High-resolution, detailed images | Complex and detailed custom designs |
How To Maintain and Protect Your Handmade Laptop Sleeve?
Gently wash or spot clean with mild soap, thoroughly air-dry to prevent mildew, and reapply any water-resistant sprays if needed. Store it in a cool, dry place away from direct sunlight to avoid fading or warping.
Cleaning and Care
| Maintenance Task | Frequency | Method |
|---|---|---|
| Spot Clean | As needed | Dab with mild detergent, warm water, air-dry fully |
| Deep Wash | Every few months (if fabric allows) | Gentle cycle or hand-wash, especially for foam or thick layers |
| Reapply Water Repellent | 6–12 months | Spray DWR or wax finish, depending on fabric |
- Canvas or Denim: Might handle a gentle cycle well; just don’t toss them in a high-heat dryer.
- Neoprene: Hand-wash or machine-wash cold. Avoid harsh detergents to keep elasticity.
- Leather: Wipe with damp cloth, apply leather conditioner to keep from cracking.
Storage Tips
- Cool, Dry Place: Prolonged moisture fosters mold, while direct sun fades color or can stiffen certain fabrics.
- Avoid Overstuffing: Don’t store anything heavy on top that could distort its shape or crush the padding.
- Protective Wrapping: If you’re traveling with it in a suitcase, keep it in a plastic or cloth bag to avoid snagging.
Repairs and Revamps
- Seam Rips: Minor tear? Stitch it up with matching thread or fabric glue for quick fixes.
- Zipper Malfunctions: If the zipper track warps, sometimes just a slight realignment or lubricating the zipper with graphite helps.
- Velcro Worn Down?: Simply replace the old strip.
Conclusion
Crafting your own laptop sleeve can be an incredibly satisfying project, merging creativity and practicality. By choosing the right materials,be it neoprene for extra cushioning or a quirky patterned polyester,and adding thoughtful touches like foam padding or a handy charger pocket, you’re ensuring your laptop gets the personalized protection it deserves. Plus, you avoid the dreaded “this is too big or too small” conundrum most mass-produced sleeves inflict.
At Szoneier factory, we love championing these kinds of projects,whether for personal enthusiasts or small businesses eager to create a line of branded sleeves. Whether you have a bold new concept or simply want to standardize a design across your brand, we can guide you from initial concept to final product.Contact Szoneier right now to explore how we can help bring your design dreams to life.