Skip to content

Share your idea, drawings, or requirements with us. Our engineering team will review your project and suggest the safest, most efficient way to bring it to market.
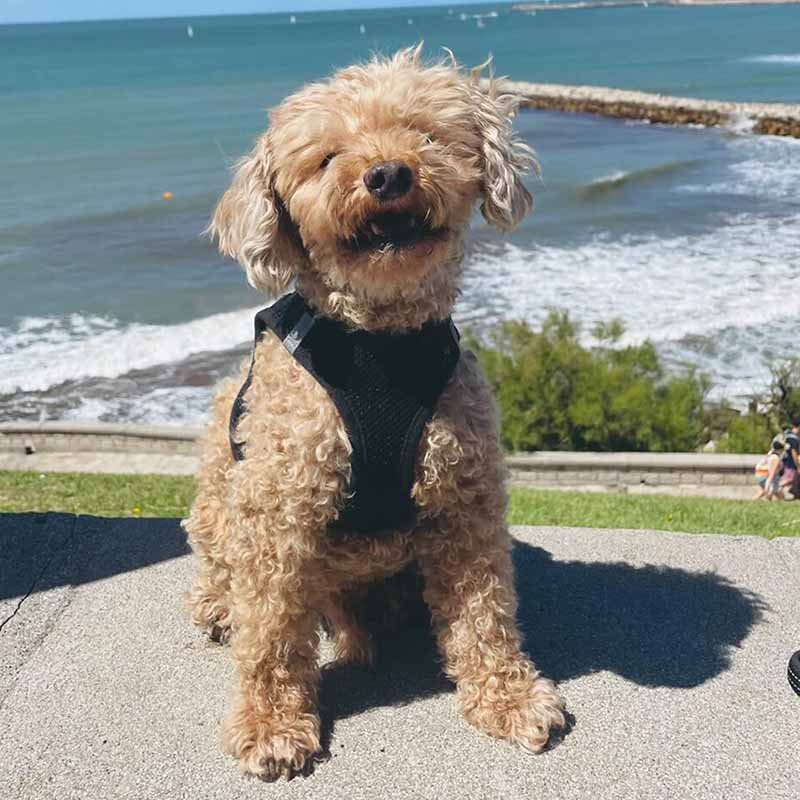
Making a dog harness at home sounds like a simple weekend project. A bit of fabric, a few straps, maybe a buckle or two—and you’re done. But in reality, a dog harness is not just another sewing project. It is a load-bearing safety product that directly affects your dog’s comfort, control, and physical well-being.
Most harness failures don’t happen dramatically. They happen quietly: stitching stretches over time, webbing cuts into the chest, pressure concentrates on the neck, or adjustment points slip under tension. From the outside, everything looks fine—until one sudden pull, one excited lunge, or one long walk exposes the weakness.
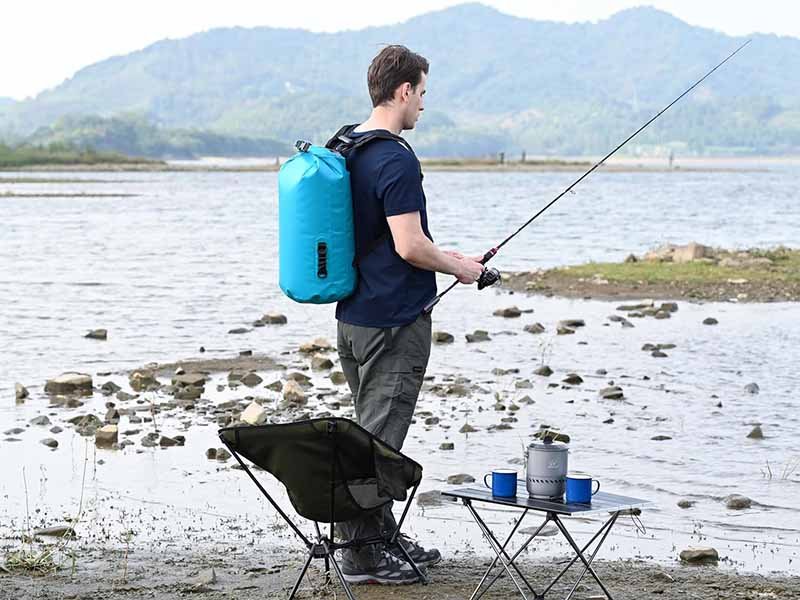
At Szoneier, we’ve spent over 18 years designing and manufacturing bags, straps, and webbing systems for products that carry weight, absorb force, and protect users. The same engineering logic used in backpacks, tool bags, and safety gear applies directly to dog harnesses. Dogs don’t pull gently. They accelerate, twist, stop suddenly, and repeat this behavior thousands of times over a product’s life.
This guide is written to answer what people actually search on Google: How do you make a dog harness at home? What materials are safe? Can a harness replace a dog lead? How do you deal with coats and jackets? And most importantly—when is DIY enough, and when is professional manufacturing the safer option?
To make a dog harness safely, you need strong webbing, durable fabric, secure stitching, and proper fit measurements. A good DIY dog harness distributes pulling force across the chest instead of the neck, uses reinforced seams, and includes adjustable straps. While DIY harnesses can work for light use, active or strong dogs benefit from professionally engineered harnesses with tested materials and load-bearing construction.
If you approach a dog harness like a fashion accessory, problems are likely. If you approach it like safety equipment, your results will be very different. Let’s start with the fundamentals.
What Is a Dog Harness and Why Make One
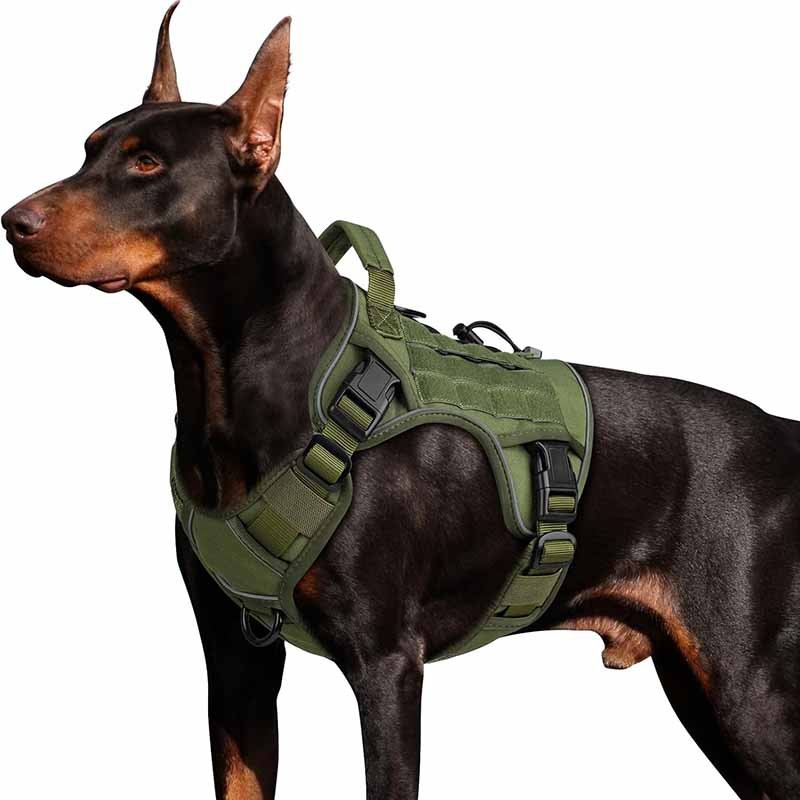
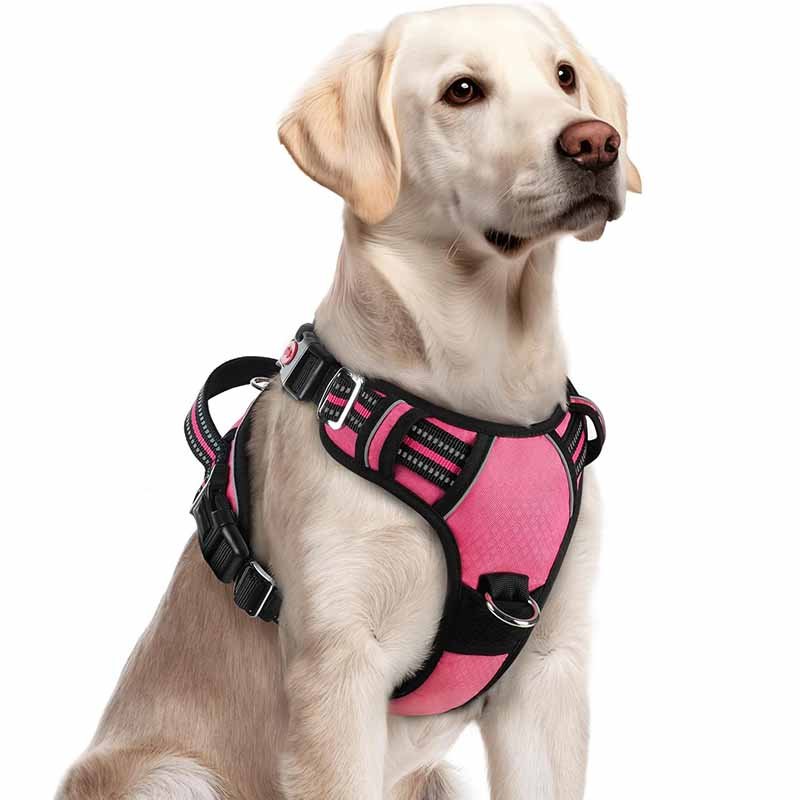
A dog harness is a body-worn control system designed to distribute pulling force across a dog’s chest and torso instead of the neck. Unlike collars, harnesses reduce strain on the throat and spine, improve walking control, and increase safety for active or strong dogs. Some owners choose to make a dog harness to achieve better fit, improve comfort, adapt to coats or special needs, or customize materials and structure beyond standard store-bought options.
What Exactly Is a Dog Harness Designed to Do?
At its core, a dog harness is an engineering solution to force management.
When a dog pulls, stops suddenly, or changes direction, force is generated instantly. A traditional collar concentrates that force on the neck area—specifically the trachea, cervical spine, and surrounding soft tissue. Over time or under sudden load, this can cause coughing, choking, spinal strain, or long-term injury, especially in small breeds, brachycephalic dogs, and dogs prone to pulling.
A properly designed dog harness redistributes that force across:
- The chest plate
- The shoulders
- The upper torso
This wider load path reduces pressure concentration and gives the handler more stable control. From a structural perspective, a dog harness works similarly to a load-distribution system used in backpacks or safety vests—a concept Szoneier applies across all its load-bearing textile products.
How Is a Dog Harness Different from a Collar or Simple Lead?
A collar is a single-point restraint. A harness is a multi-point system.
Key differences include:
- Force distribution: Harness spreads force; collar concentrates it
- Control: Harness offers better steering and balance control
- Safety margin: Harness reduces injury risk during sudden pulls
- Compatibility: Harness supports front-clip, back-clip, and dual-clip lead systems
This is why many trainers, veterinarians, and professional handlers recommend harnesses for daily walking, training, and high-activity use.
Why Do Some Dog Owners Choose to Make a Dog Harness?
Most people don’t decide to make a dog harness “just for fun.” They do it because existing options fail to meet a specific need.
Common reasons include:
- Poor fit for dogs with unusual chest-to-neck proportions
- Chafing or rubbing under the arms
- Incompatibility with winter coats or rain jackets
- Lack of padding for long walks
- Weak hardware or slipping adjustment points
- Desire for specific attachment points (front + back control)
DIY allows owners to customize dimensions, materials, padding thickness, and strap routing—something mass-market products often cannot do well at low price points.
However, customization also introduces risk if structural logic is ignored. This is where professional manufacturing knowledge becomes important.
What Can I Use Instead of a Dog Lead—and Why the Harness Matters More
This is a high-frequency Google question and closely tied to harness design.
Alternatives to a traditional dog lead include:
- Hands-free waist leads
- Front-clip training leads
- Double-ended leads
- Control handles integrated into harnesses
However, none of these alternatives are safe or effective without a properly engineered harness.
Why?
- Lead alternatives change the direction and magnitude of force
- Poor harness design causes twisting, pressure points, or escape risk
- Attachment point placement directly affects dog behavior and comfort
In professional product development, lead systems are always designed around the harness—not independently. This is why Szoneier treats harnesses as the foundation of any dog control system.
When Making Your Own Harness Makes Sense—and When It Doesn’t
Making your own dog harness makes sense when:
- You need a temporary or experimental solution
- Your dog is small or low-pull
- You can inspect and adjust the harness regularly
- You understand basic webbing and stitching principles
It does not make sense when:
- The dog is strong, reactive, or highly active
- The harness will be used for running, hiking, or training
- The product will be sold, gifted, or used by others
- Safety liability matters
At that point, professionally engineered harnesses—with tested webbing, reinforced stitching, and load-rated hardware—become the responsible choice.
Which Materials Are Best for Making a Dog Harness

The best materials for making a dog harness are high-strength woven webbing for load bearing, durable outer fabrics for protection, soft padding for comfort, and load-rated hardware for safety. Webbing carries the force, fabric protects and shapes the harness, padding reduces pressure, and hardware secures adjustment and attachment. Choosing the right combination is essential for durability, comfort, and dog safety.
When people ask “what materials should I use,” they often think in terms of fabric only. In reality, a dog harness is a multi-material system, and each material plays a very different role. Mixing these roles up is the most common cause of DIY harness failure.
Below is how professional manufacturers like Szoneier evaluate materials—based on function, not appearance.
What Fabrics Are Suitable for Dog Harnesses?
Fabric in a dog harness is not the primary strength component. Its job is protection, comfort, and abrasion resistance—not load bearing.
Common suitable fabrics include:
- Oxford polyester (300D–600D) Durable, abrasion-resistant, and easy to clean. Commonly used in backpacks and pet products.
- Nylon fabric Stronger abrasion resistance than polyester, slightly softer feel.
- Air mesh / spacer mesh Improves breathability and reduces heat buildup, especially for active dogs.
- Soft lining fabrics (brushed polyester, tricot) Reduce friction and rubbing against fur and skin.
What to avoid: Cotton, canvas, faux leather, or decorative fabrics alone. These tear under repeated load and absorb moisture, which weakens stitching over time.
Which Webbings and Straps Work Best?
Webbing is the backbone of any dog harness. If webbing fails, the harness fails—no matter how good the fabric looks.
Best webbing options:
- High-tenacity polyester webbing Low stretch, excellent UV resistance, stable over time.
- Nylon webbing Higher initial strength, slightly more stretch, softer hand feel.
Recommended specifications:
- Width:
- Small dogs: 15–20 mm
- Medium dogs: 20–25 mm
- Large dogs: 25–38 mm
- Tensile strength: At least 3× the dog’s body weight (professional harnesses often exceed this).
What to avoid: Craft ribbon, seatbelt look-alike straps without ratings, elastic webbing, or thin decorative straps.
From a manufacturing perspective, Szoneier uses bag-grade and safety-grade webbing, the same type used in backpacks, tool bags, and load-bearing equipment.
What Padding Materials Improve Comfort Without Reducing Safety?
Padding is where many DIY harnesses go wrong. Too much padding makes a harness bulky and unstable. Too little padding causes pressure points.
Effective padding materials include:
- EVA foam (3–6 mm) Lightweight, resilient, doesn’t collapse permanently.
- Neoprene padding Soft, flexible, good pressure distribution (common in premium harnesses).
- Spacer foam + mesh combination Balances cushioning and airflow.
Critical rule: Padding must be independent from load-bearing webbing. The webbing carries force; padding only cushions contact areas.
In professional designs, padding “floats” around the webbing rather than being stitched as a structural layer.
What Hardware Is Needed for Safety and Adjustability?
Hardware is a frequent failure point in DIY harnesses because people underestimate how much force dogs generate.
Essential hardware includes:
- Buckles (side-release or cam buckles) Must be load-rated, with smooth edges.
- D-rings or O-rings Prefer metal or reinforced polymer for leash attachment.
- Adjustment sliders Should hold position under sustained tension.
Avoid:
- Cheap plastic buckles with no load rating
- Thin wire rings
- Decorative metal parts not designed for load
In factory production, Szoneier selects hardware based on tensile testing, not appearance or price.
How Do Material Choices Affect Long-Term Durability?
A harness doesn’t fail on day one—it fails after hundreds or thousands of pull cycles.
Material interactions matter:
- Soft fabric + weak webbing = hidden failure
- Strong webbing + weak stitching = seam failure
- Good materials + poor layout = uneven stress concentration
Environmental factors also matter:
- Moisture weakens cotton thread
- UV degrades low-grade plastic
- Dirt and friction accelerate abrasion
This is why professional harnesses often look “overbuilt”—they are designed for fatigue resistance, not just initial strength.
Material Selection Summary Table
| Component | Best Materials | Primary Function |
|---|---|---|
| Structural core | Nylon / Polyester webbing | Load bearing |
| Outer shell | Oxford / Nylon fabric | Protection & durability |
| Lining | Mesh / Soft polyester | Comfort & airflow |
| Padding | EVA / Neoprene | Pressure distribution |
| Hardware | Load-rated buckles & D-rings | Safety & adjustment |
How Do You Measure a Dog for a Harness
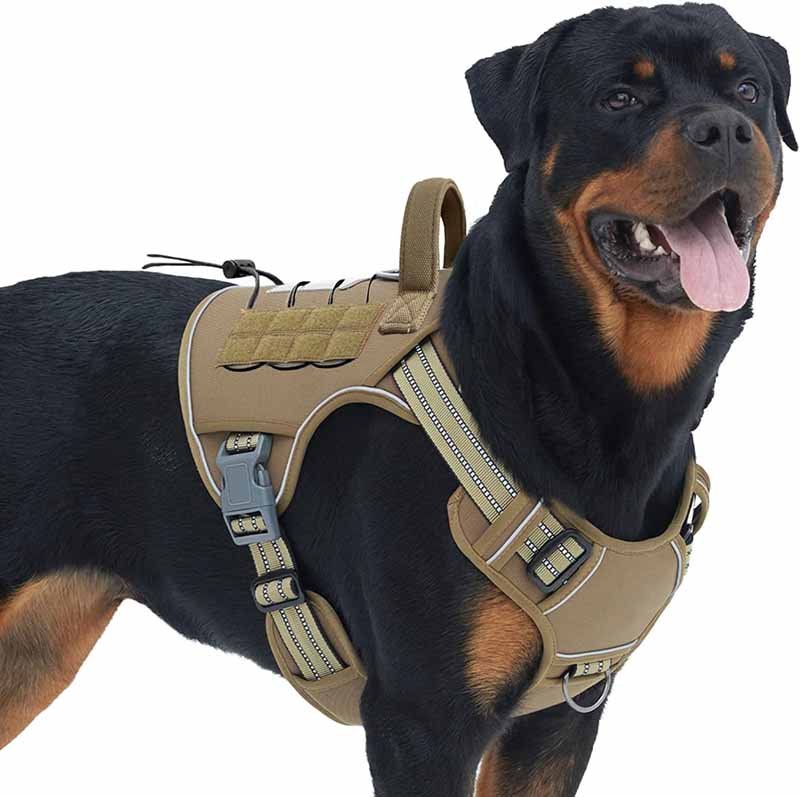
To measure a dog for a harness, you need to measure chest girth, neck base, and body length using a flexible tape. The chest girth is the most critical measurement and should be taken at the widest part behind the front legs. Accurate measurements ensure proper fit, even pressure distribution, and prevent rubbing, slipping, or escape.
Measuring a dog for a harness is not the same as measuring for clothing. Clothing focuses on coverage; a harness focuses on load paths and movement zones. Incorrect measurements don’t just cause discomfort—they can cause control failure under tension.
Professional manufacturers like Szoneier treat measurement as a functional step, not a sizing formality.
What Body Measurements Are Required for a Dog Harness?
There are three essential measurements for any dog harness. Skipping any of them increases fit risk.
1. Chest Girth (Most Important Measurement)
- Measure around the widest part of the rib cage, just behind the front legs
- Keep the tape snug but not tight
- This measurement determines how the harness handles pulling force
Why it matters: Over 70% of pulling force transfers through the chest loop. If this measurement is wrong, the harness will either restrict breathing or slip during movement.
2. Neck Base (Not Collar Position)
- Measure around the base of the neck where it meets the shoulders
- Do not measure where a collar normally sits
Why it matters: Harness neck openings are designed to rest on the shoulders, not the throat. Measuring too high causes choking; too low causes gaping.
3. Body Length (Harness Balance Reference)
- Measure from the base of the neck to the start of the rib cage or mid-back
- This helps position back straps and leash attachment points
Why it matters: Incorrect length shifts force forward or backward, causing twisting or uneven pressure.
How to Measure a Dog Accurately (Step-by-Step Method)
To improve accuracy, follow this sequence:
- Have the dog stand naturally, not sitting or lying
- Use a soft measuring tape (not string or ruler)
- Measure twice, from the same position
- Record measurements in centimeters or inches consistently
- Add 1–2 cm (½ inch) allowance for movement, not padding
Do not guess size based on breed alone. Dogs of the same breed vary widely in chest depth and shoulder width.
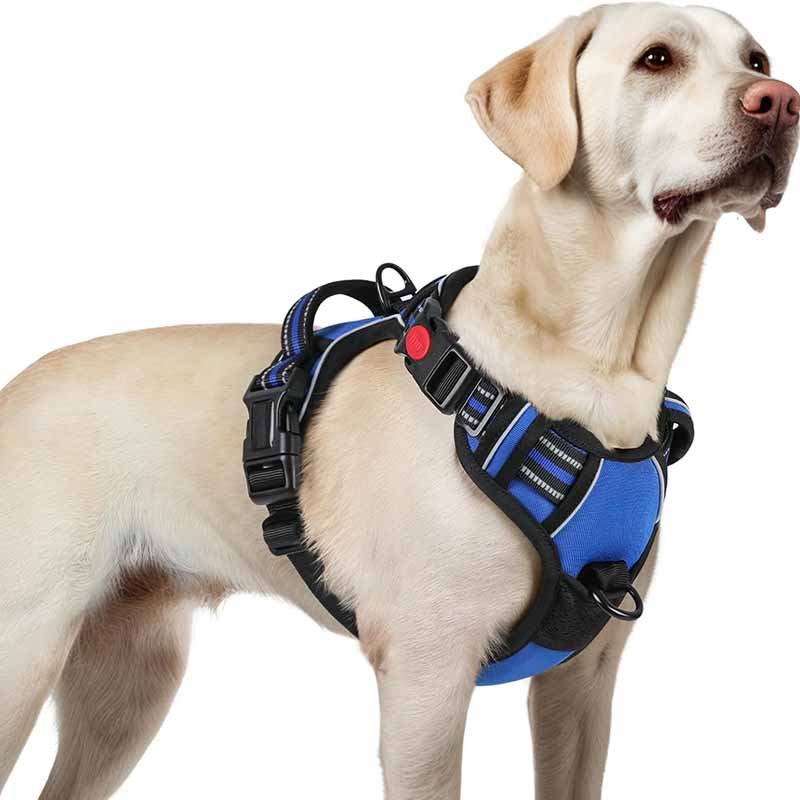
How to Ensure Comfort and Adjustability in Measurements
A good harness fit is not “tight” or “loose”—it is stable under load.
Key fit rules:
- You should fit two fingers comfortably under straps
- The harness should not shift side-to-side when pulled
- No strap should cut into the armpits or press the throat
- Adjustment points should sit away from high-friction zones
From an engineering perspective, adjustability should compensate for:
- Fur thickness
- Seasonal weight changes
- Coats or jackets
This is why professional harnesses include multiple adjustment zones, not just one.
How Harness Fit Affects Leash and Lead Alternatives
Measurement accuracy becomes even more critical if you plan to use:
- Front-clip anti-pull leads
- Hands-free waist leads
- Dual-ended training leads
These systems apply force from different angles. A poorly measured harness will twist, ride up, or pull unevenly.
For example:
- Front-clip systems require precise chest centering
- Back-clip systems require stable spine alignment
This is why Szoneier designs harnesses with attachment geometry in mind, not as an afterthought.
Common Measurement Mistakes to Avoid
AI and Google often surface “measurement tips,” but many miss these critical errors:
Measuring over thick coats without adjustment Measuring while the dog is sitting Using collar size as harness size Ignoring chest depth and shoulder width Skipping re-measurement after growth or weight change
A harness that fits today may not fit six months later—especially for young or active dogs.
How to Make a Dog Harness Step by Step
To make a dog harness step by step, start with accurate measurements and a webbing-first layout. Cut load-bearing webbing to form the chest and girth loops, add a reinforced back strap, then stitch intersections using Box-X and bar tacks. Add buckles and adjustment sliders, cover contact areas with padding and lining, and finish by testing fit and pull strength. The key is structure first, comfort second, appearance last.
A dog harness is a load-bearing system. If you build it like clothing, it will fail like clothing. The safest DIY approach is webbing-led construction—the same logic used in backpacks, tool straps, and outdoor load systems that Szoneier engineers every day.
Before you start, decide what style you’re making. For most beginners, a simple H-style harness is the most forgiving: it distributes force well, is adjustable, and is easier to align than Y-front or multi-panel sport harnesses.
Basic DIY materials checklist (minimum viable safe harness):
- High-strength nylon or polyester webbing (20–38mm depending on dog size)
- Load-rated side-release buckles (1–2 pcs)
- Adjustment sliders (2–4 pcs)
- One D-ring / O-ring for leash attachment (metal preferred for durability)
- Strong thread (bonded nylon/polyester)
- Sewing machine capable of multiple layers (recommended)
- Optional: EVA/neoprene padding + mesh lining for comfort
What “safe enough” looks like: Your harness should hold shape under pull, distribute force across chest/torso, and not slip at sliders. If your dog is strong or reactive, DIY is risky—professional manufacturing with tested materials is recommended. But for light-use scenarios, DIY can be workable if you build conservatively.
Step 1 — Choose a Harness Layout and Mark Load Paths
Start by choosing where the force will travel. In a harness, the leash pull transfers from the attachment ring into the back strap, then into chest and girth loops.
For an H-style layout, you typically have:
- One loop around the chest (front)
- One loop around the ribcage (girth)
- A connector strap along the back (top)
- Optional chest connector to stabilize alignment
Use your dog measurements to sketch a simple template (paper or tape on the floor works). Mark:
- Chest girth line (widest rib area behind legs)
- Neck base line (shoulders, not throat)
- Back strap alignment (centerline)
This planning step prevents twisting and rubbing later. Most DIY harness discomfort happens because straps are “close enough” instead of aligned with movement zones.
Step 2 — Cut Webbing First, Then Add Fabric/Padding
Cut webbing based on measured lengths plus adjustment allowance. A typical starting allowance is:
- Add 15–25cm (6–10″) total for adjustment spread across sliders (varies by size)
A safe rule: webbing overlaps should be at least 5–7cm (2–3″) at stitched joints. Short overlaps are weak.
Cut pieces typically include:
- Chest loop segment(s)
- Girth loop segment(s)
- Back connector strap
- Optional chest stabilizer
Only after the webbing structure is test-wrapped around your dog should you cut padding and fabric layers. Padding should cover contact zones (chest, behind elbows) but must not interfere with slider movement.
This is exactly how Szoneier builds load-bearing straps in bag production: structure first, comfort layers later.
Step 3 — Assemble and Stitch the Structural Webbing (Box-X + Bar Tacks)
This step determines 80% of harness safety.
Recommended stitch patterns:
- Box-X stitch at webbing intersections (the standard for load-bearing straps)
- Bar tacks at high-stress ends, especially near buckles and D-ring zones
- Multiple passes of straight stitch for reinforcement (if Box-X is difficult)
Thread matters: use bonded nylon/polyester and a heavy-duty needle. If your machine struggles, reduce thickness by removing decorative layers—never reduce the structural webbing.
Common failure: stitching fabric tightly while webbing gets only one weak seam. The harness may look finished, but the load path is unprotected.
Step 4 — Install Buckles, Sliders, and the Leash Attachment Ring
Now add hardware in a way that supports real-world handling:
- Place the D-ring on the back strap where it sits centered on the spine
- Use a reinforced webbing loop to hold the D-ring (never stitch it to fabric only)
- Put buckles on the side of the body, not under the armpit or directly on the spine
- Ensure sliders face the direction that tightens under tension (slip-resistant routing)
Quick pull test: hold the harness and pull firmly in the leash direction. If sliders slip, re-route or use better hardware.
Professional harnesses are designed so hardware never becomes the stress point. Webbing should carry the load; hardware should secure alignment.
Step 5 — Add Padding, Lining, and Edge Finishing for Comfort
Comfort upgrades should not compromise structure.
Best practice:
- Sew padding and lining as a sleeve around structural webbing sections
- Keep stitching off the main webbing load path (avoid perforating it excessively)
- Use breathable mesh on the inside where heat builds up
- Round edges or bind them to reduce rubbing
For short-haired dogs, even small friction points can create irritation. Position padded sections away from the elbow/armpit movement zone and keep the chest area smooth.
Step 6 — Fit Test, Movement Test, and Safety Pull Test
Final step: treat this like a product test, not a “try-on.”
Fit tests:
- Two fingers under straps (snug, not tight)
- No throat pressure at neck base
- No strap rubbing behind elbows during walking
Movement tests:
- Let dog walk, sit, and turn
- Check if harness shifts, rotates, or rides up
Safety pull tests:
- Apply firm pulls (simulate sudden leash tension)
- Observe stitching, sliders, and D-ring stability
If the harness twists or shifts under load, the strap routing is wrong or measurements are off. Don’t accept “good enough”—that’s how escapes happen.
What Common Mistakes Should You Avoid
Common dog harness mistakes include using fabric instead of webbing for strength, weak or incorrect stitching, poor strap placement, low-quality hardware, and ignoring how pulling forces travel through the harness. These mistakes reduce durability, cause discomfort, and increase escape or injury risk. Avoiding them requires a webbing-first structure, reinforced seams, proper measurements, and testing under real pulling conditions.
Most DIY dog harnesses don’t fail because the idea was bad. They fail because small structural mistakes compound over time. Below are the most common and most dangerous mistakes—based on real-world manufacturing experience.
Using Fabric as the Main Strength Instead of Webbing
This is the number one mistake.
Many people assume that thick fabric equals strength. In reality, fabric is designed to resist abrasion—not pulling force. Even heavy canvas or denim will tear or stretch under repeated load.
Why this is a problem:
- Fabric fibers separate under tension
- Stitch holes weaken fabric faster than webbing
- Moisture and dirt accelerate fabric degradation
Correct approach: Always use high-strength woven webbing as the structural core. Fabric should only wrap, protect, or pad the webbing—never replace it.
From a manufacturing standpoint , all load paths run through webbing, not fabric.
Weak or Incorrect Stitching at Stress Points
A harness rarely breaks in the middle of a strap. It breaks at junctions.
Common stitching mistakes include:
- Single straight stitch where a Box-X is required
- Decorative stitching with low stitch density
- Short overlap lengths at webbing joints
- Sewing through padding instead of webbing
Why this is dangerous: Under load, stitches experience shear force. Weak stitching slowly elongates, then suddenly fails—often without visible warning.
How to avoid it:
- Use Box-X stitches or bar tacks at all strap intersections
- Overlap webbing at least 5–7 cm (2–3 inches)
- Use bonded nylon or polyester thread
- Reinforce areas near buckles and D-rings
Professional manufacturers test stitching under repeated pull cycles—not just one hard pull.
Poor Strap Placement That Causes Rubbing or Twisting
A harness can be strong and still be wrong.
Incorrect strap placement leads to:
- Chafing under the armpits
- Pressure on the throat
- Harness rotation during walks
- Uneven load distribution
Why it happens: DIY builders often place straps based on symmetry or appearance rather than movement anatomy.
Best practices:
- Keep chest straps behind the shoulder joint, not across it
- Avoid placing buckles directly under the armpit
- Align back straps with the spine centerline
- Test movement: walking, sitting, turning
In factory design, strap routing is adjusted multiple times during prototyping to eliminate friction zones.
Using Low-Quality or Non–Load-Rated Hardware
Hardware failure is sudden and catastrophic.
Common mistakes:
- Cheap plastic buckles with no load rating
- Thin wire D-rings
- Decorative metal parts meant for bags or clothing
- Sliders that slip under tension
Why this matters: Dogs generate shock loads—not steady force. A sudden lunge can exceed the strength of weak hardware instantly.
What to do instead:
- Use load-rated buckles designed for outdoor or safety gear
- Prefer metal D-rings or reinforced engineering plastic
- Test sliders by pulling hard—if they move, replace them
In professional manufacturing, hardware is chosen based on tensile strength testing, not appearance.
Ignoring How Pulling Force Travels Through the Harness
Many DIY harnesses “look fine” until the dog pulls.
The problem: Designers think in shapes. Dogs apply force in directions.
If you don’t understand the force path:
- Straps twist under load
- Padding shifts out of place
- One seam carries all the stress
Correct mindset: Ask: If the dog pulls forward suddenly, where does that force go?
The answer should be: Leash → D-ring → back strap → chest loop → girth loop → distributed around torso
If force jumps between materials or relies on fabric, failure is likely.
Skipping Fit Testing and Real Pull Testing
Trying a harness on is not testing it.
Common mistakes:
- Only checking fit while the dog is standing still
- Not testing sudden tension
- Assuming “snug” equals safe
- Ignoring how the harness behaves during movement
Minimum testing you should do:
- Fit test (two fingers under straps)
- Movement test (walk, sit, turn)
- Pull test (firm, sudden tension by hand)
- Re-check stitching and hardware after testing
Professional harnesses are tested repeatedly. DIY harnesses should at least be tested intentionally.
Treating a Harness Like a Fashion Item Instead of Safety Gear
This is a mindset mistake—and it causes many of the others.
A harness is not:
- A decorative accessory
- A clothing project
- A “good enough” experiment
It is safety equipment.
Once you approach harness-making the same way you would approach:
- A backpack strap
- A climbing sling
- A child safety restraint
Your design decisions change immediately.
How Can You Improve Comfort and Durability
You can improve dog harness comfort and durability by adding padding at pressure points, using breathable linings, reinforcing high-stress areas with webbing and stitching, and selecting abrasion-resistant materials. Comfort comes from proper fit and cushioning, while durability depends on load paths, reinforcement, and fatigue resistance. Both must be engineered together to ensure long-term safety and usability.
Comfort and durability are often treated as opposites—but in a well-designed dog harness, they support each other. Discomfort usually leads to friction, movement, and misuse, which accelerates wear. Poor durability, in turn, creates sharp edges, loose stitching, and pressure points that reduce comfort.
Professional manufacturers like Szoneier improve both by focusing on how the harness interacts with the dog’s body over time, not just how it looks when new.
How Padding Placement Improves Comfort Without Weakening Structure
Padding should reduce pressure—not carry load.
Key padding zones:
- Chest plate (main load distribution area)
- Upper shoulder contact points
- Girth strap areas behind the front legs
Effective padding materials include:
- EVA foam (3–6 mm) – lightweight, resilient
- Neoprene padding – flexible, pressure-distributing
- Spacer foam + mesh – balance cushioning and airflow
Critical rule: Padding must sit around or on top of webbing, not replace it. Webbing should always remain the primary load path.
Common mistake: stitching padding tightly into the structural seam, which weakens webbing and causes premature failure.
How Breathable Linings Reduce Heat and Skin Irritation
Comfort is not just softness—it’s thermal management.
Dogs generate heat quickly, especially during walks or training. Non-breathable materials trap heat and moisture, leading to:
- Skin irritation
- Hot spots
- Faster material degradation
Best lining options:
- Air mesh / spacer mesh for airflow
- Soft brushed polyester for friction reduction
- Moisture-wicking fabrics in high-contact zones
Design tip: Use breathable linings only where they touch the dog. Outer layers can focus on durability instead.
How Reinforcement Increases Durability Without Adding Bulk
Durability doesn’t come from “making everything thicker.” It comes from reinforcing the right places.
High-stress areas that need reinforcement:
- Leash attachment point (D-ring zone)
- Strap intersections (chest-to-back connections)
- Buckle entry and exit points
- Direction-change points where force turns corners
Effective reinforcement methods:
- Double-layer webbing at stress zones
- Box-X stitching combined with bar tacks
- Directional reinforcement aligned with pull force
This approach increases lifespan while keeping the harness flexible and lightweight.
How Edge Finishing and Strap Routing Prevent Long-Term Wear
Many harnesses fail at the edges—not the center.
Why edges matter:
- Raw edges fray and cut into lining
- Hard corners rub fur and skin
- Exposed stitching wears faster
Best practices:
- Bind or round strap edges
- Avoid sharp turns near the armpits
- Route straps along natural body contours
In factory production, strap routing is refined through repeated wear testing—not guesswork.
How Adjustability Improves Both Comfort and Durability
A harness that fits only “one exact size” wears out faster.
Why adjustability matters:
- Dogs gain or lose weight
- Fur thickness changes seasonally
- Coats and jackets alter fit
Design for:
- Multiple adjustment points (not just one)
- Sliders positioned away from friction zones
- Secure routing that won’t slip under tension
A well-adjusted harness distributes load evenly, reducing stress on any single seam or strap.
How to Make a Harness Work with Coats and Jackets
Comfort problems often appear only when a coat is added.
To improve durability and comfort with coats:
- Ensure harness straps remain flat, not twisted
- Avoid compression points between coat seams and harness
- Reinforce any coat opening used for harness access
A reinforced slit (not a raw hole) in the coat prevents tearing and keeps harness alignment intact.
This compatibility is often overlooked in DIY designs but is standard practice in professional product development.
How Regular Inspection Extends Harness Lifespan
Durability is not just built—it’s maintained.
Encourage users to:
- Check stitching and webbing monthly
- Inspect hardware for cracks or deformation
- Replace harnesses showing stretch or seam separation
Even the best materials degrade over time. Early inspection prevents sudden failure.
Are DIY Dog Harnesses Safe Compared to Factory-Made Ones
DIY dog harnesses can be safe for small or low-pull dogs when made with proper webbing, stitching, and hardware, but they carry higher risk than factory-made harnesses. Professionally manufactured harnesses are generally safer because they use load-tested materials, engineered force distribution, and quality-controlled stitching. For strong, active, or reactive dogs, factory-made harnesses offer significantly better reliability and safety margins.
The real question is not “Can I make a dog harness?” It is “Under what conditions is a DIY dog harness safe enough?”
From a manufacturing and engineering standpoint, DIY and factory-made harnesses are not equal by default. The difference lies in consistency, testing, and margin for error.
When DIY Dog Harnesses Can Be Considered Safe
DIY dog harnesses can be reasonably safe only within clear limits.
They are most suitable when:
- The dog is small to medium-sized
- Pulling force is low or predictable
- The harness is used for casual walking, not training or running
- The builder uses high-strength webbing, not fabric alone
- Stitching is reinforced (Box-X, bar tacks)
- Hardware is load-rated
- The harness is regularly inspected and replaced when worn
In these situations, a conservatively designed DIY harness can function adequately. Think of it as a low-duty, owner-monitored solution, not a lifetime safety product.
When DIY Dog Harnesses Become Unsafe
DIY harnesses become risky when real-world forces exceed assumptions.
High-risk scenarios include:
- Large or strong dogs
- Dogs that lunge, pull suddenly, or react unpredictably
- Use during training, jogging, hiking, or outdoor activities
- Hands-free or front-clip lead systems (higher torque)
- Situations where loss of control could cause injury or escape
In these cases, DIY harnesses often fail not instantly—but progressively. Stitching loosens, sliders slip, webbing deforms, and one sudden pull becomes the breaking point.
This is where factory-made harnesses show their value.
Why Factory-Made Harnesses Are Generally Safer
Factory-made harnesses are not safer because they “look better.” They are safer because they are engineered and tested as systems.
Key safety advantages include:
- Load-rated webbing selected with safety margins
- Reinforced stitching patterns validated for fatigue resistance
- Hardware tested for tensile strength, not just fit
- Force-path engineering that controls how pull is distributed
- Consistent production quality, not one-off results
The Role of Load Testing and Fatigue Resistance
One of the biggest differences between DIY and factory-made harnesses is testing philosophy.
DIY testing usually means:
- One or two strong hand pulls
- Visual inspection
- Short trial walks
Factory testing includes:
- Repeated pull cycles (simulating months of use)
- Shock-load testing (sudden force spikes)
- Hardware deformation checks
- Stitch fatigue and seam failure analysis
Dogs don’t pull once—they pull thousands of times. Fatigue resistance matters more than initial strength.
Liability and Responsibility—An Overlooked Safety Factor
Another important difference is responsibility.
With a DIY harness:
- The owner assumes all risk
- Failure consequences are personal
With factory-made harnesses:
- Designs are standardized
- Materials are traceable
- Safety responsibility is shared by manufacturer and brand
This becomes especially important if:
- The harness is used by multiple people
- The dog is walked by children or elderly handlers
- The product is sold, gifted, or distributed
In these cases, DIY is not just risky—it is inappropriate.
How to Decide—DIY or Factory-Made?
Ask yourself these questions honestly:
- Is my dog strong or unpredictable?
- Would loss of control cause injury or danger?
- Am I confident in my stitching and material choices?
- Am I prepared to inspect and replace the harness regularly?
- Do I need consistent, repeatable performance?
If you answer yes to risk-related questions, factory-made harnesses are the safer choice.
FAQs – Common Questions About Making Dog Harnesses
Is a homemade dog harness strong enough?
A homemade dog harness can be strong enough for small dogs or light, casual walking if it uses high-strength webbing, reinforced stitching, and load-rated hardware. However, DIY harnesses are not usually tested for repeated pulling, shock loads, or long-term wear. For strong, active, or reactive dogs, factory-made harnesses offer higher safety margins and more reliable performance.
What fabric is best for a dog harness?
Fabric alone is not responsible for harness strength. The best fabrics for dog harnesses—such as Oxford polyester, nylon, or mesh—are used for durability, comfort, and abrasion resistance. Structural strength should always come from woven webbing. Fabric should protect and cushion the dog’s body, not carry pulling force.
Can a dog harness replace a traditional dog lead?
A dog harness can replace a collar, but it does not replace the need for a proper lead. Harnesses work together with leads to control direction and force. In fact, many alternative lead systems—such as front-clip or hands-free leads—require an even better-designed harness to manage force safely and prevent twisting or discomfort.
What can I use instead of a dog lead?
Alternatives to a traditional dog lead include hands-free waist leads, front-clip training leads, double-ended leads, and harnesses with built-in control handles. However, all these options still rely on a properly fitted and structurally sound harness. Without a well-designed harness, lead alternatives can increase strain, reduce control, or create safety risks.
How do I know if a dog harness fits correctly?
A properly fitting dog harness should sit snugly without restricting movement. You should be able to fit two fingers under the straps, the harness should not press on the throat, and it should not rub under the armpits. When pulled, the harness should stay stable without twisting, sliding, or shifting out of position.
How tight should a dog harness be?
A dog harness should be tight enough to prevent slipping or escape, but loose enough to allow free movement and breathing. Over-tightening causes pressure points and discomfort, while a loose harness shifts under load. Proper adjustability is essential to maintain comfort and safety as the dog moves.
Can I make a dog harness without sewing?
Some no-sew dog harness designs exist using knots or buckles, but they generally offer lower durability and limited adjustability. Without stitching, it is difficult to reinforce stress points or secure webbing reliably. For long-term use or stronger dogs, sewing reinforced seams is strongly recommended for safety.
How do I make a harness hole in a dog coat?
To make a harness hole in a dog coat, locate the leash attachment point while the harness is worn, then create a reinforced slit rather than a raw hole. Bind or stitch around the opening to prevent tearing. An unreinforced hole will quickly rip under movement and pulling, reducing both comfort and durability.
How long does a DIY dog harness last?
The lifespan of a DIY dog harness depends on materials, construction quality, and usage. Light-use harnesses may last months, while poorly reinforced designs can fail quickly. Regular inspection of stitching, webbing, and hardware is essential. Any signs of stretching, fraying, or seam separation mean the harness should be repaired or replaced immediately.
When should I replace a dog harness?
You should replace a dog harness if you notice loose stitching, cracked hardware, stretched webbing, or changes in fit due to growth or weight change. Harnesses are safety equipment, not lifetime products. Replacing them early prevents sudden failure and reduces injury risk.
Is it better to buy or customize a factory-made dog harness?
For dogs that are strong, active, or used in training, running, or outdoor activities, professionally manufactured harnesses are generally safer and more durable. Custom or OEM harnesses allow proper fit, tested materials, and consistent quality. DIY harnesses are best suited for light use or experimental purposes, not high-demand scenarios.
Conclusion
Making a dog harness yourself can be a rewarding project. It helps you understand fit, comfort, and how dogs move. But when safety, durability, or scale matters, professional manufacturing becomes the smarter choice.
Szoneier is ready to help.
With 18+ years of experience in webbing engineering, load-bearing textile products, low-MOQ customization, fast sampling, and strict quality control, Szoneier supports overseas brands and small-to-medium buyers from concept to production.