Skip to content

When purchasing a backpack, many people consider it a long term investment. Whether you’re planning to use it for school, work, or travel, durability and reliability are key. The goal is to select a backpack that not only meets your immediate needs but also stands the test of time, making it a trusty companion whenever you need to carry heavy loads.
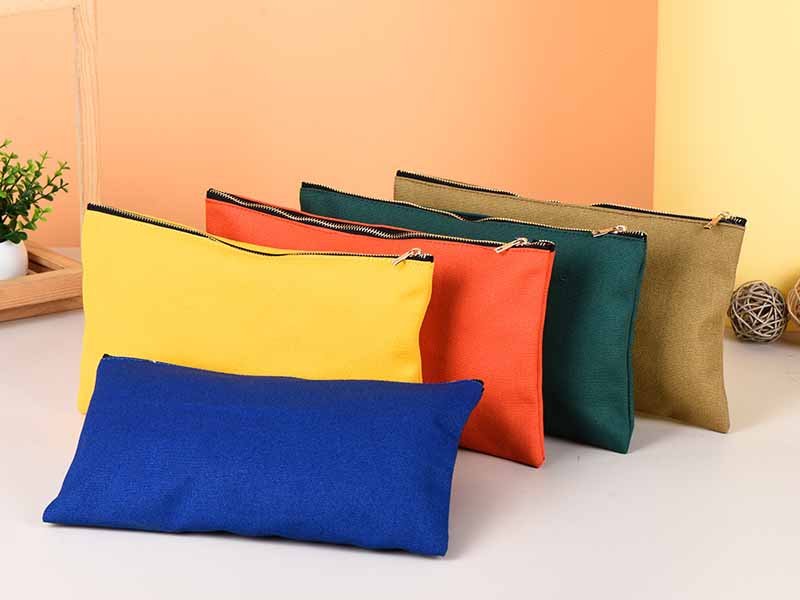
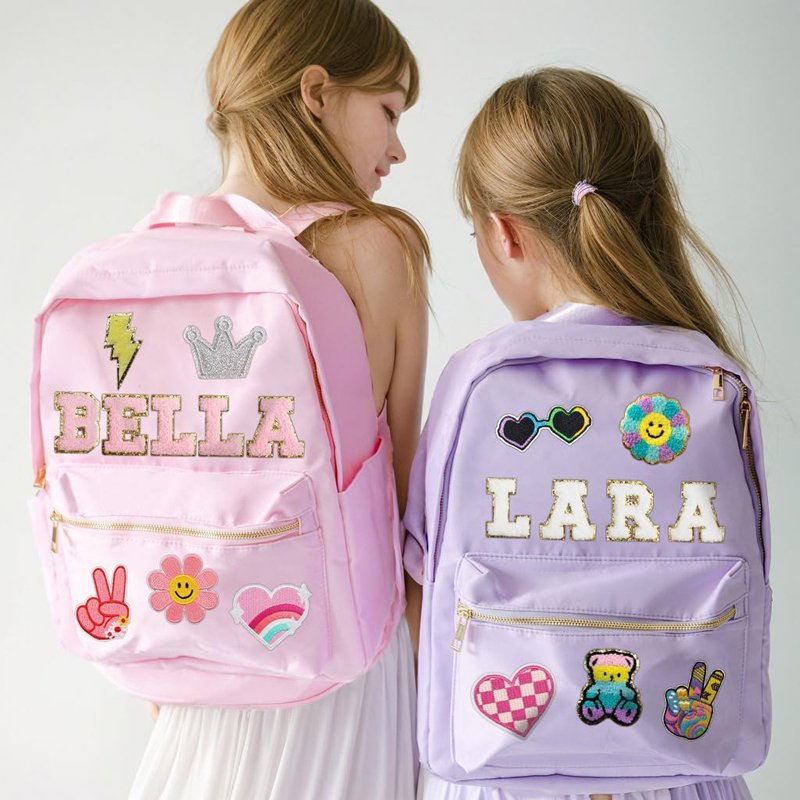
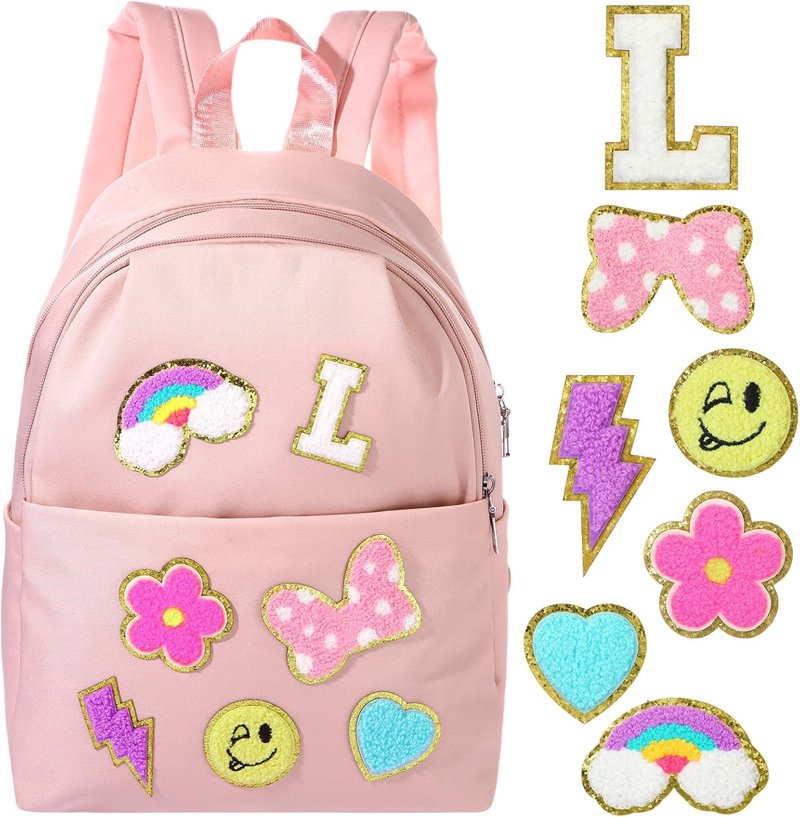
Often, backpacks are chosen in solid, neutral colors for their timeless appeal. While this choice is practical for longevity, it can start to feel a bit dull after years of use. This is where patches come into play. Adding patches to your backpack offers a simple and creative way to refresh its look without the need to buy a new one. Patches allow you to inject some personality into your bag, turning it from something ordinary into a unique statement piece.
Not only do patches offer aesthetic benefits, but they also serve practical purposes. They can cover up any signs of wear and tear, such as stains or small holes, giving your backpack a new lease on life. so do you want to know how to add or put patches on your backpack?with a variety of patch types available,embroidered, iron-on, sew-on, and adhesive,you can customize your bag in a way that suits your style and needs. This guide from a expert with 17 year bag industry experience will walk you through everything from selecting the right patches to applying them effectively, ensuring your backpack becomes a true reflection of your personality and experiences.
What are the types of patches on backpacks?
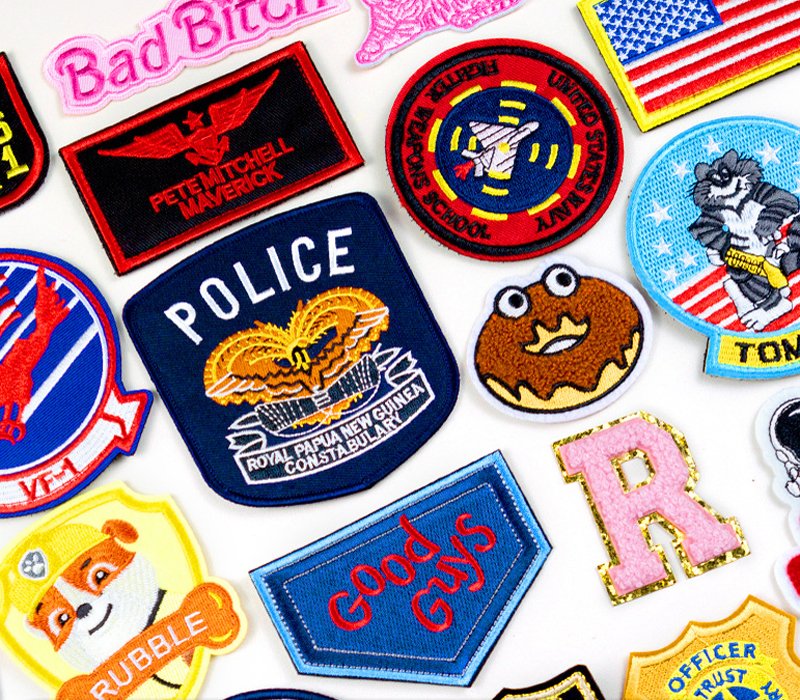
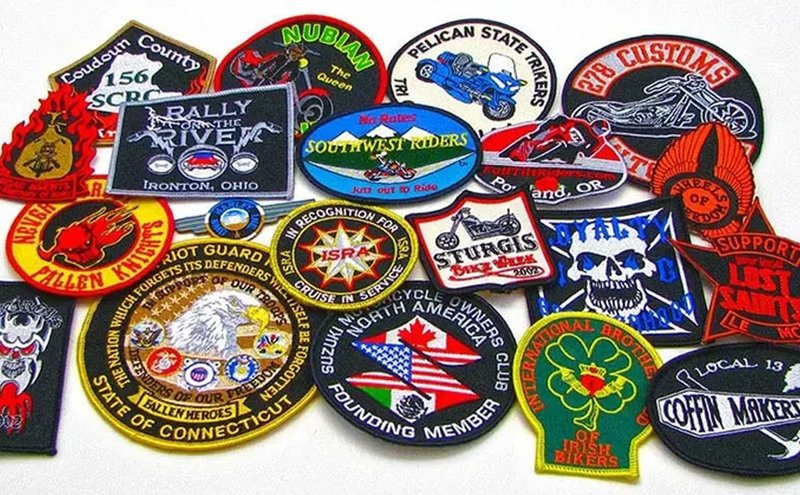
Customized backpack patches have become an iconic way for travelers to visually document their journeys. Each patch represents a memory, a place visited, or an experience shared. For instance, collecting a patch from every city or country you visit and attaching it to your backpack creates a colorful and personal tapestry of your travels. But travel isn’t the only story you can tell with patches. If you’re passionate about music, you might collect patches from concerts or festivals, transforming your backpack into a tribute to your favorite bands and events.
Patches are also a fantastic way to express personal interests or support for teams and hobbies. Sports enthusiasts can adorn their backpacks with patches representing their favorite teams or events, while children might be more excited to carry a school bag featuring patches of beloved cartoon characters. Whether for function or fun, patches are a versatile tool for personalization, making your backpack not just a bag, but a unique reflection of your identity and experiences.
Before you start adding patches to your backpack, it’s important to understand the different types available and what makes each one unique. This knowledge will help you choose the right patch for your specific needs and ensure that your customization efforts yield the best possible results.
1.Embroidered Patches
Embroidered patches are among the most popular types due to their durability and detailed design. These patches are made by stitching threads onto a backing fabric, creating intricate patterns and textures. The raised threads give the patch a 3D effect, making them visually appealing and tactile. Embroidered patches are ideal for backpacks made from sturdy materials like canvas or denim, as they provide a strong surface for stitching.
Application: Typically sewn onto the backpack, but they can also be attached using adhesive backings or iron-on methods.
Pros:
- Durable and long-lasting.
- High-quality, detailed designs.
- Suitable for heavy-duty materials.
Cons:
- Requires sewing skills for attachment.
- Can be time-consuming to apply.
2.Iron-on Patches
Iron-on patches are a convenient option for those who prefer a quicker application process. These patches have a heat-activated adhesive on the back, allowing them to bond with the fabric when exposed to heat. Iron-on patches are ideal for cotton or polyester backpacks, as these materials can withstand the heat required to activate the adhesive.
Application: Simply place the patch on the desired spot and use an iron to heat it, pressing firmly to ensure the adhesive melts and sticks to the backpack.
Pros:
- Easy and quick to apply.
- No sewing required.
- Suitable for various fabrics.
Cons:
- May not adhere well to nylon or leather.
- Adhesive can weaken over time.
3.Sew-on Patches
Sew-on patches are a versatile option for those who want a permanent and secure attachment. These patches are applied by stitching them onto the fabric, making them ideal for backpacks that will undergo heavy use. Sew-on patches work well on almost any fabric, including leather, nylon, and canvas.
Application: Can be sewn by hand or using a sewing machine, providing a permanent and durable attachment.
Pros:
- Permanent and secure attachment.
- Versatile application for different fabrics.
- Can be combined with other patch types for added security.
Cons:
- Requires sewing skills and time.
- Not as convenient as iron-on or adhesive patches.
4.Adhesive or Peel and Stick Patches:
Adhesive patches are the easiest to apply, as they come with a sticky backing that can be pressed onto the fabric. These patches are perfect for temporary customization or for those who want to frequently change the look of their backpack. However, adhesive patches are not as durable as other types and may peel off over time.
Application: Simply peel off the backing and press the patch firmly onto the backpack. They are often used for temporary decorations or on backpacks made from materials that don’t handle heat well.
Pros:
- Quick and easy application.
- Ideal for temporary use.
- No sewing or heat required.
Cons:
- Less durable and may peel off.
- Not suitable for heavy duty use.
5.Velcro Patches:
These patches have a Velcro backing, allowing them to be easily attached and removed from the backpack. They are commonly used by military personnel and outdoor enthusiasts who may need to swap out patches frequently.
Application: The corresponding Velcro piece is sewn or glued onto the backpack, and the patch is attached to it. This system allows for versatility and easy customization.
6.PVC or Rubber Patches:
Made from soft PVC or rubber, these patches are highly durable and weather resistant. They are often used for logos or branding on backpacks.
Application: Usually attached with sewing or an adhesive backing, making them ideal for outdoor or heavy duty use.
Preparation Before Adding Patches
Before you start adding patches to your backpack, some preparation is necessary to ensure a successful and long lasting application. From selecting the right material to gathering the necessary tools, this section will guide you through the crucial steps you need to take.
Selecting the Right Backpack Material
The material of your backpack plays a significant role in determining which type of patch will work best. Here’s a quick guide to help you choose:
- Canvas: Ideal for embroidered and sew-on patches. The thick fabric provides a strong base for stitching.
- Denim: Works well with all types of patches, especially embroidered and iron-on patches.
- Nylon: Better suited for sew-on or adhesive patches, as iron-on patches may not adhere well.
- Leather: Requires sew-on patches, as iron-on and adhesive patches may not stick properly.
- Polyester: Suitable for iron-on and sew-on patches.
Choosing the Location for Patches
Where you place your patches is just as important as the type of patch you choose. Consider the following when deciding on the location:
- Visibility: Choose areas that are easily visible, like the front pocket or top flap, to showcase your patches.
- Balance: Distribute patches evenly to create a balanced look. Avoid clustering too many patches in one area.
- Functionality: Ensure that the placement of patches doesn’t interfere with the functionality of zippers, pockets, or straps.
Tools and Materials Needed
To apply your patches, you’ll need the following tools and materials:
- Needle and thread: For sewing on patches.
- Iron: For applying iron-on patches.
- Scissors: To trim excess fabric or thread.
- Pins: To hold patches in place before sewing.
- Heat-resistant cloth: To protect your backpack when applying iron-on patches.
Step by Step Guide: How to Add Different Types of Patches
Now that you’re prepared, it’s time to start adding patches to your backpack. This step-by-step guide will walk you through the process for each type of patch, ensuring that your customization efforts are successful.
How to sew patches on a backpack
Sewing patches onto a backpack is a reliable method that ensures they stay firmly attached, making it an ideal choice for those looking for a durable and long-lasting solution. While other methods like ironing or gluing can work, they often don’t provide the same level of security as sewing. Here’s a detailed guide on how to sew patches onto your backpack effectively:
Step 1: Prepare the Patch and Backpack
Before you begin sewing, it’s crucial to properly position your patch. This ensures that the final result looks neat and professional. Start by selecting the exact spot where you want to place the patch on the backpack. Use safety pins to secure the patch in place temporarily. This will prevent any unwanted movement while you sew, allowing for more precise stitching.
Step 2: Select the Right Thread
Choosing the right thread is key to achieving a seamless look. Ideally, the thread should match the color of the patch’s border to make the stitches less visible. This not only enhances the aesthetic appeal but also contributes to a clean finish. Thread your needle with the appropriate thread, then cut it to a manageable length. For added strength, double the thread and tie a knot at the end. This will also help prevent the thread from slipping out of the needle while sewing.
Step 3: Start Sewing the Patch
There are different stitches you can use to sew your patch onto the backpack, but the two most common and effective ones are the running stitch (also known as a straight stitch) and the overcast stitch.
- Running Stitch (Straight Stitch): This is the most basic stitch, where the needle goes in and out of the fabric in a straight line. It’s easy to do and works well for most patches. Simply push the needle through the fabric and patch, pull it out on the other side, and repeat the process around the edge of the patch.
- Overcast Stitch: For a more secure hold, you might opt for an overcast stitch. This stitch involves wrapping the thread over the edge of the patch, creating a series of diagonal stitches that run along the perimeter of the patch. This method is particularly useful for thicker patches or when you want to ensure that the edges are securely fastened to the backpack.
Step 4: Secure the Stitch
Once you’ve sewn around the entire edge of the patch, it’s important to secure the stitch to prevent it from unraveling. To do this, tie a knot as close to the fabric as possible and snip off any excess thread. Make sure the knot is tight and discreet, ideally hidden on the inside of the backpack.
Final Touches
After finishing the sewing process, check the patch to ensure it’s firmly attached without any loose areas. If needed, you can go over certain sections with additional stitches for extra security. Remove the safety pins and give the patch a final press to smooth out any wrinkles.
How to do an straight stitch step by step?
- Position the Needle: Begin by inserting the needle from inside the backpack through the fabric patch.
- Make the First Stitch: Move the needle a few millimeters to the left and push it through the patch, coming back out from the inside of the bag.
- Repeat the Motion: Shift the needle a few millimeters to the left again and push it through the patch. Continue this process, maintaining a consistent distance from the previous stitch.
- Align with the Patch Edges: Adjust the needle position as you proceed to ensure the stitches align with the edges of the patch.
- Result: The finished line of stitches should appear as a series of horizontal lines, slightly spaced out.
How to do an overcast stitch step by step?
- Start Position: Begin by inserting the needle from inside the bag through the patch, positioning it a few millimeters away from the edge of the patch.
- Move to the Edge: Shift the needle to the edge of the patch and insert it right above the edge.
- Create the Stitch: From the back of the fabric, move the needle leftward, and then insert it into the patch again. Continue this process by moving upward with each stitch.
- Continue Along the Patch: Keep inserting the needle and stitching along the edge of the patch in this manner.
- Result: The final appearance should be a row of vertical lines, giving a more decorative and secure finish than the straight stitch.
How to Apply Iron-On Patches to Your Backpack

Applying iron-on patches is a straightforward process that is quicker than using glue. However, it’s important to note that, like glue, iron-on patches may eventually wear off. Also, because this method involves heat, ensure that your backpack material can handle it.
Ideal Materials: For best results, choose a backpack made from natural or non synthetic fabrics, such as cotton, denim, or polyester.
What You’ll Need:
- A hand held iron
- A pressing cloth
- Iron-on patches
Steps:
- Prepare the Surface: Place your backpack on a hard, heat resistant surface. Avoid using an ironing board as it may be too soft for this task.
- Preheat the Backpack: Before positioning the patches, run the iron over the area of the backpack where you plan to apply the patches. Use only dry heat; do not use the steam setting. This step helps to smooth the fabric and ensures the patches adhere better.
- Position and Apply the Patches: Place the iron-on patches on the desired spots on your backpack. Cover the patches with a pressing cloth to protect both the patches and the backpack fabric. Iron over the patches in circular motions for about 30 seconds, paying particular attention to the edges to ensure they are well adhered.
- Cool and Set: After ironing, let the patches cool for about a minute. This cooling period allows the adhesive to fully bond with the fabric.
Your iron-on patches should now be securely attached to your backpack, giving it a personalized touch!
How to Attach Patches to a Backpack with Glue
Attaching patches to a backpack with glue is a simple and effective method that doesn’t require advanced skills. It’s ideal for quick fixes and customization. Note, however, that fabric glue may weaken over time, especially if exposed to moisture.
Materials Needed:
- Strong fabric glue
- Pencil
- Patches
- Heavy object (e.g., a book)
Instructions:
- Choose the Placement: Determine where you want to place the patches on your backpack. Arrange them as desired, and use a pencil to lightly outline the patch’s position, staying a few millimeters away from the edges. This outline will serve as a guide to ensure precise application.
- Apply the Glue: Spread the fabric glue directly onto the area of the backpack within the pencil outlines. Ensure the glue covers the entire outlined area but remains within the lines to prevent spillage. Apply an even layer to ensure a strong bond.
- Position the Patch: Carefully place the patch onto the glued area, aligning it according to the pencil outline. Press down firmly, making sure to smooth out the edges to secure them well.
- Weight for Adhesion: Place the backpack on a flat surface and position a heavy object, such as a book, on top of the patch. Leave it undisturbed for at least one hour to allow the glue to dry and set properly.
By following these steps, you’ll be able to add patches to your rucksack that not only look great but also withstand the rigors of everyday use. This method is particularly beneficial for those who want their patches to stay put, even through heavy wear and tear. Whether you’re customizing a new backpack or giving an old one a fresh look, sewing is the way to go for a durable and professional finish.
Customizing Patches For Your Bespoke Backpack

For those who want to take their backpack customization to the next level, creating custom patches is a great way to ensure your bag is truly one of a kind. Here’s how you can customize your patches:
Creating Custom Patches
If you want something truly unique, consider creating your own custom patches. Many online services allow you to design your patch by uploading images or selecting from pre-made templates. Custom patches are perfect for commemorating special events, showcasing your artwork, or simply adding a personal touch.
Combining Multiple Patches
One patch can make a statement, but combining multiple patches can tell a story. Consider arranging your patches in a theme, such as travel destinations, favorite bands, or hobby related icons. Be mindful of balance and symmetry when placing multiple patches.
Adding Embellishments
In addition to patches, you can add other embellishments like pins, studs, or fabric paint. These additional elements can enhance the look of your patches and create a more personalized design.
How To Care for Your Patched Backpack
Washing Tips
Backpacks with patches require special care when washing. If possible, spot clean the area around the patch rather than putting the entire backpack in the washing machine. If machine washing is necessary, use a gentle cycle with cold water and place the backpack in a mesh laundry bag to protect the patches.
Handling Wear and Tear
Over time, patches may start to come loose or show signs of wear. For sewn-on patches, simply re stitch any loose edges. For iron-on patches, you may need to reapply heat or use fabric glue to secure them. Adhesive patches can be replaced as needed.
Storing Your Backpack
When not in use, store your backpack in a cool, dry place. Avoid folding or creasing areas with patches, as this can cause them to peel or crack over time.
Begin Your Patch Customization Project
We hope you’re inspired to start personalizing your backpack with unique patches! This is a fantastic way to make your bag truly your own. If you don’t have a suitable backpack for this project yet, now is the perfect time to find one that will be a great canvas for your creativity. So go ahead, gather your patches, and start creating a backpack that’s as unique as you are!
RELATED ARTICLES:
How to Fix a Zipper On a Backpack:Step By Step Guide
How To Choose The Best Laptop Backpack For Travel An Expert Guide?
15 Best Fabrics For Bag Making Ultimate Guide
Nylon vs Polyester: Which is The Better Fabric For Bag Manufacturing?