Skip to content

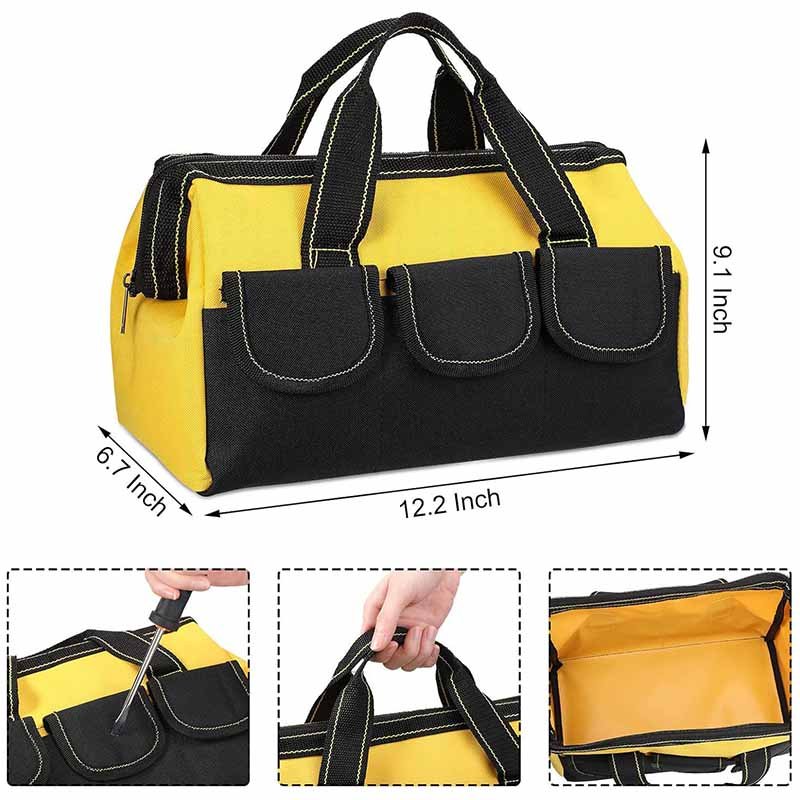
A custom tool bag looks simple until it is filled with real tools. The moment screwdrivers, meters, drills, batteries, pliers, cutters, fittings, and other dense or sharp objects are loaded into the bag, the product begins behaving very differently from an ordinary backpack or promotional tote. Weight concentrates around the bottom, handle anchors, pocket corners, zipper ends, and structural seams. A good-looking sample can therefore fail quickly if the construction was designed around appearance instead of actual working conditions.
Custom tool bags are manufactured by first defining the tools, target load, working environment, and carrying method, then selecting suitable fabrics, webbing, hardware, reinforcement, and bottom structures. A prototype is developed to verify tool fit, pocket access, balance, durability, and manufacturing feasibility. After approval, controlled patterns, BOM specifications, sewing standards, inspections, functional checks, and packaging requirements guide repeatable bulk production.
This is where professional development separates itself from simple logo customization. One bag may hold 15 kilograms comfortably for years, while another with almost the same outward appearance starts sagging after a few weeks because the handle webbing ends too high, the base lacks structural support, or the pockets concentrate too much weight on one side. Most long-term performance is decided before the production line begins, which is why material selection, pattern work, sampling, reinforcement, and practical testing deserve as much attention as sewing itself.
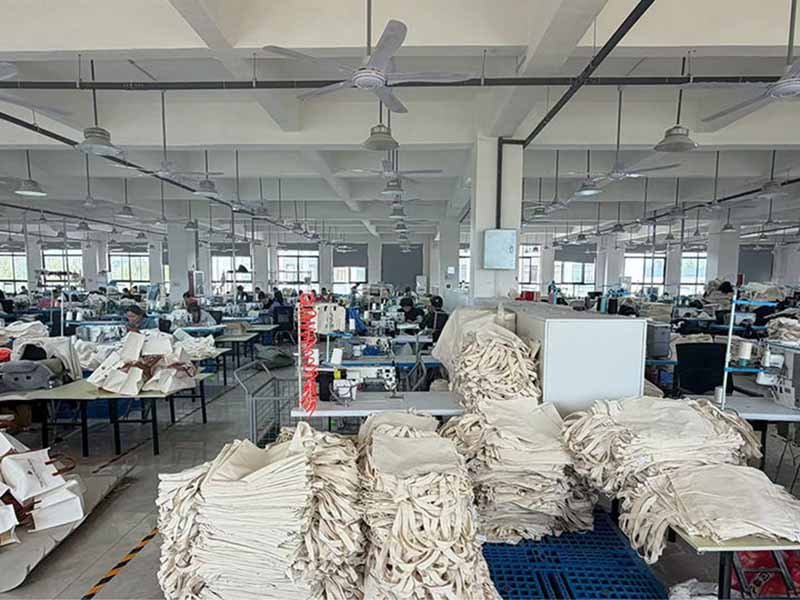
Szoneier approaches tool bags as part of a broader custom bags and soft goods manufacturing system rather than as isolated sewn items. The company’s documented capabilities cover material sourcing, structure development, pattern making, sampling, bulk sewing production, in-line inspection, final quality control, packaging, and export coordination, with tool bags included among its supported product categories. This matters because reliable tool bag production depends on coordination across all of these stages rather than on a single strong material or one skilled sewing operation.
What Should Be Defined Before Manufacturing?
A custom tool bag should be defined around its intended tools, working load, environment, carrying method, organization needs, reinforcement requirements, branding, packaging, and order plan before sampling starts. These decisions determine material choice, pocket dimensions, webbing width, structural support, hardware, sewing methods, testing requirements, and whether the finished product remains practical after repeated daily use.
Tool List and Target Load
The first development question should be what the bag is expected to carry. Electricians may need narrow vertical pockets for pliers, screwdrivers, testers, and meters, while HVAC technicians often need larger spaces for gauges, fittings, batteries, hoses, and small parts. Mechanics and installers may carry dense steel tools that create greater concentrated weight, even when the outer dimensions of the bag remain similar. Designing around a generic bag size before understanding the contents often produces poor pocket layouts and unnecessary revisions.
The tool list should record the largest items, the tools used most frequently, objects with sharp edges, and components that should remain separated. A long screwdriver may require a deep vertical pocket, while a battery charger may need a wider compartment with more clearance. Sharp-edged tools may need double-layer pocket bottoms or reinforcing panels, and meters or electronic equipment may require separation from metal tools. These details are easier and cheaper to solve during layout development than after the first full sample is already complete.
Working load should then be translated into construction requirements. A promotional organizer intended to carry 5 kilograms does not need the same handle anchoring or bottom support as a technician’s bag expected to carry 15 or 20 kilograms repeatedly. As the load increases, the design should consider wider or denser webbing, longer anchor areas, additional backing layers, stronger bottom boards, reinforcement around side panels, and more deliberate use of bartacks or box stitching.
| Intended Working Load | Typical Construction Focus | Common Development Considerations |
|---|---|---|
| Under 8 kg | Light to medium reinforcement | Standard webbing, basic bottom support, conventional pockets |
| 8–15 kg | Moderate reinforcement | Wider webbing, strengthened handles, improved base support |
| 15–25 kg | Heavy-duty structure | Extended anchors, additional backing, stronger bottom and hardware |
| Above 25 kg | Project-specific engineering | Defined load paths, functional testing, specialized base or hardware |
These ranges are development references rather than universal standards, because material quality, bag geometry, lifting behavior, and load distribution can change the real stress significantly. A brand should therefore avoid treating the phrase “heavy duty” as a substitute for measurable product conditions. The more useful question is what the normal working load will be, where that weight will sit, and which areas should be reinforced so the entire structure carries the force instead of transferring most of it to one short seam.
Working Environment
A tool bag used in a clean indoor workshop has very different needs from one placed repeatedly on concrete, carried through construction sites, stored in service vehicles, or exposed to rain, dust, oils, and dirt. Indoor products may prioritize organization, lighter weight, and easy access, while outdoor or industrial bags often require stronger abrasion resistance, moisture protection, easier cleaning, and more durable base construction.
The lower portion of the bag usually experiences the highest wear because it contacts floors, shelving, truck beds, and other rough surfaces. Using thicker material everywhere is not always the best solution. A more efficient approach is to reinforce the bottom and corners with coated fabric, double layers, boards, EVA, rubberized elements, or other abrasion-resistant materials while keeping the upper panels lighter and more flexible. This improves performance without increasing unnecessary weight throughout the product.
Water resistance also needs a precise definition. A PU-coated Oxford fabric may repel light rain and surface moisture, but this does not make the whole bag waterproof. Water can still enter through seams, zipper teeth, needle holes, or openings. If the application only involves occasional rain or damp floors, water-resistant construction may be sufficient. If the product is expected to protect tools in sustained wet conditions, the structure, seams, closures, and testing approach must be reconsidered as a complete system rather than relying only on the outer fabric.
Color and surface finish have practical value too. Dark tones such as black, charcoal, navy, or olive tend to hide workshop dirt, oils, and abrasion marks better than light colors. Smooth coated surfaces may clean easily but show scuffs more clearly, while textured fabrics can hide scratches but may trap more dust. These small decisions influence how the product looks after months of use, which matters for professional brands that want their equipment to remain presentable in real working environments.
Product Format and Carrying Method
The format should follow how the user works. Open-top tool totes provide quick visibility and fast access, which suits technicians who repeatedly reach for tools during a job. Zippered tool bags keep contents more secure during transport. Tool backpacks distribute weight across both shoulders and are useful for longer walking distances, while tool rolls work well for organized sets of hand tools. Hard-bottom bags improve standing stability and floor protection, and rolling bags are more appropriate for heavier kits that would be uncomfortable to carry manually.
Carrying method affects structural design because different systems create different force paths. A short hand handle transfers weight through the side panels and base, while a shoulder strap introduces angled loads at D-rings or anchor tabs. Backpacks move force into shoulder strap attachment points and the upper back panel, and rolling bags add stress around wheels, molded bases, and pull handles. These differences should be considered before the first pattern is made, because retrofitting a new carrying system later can require substantial structural changes.
A useful project brief should clarify whether the bag must stand upright when open, whether it should fit inside service vehicles or lockers, whether the user will access tools while the bag remains on the floor, and whether packed shipping volume is important. A highly structured bag may work beautifully on a jobsite but occupy much more carton space during shipping, while an overly soft bag may pack efficiently but collapse when the user tries to access tools. The correct format balances use, manufacturing, packaging, and transportation rather than optimizing only one stage.
Manufacturing Inputs
A factory can develop and quote a tool bag much more accurately when project information is structured. For a mature OEM project, this may include a tech pack, BOM, drawings, measurements, artwork, Pantone colors, packaging files, approved hardware, tolerances, and a physical sample. For an ODM project, the starting information may be simpler, such as a reference product, sketch, target tool list, desired quantity, expected market position, and target functions.
At minimum, a useful development package should normally cover:
- intended tools and approximate dimensions;
- expected working load;
- external bag dimensions;
- pocket quantity and purpose;
- carrying method;
- preferred materials;
- reinforcement expectations;
- logo method;
- colors;
- target quantity;
- packaging needs;
- target market;
- testing requirements;
- desired delivery window.
Clear inputs reduce unnecessary sampling rounds because each revision can focus on a defined problem. If fabric, dimensions, pocket positions, handles, hardware, and branding are changed simultaneously, it becomes difficult to determine which modification actually improved the product. Structured development is therefore not only about making communication more professional; it directly reduces time, cost, and the risk of approving a sample that cannot be reproduced consistently in bulk production.
Which Materials Are Best for Tool Bags?
The best tool bag materials balance abrasion resistance, tear strength, structure, weight, moisture resistance, appearance, sewing performance, and cost. High-denier Oxford, polyester, nylon, heavy canvas, reinforced webbing, coated bottom fabrics, structural boards, EVA, and selected molded components are commonly used. The correct combination depends on intended load, working conditions, product positioning, and the specific areas that experience the most stress.
Oxford, Polyester, and Nylon
High-denier Oxford and polyester are widely used for tool bags because they provide good durability, consistent availability, and compatibility with coatings, backing layers, printing, embroidery, and reinforcement. 600D polyester may be suitable for lighter utility bags, while 900D, 1200D, and 1680D materials are more common as requirements for structure and abrasion resistance increase. Szoneier’s documented material guidance specifically identifies 1680D Oxford, heavy-duty canvas, and reinforced webbing as suitable options for tool bag projects.
Denier alone should not be treated as a quality grade. Two fabrics both labeled 1680D may differ substantially because yarn composition, weave density, coating, backing adhesion, finished weight, and surface treatment all influence real performance. A lower-denier fabric from a reliable construction can outperform a poorly made higher-denier material in abrasion, tear resistance, or coating durability. For serious product development, flat fabric swatches should be evaluated alongside finished sewn samples because fabric behavior changes at folds, seams, and high-stress corners.
Polyester tends to provide good color stability, lower moisture absorption, broad availability, and competitive cost, which makes it useful for medium and larger production programs. Nylon often offers strong abrasion resistance and a premium hand feel, but usually costs more. The decision should match the expected market position rather than following the assumption that the most expensive material automatically creates the best product.
| Material | Common Application | Main Advantage | Typical Limitation |
|---|---|---|---|
| 600D Polyester | Light utility tool bags | Economical and widely available | Less suitable for demanding abrasion |
| 900D–1200D Oxford | Mid-duty designs | Good balance of structure and cost | Performance varies by construction |
| 1680D Oxford/Polyester | Heavy-duty styles | Dense surface and stronger structure | Heavier and bulkier at seams |
| Nylon | Premium professional products | Strong abrasion performance | Higher material cost |
| Heavy Canvas | Workshop or heritage styles | Natural appearance and substantial feel | Greater weight and moisture absorption |
| Coated Fabric | Bottoms and wet areas | Easier cleaning and moisture resistance | Poor coatings may crack or wear |
Material selection should therefore be based on finished fabric performance and real use conditions rather than marketing labels. It is usually more useful to compare abrasion behavior, surface finish, coating quality, stiffness, weight, and sewing performance than to focus only on one specification. The finished bag must still be comfortable to carry, practical to manufacture, and consistent in bulk production, so material decisions should always be evaluated together with the complete structure.
Canvas and Hybrid Constructions
Canvas remains valuable for tool bags because it creates a traditional workwear appearance that many hardware, workshop, craft, and heritage-focused brands prefer. Heavy cotton or cotton-polyester canvas can provide strong everyday abrasion resistance, a distinctive natural surface, and good compatibility with embroidery, printing, and selected leather details. Waxed or treated canvas can add water repellency and a more premium feel, although the treatment can also affect color consistency and handling during production.
The main trade-off is weight and moisture behavior. Heavy canvas can make a large bag noticeably heavier before any tools are added, while untreated cotton fabrics tend to absorb more moisture than coated polyester or nylon. This does not make canvas unsuitable; it simply means the material works best when selected for the right product and combined intelligently with other components.
Hybrid construction often gives better results than using one fabric everywhere. A canvas tool bag may use synthetic webbing for the handles, coated polyester underneath, PE or PP board in the bottom, and leather reinforcement at selected contact points. An Oxford bag may use a molded base, EVA structure, mesh pockets, or PU details in specific zones. This approach places stronger or more specialized materials exactly where the product needs them, which can reduce total weight and cost while improving real durability.
The most experienced tool bag development rarely asks which single fabric is “best.” It asks which material should be used in the body, which should protect the base, which should reinforce the load points, and which should provide comfort or organization. Dividing the bag into functional zones produces better results than applying one expensive material across every panel simply to create a higher specification on paper.
Webbing, Zippers, and Hardware
Webbing is a structural component rather than a decoration because it often transfers the actual carrying load. Common widths such as 25 mm, 38 mm, and 50 mm can all be appropriate depending on the product. Smaller pouches may work with narrower webbing, while medium and heavy tool bags commonly benefit from wider straps that spread pressure over a larger area. Thickness, weave density, yarn quality, and tensile performance are just as important as width, because two webbings of the same nominal size may perform very differently.
The handle should also be considered as part of the bag’s load path. A webbing handle that stops near the top of the body can place high stress on a short seam, while a longer webbing route that extends downward spreads the force over a larger panel. Backing reinforcement behind the visible fabric can further reduce local stress without changing the outward appearance.
Zipper selection should reflect opening size, packing pressure, and frequency of use. Smaller zipper chains work well on accessory pockets but may be less suitable for a main opening that is frequently stretched by a full load. Curved openings also create different forces from straight zippers, particularly when the bag is tightly packed. Hardware such as D-rings, snap hooks, buckles, adjusters, and rivets should be chosen according to load, corrosion exposure, weight, and brand positioning rather than simply because metal looks more premium.
Professional hardware evaluation considers how every component behaves after repeated use. Metal parts can add durability and perceived value but also increase weight and may scratch nearby surfaces. Engineering-grade plastic hardware can be lighter and more corrosion-resistant, but dimensions and material quality are critical. The right choice is the one that performs reliably in the complete bag rather than the component that appears strongest when viewed separately.
Bottom Materials
The bottom is one of the highest-wear areas because it contacts floors, shelves, vehicle beds, concrete, dirt, and moisture repeatedly. A strong main body fabric does not automatically solve this problem, so the base often needs a separate structure designed around abrasion, load distribution, standing stability, and cleaning.
Common solutions include double-layer Oxford, coated polyester, PE board, PP board, EVA reinforcement, rubberized panels, and molded plastic bases. Flexible reinforced bottoms reduce weight and shipping volume, while board-supported structures help the bag remain flat and distribute the load more evenly. Molded bases provide excellent standing stability and resistance to wet or dirty surfaces, but they usually involve tooling, higher production requirements, and greater carton volume.
A typical layered bottom for a medium-duty bag may combine:
- abrasion-resistant outer fabric;
- secondary reinforcement layer;
- PE or PP support board;
- optional foam or EVA;
- internal lining or protective layer.
The goal is not to make the bottom as rigid as possible. Excessive stiffness can increase weight, make the bag uncomfortable to carry, and create larger shipping cartons. The correct base supports the intended load, reduces sagging, and protects the lower surface while allowing the product to remain practical for handling and transportation.
How Is a Custom Tool Bag Engineered?
A custom tool bag is engineered by controlling pocket geometry, load distribution, handle and strap anchors, bottom support, access, and reinforcement. The strongest designs spread force across multiple layers and broad attachment areas instead of relying on thick fabric alone. Pocket placement must also support real workflows so the bag remains balanced, accessible, and stable when the intended tools are loaded.
Pocket Geometry
Tool pockets should be designed around the objects they hold rather than arranged simply to make the bag look organized. Thin screwdrivers may work well in narrow vertical pockets, while wider tools need gussets, pleats, elastic, or shaped panels that create more usable volume. Pocket depth matters equally. A shallow pocket may allow tools to fall out, while an excessively deep pocket can make shorter items difficult to retrieve during work.
The bottom of each pocket also deserves attention because steel tools create concentrated point loads. Long screwdrivers, pliers, and similar items may repeatedly hit the same area when the bag is placed on the floor. Double-layer fabric, reinforcement patches, or more abrasion-resistant inner materials can extend service life without making the entire side panel excessively heavy.
Pocket layout influences balance as well. If most heavy tools are placed on one outside wall, the bag may lean even when the total weight is within the intended working load. Heavier objects often perform better closer to the center and lower in the bag, while frequently used lighter tools can remain around the exterior for quicker access. This kind of internal organization creates a better user experience than simply maximizing the number of visible pockets.
A practical review should always load the prototype with representative tools. When the bag is full, check whether tall items interfere with the zipper, whether pocket openings remain accessible, whether the center of gravity shifts badly, and whether the body stays upright. CAD drawings are helpful for dimensions, but actual loading reveals problems that drawings cannot show.
Load Paths
A strong tool bag creates a continuous load path from the contents through the bottom and body into the handle or shoulder strap system. This is one of the most important principles in functional bag construction because a bag can fail even when every individual material appears strong. If most force is concentrated at a short handle seam, the surrounding panel may stretch, tear, or distort before the webbing itself approaches its tensile limit.
Consider a bag carrying approximately 18 kilograms. In a perfectly balanced static condition, two handles may appear to carry roughly half the weight each, but real handling is rarely symmetrical. Users lift one handle first, swing bags into vehicles, set them down quickly, or allow the contents to shift toward one side. These dynamic movements can create higher temporary forces than a simple static calculation suggests.
Useful structural methods include extending webbing farther down the side panels, adding backing patches behind anchor points, reinforcing seams that lie near the load path, stabilizing the bottom to reduce sag, and positioning bartacks at transitions where force changes direction. The exact solution depends on material and geometry, but the principle remains consistent: force should spread gradually through the structure rather than stop abruptly at one stitch line.
A prototype does not need to tear to show that its load path is poor. Excessive wrinkling around the handle anchors, severe bottom sag, distorted zipper openings, or a body that collapses under load are already signs that the structure is concentrating force inefficiently. Addressing those symptoms during sampling can prevent much more serious durability problems later.
Stress Points
Stress points normally appear where force changes direction or where several materials meet. Handle ends, shoulder strap anchors, pocket corners, zipper ends, D-ring tabs, base corners, and transitions between thick and thin sections deserve particular attention. Reinforcement works best when it is concentrated at these zones instead of being added indiscriminately across the entire product.
Common methods include bartacking, box-and-cross stitching, backing patches, additional rows of stitching, double-layer fabric, webbing overlays, reinforced binding, and selected rivets or structural inserts. Szoneier’s documented manufacturing equipment includes sewing machines, walking-foot machines, computer sewing machines, binding machines, bartack machines, thick-material handling equipment, cutting systems, and inspection tools, supporting the kind of multilayer construction frequently used in functional bags.
More reinforcement does not automatically create a better product. Very dense stitching can perforate coated fabric and create a potential tear line, while oversized reinforcement can make corners too stiff or difficult to sew consistently. Rivets can strengthen certain constructions but may also concentrate force around a small hole if the surrounding material is not prepared correctly. The best reinforcement is one that has been designed for the actual material and validated in a loaded prototype.
Different materials also behave differently under repeated bending and stitching. Heavy canvas, coated Oxford, thick webbing, PU, leather, EVA, and PVC do not respond the same way to dense needle penetration or sharp folding. Experienced development therefore treats reinforcement as an engineering decision rather than a visual detail copied from another bag.
Shape and Stability
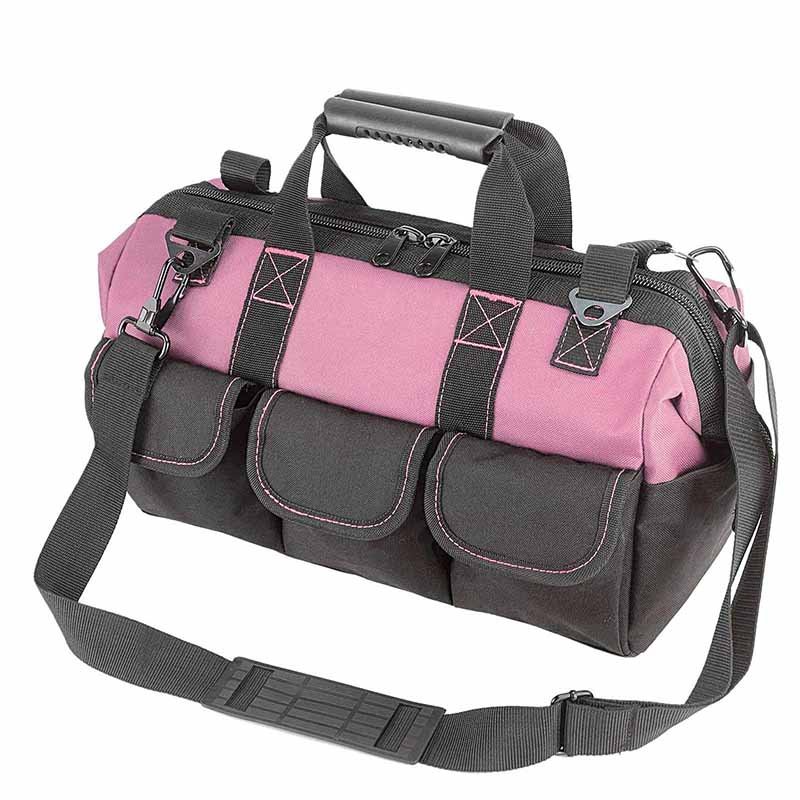
A professional tool bag often needs enough structure to remain accessible while the user works. Open-top totes should generally stay open and upright when placed on the floor, while zippered tool bags need enough body support to prevent the opening from collapsing when tools are removed. Tool backpacks require structure that separates heavy internal objects from the wearer’s back and helps the bag retain shape without becoming unnecessarily rigid.
Shape can be created through several methods, including stiffer outer fabric, lining, foam, binding, PE or PP board, internal dividers, metal frames, EVA panels, or molded components. Each solution affects weight, cost, sewing difficulty, shipping volume, and the finished feel. The best approach is therefore not simply to add more structure, but to use enough support to achieve the required function.
Over-structuring can create as many problems as under-structuring. A very rigid bag may take up excessive carton volume, become awkward to store in a service vehicle, and feel heavy before tools are added. A very soft bag may pack efficiently but collapse as soon as the user opens it. The right balance depends on the intended environment, carrying method, and how quickly users need to see and access their tools.
For most professional products, the goal should be functional stability rather than maximum stiffness. The bag should support itself where required, remain comfortable to carry, and recover its shape after normal loading. This creates a more useful product than one that simply looks rigid on a studio photography table.
How Are Tool Bag Samples Developed?
Tool bag sampling confirms dimensions, materials, pocket fit, carrying comfort, load behavior, reinforcement, branding, hardware, and manufacturing feasibility before bulk production begins. The first sample should be treated as a working prototype rather than a final sales sample. It allows the development team to test real tools, identify stress points, revise patterns, and create a controlled reference for mass production.
Pattern Development
Pattern development converts a three-dimensional product idea into individual components that can be cut and assembled consistently. A complex tool bag may contain dozens of pieces, including body panels, gussets, pocket panels, pocket gussets, bottom layers, zipper sections, reinforcement patches, bindings, dividers, webbing lengths, handle wraps, lining pieces, foam, and structural inserts. Every piece needs correct dimensions, seam allowances, alignment references, and joining relationships.
Material thickness influences pattern accuracy more than many people expect. Several layers of 1680D fabric, webbing, binding, lining, and reinforcement can create a thick corner, and that bulk consumes physical space during assembly. If the pattern is developed as though the material were thin paper, the finished dimensions may become smaller than planned, curved seams may become distorted, and pocket openings can tighten after sewing.
Manufacturability should be considered at the same time. A prototype may look excellent when produced slowly by one highly experienced sample maker, but if every pocket requires difficult hand positioning or thick layers meet at inaccessible angles, consistency can fall during bulk production. Good pattern work therefore solves finished dimensions, functional use, and repeatable production at the same time.
Szoneier’s documented sampling workflow includes material confirmation, pattern making, sample sewing, internal checking, photo or video review, shipping, revisions, final approval, and pre-production confirmation. This sequence reflects an important reality: the first physical sample is usually the beginning of product validation rather than the end of development.
Prototype Review
A useful prototype review should use real or representative tools whenever possible. The first check covers basic dimensions, pocket positions, handle drop, strap adjustment, zipper movement, logo placement, and overall workmanship. The next stage should focus on how the bag behaves under realistic use, because this is where structural weaknesses that are invisible on an empty sample begin to appear.
Load the bag close to the intended working condition and observe whether the bottom sags, whether the side panels wrinkle around handle anchors, whether tall tools block the zipper path, and whether frequently used pockets remain accessible. Lift the bag by one handle, two handles, and the shoulder strap if one is included. Place it on the floor and remove tools from different sections to see whether the balance or standing stability changes unexpectedly.
Useful questions include:
- Does the bag lean when fully loaded?
- Do handles remain comfortable?
- Does the top opening stay usable?
- Are any pockets too tight or too loose?
- Do sharp tools press through the pocket bottoms?
- Does the base remain flat?
- Can the user identify frequently used tools quickly?
- Does the shoulder strap pull the bag at an awkward angle?
The purpose of the first sample is not to prove that the design is perfect. Its value comes from revealing problems while changes are still inexpensive. A well-managed development process expects revisions and uses each sample to reduce uncertainty before bulk materials are purchased.
Revision Control
Sample revisions should be measurable. Instructions such as “make the pocket slightly bigger” or “strengthen the handle” are difficult to reproduce consistently. A better record states that a pocket opening changes from 55 mm to 65 mm, its depth increases by 15 mm, the backing panel extends 30 mm farther down the side, or the handle webbing changes from one specified construction to another.
A clear revision record may include:
- pattern version;
- sample date;
- material version;
- revised measurements;
- webbing or hardware change;
- reinforcement change;
- logo version;
- packaging version;
- customer comments;
- approval status.
This becomes increasingly important after several sample rounds because one improvement can easily disappear when another area is modified. Version control also helps procurement, pattern making, sampling, production, and inspection teams work from the same specification rather than from different email messages or annotated photographs.
Strong revision control becomes even more valuable during repeat production. A successful bag may return for replenishment six months or a year later, sometimes with new colors or packaging. If the technical records are complete, the product can be rebuilt from documented standards instead of relying on memory, which significantly reduces the risk of sample-to-bulk or order-to-order inconsistency.
Pre-Production Approval
The final approved sample should serve as the physical production reference, but it should never be the only reference. Finished bags hide many internal components, including reinforcement patches, boards, seam allowances, and backing layers. A factory may reproduce the external appearance accurately while unintentionally changing important hidden construction if these details are not documented.
A production-ready package should normally include:
- approved BOM;
- finished dimensions and tolerances;
- final pattern version;
- fabric and color references;
- webbing specification;
- zipper and hardware references;
- reinforcement details;
- logo artwork and placement;
- packaging requirements;
- photographs of hidden construction where useful.
A pre-production sample can provide an additional checkpoint when final bulk materials differ from development materials or when the structure is unusually complex. It allows the team to confirm that the exact materials and components intended for production still produce the approved fit, appearance, and function before the entire order is cut.
This documentation is particularly important for long-term programs because consistency becomes harder as time passes, suppliers change batches, and new workers join the project. Combining a sealed sample with controlled technical records creates a much stronger production standard than relying on the sample alone.
How Are Custom Tool Bags Manufactured?
Custom tool bag production usually moves through material receiving, inspection, cutting, component preparation, branding, pocket assembly, reinforcement, body sewing, base construction, hardware installation, in-line inspection, finishing, final quality control, and packaging. Complex designs may use separate subassemblies for pockets, handles, internal dividers, frames, or molded bases before those parts are joined into the final product.
Material Preparation
Bulk manufacturing starts before fabric reaches the sewing line. Outer fabric, lining, webbing, zippers, sliders, thread, hardware, labels, foam, boards, reinforcement materials, and packaging should be checked against approved specifications. Surface defects, coating problems, shade differences, incorrect dimensions, or the wrong hardware can create much larger problems once thousands of cut pieces have already entered production.
Color control is especially important because one apparently simple black tool bag may combine black Oxford, black webbing, black zipper tape, black binding, black lining, and black plastic or metal hardware. These components can look noticeably different under daylight or retail lighting even when every supplier describes the shade as “black.” Visual matching before production helps avoid a finished product that looks inconsistent despite technically correct purchasing.
Cutting accuracy directly affects pocket positioning, zipper alignment, base symmetry, and finished dimensions. A large body panel that shifts by 10 millimeters can move a pocket or handle position enough to become visible after assembly. Hidden reinforcement pieces need similar control because a backing patch that moves away from the handle anchor may no longer support the intended load-bearing area.
Components are usually grouped by size, color, style, or production lot so that operators receive the correct combination of parts. Good preparation reduces rework because opening a thick multilayer seam later to replace a missing reinforcement piece can damage the fabric and consume far more time than checking the component before assembly begins.
Pocket and Body Assembly
Tool bags are commonly built from subassemblies. Pocket panels may first receive elastic, binding, zipper sections, labels, or reinforcement. Handles can be prepared separately with wraps, padding, and webbing layers. Internal dividers may be assembled before they are joined to the main body, and bottom structures may require their own sequence of fabric, board, foam, or molded components.
The order matters because some areas become inaccessible after the shell is closed. Branding processes such as embroidery or printing are often completed while panels still lie flat, while hidden backing materials should be positioned before handle webbing covers them. A well-planned sewing sequence minimizes unnecessary handling and helps operators maintain more consistent alignment.
Thick materials require appropriate sewing capability. Multilayer intersections may contain outer fabric, lining, webbing, reinforcement, binding, and foam in one seam. If the feeding system cannot handle that thickness smoothly, stitch length and alignment may change as the operator crosses the joint. Walking-foot machines, bartack machines, binding equipment, and thick-material sewing capability can therefore become important in professional tool bag production.
Typical control points include:
- bartack position;
- webbing anchor length;
- seam allowance;
- pocket dimensions;
- zipper end reinforcement;
- base alignment;
- hardware orientation;
- visible stitch quality;
- label position.
The manufacturing objective is repeatability. Producing one excellent sample proves that the design is possible, but successful bulk production requires hundreds or thousands of units to follow the same pattern, reinforcement, dimensions, materials, and assembly sequence with controlled variation.
Logo and Branding
Branding should be integrated into the manufacturing sequence rather than added as an afterthought. Embroidery is often completed on flat panels before body assembly so the material remains stable and the back of the embroidery can be controlled. Screen printing and heat transfer are also commonly applied before final sewing, while woven labels may be inserted into seams and rubber, leather, PU, or metal patches may be attached at different stages depending on their construction.
Common branding methods include:
- embroidery;
- screen printing;
- heat transfer;
- woven labels;
- rubber patches;
- leather or PU patches;
- metal badges;
- molded logo elements.
The best method depends on the material, expected wear, visual positioning, cost, and working environment. A metal badge can look premium but may catch on equipment or scratch nearby surfaces. Large embroidery areas can distort coated fabric if the stabilizer and stitch density are poorly chosen, while heat transfer requires suitable temperature, pressure, and material compatibility to avoid peeling or surface damage.
For professional tool products, the most successful branding usually looks intentional and remains durable without interfering with function. A logo does not need to dominate the bag to create recognition. Clean positioning, consistent colors, durable application, and integration with the product’s structure are often more valuable than using the most complex branding technique available.
Production Control
Quality control should begin during production rather than waiting until the order is complete. A first-piece or early-production review confirms whether the sewing line is following the approved sample and technical records. Dimensions, pocket positions, handle construction, reinforcement, hardware, zippers, branding, and base structure can all be checked before significant quantities accumulate.
In-line inspection then catches problems while they are still practical to correct. If a reinforcement patch is missing from 30 units, the issue can usually be contained. If the same omission is discovered after 3,000 finished pieces have been packed, correction becomes costly and disruptive. The same principle applies to misplaced bartacks, incorrect pocket dimensions, zipper alignment, hardware, and logo position.
Szoneier’s documented QC process includes material inspection, accessory inspection, pre-production sample confirmation, cutting inspection, sewing process inspection, semi-finished inspection, final inspection, and packaging inspection before shipment. This multi-stage approach is especially relevant to tool bags because several critical structural components become hidden after assembly and can no longer be inspected easily once the product is finished.
Commercial specifications also influence production stability. Custom-dyed fabrics, special hardware, molded bases, multiple colors, unusual packaging, or special testing requirements can increase MOQ, lead time, and supply-chain risk. The most effective cost discussion therefore focuses on which features are essential to performance and which can be simplified without weakening the real product, rather than reducing unit price at the expense of structural reliability.
How Is Tool Bag Quality Verified?
Tool bag quality is verified through visual inspection and functional checks covering dimensions, seams, reinforcement, handles, shoulder straps, zippers, hardware, pockets, base structure, loaded behavior, and packaging. Performance descriptions such as “heavy duty” should be supported by defined use conditions and test methods. The most useful QC process concentrates attention on high-risk failure points rather than treating every cosmetic and structural issue as equally important.
Load and Pull Checks
Load testing is valuable because many weaknesses do not appear when the bag is empty. A sample can have straight seams, attractive stitching, and clean branding on the inspection table while deforming significantly once 15 or 20 kilograms are added. Testing allows the development team to see how the handle anchors, side panels, bottom, hardware, and complete shape behave together under realistic force.
A practical internal load check can fill the bag to a defined target weight and observe handle deformation, seam opening, webbing movement, hardware distortion, bottom sag, and overall shape. Short lifting or carrying cycles can then reveal different problems because dynamic movement creates forces that static testing does not. The target should be based on intended use rather than copying an arbitrary test weight from another bag.
Pull checks can also focus on specific attachment points such as handles, shoulder straps, D-rings, buckles, webbing tabs, or zipper ends. Szoneier’s documentation states that internal pull checks can be performed and third-party tensile testing can be coordinated for straps, handles, webbing, D-rings, snap hooks, buckles, zipper ends, tool bag handles, and other load-bearing points according to project requirements.
The company’s documented load-bearing checks can also consider product type, intended use, target load, handle reinforcement, strap structure, and bottom construction. These checks are useful during development and routine quality control, although formal performance claims may still require an agreed laboratory method or third-party report depending on the market and the claim being made.
Sewing and Zipper Inspection
Sewing inspection should evaluate function as well as appearance. High-risk areas include handle anchors, pocket corners, zipper ends, base seams, shoulder strap connections, and webbing joints. Inspectors should look for skipped stitches, loose stitching, inadequate seam allowance, misplaced bartacks, fabric damage, seam puckering, and reinforcement that does not align with the intended load path.
Zippers should be opened and closed along their full travel. A zipper that operates smoothly on an empty bag may behave differently when the bag is packed because internal pressure can distort the opening or pull the chain sideways. Curved zipper paths deserve particular attention because corner tension can increase when the main compartment is full.
Hardware inspection should verify size, orientation, secure attachment, movement, deformation, surface finish, sharp edges, and compatibility with the surrounding webbing. Small hardware problems can create major user complaints because these parts are handled repeatedly and often carry significant load.
The most useful inspection process prioritizes risk. A small loose thread and a poorly secured 20-kilogram handle should not receive the same level of attention. Structural characteristics that could cause product failure, tool loss, or unsafe carrying deserve higher priority than minor cosmetic differences that do not affect use.
Sample-to-Bulk Control
The final inspection should determine whether bulk production still matches the approved product. This requires more than placing one finished unit beside the sample and deciding that they look similar. Materials, dimensions, webbing, zipper specification, reinforcement, hardware, pocket positions, bottom structure, branding, and packaging all need to correspond to the controlled production version.
| Control Point | What to Verify | Main Risk if Missed |
|---|---|---|
| Materials | Fabric, lining, webbing, zipper, hardware | Different appearance or performance |
| Dimensions | Bag size, pockets, handle drop | Poor fit or inconsistent shape |
| Reinforcement | Bartacks, anchors, backing layers | Premature structural failure |
| Zippers | Chain, slider, end reinforcement | Opening or closure problems |
| Bottom | Board, molded parts, alignment | Sagging or poor standing stability |
| Branding | Logo size, position, color | Inconsistent brand presentation |
| Packaging | Protection, labels, cartons | Damage or receiving issues |
Critical, functional, and cosmetic characteristics should be separated according to consequence. Missing handle reinforcement or incorrect load-bearing hardware is more serious than a small variation in logo position. This risk-based approach makes inspection more meaningful because time and sampling effort are concentrated on defects that can genuinely damage performance, customer satisfaction, or brand reputation.
For large or technically demanding orders, third-party inspection can provide additional verification before shipment. The need depends on order size, product complexity, market requirements, customer policy, and whether the project includes defined functional claims. Third-party inspection is most useful when it complements good factory control rather than replacing it, because quality problems are still cheaper to prevent during production than to discover only after the entire order is complete.
Final Validation
Final validation combines appearance, measurements, function, and packaging into one last review before shipment. Selected finished units should be compared against the approved sample, BOM, measurement chart, artwork, and packaging requirements. Where the QC plan includes loading or pull checks, those tests can be repeated on selected production units to confirm that bulk construction remains aligned with development expectations.
Packaging should also be evaluated because a well-made tool bag can still arrive deformed if it is folded, compressed, or stacked incorrectly. Structured bags may need internal support or controlled folding, while molded bases require carton dimensions that prevent crushing. Labels, cartons, SKU identification, and any channel-specific packaging requirements should be checked before the product leaves the factory.
The most reliable manufacturing process is one where development and quality control remain connected from beginning to end. The target load influences the structure, the structure influences the sample, the sample defines the production standard, and the production standard guides inspection. When those links remain consistent, the finished product is much more likely to perform in the same way as the approved prototype rather than becoming a visually similar but structurally different version.
Conclusion
Manufacturing a reliable custom tool bag is not mainly about choosing the thickest fabric or adding more pockets. It begins with understanding which tools the user carries, how much they weigh, where the bag will be used, and how the load should travel through the handles, body, and base. From there, material selection, pocket geometry, reinforcement, pattern development, sampling, and testing become part of one connected product-development process.
The most valuable sample is not simply the one that looks attractive in photographs. It is the one that has been loaded, carried, opened, closed, inspected, revised, and documented closely enough that the same construction can be reproduced consistently during bulk production. When the approved sample is supported by a BOM, pattern version, measurements, reinforcement records, QC checkpoints, and packaging standards, the gap between development and mass production becomes much easier to control.
For brands developing a new tool bag or improving an existing model, the most productive starting point is a real use case rather than a generic specification. Define the tools, working load, environment, pocket needs, carrying method, and failure risks first. Szoneier can then use its material, sampling, sewing, quality-control, and production experience to turn those requirements into a more practical production-ready design without forcing the product into a one-size-fits-all construction.
Frequently Asked Questions
What Is the Best Fabric for a Heavy-Duty Tool Bag?
There is no single best fabric for every heavy-duty tool bag because working load, abrasion, weather exposure, product weight, cost, and brand positioning all matter. 900D, 1200D, and 1680D Oxford or polyester are commonly considered for professional applications, while nylon can offer strong abrasion performance and heavy canvas provides a more traditional workwear appearance. Bottom areas often benefit from separate reinforcement rather than simply increasing the denier of every panel.
Is 1680D Oxford Strong Enough for Tool Bags?
1680D Oxford can be suitable for demanding tool bags when the yarn, weave, coating, backing, and finished construction are properly specified. The denier number alone does not guarantee durability because two 1680D fabrics may have different weave density, weight, coating quality, and tear resistance. The finished sample should therefore be evaluated under realistic loading, with particular attention to seams, handle anchors, pocket bottoms, and the base rather than judging strength from the fabric specification alone.
How Much Weight Can a Custom Tool Bag Hold?
A custom tool bag does not have a universal weight capacity because performance depends on fabric, webbing, handle design, reinforcement, base structure, hardware, dimensions, and load distribution. A brand should define the intended working load during development and then build and test the structure around that requirement. For professional products, internal load checks, handle pull checks, or project-specific third-party testing may be appropriate before publishing any specific weight-capacity claim.
How Long Does Custom Tool Bag Sampling Take?
Sampling time depends heavily on the complexity of the bag, material availability, custom colors, special hardware, molded components, logo processes, and the number of revision rounds required. A straightforward bag using available materials can normally move faster than a highly structured design with molded bases, custom zipper pulls, specialty hardware, or several prototype revisions. The more complete the initial tool list, dimensions, artwork, and functional requirements are, the easier it is to keep the development process efficient.
Do Tool Bags Need Load or Tensile Testing?
Load or tensile testing is not mandatory for every tool bag, but it can be extremely useful when handles, shoulder straps, webbing, hardware, or other load-bearing areas are critical to product performance. Internal checks can identify obvious weaknesses during sampling, while third-party testing may be appropriate when the brand wants documented performance data or makes specific durability claims. The test method should match the intended use rather than applying an arbitrary number without context.
What Should Be Included in a Tool Bag Tech Pack?
A useful tool bag tech pack should include overall dimensions, pocket sizes and positions, material specifications, webbing, zippers, hardware, reinforcement, logo artwork, colors, handle or strap construction, bottom structure, packaging requirements, and applicable tolerances. For load-sensitive designs, intended tool type and target working load should also be documented. The tech pack becomes much more valuable when it is updated after sampling so that the final approved construction, rather than the original concept, becomes the bulk-production reference.
How Do You Keep Bulk Tool Bags Consistent with the Approved Sample?
Sample-to-bulk consistency depends on controlling materials, patterns, measurements, reinforcement, hardware, artwork, and production versions instead of relying only on the physical sample. A sealed sample should be supported by an approved BOM, pattern revision, measurement chart, hidden-construction records, and QC criteria. Early production checks, in-line inspections, final inspection, and packaging verification then help confirm that bulk units continue to follow the same approved standard throughout the order.