
How to make a makeup bag with a zipper?
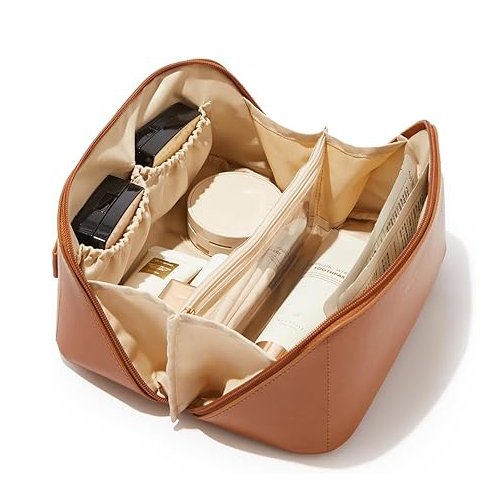
Making a makeup bag with a zipper is not only practical but also a rewarding project. Whether you’re looking to create a unique bag for yourself or designing custom cosmetic bags for your brand, understanding the process can help you achieve professional results. Here’s a detailed guide:
Step 1: Choose Your Fabric
The fabric sets the tone for your makeup bag, so pick something that matches your needs and style. Common choices include:
- Cotton: Lightweight and easy to sew, perfect for casual designs.
- Canvas: Durable and great for heavier bags or those that need structure.
- Polyester or Nylon: Ideal for water-resistant makeup bags, as they repel moisture and are easy to clean.
- Velvet or Satin: Great for a luxurious touch, commonly used in high-end or decorative makeup bags.
Pro Tip:
Choose a fabric that’s easy to clean since makeup bags often encounter spills. You might also consider a fabric with a wipeable surface or a waterproof coating for added practicality.
Step 2: Prepare and Cut Your Fabric
Once you’ve chosen your fabric, it’s time to cut it to the right size. For a standard-sized makeup bag:
Dimensions: A typical makeup bag might be 8 inches wide, 6 inches high, and 3 inches deep. You’ll need:
- Two rectangles for the front and back (e.g., 9” x 7” to include seam allowances).
- Two smaller pieces for the lining (same dimensions as the exterior).
- A strip for the bottom or gusset if you want a flat-bottomed bag.
Pro Tip:
Always add an extra 1/2 inch to your measurements for seam allowances, so your final bag isn’t smaller than intended.
Step 3: Add a Lining
A lining not only gives your makeup bag a professional finish but also protects the outer fabric from makeup stains. Here’s how:
- Cut Lining Fabric: Use a water-resistant material like nylon, polyester, or laminated cotton for the lining.
- Attach Interfacing: If your fabric is soft, add fusible interfacing to give it structure and make the bag hold its shape.
Pro Tip:
Choose a contrasting or complementary color for the lining to add a stylish touch when you open the bag.
Step 4: Sew the Bag Body
Before attaching the zipper, sew the body of the bag. Here’s how:
- Layer the Fabric: Place the exterior fabric pieces right sides together. Do the same with the lining pieces.
- Pin and Sew the Sides: Sew the sides and bottom edges of the exterior and lining fabrics, leaving the top open. For added durability, use a straight stitch followed by a zigzag stitch to prevent fraying.
Optional: Add a Gusset
If you want a flat-bottomed bag:
- Pinch the bottom corners of the fabric into triangles.
- Sew across the triangles to create depth.
Step 5: Install the Zipper
Adding a zipper might seem tricky, but it’s easier than you think with the right technique:
Align the Zipper:
- Lay the zipper face down on the top edge of the exterior fabric.
- Place the lining fabric on top, sandwiching the zipper between the exterior and lining fabrics.
Pin in Place: Secure everything with pins or clips.
Sew the Zipper:
- Use a zipper foot on your sewing machine to sew a straight line along the edge of the zipper.
- Repeat on the other side of the zipper with the opposite edge of the fabric.
Topstitch: For a polished look and to keep the fabric from catching in the zipper, sew a line of topstitching close to the zipper edge.
Pro Tip:
Go slowly when sewing over the zipper to avoid breaking your needle. Open and close the zipper to ensure it moves smoothly before moving to the next step.
Step 6: Assemble the Bag
Once the zipper is attached, you’re ready to finish the bag:
Sew the Sides:
- Turn the exterior and lining fabrics so that the right sides are facing each other.
- Sew around the edges, leaving a small opening in the lining to turn the bag right-side out.
Turn the Bag Right-Side Out:
- Pull the bag through the opening in the lining, and use your fingers to push out the corners for a crisp finish.
Close the Lining:
- Sew the opening in the lining closed with a small hand stitch or a machine stitch.
Step 7: Add Final Touches
Now that your makeup bag is assembled, it’s time to add any finishing touches that will make it unique and functional:
- Custom Branding: Add your logo with embroidery, screen printing, or a custom tag for a professional look.
- Decorative Elements: Attach tassels, charms, or fabric embellishments to the zipper pull for added flair.
- Reinforce Seams: Use double stitching in high-stress areas, like the corners and zipper ends, for extra durability.
Step 8: Quality Check
Before calling it complete, give your cosmetic bag a thorough check:
- Test the zipper to ensure it glides smoothly.
- Inspect the seams for any loose threads.
- Ensure the bag is symmetrical and the lining sits neatly inside.
Tips for Success
- Start Simple: If you’re new to sewing, start with a basic design and work your way up to more complex styles.
- Invest in Quality Materials: High-quality fabric and zippers will make your bag look more professional and last longer.
- Experiment with Sizes: Try making a set of bags in different sizes for various uses,small for lipsticks, medium for toiletries, and large for travel.
Making a makeup bag with a zipper is a creative and practical project that lets you design a bag that’s as stylish as it is functional. By choosing the right materials and following these steps, you can create a cosmetic bag that’s perfect for personal use, gifting, or branding. If you’re looking for professional customization or bulk production, our factory specializes in crafting high-quality makeup bags tailored to your needs.
Sample →
Can't find the answers?
No worries, please contact us and we will answer all the questions you have during the whole process of bag customization.
Make A Sample First?
If you have your own artwork, logo design files, or just an idea,please provide details about your project requirements, including preferred fabric, color, and customization options,we’re excited to assist you in bringing your bespoke bag designs to life through our sample production process.