Skip to content
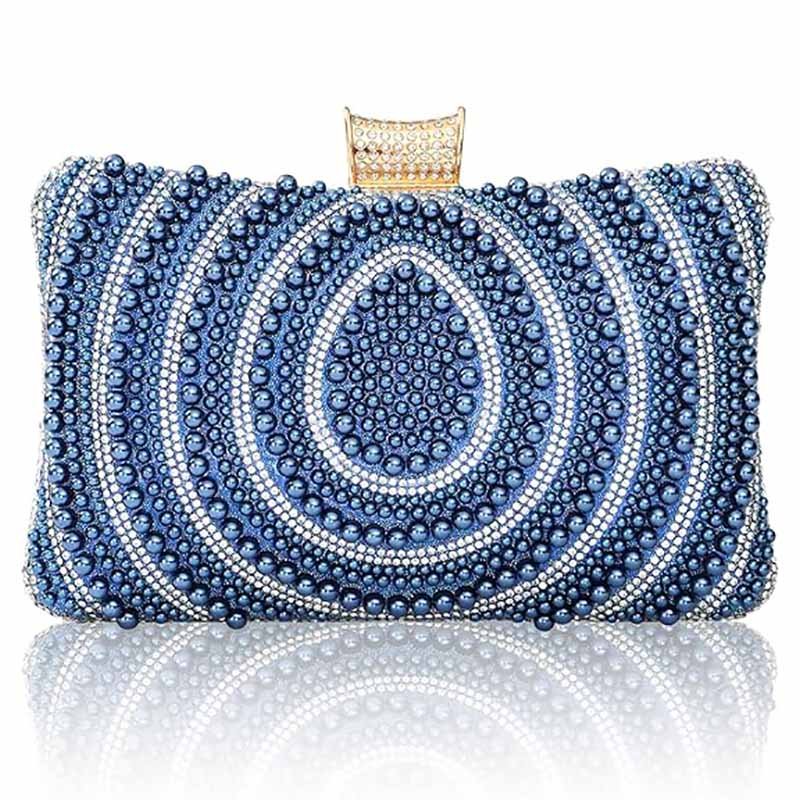
A beaded clutch can look effortless on a retail shelf, yet every polished detail hides a demanding manufacturing process. A small evening bag may contain hundreds or several thousand beads, multiple reinforcement layers, carefully controlled seam allowances, a lined interior, a closure system, and hidden hardware supports. One incorrect decision can create loose decorations, uneven patterns, distorted corners, excessive weight, or an opening that is difficult to use.
Beaded clutch bags are manufactured by converting artwork into a measurable bead-placement plan, selecting a stable exterior material, reinforcing the decorated panels, attaching beads by hand or machine, cutting and sewing the bag body, installing the closure and hardware, and inspecting decoration security, pattern alignment, dimensions, shape, and packing protection.
The difficult part is not simply sewing beads onto fabric. The decoration must survive panel cutting, machine sewing, edge turning, frame installation, storage, packing, international transport, retail handling, and repeated use. Beads near the side seams, base corners, zipper opening, flap fold, or hand-grip area face much more friction than beads placed in the center of a flat panel.
A factory may produce a visually attractive first sample and still struggle during production if the pattern, material, structure, and labor time were not studied together. The real quality of a beaded clutch often becomes visible only after it has been filled with a phone, carried for several hours, opened repeatedly, and packed beside other decorated bags. That is where thoughtful engineering begins to matter.
What Defines a Beaded Clutch Bag?
A beaded clutch bag is a compact handheld bag decorated with sewn, embroidered, woven, or applied beads. Its quality depends on more than the decorative surface. The bag must combine accurate artwork, balanced weight, stable reinforcement, clean interior construction, comfortable handling, secure closure operation, and dependable bead attachment.
A clutch normally has no permanent shoulder strap, although many styles include a removable chain, wrist loop, or hidden carry system. The body may be soft and flexible, moderately reinforced, or built around a rigid frame. Decoration may cover one panel, both panels, the flap, a border, a logo, or the entire exterior.
The product should be developed as one connected system. Bead size affects pattern resolution. Bead density affects weight. Weight affects backing and hardware reinforcement. Reinforcement affects seam thickness. Seam thickness affects corner shape and frame installation. A change that looks small on the artwork can therefore alter several manufacturing operations.
The following planning ranges help product teams define the first specification. Final dimensions should always be confirmed through a physical sample.
| Clutch Type | Common Width | Common Height | Common Depth | Approximate Use |
|---|---|---|---|---|
| Mini event clutch | 16–19 cm | 9–11 cm | 2–4 cm | Cards, lipstick, keys |
| Standard evening clutch | 20–24 cm | 11–14 cm | 3–5 cm | Phone, cards, compact cosmetics |
| Envelope clutch | 24–30 cm | 14–18 cm | 1–4 cm | Phone, documents, slim personal items |
| Box clutch | 17–22 cm | 10–13 cm | 4–6 cm | Structured occasion accessory |
| Soft pouch clutch | 22–28 cm | 13–18 cm | 4–8 cm | Resort, travel, casual collections |
Internal capacity should be checked with actual objects rather than estimated from the external measurements. Thick reinforcement, folded seams, frame channels, magnetic closures, and padded walls can reduce usable space by 10–25%, depending on construction.
A clutch designed around a large smartphone should allow additional clearance for a protective phone case. A body width that matches the phone exactly will often feel too tight after lining, seams, and closure hardware are added.
What Are Its Main Features?
A well-made beaded clutch combines decoration, structure, function, and comfort. The main exterior feature is the beadwork, but the internal construction determines whether the decoration remains stable.
Important product features include:
- A controlled exterior silhouette that does not collapse under bead weight
- Smooth bead surfaces without sharp, chipped, or cracked components
- A clear opening area that allows the zipper, frame, or flap to operate freely
- Protected thread ends and bead knots hidden behind backing and lining
- Reinforced hardware attachment points
- A lining that remains flat and does not pull the exterior inward
- Sufficient interior space for the intended use
- Clean edge finishing without beads trapped in seam lines
- Balanced front and back panels
- Protective packing that prevents decorated surfaces from rubbing together
The way a clutch feels in the hand also matters. A product covered with large crystals or angular bugle beads may photograph beautifully but feel uncomfortable when gripped. The center hand-contact zone can use smaller, smoother beads, while raised stones are concentrated away from the main gripping area.
Weight should be considered during the first design review. A lightly decorated acrylic-bead clutch may remain below 300 grams, while a dense glass-bead or crystal-covered style can exceed 600 grams before personal items are added. There is no universal ideal weight, but the bag should feel consistent with its size and intended selling position.
| Feature | Recommended Development Check |
|---|---|
| Exterior weight balance | Compare front and back panel weight before assembly |
| Phone fit | Test with the intended phone size and a protective case |
| Opening access | Confirm one-hand opening and closing |
| Hand comfort | Hold the filled bag for at least 10 minutes |
| Closure clearance | Keep beads outside the operating path |
| Interior protection | Ensure no bead threads are exposed inside |
| Hardware support | Reinforce chain loops and magnetic components |
| Surface durability | Rub and flex the decorated panel before approval |
The difference between a decorative sample and a commercially workable product often appears in these small usability checks.
Which Clutch Shapes Work Best?
Flat rectangular, envelope, soft pouch, framed, flap, and box-shaped clutches can all support beaded decoration. The best shape depends on bead density, artwork layout, closure method, internal capacity, and desired rigidity.
Flat rectangular styles are among the easiest to control because decoration can be completed on flat panels. Symmetrical patterns, names, logos, and repeated geometric artwork are easier to position accurately on a flat surface.
Envelope clutches offer a larger visible area, but the flap fold requires planning. Dense beads should not sit directly on a sharp folding line. Repeated folding can force adjacent beads against each other, abrade the thread, and make the flap difficult to close. A flexible embroidered transition zone is often more reliable than a fully beaded fold.
Soft pouches work well with floral patterns, abstract designs, tassels, fringe, and irregular bead placement. Their relaxed shape can absorb small handmade variations, but excessive bead weight may pull the body downward. A light foam, felt, nonwoven reinforcement, or thin neoprene layer can help maintain volume.
Metal-frame clutches create a refined evening look. The decorated body must match the frame opening precisely. Even a 2–3 mm difference around the top edge can create wrinkles, uneven tension, exposed adhesive, or a twisted opening.
Box clutches support geometric and highly structured designs but introduce more complex edge and corner requirements. Decoration may need to be completed as individual panels and then mounted onto the rigid shell. Large beads should not be placed where the panels meet.
| Shape | Decoration Advantage | Main Production Risk |
|---|---|---|
| Flat rectangular | Easy artwork alignment | Bead pressure near zipper seam |
| Envelope | Large front display area | Decoration cracking at flap fold |
| Soft pouch | Suitable for organic patterns | Sagging under heavy beadwork |
| Metal frame | Premium structured appearance | Opening mismatch and adhesive marks |
| Box clutch | Strong geometric presentation | Difficult corner and edge finishing |
| Drawstring pouch | Flexible resort styling | Beads interfering with cord channel |
The shape should follow how the product will be used. A compact wedding clutch may prioritize elegance over capacity, while a resort pouch needs easier access, lighter decoration, and better resistance to frequent handling.
Are Beaded Clutches Only for Evening Use?
Beaded clutches are strongly associated with weddings, parties, dinners, and formal events, but modern collections use beadwork across resort, vacation, festival, gifting, lifestyle, and casual fashion categories.
The intended use changes the material and decoration plan.
A formal evening clutch may use satin, velvet, glass seed beads, pearls, crystals, metallic thread, and a polished frame. Dense coverage and a smaller interior may be acceptable because the product is carried for shorter periods and used mainly as a statement accessory.
A resort clutch may use cotton canvas, linen-look polyester, neoprene, raffia-style fabric, wooden beads, acrylic beads, shells, tassels, or colorful embroidery. Lower weight and easier cleaning become more important because the bag may be packed in luggage and used repeatedly during travel.
A promotional or gift collection may focus on readable bead lettering, recognizable symbols, moderate coverage, dependable construction, and controlled costs. A designer-led limited collection may accept longer handwork time and greater variation between pieces.
| Use Scenario | Suitable Materials | Decoration Direction | Construction Priority |
|---|---|---|---|
| Wedding | Satin, velvet, pearl-finish fabric | Pearls, crystals, floral beadwork | Refined finish and elegant closure |
| Evening event | Satin, faux suede, structured textile | Glass beads, sequins, metallic details | Shape control and visual impact |
| Resort | Canvas, linen blend, neoprene | Colorful beads, shells, tassels | Lower weight and flexible packing |
| Festival | Polyester, denim, coated textile | Bright beads, fringe, mixed media | Strong attachment and movement resistance |
| Corporate gifting | Durable woven fabric | Logo, lettering, limited motifs | Consistency and cost control |
| Collectible collection | Premium textile or rigid shell | Complex artwork and numbered designs | Detail accuracy and presentation |
A product intended for frequent daytime use should avoid fragile surface finishes and exposed stones that catch on clothing. Areas that touch the body should be smoother. Removable chains should be tested for repeated movement, and light-colored fabrics should be evaluated for stain visibility.
The decoration style should therefore reflect the use environment, not just the design image. A clutch that looks perfect under studio lighting may need different engineering when it will be carried through airports, packed into suitcases, displayed in open retail environments, or used at outdoor events.
Which Materials Work Best?
The best material system combines a stable exterior fabric, secure bead attachment, suitable backing, controlled reinforcement, a smooth lining, dependable hardware, and protective packaging. Satin, velvet, canvas, polyester, faux suede, mesh, leather alternatives, and neoprene can all be used when their thickness, stretch, needle resistance, and bead load are tested together.
Material selection is one of the most important decisions in beaded clutch manufacturing. The exterior fabric must hold many needle penetrations without tearing, stretching, or puckering. It must also remain stable after the decorated panel is cut, sewn, turned, pressed, and attached to a closure.
A material should not be approved by appearance alone. A small undecorated swatch cannot show how the fabric will behave under the weight of several hundred beads. The factory should prepare a decorated trial panel using the proposed base fabric, backing, bead type, thread, stitch density, and motif size.
The trial panel should be:
- Measured before and after decoration
- Held vertically to observe stretching
- Bent repeatedly to check bead contact
- Rubbed by hand to identify sharp edges
- Sewn through the planned seam allowance
- Turned around a corner where required
- Stored under light pressure
- Checked for dye transfer and coating damage
A panel that shrinks or grows by more than 2–3% after decoration may require revised tension, a stronger backing, a different base fabric, or adjusted cutting dimensions. Pattern distortion becomes especially visible in logos, lettering, straight borders, and symmetrical artwork.
Which Base Fabrics Support Beading?
Tightly woven and dimensionally stable fabrics provide the best support for dense beadwork. Cotton canvas, polyester twill, backed satin, velvet, faux suede, microfiber, and firm decorative fabrics are widely used.
Satin creates a refined surface but requires support. Thin satin can wrinkle around bead stitches, show needle marks, and pull away from heavy decoration. A woven backing or lightweight nonwoven reinforcement can stabilize the panel before beading.
Velvet offers depth and a premium hand feel. The pile direction must be controlled across all panels, or finished bags may appear to have different shades. Bead placement marks are harder to see on velvet, so templates and positioning guides must be accurate.
Cotton canvas is strong and suitable for resort, casual, embroidered, or artistic collections. It handles repeated needle penetration well, although raw canvas may require treatment to reduce shrinkage or surface dust.
Faux suede provides a soft, rich appearance and holds embroidery securely. Its thickness must be considered near corners and frame channels.
Neoprene can create a modern, padded clutch with good shape recovery. It is also useful as a concealed support layer behind another exterior fabric. Thin neoprene may weaken when too many needle holes are concentrated in one area, so bead spacing and backing must be tested.
| Base Material | Structure | Bead Support | Main Concern |
|---|---|---|---|
| Backed satin | Soft to medium | Good with reinforcement | Puckering and needle marks |
| Velvet | Soft to structured | Good | Pile direction and pressure marks |
| Cotton canvas | Medium | Very good | Shrinkage and edge fraying |
| Polyester twill | Medium | Very good | Surface shine under tension |
| Faux suede | Medium | Good | Bulk at seams and corners |
| Mesh over backing | Soft | Good with stable underlayer | Pattern movement during sewing |
| Neoprene | Soft padded structure | Good after testing | Perforation and compressed seams |
| Synthetic leather | Medium to rigid | Limited for repeated penetration | Visible needle holes and surface cracking |
Stretch fabrics should not be rejected automatically, but their stretch direction must be controlled. Decoration should usually be applied while the panel is supported in a stable frame or backed with a low-stretch layer. Uncontrolled stretch can cause the panel to contract after beading and produce waves around the motif.
Which Bead Types Should You Choose?
Bead selection should consider appearance, weight, surface finish, hole quality, edge smoothness, color stability, pattern resolution, attachment time, and target cost.
Seed beads are suitable for detailed patterns because their small size allows smoother curves, letters, and color transitions. They are often available in sizes from approximately 1.5 mm to 4 mm.
Bugle beads create straight lines, rays, borders, and geometric surfaces. Their internal edges must be smooth because sharp holes can damage thread. Long bugle beads also need secure anchoring so they do not rotate or lift away from the panel.
Glass beads provide strong light reflection and a higher-value appearance. They are heavier than acrylic components and may break under concentrated pressure.
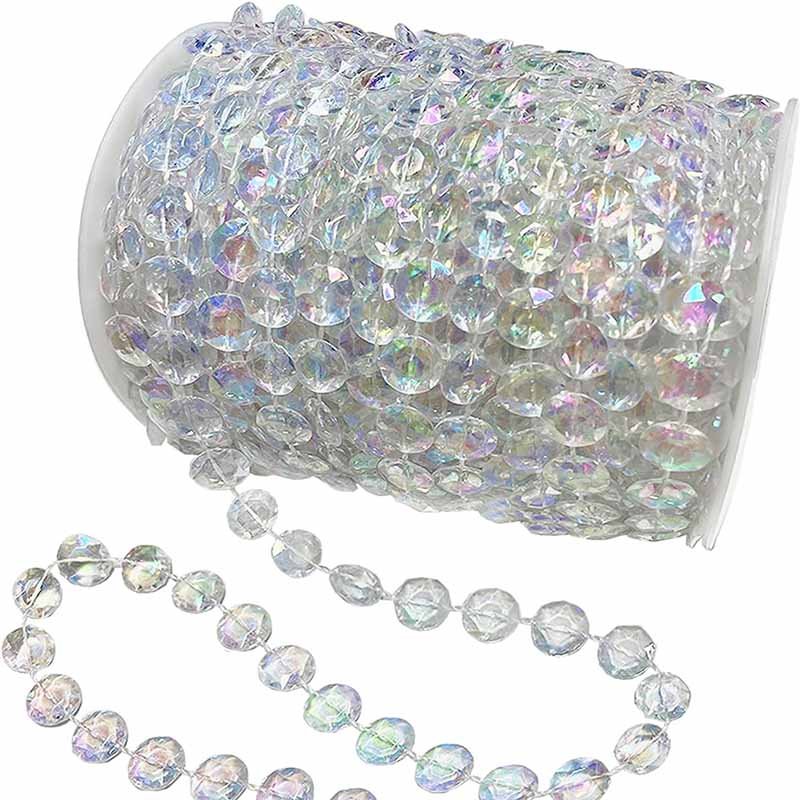
Acrylic beads are lighter and available in a wide range of shapes, colors, and imitation finishes. They are useful when the design calls for large decoration without excessive bag weight.
Pearl beads suit wedding, bridal, formal, and feminine collections. The surface coating should be checked for scratching, uneven color, and peeling around the holes.
Sequins add broad reflective coverage with less weight than dense glass beads. They can be layered with seed beads or embroidery to create depth.
Crystals and stones are best used in selected focal areas. Applying them across the full hand-grip zone can make the clutch uncomfortable and increase breakage risk.
| Decoration Type | Common Size Range | Weight Level | Best Use |
|---|---|---|---|
| Seed beads | 1.5–4 mm | Medium | Detailed images and full coverage |
| Bugle beads | 3–15 mm | Medium | Lines, borders, geometric artwork |
| Acrylic beads | 4–20 mm | Low to medium | Large motifs and lighter bags |
| Glass beads | 2–12 mm | Medium to high | Premium evening decoration |
| Pearl beads | 3–12 mm | Medium | Bridal and formal collections |
| Sequins | 3–20 mm | Low | Reflective coverage and layered effects |
| Crystals or stones | 3–25 mm | Medium to high | Focal details and premium highlights |
| Wooden beads | 5–20 mm | Low to medium | Resort and natural collections |
The bead holes should be inspected before production. Inconsistent holes slow down handwork and increase thread damage. Components with rough edges, cracks, missing coatings, or severe size variation should be removed during incoming inspection.
Are Glass or Acrylic Beads Better?
Glass beads offer stronger brilliance, greater color depth, and a more refined surface. Acrylic beads reduce weight, resist shattering more effectively, and allow larger decorations at a lower production cost.
The correct choice depends on the desired appearance and how the clutch will be used.
A compact evening bag with selected glass beadwork can feel substantial and luxurious. A full-coverage design made entirely from glass may become too heavy, especially when combined with a metal frame, chain, and rigid internal structure.
Acrylic components work well for travel, resort, festival, gifting, and larger clutch formats. Modern acrylic finishes can imitate pearl, stone, crystal, metal, shell, and translucent glass. Quality varies widely, so coating adhesion and surface consistency should be checked.
A mixed-material design often provides the best balance. Glass or crystal components can be placed at focal points, while acrylic beads, seed beads, sequins, and embroidery complete the surrounding artwork.
| Decision Factor | Glass Beads | Acrylic Beads |
|---|---|---|
| Light reflection | Strong | Moderate to strong |
| Weight | Higher | Lower |
| Breakage risk | Higher under impact | Lower |
| Large decorative pieces | Can become heavy | More suitable |
| Surface depth | Rich and refined | Depends on coating quality |
| Shipping protection | Requires more care | Easier to protect |
| Cost control | Higher for dense coverage | More flexible |
| Resort or travel use | Suitable in limited areas | Well suited |
| Premium evening use | Strong choice | Suitable for mixed designs |
A physical decorated panel should be approved before the final bead choice is made. Loose beads placed on a color card do not show the finished weight, spacing, thread visibility, flexibility, or hand feel.
Which Linings and Interlinings Add Structure?
The interior system may include bead backing, reinforcement, padding, shape-support material, lining, pocket material, and hardware patches. Each layer has a separate function.
The first backing layer supports the stitches and prevents the exterior fabric from gathering. It may be a woven fabric, nonwoven reinforcement, tricot, thin felt, or another stable textile.
A second structural layer may be added when the clutch needs more body. Common choices include thin foam, EVA, felt, plastic sheet, board, or neoprene.
Thin neoprene is useful when the product needs soft cushioning, shape recovery, and a clean padded feel. It can replace rigid board in clutches that should remain flexible.
The lining covers the reverse side of the beadwork and protects it from keys, cards, cosmetics, and other interior items. Polyester twill, satin, cotton, microfiber, and printed woven fabrics are common options.
| Interior Layer | Main Function | Development Concern |
|---|---|---|
| Bead backing | Supports stitches | Must not stretch under weight |
| Nonwoven reinforcement | Controls shape | May wrinkle if applied unevenly |
| Thin neoprene | Adds cushioning and recovery | Adds seam thickness |
| EVA or foam | Builds body | Can reduce interior capacity |
| Plastic sheet | Creates rigid shape | Must not crack at folds |
| Felt | Soft structural support | Can become bulky |
| Lining | Covers threads and improves finish | Must remain flat and clean |
| Hardware patch | Supports magnets and chain loops | Must extend beyond hardware edges |
Reinforcement should usually be reduced near seam allowances. If every layer continues fully into the seam, the edge may become too thick to turn cleanly. Excess bulk can also prevent a metal frame from closing correctly.
Hardware patches should be larger than the metal component they support. A small magnet fixed through decorative fabric alone can pull loose after repeated opening. The reinforcement should distribute the force across a wider area.
What Closures Suit Beaded Clutches?
Zippers, magnetic snaps, flap magnets, kiss-lock frames, channel frames, turn locks, snap buttons, and drawstring systems can all be used. The closure must match the clutch shape, bead position, wall thickness, and intended use.
Zippers are secure and practical. A bead-free strip should be maintained along the zipper sewing line and slider path. Depending on bead size and machine access, a clear zone of approximately 10–15 mm may be required on each side.
Magnetic closures create a clean appearance, but both magnet halves need reinforcement. The magnet position should be checked after the bag is filled because a heavily loaded body may pull the closure apart.
Kiss-lock and channel frames suit formal evening clutches. The finished opening measurement must match the frame precisely. Glue should remain inside the channel and should not mark the lining or decorative surface.
Turn locks work well on flap styles. The lock plate should not sit directly over thick beadwork. A flat installation zone makes alignment cleaner and prevents the hardware from rocking.
| Closure Type | Main Advantage | Required Control |
|---|---|---|
| Zipper | Secure and familiar | Clear sewing and slider path |
| Magnetic snap | Clean exterior appearance | Reinforced backing on both sides |
| Kiss-lock frame | Refined evening styling | Accurate opening dimensions |
| Channel frame | Strong structured shape | Even insertion and adhesive control |
| Turn lock | Decorative and secure | Flat installation area |
| Drawstring | Flexible pouch construction | Bead-free cord channel |
| Snap button | Simple operation | Strong support behind the snap |
Closure testing should be completed with the clutch filled to its intended capacity. An empty sample may close easily, while the same clutch may pull open after a phone, keys, and cosmetics are added.
The opening should also be checked for hand access. A beautiful frame is not useful when the opening is too narrow to insert a phone comfortably. Function must be confirmed before decorative details are locked for production.
How Are Beaded Clutches Made?
Beaded clutch manufacturing follows a controlled sequence: product specification review, artwork conversion, bead and fabric testing, pattern development, sample beading, panel reinforcement, cutting, sewing, closure installation, finishing, inspection, and protective packing.
Decoration is usually completed on flat exterior panels before the bag body is assembled. Working on flat panels gives operators better control over bead direction, spacing, thread tension, and motif alignment. It also keeps the reverse side accessible for knotting, reinforcement, and repair.
The production sequence must be planned before beadwork starts. A decorated panel cannot always be trimmed, folded, or reshaped as easily as plain fabric. Cutting too close to a bead row may break the anchoring thread. Turning a heavily decorated corner may push beads into one another. Installing hardware through a completed motif may crack beads or distort the artwork.
A complete production flow should cover:
- Exterior and lining material inspection
- Bead color and size verification
- Artwork scale confirmation
- Clear seam and hardware zones
- Decoration method selection
- Beading sequence planning
- Panel measurement after decoration
- Reinforcement and backing application
- Cutting and sewing preparation
- Closure and hardware installation
- Interior finishing
- Bead security inspection
- Shape recovery
- Individual protection and carton packing
A production order should not begin from a digital image alone. The approved sample must confirm actual materials, dimensions, bead placement, thread color, lining, reinforcement, closure, hardware finish, logo position, and packing method.
| Production Stage | Main Control Point | Risk When Skipped |
|---|---|---|
| Specification review | Size, use, capacity, materials | Sample may look good but function poorly |
| Artwork conversion | Scale, bead count, clear zones | Motifs may distort at seams |
| Material trial | Fabric stability and bead weight | Puckering or panel stretching |
| Decoration sample | Color, spacing, attachment | Loose beads and uneven patterns |
| Structural sample | Reinforcement and opening | Collapsed shape or limited capacity |
| Pre-production sample | Final construction approval | Bulk inconsistency |
| In-line inspection | Workmanship during production | Large-scale rework |
| Final inspection | Appearance, function, packing | Defective goods reaching shipment |
How Is the Design Developed?
Design development begins by defining how the clutch will look, what it will carry, how it will open, and how often it will be used.
A useful design brief should include:
- Finished width, height, and depth
- Exterior and interior views
- Decoration coverage
- Bead type and size
- Main colors
- Closure style
- Chain or wrist strap requirements
- Interior pocket layout
- Logo method
- Target order quantity
- Intended retail position
- Packaging requirements
External size alone does not determine capacity. A 22 × 13 × 4 cm clutch with a rigid frame may hold less than a soft pouch of the same dimensions because the frame, lining folds, interlining, and seam allowances reduce interior space.
The design team should confirm what the clutch must hold. A phone-fit requirement should specify the phone model or maximum phone dimensions. Cosmetic capacity should also be realistic. A bag intended for a smartphone, cardholder, lipstick, compact mirror, and keys requires more usable depth than a decorative wedding clutch intended only for cards and lipstick.
A paper mock-up can be useful before sampling. Printed artwork is placed on the paper shape to study:
- Motif scale
- Center position
- Relationship to the flap
- Side seam loss
- Bottom fold behavior
- Closure location
- Logo visibility
The factory then converts the design into front, back, side, bottom, flap, lining, pocket, and reinforcement patterns.
Several areas should normally remain free of dense beadwork:
- Main sewing lines
- Zipper paths
- Frame channels
- Magnetic snap positions
- Turn-lock mounting areas
- Sharp fold lines
- Chain-loop attachment zones
- Narrow corners
- Edge-binding channels
The clear area depends on bead size and construction. Small seed beads may allow a narrower margin, while large stones or layered beads require more space.
A practical clear-zone range may begin around 8–15 mm from a standard sewing line. Framed and bound edges may require more. Final clearance must be confirmed with the actual sewing foot, frame channel, bead height, and seam thickness.
Design reviews should also consider visual balance. A centered motif on a flat artwork file may appear too low after the bottom seam is turned. A logo placed near the top may be partly hidden by the frame. Adjustments should be based on the finished bag rather than the flat panel alone.
How Is a Bead Pattern Created?
A bead pattern converts the original artwork into a repeatable production map. Every important element must be defined by size, position, color, direction, and attachment method.
A production-ready bead pattern should identify:
- Bead code
- Bead material
- Bead size
- Bead shape
- Surface finish
- Color reference
- Placement area
- Stitch direction
- Row direction
- Pattern repeat
- Edge clearance
- Starting point
- Ending point
- Anchoring frequency
Simple artwork may be transferred to fabric using washable marking, heat-transfer outlines, perforated templates, printed guide lines, or embroidery outlines.
More complex designs can be divided into a numbered grid. Each square represents a bead or color group. Such mapping works well for lettering, logos, animals, geometric graphics, and multicolor illustrations.
Fine artwork often needs simplification. Beads cannot reproduce every detail found in a digital image. The smallest practical line depends on bead size. A 3 mm bead cannot create the same fine curve as a 1.5 mm seed bead.
Pattern resolution should be checked through an actual-size print. Artwork that looks clear at 200% screen zoom may become unreadable when reduced to a 7 cm motif.
Lettering requires special attention. Thin strokes may disappear, while narrow gaps between letters may close once beads are attached. Script fonts, serif fonts, and highly detailed monograms often need simplified outlines.
Pattern development should also account for bead direction. Bugle beads create a very different appearance when placed vertically, horizontally, or radially. Sequins may reflect light unevenly when their orientation changes. Pearls and faceted beads may produce visible shading even when the color code is the same.
An approved bead board should accompany the pattern. The board should contain physical samples of every approved component with identification codes.
| Pattern Element | Required Instruction |
|---|---|
| Main motif | Exact width, height, and center point |
| Bead color | Physical bead code and approved shade |
| Bead size | Millimeter size or supplier specification |
| Direction | Horizontal, vertical, curved, or radial |
| Row spacing | Controlled distance between rows |
| Edge margin | Bead-free distance from seams |
| Logo placement | Distance from top, side, and centerline |
| Anchoring | Number of beads between secure stitches |
| Repair standard | Approved replacement method |
Pattern templates should be checked against the sewn sample. A flat measurement may change after the bag is turned and reinforced. Any correction must be added to the final production pattern before bulk decoration begins.
How Are Beads Attached?
Beads can be attached by hand sewing, machine-assisted embroidery, tambour embroidery, stitched appliqué, beaded mesh, pre-made trim, or a combined process.
Hand sewing remains the most flexible method for decorative clutch production. Operators can work with different bead sizes, shapes, directions, and layer heights within the same motif.
The thread passes through the bead and the exterior backing layer. Depending on the pattern, beads may be attached one at a time or in short groups.
Attaching one bead at a time provides strong control but requires more labor. Short grouped rows improve speed but need frequent anchoring. A long row attached only at both ends can release many beads when one thread breaks.
Secure construction may include:
- Individual bead stitching
- Short-row attachment
- Backstitch anchoring
- Double-thread attachment
- Cross anchoring
- Reinforced focal components
- Separate fringe anchoring
- Locked row endings
Thread selection depends on bead hole size, bead weight, fabric strength, and required appearance. The thread must be thin enough to pass through the bead hole and strong enough to resist repeated rubbing.
Transparent nylon thread may reduce visible color contrast, but it can feel stiff and may behave differently at knots. Polyester embroidery or beading thread offers more color choices and softer handling. Final selection should be tested with the actual beads.
Thread tension should remain firm without pulling the base fabric inward. Excessive tension causes puckering. Loose tension allows beads to move, rotate, or catch on nearby objects.
Operators should avoid placing large knots directly behind a thin exterior fabric because the knot may create visible bumps. Knots should be positioned on the backing side and covered by interlining or lining.
Glue may be used for temporary positioning or selected decorative stones. Adhesive-only attachment is less suitable for areas exposed to bending, friction, temperature changes, or repeated handling unless the adhesive system has been tested for the specific material combination.
Three-dimensional decorations require added control. Raised flowers, layered petals, tassels, and hanging bead fringe move more than flat embroidery. Their attachment points must be reinforced independently.
A fringe row should not rely on a single continuous thread. Dividing the fringe into smaller secured groups limits damage if one section is pulled.
Is Hand Beading Better Than Machine Beading?
Hand beading offers greater design freedom. Machine beading offers stronger repeatability for suitable patterns. Many well-developed clutches use both methods.
Hand beading works well for:
- Mixed bead sizes
- Irregular artwork
- Raised decoration
- Floral patterns
- Curved lines
- Small production runs
- Limited-edition designs
- Pearls and crystals
- Tassels and fringe
- Designs requiring frequent adjustment
Machine-assisted decoration works well for:
- Repeated geometric layouts
- High-volume uniform patterns
- Background textures
- Standard sequin rows
- Repeated logo outlines
- Decorative embroidery combined with limited beads
Handwork can create slight natural variation. Acceptable variation should be defined before production. Variation should not affect logo readability, motif size, bead count in key areas, color placement, symmetry, or attachment strength.
Machine decoration requires setup, testing, and programming. A machine can repeat an error just as efficiently as it repeats a correct design. Thread tension, component feeding, fabric stabilization, and pattern registration must be checked before production runs.
A combined process can improve appearance and production efficiency. Examples include:
- Machine embroidery for outlines, with hand-applied beads inside
- Machine-applied sequins, with hand-applied crystals
- Printed backgrounds with hand-beaded focal details
- Woven or embroidered appliqué with hand-beaded edges
- Machine stitching for repeated rows, with hand-finished corners
The decision should consider more than labor cost. Important factors include:
- Decoration complexity
- Order quantity
- Bead availability
- Required consistency
- Sample approval time
- Repair difficulty
- Operator skill
- Equipment setup time
- Target finished weight
- Desired handcrafted appearance
| Production Method | Strength | Limitation |
|---|---|---|
| Individual hand stitching | Strong control and flexibility | Longer labor time |
| Short-row hand stitching | Faster than single-bead sewing | Requires frequent anchoring |
| Tambour beading | Efficient for skilled operators | Needs stable fabric and trained labor |
| Machine sequin work | Fast repeat patterns | Limited component flexibility |
| Pre-beaded appliqué | Simplifies bag assembly | Edges and attachment must be concealed |
| Combined process | Balances detail and efficiency | Requires careful process coordination |
Approval should be based on a complete sample rather than a small decorative swatch alone. A method that performs well on a flat swatch may behave differently after the clutch is turned, filled, and carried.
How Are the Panels Prepared?
Decorated panels should be measured before cutting. Beadwork may change the original panel dimensions because of thread tension and component weight.
Key measurements include:
- Panel width
- Panel height
- Diagonal alignment
- Motif position
- Seam clearance
- Fold-line clearance
- Top-opening width
- Bottom corner position
A decorated panel should be compared with the approved cutting pattern. Panels outside the permitted range should not be forced into assembly because stretching or trimming may damage the artwork.
Backing should be secured without creating hard adhesive areas. Laminated reinforcement must remain flat. Air bubbles, wrinkles, and uneven adhesive can become visible on smooth fabrics.
Cutting should avoid loose bead threads. A cutting line crossing an uncontrolled continuous thread can release an entire bead row.
Production patterns should clearly mark:
- Safe cutting line
- Sewing line
- Bead-free zone
- Hardware hole
- Fold line
- Centerline
- Top direction
- Matching points
- Reinforcement placement
Decorated panels should be stored separately with a soft protective layer between them. Heavy stacking can flatten raised beadwork or create marks on velvet, satin, and coated materials.
The factory should also control moisture and contamination. White satin, light velvet, pearls, and clear crystals can show dust, hand marks, or glue stains easily. Operators may use clean work surfaces, protective gloves, finger covers, or washable handling procedures.
How Are the Panels Assembled?
Bag assembly begins after decoration, measurement, backing, and cutting are approved.
The exact sequence depends on the clutch structure. A common soft-clutch sequence may include:
- Prepare the decorated front and back panels.
- Apply reinforcement.
- Prepare the lining and pockets.
- Install interior labels.
- Install zipper or closure components.
- Join exterior panels.
- Join lining panels.
- Turn the bag through the lining opening.
- Shape the corners.
- Close the lining opening.
- Clean and inspect the finished clutch.
A framed clutch may follow a different sequence:
- Complete exterior beadwork.
- Reinforce the body panels.
- Join exterior panels.
- Prepare and attach lining.
- Finish the top opening.
- Insert the opening into the frame channel.
- Sew, clamp, screw, or bond the frame.
- Clean excess adhesive.
- Check frame alignment.
- Test opening and closing.
Sewing speed should be reduced near decorated areas. A needle striking a glass bead can break the bead, damage the needle, or injure the operator.
Special machine feet may be needed to avoid pressing directly on raised decorations. In some cases, sewing is completed from the lining or backing side.
Seam allowances should remain clear. Trapped beads can produce:
- Broken machine needles
- Uneven seams
- Hard bumps
- Visible edge distortion
- Cracked beads
- Weak seam closure
- Poor frame fit
Corner construction deserves particular attention. Thick layers must be graded before turning. Grading means trimming different internal layers to different widths so they do not stack into one bulky edge.
Bead anchoring threads should never be cut during grading. Operators need clear visual markings showing where safe trimming is allowed.
After turning, corners should be shaped using smooth tools. Sharp metal tools can puncture the lining, cut bead threads, or damage the exterior.
The bag body should be checked before the lining opening is closed. At that point, internal problems can still be corrected.
Checks should include:
- Reinforcement position
- Pocket alignment
- Exposed bead threads
- Hardware backing
- Seam security
- Corner shape
- Zipper-end finish
- Interior cleanliness
How Are Frames and Closures Installed?
Closure installation must match the finished wall thickness and opening dimensions.
A metal frame should be approved together with the bag sample. Frames from different production lots can vary slightly in curve, hinge tension, plating, and channel width.
Before installation, the factory should inspect:
- Frame width
- Frame height
- Channel depth
- Hinge movement
- Lock alignment
- Surface scratches
- Plating color
- Sharp edges
- Screw condition
- Chain-loop position
For glued frames, adhesive quantity must be controlled. Too little adhesive reduces attachment strength. Too much can leak onto the exterior or lining.
Adhesive must also be compatible with:
- Frame material
- Fabric coating
- Lining
- Reinforcement
- Operating temperature
- Transport conditions
The frame should remain fixed in a jig or controlled position while the adhesive sets. Uneven pressure can twist the bag opening.
Sewn frames require evenly spaced stitches and suitable thread. Stitch holes should not tear the top edge. The lining should remain smooth without being pulled into the frame channel.
Magnetic snaps require wide reinforcement patches. Repeated opening places concentrated force around the metal prongs or screw points.
A reinforcement patch should extend beyond the hardware base. The exact size depends on magnet strength, fabric thickness, and bag weight. A small patch that only matches the magnet diameter may not distribute force effectively.
Zippers require straight tape alignment. Common zipper problems include:
- Wavy opening
- Unequal tape exposure
- Tight corners
- Slider contact with beads
- Misaligned zipper ends
- Lining caught in teeth
- Weak zipper-end tabs
The zipper should open and close smoothly before and after the clutch is filled.
Turn locks and decorative locks need a flat installation zone. Beads located under the lock base can prevent stable contact and cause the hardware to tilt.
Chain attachments should connect to reinforced tabs, D-rings, frame loops, or internal supports. Stitching a chain loop only to the lining can lead to tearing.
A loaded hanging check can reveal weak attachment points. The clutch should be filled with a representative weight and suspended for a controlled period while the attachment, seam, and surrounding beadwork are observed.
How Is Beadwork Quality Controlled?
Beadwork quality control covers incoming materials, decoration accuracy, thread security, panel dimensions, bag shape, closure performance, hardware strength, interior cleanliness, and packing protection.
Inspection should be divided across production stages rather than performed only after all bags are completed.
A practical quality-control sequence includes:
- Incoming bead inspection
- Incoming fabric inspection
- First decorated-panel approval
- In-line beadwork inspection
- Decorated-panel measurement
- Sewing-stage inspection
- Closure and hardware inspection
- Finished-product inspection
- Packing inspection
- Carton verification
Early inspection reduces rework. A missing color section can be repaired on a flat panel more easily than on a fully assembled framed clutch.
A reference sample should remain available at the production line. Digital photographs are useful, but they may not show bead finish, true color, weight, thread tension, or tactile quality accurately.
Production approval should include measurable requirements and visual reference points.
| Inspection Area | Main Check |
|---|---|
| Bead material | Correct size, color, finish, and shape |
| Pattern | Correct position, scale, and direction |
| Attachment | No loose beads or exposed thread |
| Panel size | Within approved tolerance |
| Seam | Straight, secure, and bead-free |
| Shape | Balanced and symmetrical |
| Closure | Smooth opening and reliable holding |
| Hardware | Secure, aligned, and scratch-free |
| Lining | Clean, flat, and fully enclosed |
| Packaging | No pressure against raised decoration |
How Is Bead Attachment Tested?
Bead attachment should be checked through pulling, rubbing, flexing, opening, carrying, and packing simulation.
A production test plan may include:
- Gentle manual pull on selected focal beads
- Repeated rubbing across decorated areas
- Panel bending
- Clutch opening and closing cycles
- Loaded carrying
- Chain suspension
- Light compression
- Packing and unpacking checks
Different bead structures need different checks.
Small seed beads should be inspected for continuous row security. Large stones should be checked individually. Fringe should be pulled by selected groups. Layered flowers should be checked at the central attachment point and outer petals.
A practical manual pull check can be used during production, but the factory should avoid uncontrolled force that damages saleable goods. Stronger destructive checks are better performed on dedicated samples or test panels.
The decorated panel should be flexed in the same direction it will move during use. A flap should be opened repeatedly. A soft pouch should be squeezed and folded gently. A rigid box clutch requires more attention to corner impact and surface pressure.
Closure movement can affect bead attachment. Beads near a magnetic flap may receive repeated pulling. Beads near a zipper can rub against fingers or the slider.
Testing should focus on high-risk areas:
- Corners
- Fold lines
- Edges
- Strap attachments
- Frame channels
- Zipper ends
- Fringe anchors
- Raised focal stones
- Logo details
A test result should record the location, method, result, and corrective action. “Passed” is not enough when the same problem appears repeatedly.
How Do Factories Prevent Loose Beads?
Loose beads are prevented through component inspection, correct thread selection, controlled stitch tension, frequent anchoring, protected thread ends, stable backing, and careful assembly.
Incoming bead inspection should remove components with:
- Sharp holes
- Cracks
- Chipped edges
- Uneven coating
- Oversized holes
- Blocked holes
- Severe size variation
- Incorrect color
Sharp bead holes can cut thread gradually. The decoration may pass initial inspection and fail later during handling.
Thread should be stored clean and dry. Damaged, aged, or contaminated thread may lose strength. Operators should not continue using thread that has become frayed from repeated bead passage.
Long bead rows should be divided into secure sections. When one section fails, the surrounding decoration should remain intact.
Heavy stones and large pearls may require:
- Multiple thread passes
- Cross stitches
- Reinforced backing
- Separate anchoring
- Wider support area
Thread ends must be locked securely. Excessively large knots can create bumps, while weak knots can loosen under vibration.
The reverse side should be covered by backing and lining. Exposed threads inside the bag can catch on jewelry, keys, zippers, or cosmetics.
Repair procedures should follow the original attachment method. A repair should not merely hide a loose thread with glue.
In-line supervisors should check beadwork before panel assembly. Repairs are cleaner and faster while the reverse side remains accessible.
How Are Patterns and Colors Inspected?
Pattern inspection compares every decorated panel with the approved pattern, bead board, and reference sample.
Inspectors should confirm:
- Motif direction
- Center position
- Distance from edges
- Overall scale
- Color sequence
- Row direction
- Symmetry
- Logo readability
- Bead density
- Border alignment
Measurements should be taken from fixed reference points. Useful reference points include the top center, side seam, bottom seam, zipper line, frame edge, and flap fold.
A logo should not be judged only by visual impression. Width, height, and position should be measured.
Color inspection must use consistent lighting. Metallic, translucent, pearl, and iridescent finishes can appear different under warm light, cool light, and daylight.
Mixed bead batches should be reviewed before production. Even when supplier codes match, coating tone may vary between lots.
For multicolor designs, inspectors should confirm that neighboring colors have not been mixed. Small errors are highly visible in lettering and geometric artwork.
Acceptable handmade variation can be shown through physical examples. A reference board may include:
- Acceptable spacing
- Borderline spacing
- Unacceptable gaps
- Acceptable rotation
- Unacceptable missing rows
- Approved color variation
- Rejected shade variation
Such visual standards help operators and inspectors make consistent decisions.
How Is Clutch Shape Maintained?
Shape is maintained through balanced decoration, correct backing, controlled reinforcement, accurate cutting, even seam tension, suitable hardware, and supportive packing.
A heavily decorated front panel may weigh much more than the back. Without structural balance, the clutch can lean forward or collapse.
The factory can correct imbalance through:
- Stronger back-panel reinforcement
- Controlled bead density
- Balanced lining structure
- Wider bottom support
- More stable side gussets
- Adjusted frame position
Seam tension should remain even. Tight stitching can pull the edges inward. Loose stitching can create a soft, irregular outline.
Finished dimensions should be measured at fixed points. Measurements may include:
- Top width
- Bottom width
- Center height
- Side height
- Maximum depth
- Flap overlap
- Opening width
- Chain attachment position
Soft clutches may have natural flexibility, but left and right sides should still appear balanced.
Structured styles should stand evenly without twisting. The frame should sit parallel to the base. Corners should have matching shape and fullness.
Internal forms may be used during storage and packing. Suitable options include:
- Acid-free tissue
- Soft paper forms
- Shaped foam
- Air cushions
- Molded paper inserts
- Fabric-covered supports
Packing material should not press directly against raised stones, pearls, or three-dimensional flowers.
What Defects Should Be Rejected?
Defects should be classified by their effect on safety, function, appearance, and durability.
Serious defects include:
- Sharp broken beads
- Loose large stones
- Insecure chain attachments
- Nonworking closures
- Open seams
- Exposed metal edges
- Incorrect product dimensions
- Wrong artwork
- Incorrect logo
- Severe frame distortion
Visible decoration defects include:
- Missing beads
- Wrong bead colors
- Uneven rows
- Distorted motifs
- Mixed bead sizes
- Exposed knots
- Loose thread ends
- Damaged coatings
- Cracked pearls
- Uneven fringe length
Construction defects include:
- Twisted bag body
- Uneven corners
- Wavy zipper
- Misaligned frame
- Visible adhesive
- Lining caught in closure
- Uneven pocket placement
- Insecure labels
- Scratched hardware
- Incorrect chain length
Packing defects include:
- Decorated surfaces touching directly
- Insufficient shape support
- Crushed raised motifs
- Missing dust bags
- Incorrect barcode labels
- Incorrect carton quantity
- Wet or damaged cartons
- Inadequate carton cushioning
Defect standards should reflect the product’s selling position and decoration method. Handmade bead placement may contain minor natural variation, but visible missing sections, loose attachment, incorrect colors, and distorted logos should not be accepted as handmade character.
Inspection records should state:
- Quantity inspected
- Inspection method
- Defects found
- Defect location
- Repair quantity
- Reinspection result
- Packing status
- Final release decision
The strongest quality control system does not depend on final inspection alone. It prevents defects through clear specifications, approved materials, trained operators, in-line checks, and controlled repair procedures.
How Do You Customize Beaded Clutches?
Beaded clutches can be customized through size, shape, exterior material, bead type, decoration coverage, artwork, logo, lining, pocket layout, closure, hardware, chain, labels, packaging, and carton markings.
The most reliable projects begin by defining the product’s essential requirements before discussing decorative details. A clutch may look visually complete in a rendering, but the factory still needs to know what the bag must hold, how it will be carried, where it will be sold, and which parts cannot be changed.
A clear customization brief should answer several basic questions:
- What is the finished bag size?
- What items should fit inside?
- Is the body soft, semi-structured, or rigid?
- Is the decoration full coverage or partial coverage?
- Which areas must remain bead-free?
- What is the preferred bead material?
- Is the logo decorative or discreet?
- Does the bag need a chain, wrist strap, or both?
- What closure should be used?
- What is the estimated order quantity?
- What packaging is required?
- Is the product intended for weddings, eveningwear, resort collections, gifting, or regular daily use?
The answers affect the complete construction. A wedding clutch with dense pearl decoration requires different reinforcement and packing from a resort pouch using lightweight acrylic beads. A structured metal-frame clutch also needs tighter dimensional control than a soft zipper pouch.
It is useful to separate customization into three levels.
| Customization Level | Main Changes | Development Difficulty |
|---|---|---|
| Surface customization | Colors, bead pattern, logo, labels | Lower |
| Construction customization | Size, lining, pockets, closure, chain | Medium |
| Full product development | New shape, custom frame, new mold, special materials | Higher |
Surface customization usually uses an existing bag structure with new artwork or colors. Construction customization changes functional parts of the clutch. Full development creates a new product system and may require several sample rounds.
The design should not be finalized from appearance alone. Every customized element should be checked against weight, capacity, sewing access, hardware strength, production time, and packing requirements.
What Design Files Are Required?
Accurate design files reduce sampling errors and help the factory calculate material use, bead quantities, labor time, and construction requirements.
The most useful files include:
- Front artwork
- Back artwork
- Side and bottom views
- Finished dimensions
- Logo files
- Color references
- Material notes
- Closure details
- Chain or strap dimensions
- Lining design
- Pocket layout
- Packaging artwork
- Barcode and label information
Vector formats such as AI, EPS, SVG, and editable PDF are preferred for logos, lettering, geometric patterns, and repeat artwork. Vector files can be enlarged or reduced without losing edge quality.
High-resolution JPG or PNG files can be used for reference, but they may require redrawing. Low-resolution screenshots often contain blurred edges and unclear colors, making it difficult to convert the artwork into a bead-placement map.
A production drawing should clearly identify:
- Finished bag width
- Finished bag height
- Maximum depth
- Flap length
- Opening width
- Frame size
- Zipper length
- Chain length
- Wrist-strap loop
- Pocket dimensions
- Logo position
- Decoration boundaries
Measurements should be provided in millimeters or centimeters. Avoid relying only on descriptions such as “small,” “medium,” or “phone size,” because these terms vary between markets.
Color references can be supplied through:
- Pantone codes
- Physical fabric swatches
- Printed color cards
- Approved bead samples
- Existing product references
Pantone codes are useful for communication, but bead coatings, transparent materials, pearl surfaces, and metallic finishes may not match printed color references exactly. Physical bead approval is still required.
For products based on reference samples, the factory should record:
- Exterior dimensions
- Interior dimensions
- Material thickness
- Bead dimensions
- Decoration density
- Closure type
- Frame dimensions
- Lining construction
- Reinforcement layers
- Hardware finish
A reference sample can show the intended quality level, but copying dimensions without reviewing the intended use may repeat weaknesses from the original product.
Szoneier can assist with design development when only sketches, photos, rough artwork, or basic product ideas are available. Free design support can include structure suggestions, pattern adjustment, material recommendations, logo positioning, and packaging planning.
Which Patterns Can Be Customized?
Beaded clutch patterns can include logos, initials, lettering, flowers, animals, geometric shapes, abstract artwork, landscapes, cultural motifs, seasonal graphics, wedding themes, resort imagery, and repeating decorative textures.
The artwork must be adjusted to the physical size of the beads. Beads act like three-dimensional pixels. Small artwork details may disappear when converted into larger components.
The minimum practical detail depends on:
- Bead diameter
- Bead shape
- Spacing
- Thread thickness
- Base material
- Artwork contrast
- Final motif size
A narrow letter stroke may be visible in a digital file but become unclear after conversion into 3 mm beads. Script lettering may also lose readability if the curves are too tight.
A better production method may combine several decorative techniques:
- Small seed beads for fine lines
- Bugle beads for straight borders
- Sequins for broad reflective areas
- Thread embroidery for small text
- Crystals for selected highlights
- Printing for gradients
- Beads for focal details
This mixed approach often produces clearer artwork than attempting to reproduce every detail with one bead size.
Pattern placement should consider the finished bag shape. A large motif extending close to the side seams may lose part of its outline after the bag is assembled. Artwork placed near a flap fold may appear divided when the bag opens.
For repeated patterns, the factory should calculate:
- Pattern repeat width
- Pattern repeat height
- Center alignment
- Side matching
- Top and bottom cut position
- Seam interruption
- Left and right symmetry
A pattern may be centered on every clutch, placed randomly, or cut from a continuous decorated sheet. Each method creates a different appearance and cost.
Centered placement requires more precise cutting and may increase material waste. Random placement is more efficient but may produce visible differences between units.
Logo patterns require stricter controls than decorative artwork. A small change in letter spacing or symbol direction can affect brand recognition.
Before bulk production, customers should approve:
- Actual-size artwork
- Physical bead board
- Decorated panel
- Complete sample
- Final production pattern
Approval should be based on the finished clutch rather than the flat panel alone.
How Can a Logo Be Added?
A logo can be added through beadwork, thread embroidery, metal plates, woven labels, printed lining, screen printing, heat transfer, zipper pulls, debossed patches, hang tags, or packaging.
Beaded logos work well when the logo has:
- Clear shapes
- Limited fine detail
- Strong contrast
- Adequate width
- Simple lettering
- Sufficient space between elements
Very small text may be difficult to reproduce with beads. In such cases, embroidery or a woven label may provide better readability.
A metal logo plate creates sharp detail and suits structured evening clutches. The plate can be finished in gold, silver, gunmetal, rose gold, antique brass, matte black, or another approved color.
Metal logos require checks for:
- Surface scratches
- Sharp edges
- Plating consistency
- Logo depth
- Pin strength
- Screw security
- Backing reinforcement
- Position alignment
The plate should sit on a flat area. Installing it over raised beadwork can cause the hardware to tilt or leave pressure marks.
A woven label is useful inside the bag. It can show the brand name, country of origin, material information, or care instructions. The label should be sewn securely without visible stitching on the exterior.
Printed lining provides a broader branding surface. Repeating logos, custom colors, illustrations, or collection names can be printed across the interior.
Zipper pulls and chain charms are suitable for subtle exterior branding. Custom metal parts may require molds and higher component quantities, while stock hardware with engraved or laser-marked logos can reduce development requirements.
Packaging can also carry the strongest branding. A rigid gift box, dust bag, printed sleeve, tissue paper, and thank-you card can create a complete presentation without overloading the clutch exterior.
| Logo Method | Best Application | Main Control |
|---|---|---|
| Bead logo | Bold exterior artwork | Readability and pattern accuracy |
| Embroidery | Fine text and small symbols | Thread density and edge quality |
| Metal plate | Premium structured clutches | Reinforcement and plating |
| Woven label | Interior branding | Clean sewing and correct position |
| Printed lining | All-over brand identity | Print color and repeat alignment |
| Zipper pull | Subtle functional branding | Mold detail and attachment strength |
| Hang tag | Product information | Print quality and string security |
| Gift box | Retail presentation | Color, finish, and fit |
The logo method should support the product style. A large colorful bead logo may suit a playful collection, while a small metal plate may work better for an evening clutch.
What Affects Sample Time?
Sample time depends on artwork complexity, material availability, bead sourcing, handwork hours, structural difficulty, custom hardware, packaging development, and the number of revisions.
A simple clutch using available fabric, stock beads, standard hardware, and an existing structure can be sampled quickly.
A more complex design may require:
- Custom bead colors
- New frame dimensions
- Special metal plating
- Printed lining
- Hand-beaded artwork
- Three-dimensional flowers
- Mixed fringe
- Custom chain hardware
- Rigid gift packaging
Szoneier supports rapid sampling, but the exact schedule should be confirmed after reviewing the complete specification.
A practical development schedule may be divided as follows:
| Sample Stage | Main Work | Estimated Working Time |
|---|---|---|
| Design review | Size, artwork, materials, structure | 1–2 days |
| Material preparation | Fabric, beads, lining, hardware | 2–7 days |
| Bead pattern development | Mapping and trial placement | 1–3 days |
| Decoration | Hand or machine beadwork | 2–7 days |
| Bag assembly | Sewing, lining, closure, hardware | 1–3 days |
| Internal inspection | Measurements and corrections | 1–2 days |
Straightforward samples may be completed in approximately 5–10 working days when materials are available. Complex hand-beaded, framed, or specially sourced products may require 10–20 working days or longer.
Sampling can move faster when customers provide:
- Editable artwork
- Exact dimensions
- Approved colors
- Clear material preferences
- Target quantity
- Target price range
- Complete packaging requirements
- Consolidated feedback
Scattered feedback increases development time. It is more efficient to review the complete sample and send one organized revision list.
Revision comments should distinguish between:
- Required changes
- Preferred changes
- Optional ideas
Photos should be marked with arrows, dimensions, and notes. Statements such as “make it better” or “the shape feels wrong” are difficult to implement consistently.
Sample approval should include more than exterior appearance. The customer should also review:
- Phone fit
- Opening width
- Clutch weight
- Hand comfort
- Closure strength
- Chain length
- Interior capacity
- Pocket position
- Lining quality
- Bead security
- Packaging fit
Szoneier can provide free samples or sample support according to project conditions. Shipping, custom molds, unusual hardware, and highly complex handwork should be confirmed separately.
What Determines Production Cost?
The cost of a beaded clutch is determined by material consumption, decoration labor, bead type, bead quantity, reinforcement, closure, hardware, lining, order size, quality requirements, and packaging.
Decoration labor is often one of the largest cost factors. Two clutches with the same dimensions can have very different prices when one has a small front motif and the other has full-surface hand beadwork.
The main cost drivers include:
- Bead count
- Bead size
- Number of colors
- Number of bead types
- Decoration coverage
- Handwork time
- Pattern complexity
- Required symmetry
- Base fabric grade
- Internal reinforcement
- Frame or zipper quality
- Custom hardware
- Printed lining
- Packaging format
- Inspection requirements
A full-coverage seed-bead pattern may contain thousands of components and require several hours of handwork. Large acrylic beads may cover more area quickly but produce a different visual effect.
Glass beads, crystals, custom shapes, and premium pearl finishes generally cost more than standard acrylic components.
Cost is also affected by handling difficulty. White satin, velvet, mirrored beads, and polished frames may require cleaner work areas, extra protective layers, and slower assembly.
| Cost Area | Lower-Cost Direction | Higher-Cost Direction |
|---|---|---|
| Bead coverage | Small front motif | Full exterior coverage |
| Bead material | Standard acrylic | Glass, crystal, custom shapes |
| Pattern | Two-color simple design | Detailed multicolor artwork |
| Attachment | Repeated machine process | Individual hand application |
| Structure | Soft zipper pouch | Rigid frame construction |
| Lining | Plain polyester | Custom printed lining |
| Hardware | Stock components | Custom molded hardware |
| Packaging | Polybag and tissue | Dust bag and rigid gift box |
Cost can be reduced without removing the product’s visual identity.
Useful cost-control methods include:
- Concentrating beadwork on the front panel
- Using embroidery for background areas
- Replacing selected glass beads with acrylic
- Limiting the number of bead colors
- Using stock frames and chains
- Keeping large beads away from seams
- Simplifying tiny artwork details
- Using one signature focal motif
- Selecting standard lining colors
- Using folding cartons instead of rigid boxes
The goal should not be to remove every expensive detail. The goal is to keep the details that customers notice most.
A quotation should clearly state:
- Product dimensions
- Exterior material
- Bead specification
- Decoration coverage
- Lining
- Reinforcement
- Closure
- Hardware
- Logo method
- Chain or strap
- Packaging
- Order quantity
- Inspection level
Without these details, two quotations may appear similar while covering very different quality standards.
How Do MOQ and Lead Time Work?
MOQ depends on the finished design and the minimum quantities required for fabrics, beads, frames, metal parts, labels, printed linings, and packaging.
Szoneier supports low-MOQ customization for suitable projects. Lower quantities are easier to arrange when the clutch uses available materials and standard components.
MOQ may increase when the project requires:
- Custom-dyed fabric
- Exclusive bead colors
- Custom metal molds
- Special plating
- Printed lining
- Custom woven fabric
- Custom zippers
- Rigid gift boxes
- Specially shaped foam inserts
Different components may have different minimums. A clutch order of several hundred pieces may still require a larger quantity of printed lining or custom metal parts.
When a component minimum is too high, alternative solutions may include:
- Selecting a stock color
- Using laser engraving instead of a new mold
- Using a woven label instead of printed lining
- Applying a printed sleeve to a stock box
- Choosing existing frame dimensions
- Combining colors across several clutch styles
Production lead time begins after the final sample, materials, artwork, labels, and packing specifications are approved.
A complete production schedule may include:
| Production Stage | Estimated Working Time |
|---|---|
| Material preparation | 5–15 days |
| Beadwork production | 7–25 days |
| Sewing and assembly | 5–12 days |
| Hardware and finishing | 2–5 days |
| Inspection and repair | 2–5 days |
| Packing | 1–4 days |
Standard production may take approximately 20–35 days after approval and material readiness. Highly detailed hand-beaded orders, large quantities, custom frames, or complex packaging may require more time.
Lead time should not be calculated only from sewing capacity. Hand-beading output depends on trained operators. Adding more sewing machines does not automatically speed up decoration work.
The customer can reduce scheduling risk by confirming:
- Final quantity
- Color breakdown
- Size breakdown
- Packaging method
- Barcode files
- Shipping marks
- Delivery deadline
- Shipping destination
Late changes to bead colors, logos, labels, or packaging may affect both production and delivery.
A production plan should include enough time for inspection and repair. Removing quality-control time to recover a delayed schedule can create larger problems after shipment.
Which Packaging Options Are Available?
Beaded clutches require individual protection because raised decorations can scratch, catch, or press against nearby products.
A standard protective system may include:
- Tissue or soft paper around the decorated surface
- A shaped insert inside the clutch
- A dust bag or protective pouch
- An individual polybag
- A folding carton or gift box
- Dividers inside the export carton
The exact combination depends on decoration height, frame shape, product value, and shipping method.
Products with crystals, raised flowers, pearls, or fringe need more clearance than flat seed-bead patterns.
The interior support should maintain shape without stretching the frame or pressing against the lining. Excessive stuffing can distort the opening.
Common packaging options include:
- Protective tissue
- Soft foam sheet
- Nonwoven dust bag
- Cotton dust bag
- Drawstring pouch
- Clear polybag
- Printed polybag
- Paper sleeve
- Folding carton
- Window box
- Rigid gift box
- Drawer box
- Magnetic box
- Custom insert
- Care card
- Story card
- Barcode label
- Shipping carton
| Packaging Type | Protection Level | Suitable Position |
|---|---|---|
| Tissue and polybag | Basic | Simple or lower-risk designs |
| Dust bag and polybag | Medium | Standard decorated clutches |
| Folding carton | Medium to high | Retail and ecommerce |
| Window box | High visual display | Gift and occasion collections |
| Rigid gift box | High | Premium evening and bridal products |
| Drawer box | High | Collectible and luxury presentation |
| Custom insert | Very high | Raised decoration and rigid frames |
A dust bag protects the beadwork during storage and improves presentation. Cotton and soft polyester are common materials. Rough nonwoven fabric should be tested because it may catch on fringe or raised beads.
Rigid boxes should allow enough space around the product. The clutch should not move freely, but the box should not compress the decoration.
Printed packaging should confirm:
- Brand colors
- Logo position
- Surface finish
- Barcode
- Product name
- Material statement
- Country-of-origin information
- Care instructions
- Warning labels
- Retail price labels
Packaging artwork should be approved before printing. Metallic foils, spot UV, embossing, textured paper, and laminated surfaces can be used to create a premium appearance.
Export cartons should be selected according to product weight and box size. Dense glass-beaded clutches can create heavy cartons even when the quantity per carton is low.
Carton planning should consider:
- Gross weight
- Net weight
- Carton dimensions
- Units per carton
- Divider requirements
- Drop and compression resistance
- Moisture protection
- Shipping marks
Overpacking too many units into one carton may reduce freight volume but increase decoration damage. The correct carton quantity balances shipping efficiency and product protection.
Start Your Custom Beaded Clutch Project with Szoneier
A beaded clutch must do more than look attractive in a sample photo. It must hold its shape, open smoothly, feel comfortable in the hand, protect personal items, and reach the final destination without missing beads, scratched hardware, crushed decoration, or distorted edges.
These results depend on decisions made before production:
- Selecting a stable base fabric
- Matching bead weight to the structure
- Keeping clear sewing and closure zones
- Reinforcing hardware attachment points
- Controlling pattern scale and placement
- Protecting bead threads behind the lining
- Testing the filled clutch
- Inspecting decoration during production
- Packing every unit separately
Szoneier has more than 18 years of experience in neoprene material development and custom sewn-product manufacturing. Its product capabilities include bags, koozies, sports supports, medical supports, wetsuits, and other customized products made with neoprene and related textile systems.
Szoneier can review the design, identify possible construction risks, recommend suitable materials, estimate sample time, and prepare a production proposal based on the actual project requirements.
Send your clutch concept, artwork, or reference sample to Szoneier and begin developing a beaded bag that combines visual detail with stable construction, secure decoration, and production-ready quality.