Skip to content
Whether you are a DIY sewing enthusiast, a small business owner, or a brand looking for custom packaging solutions, the drawstring bag is a timeless accessory worth mastering. Its simple yet versatile design makes it one of the most practical and customizable bag styles in the world. From storing gym shoes and cosmetics to acting as stylish branded merchandise, drawstring bags adapt seamlessly to a variety of purposes.
A drawstring bag pattern is a sewing template that guides you in cutting and assembling fabric into a functional bag with a cord closure. Patterns ensure consistent sizing, neat finishes, and allow customization of features like lining, straps, and logos. Whether for DIY projects or commercial use, patterns save time and provide professional-quality results.
Now, imagine you’ve just joined a crafting workshop. The instructor holds up two identical-looking drawstring bags: one freehand stitched, the other made using a precise pattern. At first glance, they look similar—but when you test them, the freehand one has uneven seams and a flimsy shape, while the patterned one feels professional and durable. That’s the power of patterns. In this guide, we’ll dive deep into different types of drawstring bag patterns, materials, sewing steps, customization options, and how they fit both personal projects and global branding strategies.
What Is a Drawstring Bag Pattern?

A drawstring bag pattern is a template that guides you in cutting, shaping, and sewing fabric into a functional bag with a corded closure. It provides exact dimensions, seam allowances, and assembly instructions, ensuring consistency and reducing mistakes. Patterns are used by DIY crafters for personal projects and by professional manufacturers for large-scale production, making them the foundation of both creativity and quality in bag-making.
A drawstring bag pattern is essentially the blueprint for creating a bag that closes with a pull cord. While the concept of a drawstring bag is simple, the pattern transforms an idea into a reproducible design. Think of it as a map: it lays out every line to cut, fold, and sew so you end up with a finished bag that looks professional and works reliably.
At its most basic, a drawstring bag pattern includes:
- Dimensions (length, width, depth of the bag body)
- Seam allowances (extra fabric margins to prevent fraying and add strength)
- Casing measurements (the fold at the top where the drawstring runs through)
- Notches and guides (marks that help align fabric pieces correctly during sewing)
For more advanced users, patterns may also include features such as:
- Boxed bottoms for added volume
- Lining templates to improve structure and durability
- Multiple casing placements for double-drawstring or backpack styles
- Cord channel reinforcements where strain is highest
Why Patterns is important
Without a pattern, you might end up with bags of inconsistent size, seams that don’t align, or casings too small for the cord. A pattern eliminates trial and error by providing exact instructions, ensuring that every bag—whether it’s the first or the hundredth—comes out uniform. This consistency is especially valuable for businesses like Szoneier, which manufacture thousands of units for private label clients and must guarantee identical results across large orders.
For hobbyists, patterns save frustration and fabric. Beginners often overcut or misalign pieces, wasting material and time. With a template, even a novice can produce bags that look polished. Patterns also allow for scaling: you can easily adapt a small jewelry pouch pattern into a large gym bag by increasing the measurements proportionally.
Patterns as Creative Tools
Patterns don’t limit creativity; they actually expand it. Once you understand the basics, you can alter dimensions, add features, or mix fabrics while still relying on the structural guidance of the template. For example:
- Swap plain cotton with waterproof nylon to make a swim bag.
- Add lining and decorative stitching for an upscale gift bag.
- Adjust strap length to convert a pouch into a backpack-style drawstring bag.
This flexibility makes patterns indispensable for both DIY makers and professional brands.
Professional Application in Manufacturing
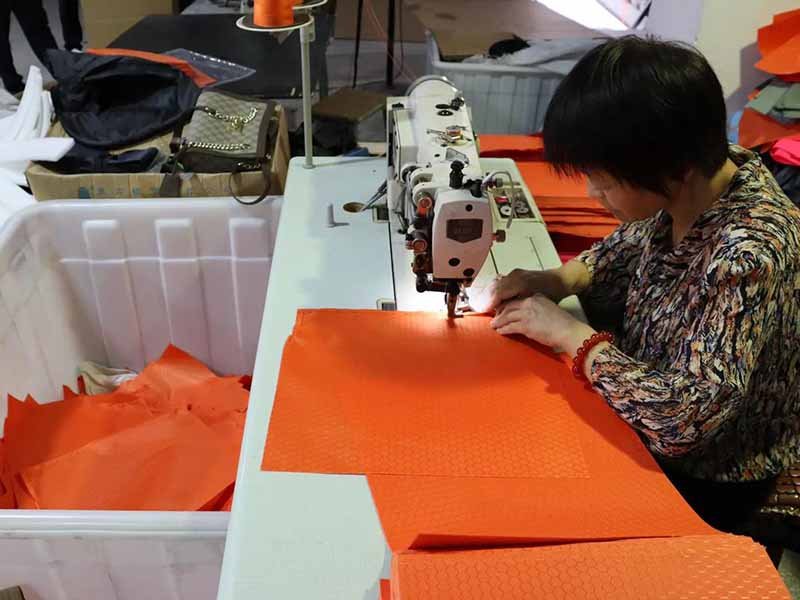
In the manufacturing world, patterns are digitized into CAD files or paper templates. Factories use them to cut hundreds of fabric pieces with precision tools like laser cutters or die presses. These patterns act as the backbone of quality control—every bag is identical, every logo placement consistent, and every seam strong.
Patterns also simplify communication between brands and factories. Instead of vague descriptions, brands provide technical patterns or specifications. This ensures their custom bags are produced exactly as envisioned.
Which Types of Drawstring Bag Patterns Are Popular?
The most popular drawstring bag patterns include flat bags, lined bags, backpack-style designs, kids’ mini versions, and travel or gym bags. Each pattern serves a unique purpose—from simple, lightweight storage to durable, reinforced carriers. Flat bags are the easiest to make, while lined and backpack patterns add strength and versatility. Travel and kids’ styles offer specialized features tailored to daily or recreational use.
Flat Drawstring Bag Pattern
The flat drawstring bag is the simplest and most beginner-friendly design. It consists of two rectangular fabric pieces sewn along the sides and bottom, with a folded casing at the top for the drawstring cord. This style is lightweight, compact, and often unlined, making it ideal for storing shoes, accessories, or cosmetics.
Advantages:
- Very easy to sew, even for beginners.
- Minimal fabric required (great for scrap fabric use).
- Works well for eco-friendly packaging or small gifts.
Limitations:
- Less durable than reinforced designs.
- Not ideal for heavy loads.
Flat drawstring bags are widely used by brands as promotional packaging since they are cost-effective and customizable with printing.
Lined Drawstring Bag Pattern
The lined bag includes two layers: the main outer fabric and an inner lining. The lining not only strengthens the bag but also hides raw seams for a polished look. For example, a cotton exterior with a satin lining works beautifully as a gift bag, while polyester with waterproof lining is perfect for carrying toiletries.
Advantages:
- Stronger and more durable than flat bags.
- More professional finish (no exposed seams).
- Allows fabric combinations for aesthetics.
Limitations:
- Requires more fabric and sewing skill.
- Slightly heavier than unlined versions.
Lined patterns are often chosen for boutique packaging, luxury brands, and higher-end custom projects.
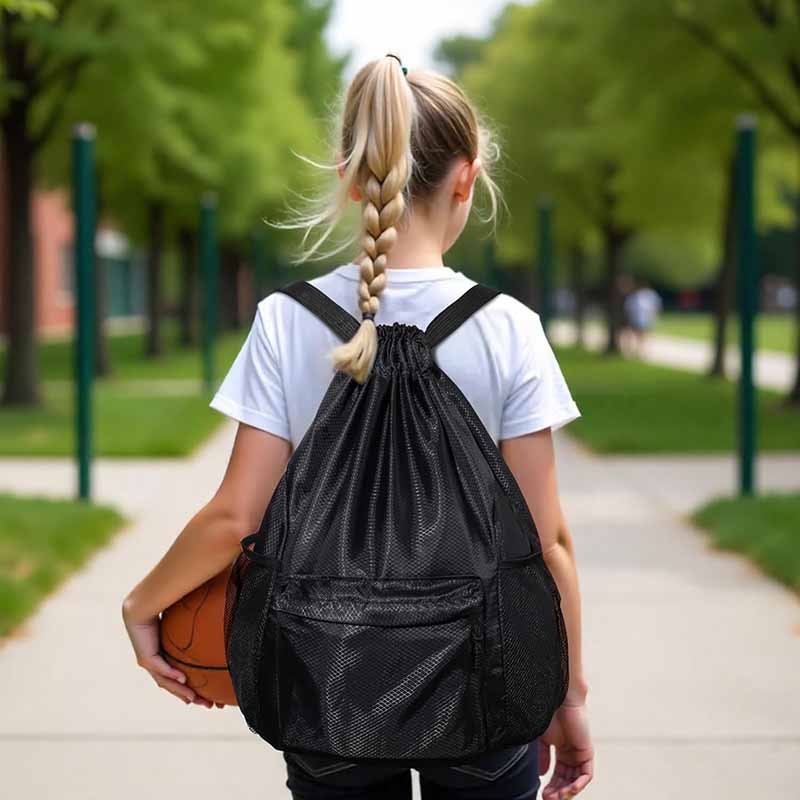
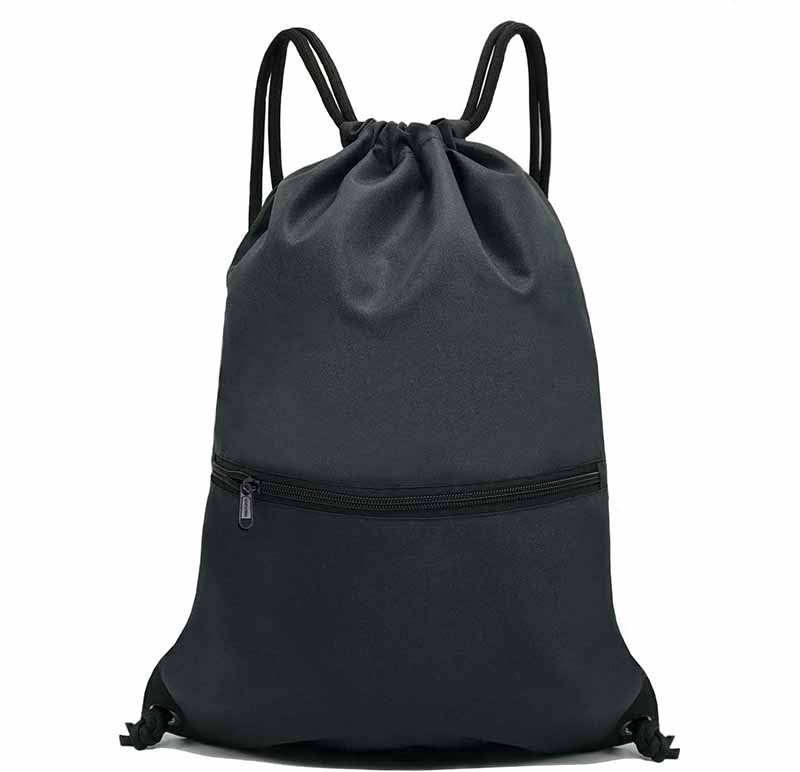
Backpack-Style Drawstring Bag Pattern
This pattern transforms a simple drawstring bag into a wearable backpack. Straps made from cord or fabric run through the casing and attach to the bottom corners, allowing the bag to be worn over the shoulders. Many patterns also include a boxed or gusseted bottom to provide extra volume.
Advantages:
- Multi-purpose—works as both a tote and backpack.
- Popular for sports, school, and promotional campaigns.
- Large print area for branding and logos.
Limitations:
- Requires stronger fabrics like canvas, polyester, or nylon.
- Extra reinforcements needed at stress points.
Backpack-style drawstring bags are the most commercially popular version, often used as gym or sports bags and frequently given away at corporate events.
Kids’ Drawstring Bag Pattern
Scaled-down patterns for children are smaller, lightweight, and focus on safety and fun. These bags are typically made from soft cotton, polyester, or novelty fabrics with cartoon prints. Instead of long cords, some designs use Velcro closures or shorter straps to avoid tripping hazards.
Advantages:
- Perfect for daycare, preschool, or small activities.
- Easy for children to open and close.
- Can be personalized with embroidery, patches, or names.
Limitations:
- Outgrown quickly by children.
- Not suitable for heavy loads.
Parents love these bags as eco-friendly alternatives to plastic for carrying snacks, toys, or clothes.
Travel and Gym Drawstring Bag Pattern
These patterns prioritize strength and space. Fabrics like canvas, ripstop nylon, or coated polyester are commonly used. Larger casings accommodate thicker drawstrings, and reinforced grommets at the bottom corners increase durability. Some designs add zippered pockets, mesh ventilation panels, or waterproof linings for sweaty clothes or shoes.
Advantages:
- Durable and practical for heavy daily use.
- Extra features make them versatile.
- Ideal for branding in fitness and travel markets.
Limitations:
- More complex construction.
- Bulkier compared to flat or kids’ bags.
Travel and gym drawstring bags are the go-to for athletes, commuters, and outdoor enthusiasts who need lightweight but tough carriers.
What Materials Work Best for Drawstring Bags?

The best materials for drawstring bags include cotton, canvas, polyester, and nylon. Cotton is eco-friendly and print-friendly, canvas is durable and structured, polyester is lightweight and water-resistant, and nylon offers strength with excellent abrasion resistance. Each material influences cost, style, and lifespan, so the right choice depends on whether the bag is for casual use, branding, sports, or heavy-duty applications.
Cotton Drawstring Bags
Cotton is one of the most popular fabrics for drawstring bags thanks to its natural softness, breathability, and eco-friendly appeal. It’s often chosen by brands seeking sustainable alternatives to plastic packaging or by individuals who prefer biodegradable materials.
Advantages:
- Soft and lightweight, comfortable to carry.
- Breathable, prevents odor buildup.
- Easy to dye, print, or embroider for branding.
- 100% biodegradable and recyclable.
Disadvantages:
- Less durable than synthetic fabrics.
- Absorbs moisture and stains easily.
- Can shrink if washed incorrectly.
Best Uses: Promotional giveaways, reusable shopping bags, eco-friendly gift packaging, kids’ pouches.
Care Tips: Hand wash in cold water and air-dry to maintain shape and prevent shrinkage.
Canvas Drawstring Bags
Canvas is a heavy-duty woven cotton or cotton-blend fabric, measured by weight (e.g., 12 oz, 16 oz). It’s strong, holds shape well, and is widely used in durable drawstring backpacks or work bags.
Advantages:
- Very durable and tear-resistant.
- Holds structure better than soft cotton.
- Can handle heavy loads like shoes, books, or sports gear.
- Ages well, developing a rugged look over time.
Disadvantages:
- Heavier than cotton, less compact.
- Can absorb water if untreated.
- Requires more effort to clean.
Best Uses: Gym bags, travel bags, school backpacks, premium branded merchandise.
Care Tips: Spot clean or wash gently; apply waterproof sprays to enhance durability.
Polyester Drawstring Bags
Polyester is the workhorse of modern textiles. It is lightweight, wrinkle-resistant, and often coated with PU or PVC to achieve water resistance. It accounts for over 50% of global drawstring bag production, especially in the promotional market.
Advantages:
- Affordable and widely available.
- Strong and abrasion-resistant.
- Water-resistant with coatings.
- Retains color well, even with frequent washing.
Disadvantages:
- Not biodegradable, less eco-friendly.
- Can feel less premium compared to cotton or canvas.
Best Uses: Promotional giveaways, travel bags, gym bags, branded merchandise.
Care Tips: Spot clean or machine wash in cold water; avoid high heat when drying.
Nylon Drawstring Bags
Nylon is a synthetic fabric known for its high strength-to-weight ratio. It’s slightly more expensive than polyester but offers better abrasion resistance and flexibility. Often used in outdoor and performance-oriented bags.
Advantages:
- Extremely strong and long-lasting.
- Resists tearing and abrasion.
- Naturally water-resistant; can be coated for waterproofing.
- Lightweight and flexible.
Disadvantages:
- Slightly higher cost than polyester.
- Sensitive to high heat (melts under hot ironing).
- Colors may fade under prolonged UV exposure.
Best Uses: Outdoor sports bags, travel backpacks, military pouches, waterproof drawstring bags.
Care Tips: Hand wash with mild soap; air-dry to preserve coatings.
Specialty Fabrics
While cotton, canvas, polyester, and nylon dominate, specialty fabrics can also be used:
- Velvet or satin: For luxury gift bags.
- Mesh fabric: For sports bags that need ventilation (e.g., for shoes).
- Recycled PET (RPET): Eco-friendly alternative made from recycled plastic bottles.
- Leather or faux leather panels: For premium branding or fashion statements.
How to Make a Drawstring Bag Step by Step
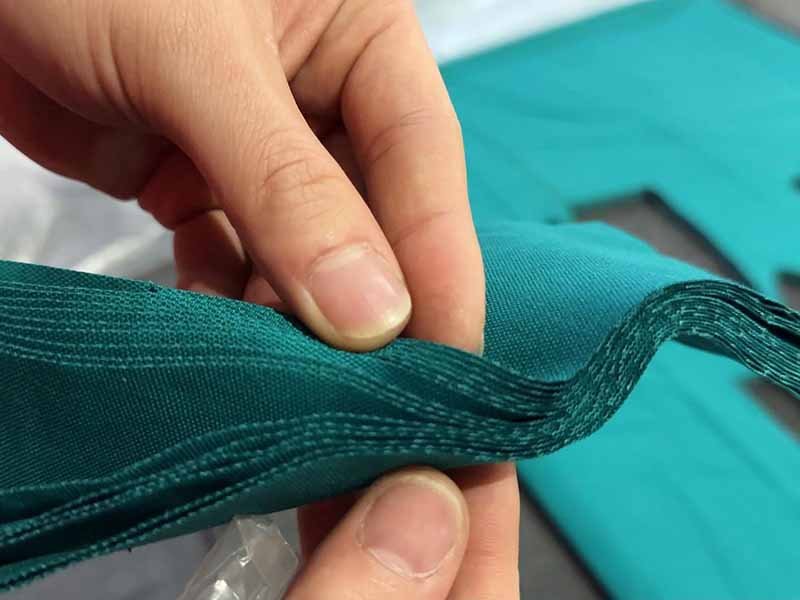
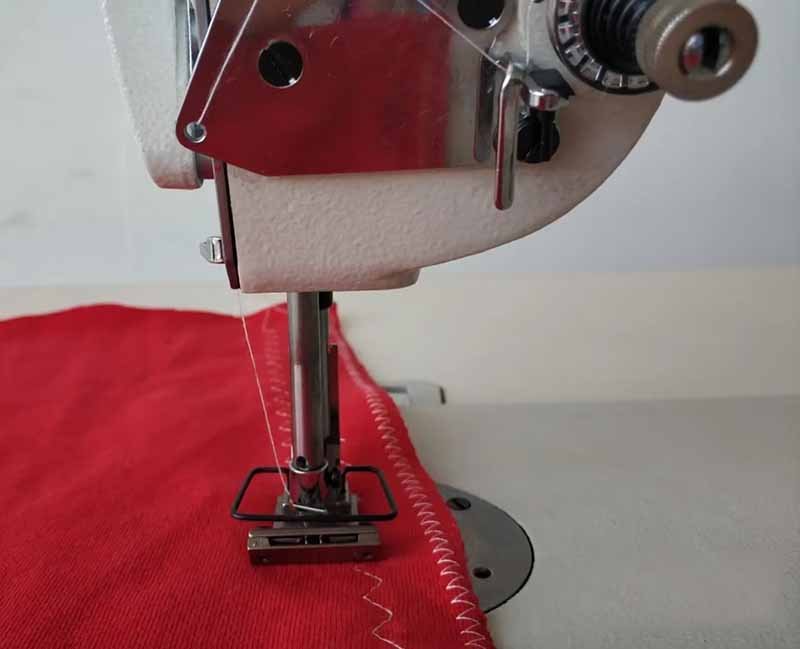
Measure and cut your fabric, sew side seams, create a double-fold casing at the top, and thread cords through the channel. Choose one of three builds—flat (unlined), lined (clean finish), or backpack-style with boxed base—and match fabric, seam allowance, and cord thickness to your use case. Always press between steps, reinforce stress points with bar-tacks or grommets, and air-test the draw before final top-stitching.
Before You Start: Tools, Materials & Sizing
Tools: Fabric shears/rotary cutter + mat, clips or pins, iron, ruler or pattern square, safety pin/bodkin for threading, universal needle (size 90/14 for canvas; 80/12 for cotton/poly), matching thread.
Materials: Body fabric (cotton/canvas/poly/nylon), optional lining, two cords (or one long loop), optional grommets/eyelets, label or patch.
Key parameters (you’ll use these below):
- Finished width (Wf), finished height (Hf)
- Seam allowance (S): 1 cm (3/8″) for light fabrics; 1.5 cm (5/8″) for canvas
- Casing (C): depth of the drawstring channel (typ. 2.5–3 cm / 1–1¼″)
- Turn-under (T): small fold under the casing (typ. 1 cm / 3/8″)
Top allowance formula (for the casing): Top Allowance (TA) = C + 2T
(Example: C=3 cm, T=1 cm → TA=5 cm)
Fast Size Presets
| Style | Finished (Wf × Hf) | Cut (one-piece, fold bottom) | Cord length (each) |
|---|---|---|---|
| Mini pouch | 15 × 20 cm (6×8″) | 17 × (20 + TA) cm → 17 × 25 cm approx. | 55–60 cm (22–24″) |
| Standard tote | 30 × 40 cm (12×16″) | 32 × (40 + TA) cm → 32 × 45 cm approx. | 90–100 cm (35–40″) |
| Gym/Backpack | 35 × 45 cm (14×18″) | 37 × (45 + TA) cm → 37 × 50 cm approx. | 180–200 cm total* |
Backpack style uses two cords that loop from top casings down to lower corners; total equals wearer’s torso size ×2 plus extra for knots (usually 180–200 cm split into two).
Tip: For heavier cords (6–8 mm), add +0.5 cm to C (casing depth).
Method A — Flat, Unlined Drawstring Bag
Best for: Lightweight gift bags, shoe sacks, cosmetic pouches.
Fabric: Cotton, poly, or light canvas.
Skill: Beginner.
Step A1 – Cut & Mark
Cut a single rectangle using your preset. Transfer notches for casing fold (TA line) and side seam start/stop (leave a 2–3 cm gap just below casing fold to feed the cord if you’re not adding buttonholes/grommets).
Step A2 – Prepare Cord Openings
Option 1 (no hardware): On each side seam, mark a 2 cm slot starting ~2 cm below the casing fold line.
Option 2 (buttonholes): Sew a small vertical buttonhole centered ~2 cm below the casing fold; interface lightly behind.
Option 3 (grommets): Fuse a 2×2 cm interfacing square on the wrong side; punch and set 6–8 mm grommets.
Step A3 – Sew Side Seams
Fold right sides together. Sew both sides from bottom up to the slot mark (or just to the top if using buttonholes/grommets). Press seams open. If you left slots, edge-stitch around them to form neat cord windows. Finish raw edges with zigzag/overlock.
Step A4 – Form the Casing
With wrong side up, fold the top edge down by T, press; fold again by C, press. Stitch close to the lower fold to form the channel. Keep side seams lying open for a smooth run.
Step A5 – Thread the Drawstrings
For a double-draw (smoother closure):
- Thread Cord 1 in at the right window, all the way around, and exit the right window.
- Thread Cord 2 in at the left window, around, and out the left. Knot ends; add cord caps or heat-seal synthetics.
Step A6 – Final Press & Reinforcement
Press the bag. Add short bar-tacks at top side seam ends for strength. Test the draw—bag should close evenly without snagging.
Troubleshooting: Cord drags? Widen casing seam by 1–2 mm or switch to smoother cord. Side puckering? Reduce thread tension and re-press.
Method B — Lined Drawstring Bag
Best for: Boutique/gift packaging, travel organizers, toiletry kits.
Fabric: Outer cotton/canvas + lining (cotton, satin, or PU-coated nylon for wipe-clean).
Skill: Confident beginner/intermediate.
Cut List (two-panel method, cleaner alignment)
Outer (2 panels): Wf + 2S by Hf + TA
- Lining (2 panels): Same size (if using thick canvas, reduce lining width by 0.5 cm to nest neatly).
Step B1 – Prep & Openings
Apply small interfacing squares where buttonholes or grommets will sit on outer panels (2 cm below casing line). Sew buttonholes or set grommets now.
Step B2 – Sew Outer & Lining Bodies
- Outer: Right sides together; stitch sides and bottom. Press, finish edges.
- Lining: Repeat, but leave a 7–10 cm gap in the bottom seam (turning gap).
Step B3 – Join at the Top
Turn the outer right side out; keep lining wrong side out. Insert the outer into the lining so right sides face. Align top edges and seams; stitch around the top edge.
Step B4 – Turn & Close
Pull the bag through the lining’s bottom gap to turn everything right-side-out. Close the lining gap with a narrow top-stitch.
Step B5 – Define the Casing
Press the top edge crisp. From the top edge, mark two parallel stitching lines: one at C down, one at C + 1 cm (to create a neat double-row channel). Stitch around both lines—skip over the buttonhole/grommet area to avoid hitting hardware.
Step B6 – Thread Cords & Finish
Thread cords as in Method A (double-draw recommended). Add a light top-stitch 2–3 mm from the top edge for a tailored finish.
Upgrade: Use wipe-clean lining (PU-coated nylon) for toiletries; add a hanging loop between outer and lining at one side seam.
Method C — Backpack-Style with Boxed Base
Best for: Gym, day trips, events; carries on shoulders.
Fabric: 300–600D polyester/nylon or 10–12 oz canvas; 6–8 mm cord.
Skill: Intermediate (boxing corners + reinforcements).
Cut List (two-panel)
- Panels (2):
Wf + 2SbyHf + TA - Reinforcement patches (2): 6×6 cm squares (bottom corners, wrong side)
- Optional facing/lining: As desired
Step C1 – Reinforce Corners
Fuse or stitch reinforcement patches to the wrong side of each lower corner where cords will anchor. Mark a square to box each corner (see Step C3).
Step C2 – Sew Body
Right sides together; sew sides and bottom. Finish seams robustly (flat-fell or overlock). Add a second security row along the bottom if carrying heavy loads.
Step C3 – Box the Base
To achieve depth B (e.g., 8 cm), align the side seam over the bottom seam to form a triangle. From the tip, measure B/2 (4 cm) along the seam and draw a line perpendicular to the seam. Stitch across that line; trim to 1 cm seam allowance and finish. Repeat other side. This creates a stable, roomy base.
Step C4 – Cord Anchor Openings
At the lower side seams, install grommets through the reinforced patches or stitch small tabs/loops into the bottom corners to act as cord anchors.
Step C5 – Build Casing & Top-Edge
Create a double-fold casing as before (T then C) and stitch. If using grommets at top instead of side slots, set them now.
Step C6 – Thread Backpack Cords
Thread Cord A in at the right top opening, around the casing, out the same side; feed both ends down to the right bottom anchor and knot. Repeat for Cord B on the left. Adjust for wearer height; ends should sit near hip level when worn.
Optional Features & Variations
Boxed Bottom on Flat/Lined Bags
Cut 3–4 cm squares from the bottom corners before sewing, or use the seam-boxing method (Step C3). A 6–8 cm finished depth suits gym shoes and lunch boxes.
Zipper or Patch Pocket
Add a zip pocket to the lining panel before assembly (Method B Step B2) or a front patch pocket to an outer panel. Keep pockets clear of casing stitch lines.
Label & Branding
Center a woven label 4–5 cm below the casing line on the front panel, or apply heat-transfer/embroidery before assembly for a flat interior finish.
Hardware Choices
Grommets (6–8 mm) for cord exits; cord locks for quick cinch; end caps to prevent fray on rope ends (heat-seal PP/nylon cords).
Cord & Casing Sizing Reference
| Cord Ø | Casing Depth (C) | Slot/Buttonhole Height | Use Case |
|---|---|---|---|
| 3–4 mm | 2.0–2.5 cm | 1.2–1.5 cm | Mini/standard pouches |
| 5–6 mm | 2.5–3.0 cm | 1.5–1.8 cm | Standard totes, lined bags |
| 7–8 mm | 3.0–3.5 cm | 1.8–2.2 cm | Backpack/gym, heavy canvas |
Seam Finishes & Stitch Settings
- Light cotton/poly: 2.5 mm stitch length; zigzag or overlock raw edges.
- Canvas/600D poly: 3.0 mm stitch; consider flat-felled side seams for strength.
- Ripstop nylon: Use microtex needle, 2.5–3 mm stitch; avoid too-short stitches that perforate fabric.
- Top-stitching: 3–3.5 mm along casing and top edge for a crisp look.
How to Customize Drawstring Bag Patterns
Drawstring bag patterns can be customized through different fabrics, printing and embroidery, logo placements, and added features like pockets, linings, or reinforced straps. These modifications turn a basic design into a branded, functional, or luxury product. From small DIY adjustments to large-scale OEM manufacturing, customization makes drawstring bags versatile for personal use, corporate giveaways, or retail sales.
Printing and Embroidery Options
Printing is the most common way to customize drawstring bags, with methods ranging from screen printing (affordable, bold designs) to sublimation printing (vivid, all-over prints on polyester). Heat transfer and digital direct-to-fabric printing are perfect for smaller runs or complex logos. For brands seeking a premium look, embroidery adds texture and durability. For example, embroidered initials on cotton bags elevate them into stylish accessories, while screen-printed logos on polyester bags create effective promotional items.
Adding Logos for Branding
Logos can be positioned on the center front panel for maximum visibility, or on corners for a subtler touch. Beyond printing or embroidery, businesses also use woven patches, leather tags, silicone labels, or heat-pressed vinyl decals to showcase branding. For eco-conscious lines, even laser-etched cork or bamboo labels can be sewn on. Strategic placement is key: for backpack-style bags, logos placed above the boxed base remain visible even when the bag is full.
Unique Features: Pockets, Lining, and Straps
Customization doesn’t stop at surface design. Adding zippered pockets to the front or inside increases functionality for travel or gym bags. Lining options—waterproof nylon for swim bags, satin for boutique packaging—add value and differentiate product tiers. Upgrading the straps also changes perception: cotton cords are casual, while padded straps give a sporty, premium feel. Reinforced grommets, reflective trims, or anti-theft hidden pockets are popular upgrades for performance or commuter markets.
How to Care for and Maintain Drawstring Bags
To care for drawstring bags, clean them according to their material—machine wash cotton, hand wash nylon or polyester, and spot clean leather or canvas. Always air-dry, avoid harsh detergents, and store in a cool, dry place. Proper care extends durability, preserves colors, and keeps the bag looking fresh for daily use.
1. Cleaning by Material Type
- Cotton Bags: Machine washable on a gentle cycle, but use mild detergent to avoid fading. Cold water helps preserve fabric strength.
- Polyester or Nylon Bags: Best hand washed with lukewarm water and a soft sponge. Avoid fabric softeners, which can weaken the fibers and coatings.
- Canvas Bags: Use a damp cloth or gentle hand wash. Avoid soaking heavy canvas bags to prevent shrinking.
- Leather or Faux Leather Bags: Spot clean with a damp cloth. Apply leather conditioner every few months to prevent cracking.
Each material responds differently to water, detergents, and heat, so following these tailored methods prevents early damage.
2. Drying Practices That Preserve Shape
Never use a tumble dryer for drawstring bags—high heat can warp fibers, damage coatings, or shrink fabrics. Instead, air-dry flat or hang naturally in a shaded area. Direct sunlight can fade printed logos or patterns. For leather, pat dry with a towel and allow it to dry slowly indoors.
3. Stain and Odor Removal
Accidents happen, whether it’s spilled coffee or gym sweat. Spot cleaning with a baking soda paste or a vinegar-water solution works well for stains and odors on cotton or canvas bags. For polyester, diluted dish soap is effective. Leather bags may need a specialized cleaner. Deodorizing bags with a sprinkle of baking soda before storing is an easy hack to keep them fresh.
4. Proper Storage for Longevity
- Keep in a cool, dry place: Moisture can lead to mildew.
- Stuff with tissue paper: Helps maintain shape for leather or structured bags.
- Avoid stacking under heavy loads: Prevents creasing and damage to drawstrings or printed surfaces.
For promotional or branded drawstring bags, proper storage ensures your investment retains its quality until it reaches end customers.
5. Handling Drawstrings and Hardware
Over time, drawstrings may fray or knots may loosen. To prevent this:
- Burn or seal frayed ends of nylon strings with heat.
- Replace damaged cords easily with low-cost rope or fabric drawstrings.
- Check grommets or eyelets periodically and reinforce if they loosen, especially in heavy-use bags.
Conclusion
A drawstring bag might look simple at first glance, but its true potential lies in how it’s designed, customized, and used. From fabric selection to printing techniques, from functional add-ons to creative branding, the possibilities are endless. Whether you’re creating a small DIY project or sourcing bulk production for retail or promotions, the right customization approach ensures your drawstring bag becomes more than just a carryall—it becomes a practical, stylish, and memorable accessory.
Whether you’re a growing brand seeking standout packaging, a business looking for promotional products, or a retailer aiming to launch a private-label line, we can craft drawstring bags that balance style, durability, and cost efficiency.
If you’re ready to create custom drawstring bags that reflect your brand and meet your customers’ needs, reach out to Szoneier today. Let’s collaborate on your next project and deliver bags that leave a lasting impression.